
How to Set up a Skateboard for Street Skating
This post contains affiliate links. As an Amazon Associate, we earn from qualifying purchases.
To set up a skateboard for street skating, assemble these parts in order: a 7-ply maple deck (7.5″ to 8.5″ wide), trucks matched to the deck width, street wheels (50-53mm, 99a+ hardness), eight bearings, grip tape, and hardware. Tighten the axle nut all the way, then back it off a touch for free spinning, as recommended by Skate Labs, though some sources note wheels should never be completely locked. Keep the kingpin nut fully threaded to avoid wobble at speed.
That sequence gets a board rolling, but the feel under your feet, what makes a setup good for kickflips and ledges instead of just pushing, comes from the specifics hidden inside those steps. Wheel hardness changes how the board slides. Truck tightness trades stability for turn speed. And a single quarter-turn on a nut is the difference between a board that flips predictably and one that feels dead. This is the core of how to set up a skateboard for street skating.
What follows is the full breakdown: the parts list with street-specific sizes, the assembly order that prevents common mistakes, and the tuning adjustments central to how to set up a skateboard for street skating. By the end, you’ll know not just how to bolt it together, but how to make it yours.
Key Takeaways
- Match your truck axle width to your deck width so the wheels sit close to the edges for optimal control.
- For street skating, choose small, hard wheels (50-53mm, 99a durometer and up) for faster slides and better pop.
- When installing bearings, use the axle of your truck as the pressing tool for a secure, straight seat.
- Adjust wheel nuts by tightening all the way, then backing off a touch so the wheel spins freely with minimal side play.
- Always keep the kingpin nut fully threaded onto the kingpin; loosening it too far is a safety hazard that can cause the truck to fail.
The Parts and Tools You Actually Need
You need six components and a few basic tools. The components are essential: deck, trucks, wheels, bearings, grip tape, and hardware. The tools are what make the job clean instead of frustrating.
A proper street deck is 7-ply Canadian Maple, per the industry standard noted by Portland Parks & Recreation. Common widths run from 7.5 to 8.5 inches. A wider deck (like an 8.25″) offers more stability for learning, while a narrower one (like a 7.75″) can feel quicker for technical flip tricks. Your shoe size is a decent guide; if you’re above a men’s US 9, lean toward a deck width of 8.25 inches or wider.
Trucks are the metal T-shaped axles. Their axle width must match your deck width. The rule from the Skate Labs guide is simple: the wheels should sit flush with or just inside the edge of the deck. Buy them as a pair.
Street wheels are smaller and harder. The Skate Labs guide specifies 50-53mm for street skating. Hardness is measured in durometer (the “a” scale). For parks and sliding, many skaters prefer wheels 99a and up, though Portland Parks & Recreation notes the hardest urethane wheel is 101a. The hardest urethane wheel is 101a, as noted by Portland Parks & Recreation. Hard wheels slide predictably and provide the “pop” needed for ollies and kickflips. Softer wheels (like 78a-90a) are for cruising; they absorb vibration but grip too much for most street tricks.
Bearings come eight to a set, two per wheel. The ABEC rating is less important than the brand’s reputation for smooth rolling. Choose bearings from a brand known for smooth rolling. You’ll also need a sheet of grip tape. And a set of hardware (eight bolts and eight nuts, typically 7/8″ long for setups without riser pads).
For tools, a skate tool is the only specialized item you need. It combines socket wrenches and a screwdriver in one T-shaped tool. You’ll also need a sharp utility knife and a file or old screwdriver for finishing the grip tape. Work on a stable table in good light. Rushing with the blade is how people cut themselves.
Grip Your Deck: The First Permanent Step
Peel the backing off the grip tape sheet and center it over the deck. Press it down firmly from the middle outward, working out any air bubbles. Use the file to rub firmly along the entire edge of the deck. This grinds the grip tape against the wood, creating a clean, visible cutting line.
Where this goes sideways: Cutting grip tape with the deck balanced on your lap. The Skate Labs guide explicitly warns against this: “Never cut with the deck across your lap.” The blade can slip and travel much farther than you intend.
Stand the deck on its side on your table. Follow the filed line with your utility knife, using the deck’s edge as a guide. Go slow. The goal is a clean edge, not speed. Once cut, peel away the excess grip tape from the sides. Use the tip of your bolt or the screwdriver end of the skate tool to punch through the grip tape over each of the eight mounting holes. A smooth, clean grip job looks professional and gives you consistent footing from day one.
Mount the Trucks: Direction and Tightness Matter
Identify the front of your deck, the nose is usually slightly longer and steeper than the tail. Your trucks will be mounted with the kingpin (the large central bolt) facing inward, toward the center of the deck. This setup is required; it’s the only way the bushings can compress properly for turning.
Place the baseplate of the truck over the four mounting holes. Insert your hardware bolts from the top of the deck down through the holes. Hand-tighten the nuts onto the bolts from underneath.
Here is the step most people skip: tighten the nuts in a cross pattern, not in a circle. Imagine an “X” over the four bolts. Tighten the first nut snug, then move to the one diagonally opposite, then the remaining two in the same cross pattern. This ensures even pressure and prevents the truck baseplate from sitting crooked, which can create a subtle steering bias. Final tightening should be firm, but you shouldn’t strip the bolt heads. A little thread should still be visible above the nut when you’re done.
| Truck Tightness | Feeling Underfoot | Best For | Risk If Too Loose |
|---|---|---|---|
| Tighter Kingpin | More stable, harder to turn | High speed, beginners learning control | Less responsive carving |
| Looser Kingpin | Easier carving, quicker turns | Technical street tricks, surfy feel | Speed wobble above 10 mph |
Wheels, Bearings, and the Critical Final Adjustment
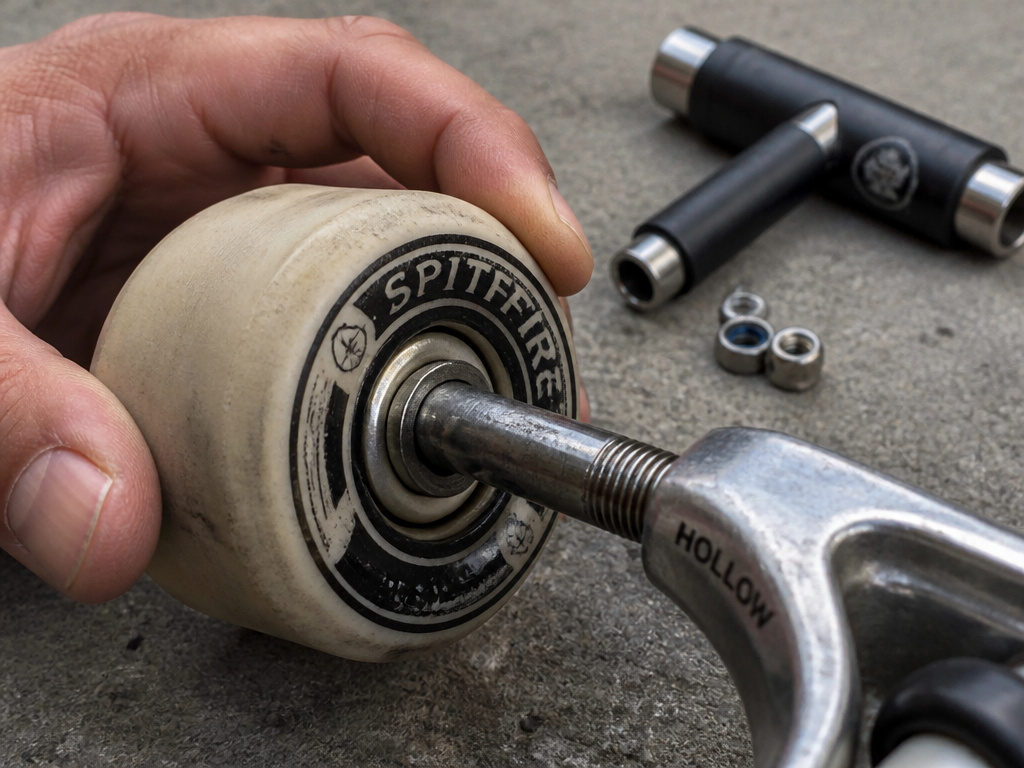
This is where the board either rolls smoothly or feels like it’s fighting you. You need four wheels, eight bearings, and eight washers (two per wheel).
The community-driven method from the Skate Labs guide is the most reliable: use the axle of your truck as the tool for pressing bearings in. Remove the nut and outer washer from one axle. Slide one bearing onto the axle. Set your wheel over the bearing and push straight down until the bearing seats flush with the wheel’s hub. Flip the wheel over. If you’re using spacers (more on that in a moment), drop one in now. Then press the second bearing onto the axle and into the wheel the same way. The axle ensures the bearings go in straight, which is the single biggest factor in how long they last.
Common mistake: Overtightening the axle nut so the wheel can’t spin freely. The Pleasures Milano blog notes that in street skating, very few skaters ride with fully tightened wheels because it feels restrictive.
The correct adjustment is a two-step process, per the Skate Labs guide. First, tighten the axle nut all the way with your skate tool. Then, back it off a quarter-turn or less. The goal is for the wheel to spin freely for several seconds when you flick it, but with almost no side-to-side play if you wiggle it laterally. That tiny bit of movement is what makes the setup feel “quick” and natural when pushing and turning. A completely locked wheel creates drag and wears out bearings prematurely.
Should you use bearing spacers? Sources disagree on their necessity for street skating. The Pleasures Milano blog observes that in technical street skating, many skaters don’t use them at all. However, they note that bowl riders or those seeking maximum speed often prefer spacers because they keep the bearings aligned under lateral pressure. For your first street setup, you can skip them. If you find your bearings developing flat spots quickly, adding spacers is a cheap fix.
Tuning Your Trucks for Street Control
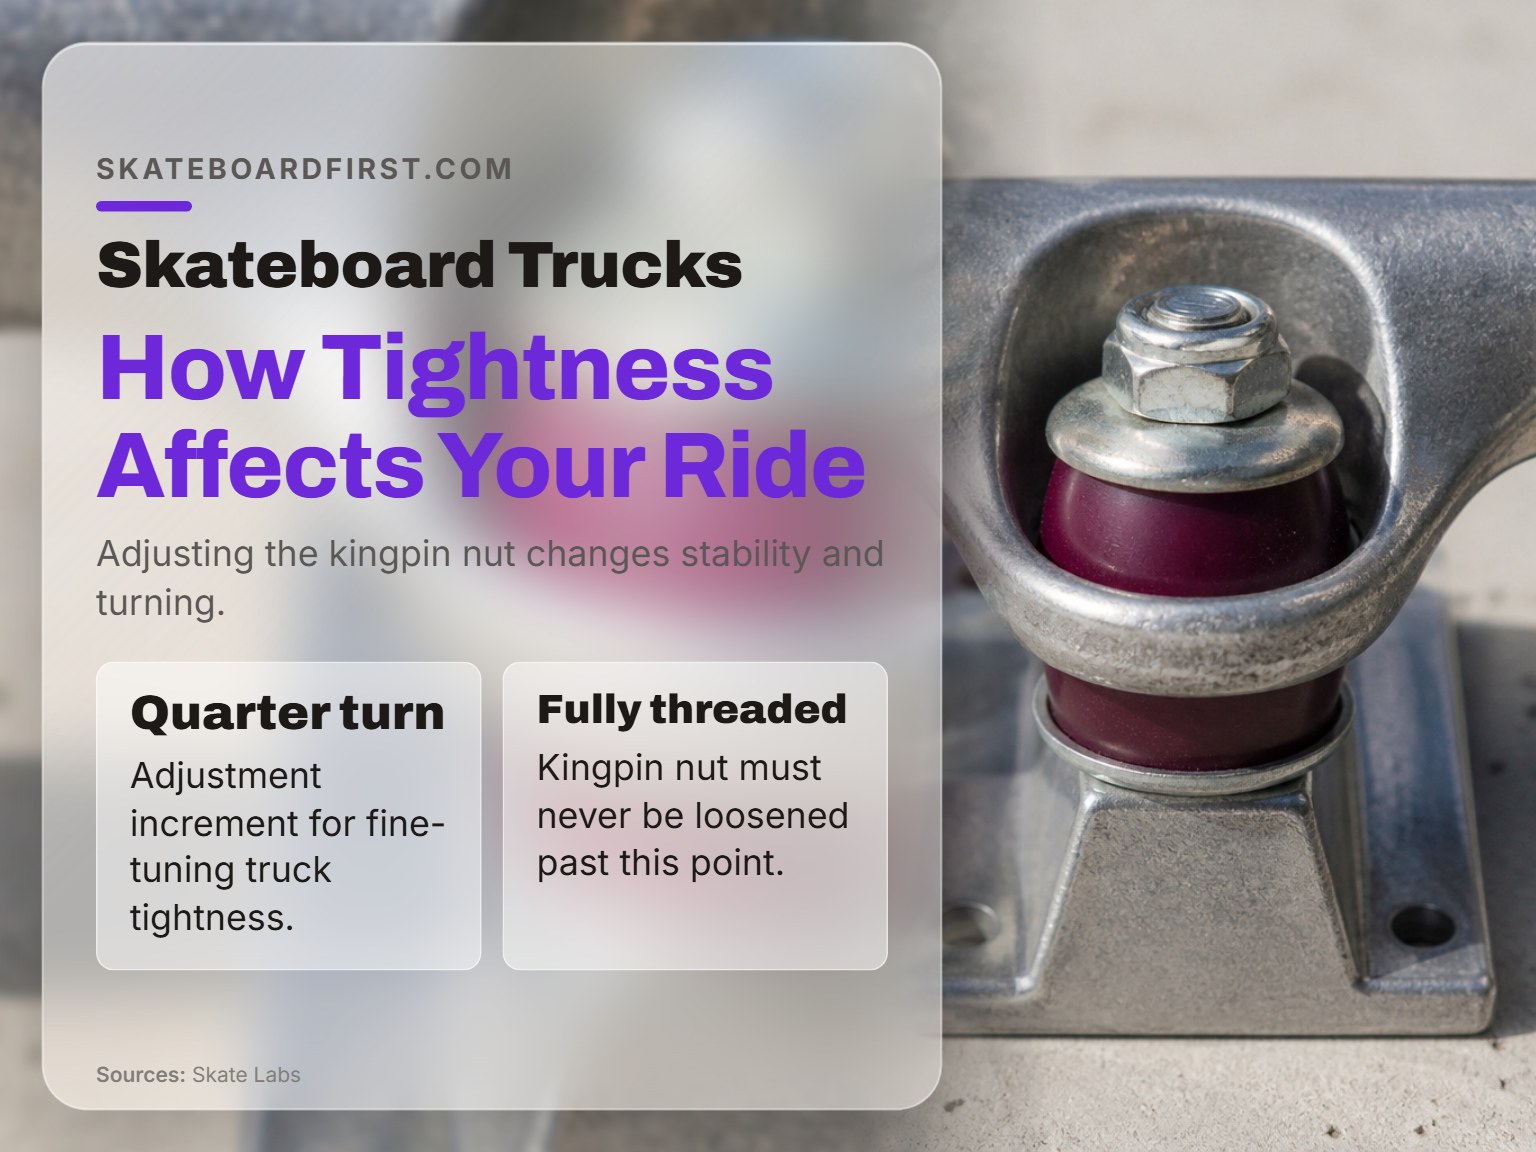
Truck tuning is personal, but it starts with a safe baseline. The kingpin nut must always remain fully threaded onto the kingpin. The Skate Labs guide warns that if you loosen it so far that it’s barely hanging on, it can work its way off while you ride.
Start with both trucks equally tight. A beginning point is tight enough that you can’t turn the hanger by hand without significant force, but loose enough that leaning your body weight makes the board carve.
Tighten the kingpin nut (a quarter-turn at a time) and the board gets more stable and harder to turn. This matches the CPSC’s advice to keep trucks tightened properly to improve stability at higher speeds. Loosen the nut (again, a quarter-turn at a time) and carving gets easier, but the board can develop a wobble at speed. This aligns with the Skate Labs guide’s note that loosening the kingpin nut makes carving easier. You must ride between adjustments. A setting that feels right in your hands can feel completely different under your feet while moving.
Bushings, the urethane rings around the kingpin, wear out. According to the Skate Labs guide, they can crack, squash flat, or simply stop holding a setting. If your trucks won’t stay where you tune them, or they turn inconsistently, new bushings are a $10 fix. Portland Parks & Recreation adds that softer bushings are often recommended for lighter riders.
Safety Check and First Ride Fine-Tuning
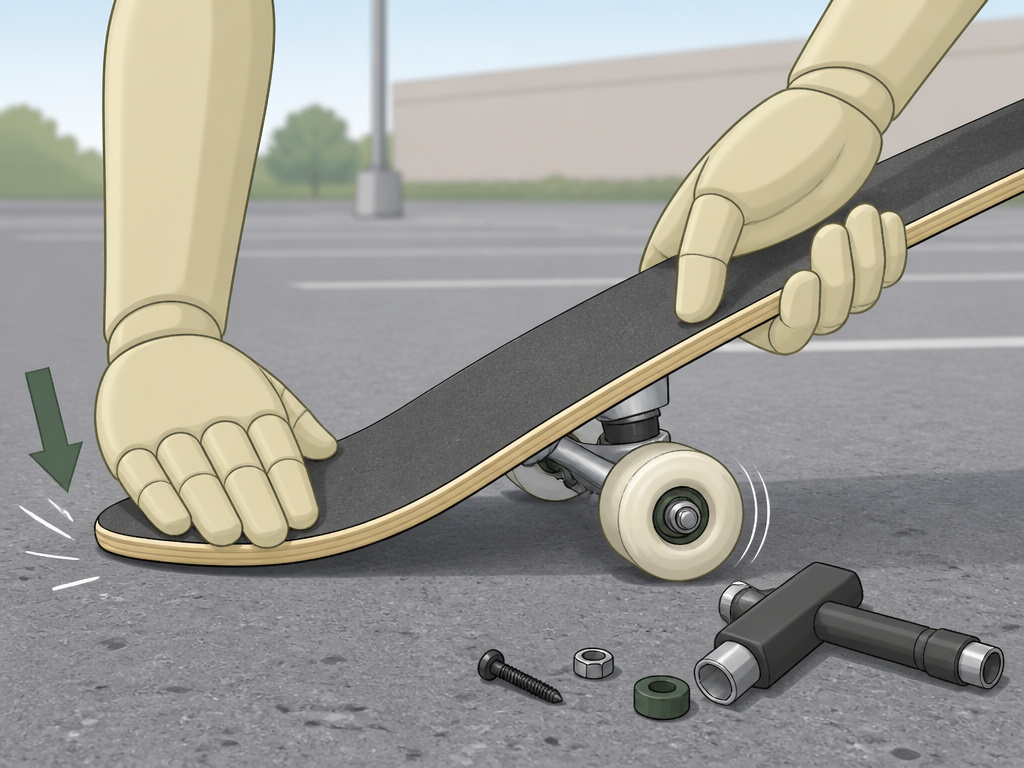
Before your first push, do a mechanical inspection. The CPSC recommends checking for “excessive play (looseness) and any broken or cracked parts.”
Grab the board and give it a shake. Listen for rattles from loose hardware. Visually check that all bolts are flush and no cracks are radiating from the truck mounts on the deck. Lift the board and spin each wheel. They should spin freely and quietly for at least 5-10 seconds. If a wheel stops almost instantly, the axle nut may be too tight. If it wobbles noticeably as it spins, the bearing might not be seated properly or the wheel could be damaged.
Your first session should be a test drive of how to set up a skateboard for street skating, not a trick attempt. Find a smooth, flat parking lot or quiet street. Practice pushing, turning, and stopping. Pay attention to how the board responds. Does it turn too easily? Do you feel unstable when rolling straight? This is your feedback for final tuning.
The “pop” test is a key street-skating diagnostic. Stand on the tail to lift the nose. Does the board spring back up quickly and smack the ground with a sharp crack? That’s good pop. If it feels mushy or unresponsive, your trucks might be too loose for your weight, or your tail might be hitting the ground before the deck can flex fully. A quarter-turn tighter on the kingpin nut can often fix this.
Hardware (bolts) size
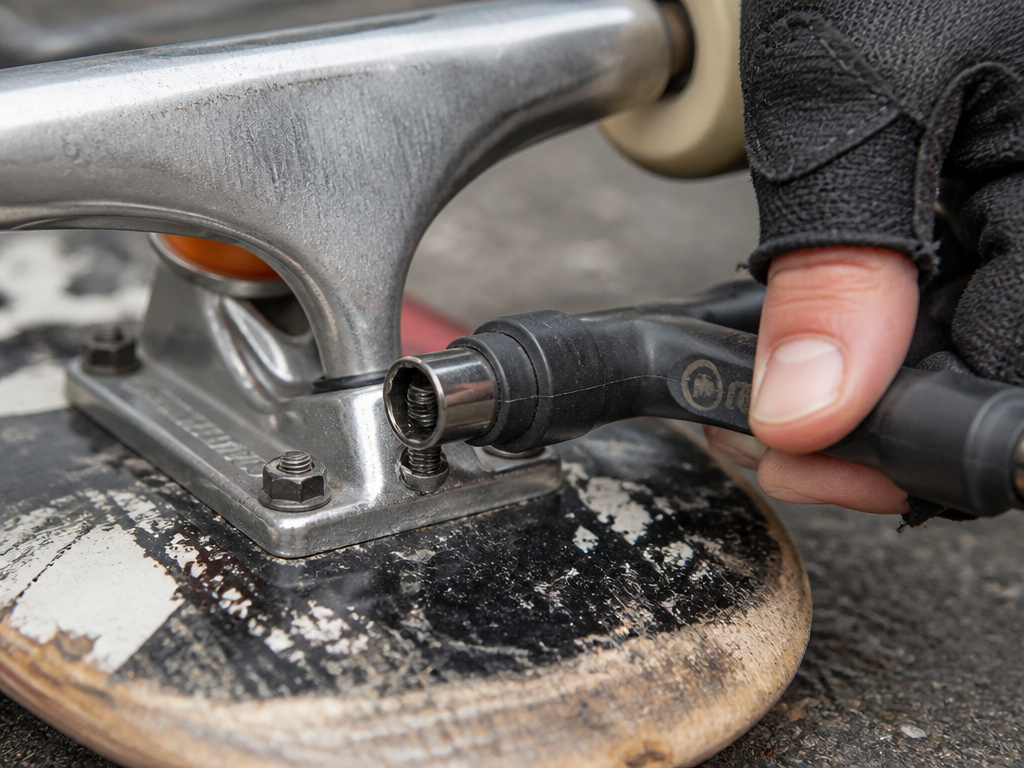
Hardware refers to the bolts and nuts that secure your trucks to the deck. These bolts must be long enough to pass through the deck, the truck baseplate, and any potential riser pads, while still allowing the nut to thread on fully. Mounting screws must be kept tightened properly to improve stability. If you are not using riser pads, a shorter bolt length is typical. Always ensure the nut is fully threaded onto the bolt and check for any looseness before you ride.
Frequently Asked Questions
What is the best skateboard setup for a street skating beginner?
An 8.0″ to 8.25″ deck, trucks with a matching axle width, 52mm wheels at 99a durometer or harder, and reliable bearings. This combination offers stability for learning while remaining capable of all fundamental tricks.
How tight should my skateboard wheels be?
Tighten the axle nut all the way, then back it off a quarter-turn or less. The wheel should spin freely when flicked but have almost no side-to-side wobble. The Pleasures Milano blog notes most street skaters leave a tiny amount of movement for a smoother, quicker feel, while CPSC advises keeping wheels tightened properly for stability.
Is an 8.25 deck good for street skating?
Yes. An 8.25″ deck is an excellent choice for street skating. It provides a stable platform for learning and enough surface area for confident foot placement, yet it’s still light and narrow enough for flip tricks as you progress.
Should I use riser pads on my street skateboard?
For a classic street setup, most skaters avoid them. As noted by Pleasures Milano, riser pads raise the board’s height, which can make flip tricks more difficult. Only use risers if you’re riding larger wheels to prevent wheel bite, where the wheel touches the deck during sharp turns.
How do I stop my skateboard trucks from squeaking?
Truck squeaking usually comes from the pivot cup (the plastic socket where the hanger rotates) or the bushings. Lubricating the pivot cup and bushings can silence most squeaks. Avoid petroleum-based greases that can degrade urethane.
Before You Go
Setting up your first board is a rite of passage. It demystifies the equipment and gives you direct control over how it behaves. The specs from the guides, the 7-ply maple, the 99a durometer, the matched truck width, are your starting recipe. The quarter-turn adjustments on the nuts are your seasoning.
One rule I had to learn the hard way: if something feels off in the first five minutes of riding, stop and fix it. A wheel that’s too tight won’t loosen itself. A slightly loose truck bolt will only get looser. The difference between a session that builds confidence and one that ends with a frustration-induced slam often comes down to those pre-ride checks you thought you could skip.
Now take that board you just built, find a flat patch of ground, and just push. Get used to the sound of the wheels, the flex of the deck, the way it turns when you lean. The tricks come later. Today, you built the tool. Next, you learn to use it.
