
Skateboard Setup for Heavy Riders: The 7-Ply Rule
This post contains affiliate links. As an Amazon Associate, we earn from qualifying purchases.
A skateboard setup for heavy riders prioritizes durable materials, stable geometry, and specific component specs. It starts with a deck of at least 7 plies of Canadian Maple, often reinforced with carbon or plastic laminates like Powell Flight or Santa Cruz VX. Trucks need harder bushings or more frequent tightening adjustments, and wheels should be on the harder end of the urethane scale (closer to 101a than 76a) for durability under load. Rider weight accelerates wear on all parts, demanding stricter maintenance.
The numbers in that answer aren’t marketing. They’re printed in product manuals and safety standards like EN 13613:2009. A board that meets a 100 kg (220 lb) test load can still fail if the rider is heavier and lands off-center, or if the self-locking nuts have been adjusted past their limit.
What follows is the component-by-component breakdown the manuals actually specify: deck ply count and reinforcement, bushing hardness versus truck tightness, wheel durometer choices, and the maintenance schedule that stops a setup from failing mid-session. We’ll also cover where the official sources disagree, because a sealed bearing claimed as “maintenance-free” and a bearing you must keep dry are two different realities.
Key Takeaways
- The industry-standard 7-ply Canadian Maple deck is your baseline; riders over 200 lbs should look for 9, 11, or 13-ply constructions or carbon-reinforced decks like Powell Flight.
- Truck tightness matters more than bushing hardness for most riders; adjust the kingpin nut in quarter-turn increments and replace self-locking nuts if they’ve been loosened and tightened repeatedly.
- Wheel wear accelerates with rider weight; choose a harder durometer (closer to 101a) for park skating and rotate/flip them every few sessions to even out wear.
- Check all hardware before every session—the EN 13613:2009 standard requires that no fastening devices work loose under testing, a rule that heavy riders must enforce manually.
- Store the board indoors and dry; water soaks into the wood, kills the pop, and rusts bearings, while heat and damp warp the deck.
The 7-Ply Rule and Why It’s Your Starting Point
A quality deck should be made of wood. The industry standard is 7 plies, or layers, of Canadian Maple. The deck should not flex too much when stood on. – Portland Parks & Recreation
That’s the commodity advice. For a rider over 200 pounds, it’s the floor, not the ceiling. The Portland document doesn’t give a weight limit for that standard deck. Another source does: the Playlife Skateboard 42902010 test report lists a maximum user weight of 100 kg (220 lb). That’s a tested, certified number for a specific 7-ply board.
So what if you’re above that line? You have two paths, both grounded in manufacturer specs. Si-Boards, in their Creator Kit instructions, suggests that users over 200 lbs may want to use an 11 or 13 ply wood. That’s adding more layers of the same material. The other path is material reinforcement. Brands like Powell Peralta (Flight decks) and Santa Cruz (VX) use carbon fiber or plastic laminates between the maple plies. These decks don’t just add layers; they change the material composite. Forum riders at 270-310 lbs report landing tre flips and kickflips down stairs on them without snapping.
The feel is different. A reinforced deck has a stiffer, more direct pop. A thicker ply deck has a heavier, solid feel. Both work. The mistake is assuming a standard 7-ply shop deck will hold up to repeated impact from a 250 lb rider learning ollies. It might. It also might develop a pressure crack around the truck bolts in a month. I’ve seen it happen. The crack starts as a hairline crease you only see when you unweight the board.
Truck Tightness, Bushing Hardness, and the Quarter-Turn Rule
Here’s where the sources give you two different levers to pull, and most riders confuse them. The Portland guide says softer bushings are often recommended for lighter weight riders. That implies heavier riders need harder bushings. It’s a component swap. Another manual, however, frames it as an adjustment: “How much the nut is tightened depends on how heavy you are and your style of skateboarding.” That’s the truck tightness setting, not the bushing material.
In practice, you use both, but start with adjustment. Crank the kingpin nut down on a soft bushing and it feels hard. Loosen it on a hard bushing and it can feel loose. For a heavy rider, a medium or hard bushing (like a Bones Hardcore or Independent Hard) with the nut backed off a quarter-turn from fully tight is the sweet spot I’ve landed on after a dozen falls. The tighter I made the trucks, the less I could turn to avoid pebbles or adjust my balance. The board went straight until it didn’t, and then I was on the ground.
Common mistake: Changing bushings and truck tightness in the same session. You won’t know which change fixed the wobble or caused the wheel bite. Adjust one, ride for ten minutes, then decide.
There’s a critical failure mode here from the EN 13613:2009 standard. Clause 5.2.6 states: The self-locking nuts can, after having been tightened and untightened several times, lose their self-locking capability. Replace if necessary. If you’re a heavier rider and you’re constantly tweaking your trucks, you will hit this limit. The nut will spin freely without locking, and your truck could loosen mid-ride. Check them. If the nylon insert is stripped, replace the hardware. It’s a fifty-cent part that prevents a twenty-dollar slam.
| Rider Weight | Bushing Hardness | Kingpin Nut Setting | Risk If Set Wrong |
|---|---|---|---|
| Under 180 lbs | Soft to Medium | Loose to mid-tight | Wheel bite on carves |
| 180–220 lbs | Medium to Hard | Mid-tight (quarter-turn from snug) | Speed wobbles at push |
| Over 220 lbs | Hard | Snug, then back quarter-turn | Trucks won’t rebound, board feels dead |
So a heavier rider on soft 78A wheels will cone them—wear the inside edge down faster than the outside—within a few weeks of daily pushing on asphalt, which is a key consideration for a skateboard setup for heavy riders. Harder wheels resist that. If you’re skating smooth park concrete, you can go straight to 99A+ and save money on replacements. If you’re on rough streets, you might accept faster wear on a 90A wheel for the sake of your ankles. The solution, either way, is maintenance: rotate and flip wheels periodically so the inside edge goes out, as the Skate Labs guide advises.
Hardware, Grip, and the Pre-Session Check
The parts that hold everything together are essential. For a heavy rider, using the correct bolt length is critical. If you add a riser pad to prevent wheel bite, you need longer bolts. If the bolt is too short, you’ll strip the threads or fail to engage the nylon lock. Too long, and they protrude and snag. Use bolts of appropriate length for your setup; if you add riser pads, you will need longer bolts.
Grip tape isn’t just for traction. A fresh, coarse grip locks your foot in place, which is crucial for a heavier rider generating more force during a push or stop in a skateboard setup for heavy riders. As grip wears smooth under your front foot, your control diminishes. It’s a gradual loss you might not notice until you need to bail. The Skate Labs guide recommends scrubbing dirty grip with a stiff dry brush or a grip cleaning block.
This culminates in the pre-session checklist. The Skate Labs guide is blunt: Before every session: check bolts, wheels spin freely and don’t wobble, deck has no new cracks. For a heavy rider, this takes sixty seconds and prevents the majority of equipment failures. Tighten any loose hardware. Spin each wheel and listen for grinding. Look at the deck around the truck mounts and the tail for new stress lines.
Before you start: A loose truck kingpin nut can let the hanger separate mid-carve. A cracked deck can snap under your weight on a landing. Check both, every time.
Maintenance Schedule: What Wears Out and When
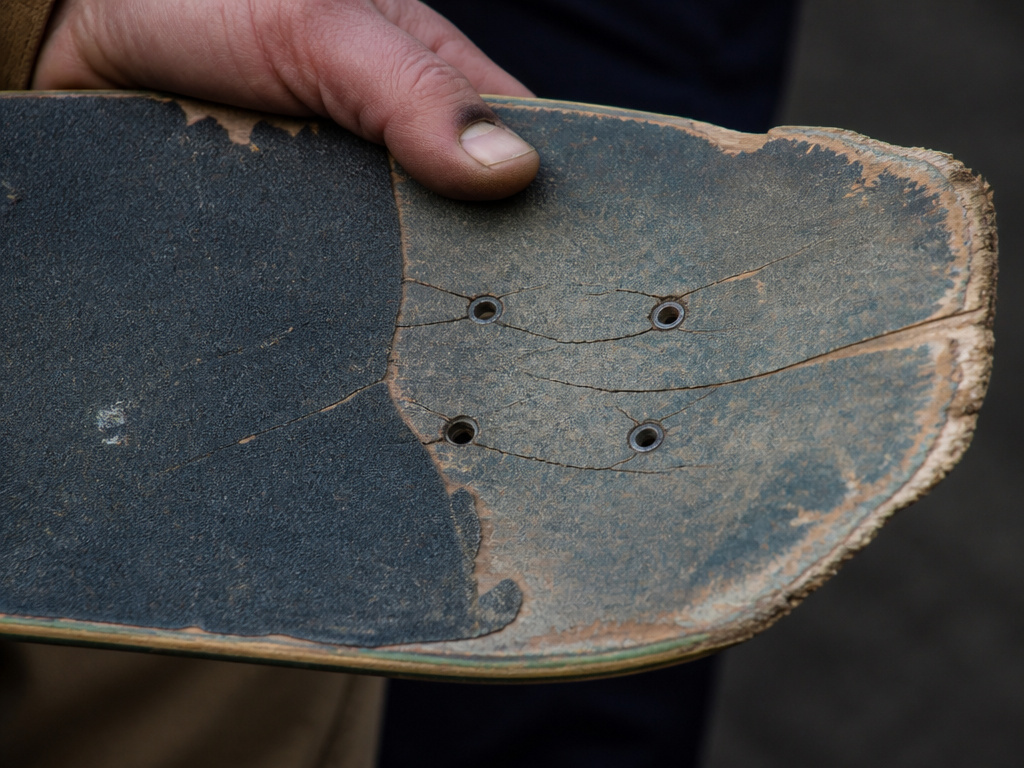
Rider weight doesn’t just mean you need stronger parts; it means you’ll replace them more often. The timelines below are estimates, but the signs are not.
Decks: Look for pressure cracks around the truck bolts, a “dead” feeling pop, or a tail worn thin to a razor edge. The Skate Labs guide warns: A cracked deck can snap, so retire it. A heavy rider will likely see signs of wear sooner than a lighter rider.
Wheels: Cone-shaped wear or flat spots that make the ride thump. Rotate and flip wheels periodically to even out wear.
Bearings: Rust, grit, or a persistent slow spin after cleaning. The EN 13613:2009 standard clause 5.2.8 requires that when tested, the wheel bearings shall not get stuck or disintegrate. Your test is the spin test. If they’re stuck, replace them.
Bushings: Cracked, squashed flat, or no longer holding the truck at your preferred tightness. Bushings can crack, squash flat, or lose their ability to hold the truck at your preferred tightness.
Hardware: Self-locking nuts that no longer lock. Replace self-locking nuts if they have been tightened and untightened several times and have lost their locking capability.
Storing the board properly extends all these intervals. The Portland guide says: Keep your skateboard dry and out of direct sunlight or moist conditions. The Skate Labs guide adds: Keep it indoors, out of hot cars and away from heaters, since heat and damp warp wood. A warped deck won’t pop evenly and can create unpredictable steering.
Complete Setup Examples for Heavy Riders
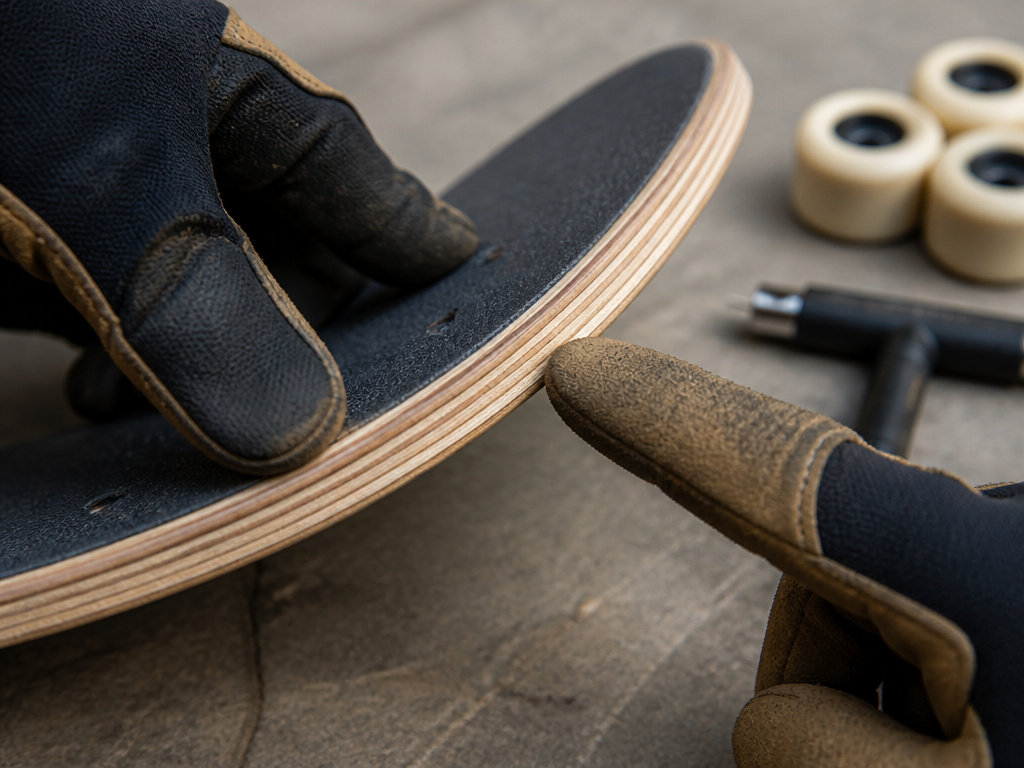
Building a reliable setup starts with a deck built for the load. The industry standard is a 7-ply maple deck, but riders over 200 pounds may want to look for decks with more plies for added strength. Sources disagree on bushing advice: Portland Parks & Recreation implies heavier riders need harder bushings, while another manual suggests adjusting truck tightness based on rider weight. Wheel choice is a balance of durability and feel; a heavier rider accelerates wheel wear, so a harder durometer wheel may last longer on smooth surfaces, while a softer wheel can offer more grip. No matter what parts you use, you must do regular checks. Before every session, check that all bolts are tight, the wheels spin freely without wobble, and the deck has no new cracks.
Frequently Asked Questions
What size skateboard for a 200 pound man?
Width matters more than length for stability. Choose a deck width that feels stable for your stance. The construction is more critical: choose a deck with more than 7 plies (like a 9-ply) or a reinforced construction like Powell Flight or Santa Cruz VX. Pair it with trucks that match the deck width (e.g., Independent 149 or 159) and harder bushings.
Can a 250 lb person skateboard?
Yes, but component selection is key. You’ll need a reinforced or high-ply-count deck, hard bushings, and harder wheels (closer to 101a). You must be diligent about hardware checks and understand that parts will wear faster. Many skaters at this weight use longboards designed for heavy riders for cruising because the longer wheelbase and softer wheels offer inherent stability.
What is the best skateboard for someone who weighs 250 pounds?
There’s no single “best” board, but the best type is a custom setup. Prioritize a durable deck (Powell Flight, Santa Cruz VX, or a 9+ ply blank), trucks with hard aftermarket bushings (like Bones Hardcore Hard), and wheels around 99A-101A durometer. Avoid cheap “completes” that use generic, soft components.
How does skateboard setup differ for light versus heavy riders?
It’s a mirror image. A setup for light riders might use softer bushings for easier turning, a narrower deck for flick, and softer wheels for comfort without rapid wear. A heavy rider’s setup inverts those choices for durability and stability, focusing on stability adjustments for skateboards through component strength and tightness.
The Bottom Line
Build for the impact you’ll actually create. A 220 lb rider coming down from a two-foot ollie generates more force than a 150 lb rider doing the same trick. Your setup needs to absorb that, not just support your static weight.
Start with a deck that exceeds the 7-ply standard—either through ply count or high-tech reinforcement. Set your truck tightness with a quarter-turn wrench, not a full crank. Choose wheels on the harder end of the spectrum if you’re skating parks, and rotate them before they cone. Read the Portland Parks skateboard design guide for the municipal specs, then look at what the heavy riders in the forums are actually riding without breaking.
One rule I enforce on myself: if I have to tighten the same bolt twice in a week, I replace the hardware. It’s cheaper than the doctor’s visit it might prevent. Your weight makes you a stress-test machine for skateboard parts. Choose them like an engineer, maintain them like a mechanic, and you’ll have a board that rolls as long as you do.
