How to Lipslide on a Skateboard: The 5-Step Breakdown
This post contains affiliate links. As an Amazon Associate, we earn from qualifying purchases.
To lipslide on a skateboard, you ollie over a rail or ledge so your back truck crosses first, land in a boardslide position, slide across, and rotate out. The core difference from a boardslide is which truck clears the obstacle, your back one, not your front. You need a solid ollie, comfort with boardslides, and the commitment to get your back wheels completely over the rail before dropping into the slide.
That definition is the simple part. The hard part is doing it without hesitation, which is where boards snap and sessions end early. Most guides agree on the motion but skip the specific warnings that change based on what you’re sliding, which is why understanding how to lipslide on a skateboard is crucial.
What follows: the five essential steps, the one foot-placement debate that changes your risk level, and the obstacle choice that decides whether you walk away with a trick or a bag of broken wood.
Key Takeaways
- A lipslide requires your back truck to cross the rail first, the opposite of a boardslide.
- Approach at a slight angle with enough speed to slide the full length of the obstacle.
- Sources disagree on foot placement: getskateai.com recommends landing with both feet on the bolts, while Skateboardhere.com advises landing with your back foot on the tail and front foot behind the bolts to reduce deck-snapping risk.
- Practice first on a low, waxed ledge before attempting a rail; the deck-snapping risk is far lower.
- Professional skater Kelvin Hoefler’s three keys are high pop ollies, centered weight, and a simple exit.
Lipslide vs. Boardslide: The Truck Rule
The difference isn’t subtle once you see it. In a boardslide, your front truck goes over the rail from where you jump. For a lipslide, your back truck crosses first. Definitions vary: some describe it as a 180 into a boardslide, while others say the board travels over the rail before landing into a boardslide position. That extra rotation is what makes lipslides more technical and, for many, more intimidating.
Think of it as clearing the obstacle completely before you start sliding. A boardslide lands you on the near side. A lipslide sends you over the top to the other side. That’s the commitment gap, you have to trust your ollie height and turn direction before the rail is even under you.
A lipslide is a slide where your board travels over the rail or ledge before landing into a boardslide position. That’s what separates it from a standard boardslide. Instead of landing on the near side, you’re clearing the obstacle and sliding back across it. . Skateboards.com
Prerequisites: What You Need First
You can’t shortcut this. The sources agree a foundation is crucial, but they differ on the specific prerequisites: some list boardslides and frontside 180s, while others also include backside 180s.
First, a dependable ollie. Not just off the ground, but one you can height-adjust to clear an object. Second, a comfortable boardslide. The slide balance is identical; if you’re wobbling through a boardslide, a lipslide will spit you off. Third, a reliable frontside 180. The turning motion and shoulder commitment are the same engine.
Oldschool.de and getskateai.com both list boardslides and the frontside 180 as mandatory. Skateboards.com adds backside 180s to the list for versatility. The point is control. If you don’t have these three tricks down on flat ground and then on a low curb, learning how to lipslide on a skateboard is out of reach.
Here’s a quick checklist to gauge your readiness:
| Prerequisite Trick | Why It Matters | Can You Do It Consistently? |
|---|---|---|
| Solid Ollie | Generates the height needed to clear the rail. | Yes / No |
| Boardslide | Teaches the balance and lock-in of the slide itself. | Yes / No |
| Frontside 180 | Builds the rotational control and shoulder commitment. | Yes / No |
If you checked “No” for any, go practice that trick first. A week on fundamentals saves a month of frustration.
The 5-Step Lipslide Breakdown
This is the sequence. Skip a step, and the trick falls apart in a specific, predictable way.
1. Approach and Angle
Roll toward the rail or ledge with solid speed. You need momentum to carry you through the entire slide. The approach angle is where guides differ slightly, but they cluster around the same idea.
Skateboards.com and getskateai.com say a slight angle, the same as a boardslide. Skateboardhere.com specifies 15–30 degrees. Oldschool.de suggests approaching like you would for a 50-50 grind, which is more parallel. Sources recommend different approach angles: a slight angle, 15–30 degrees, or like a 50-50. For your first tries, a slight angle is a common recommendation.
2. The Pop and Turn
This is the make-or-break moment. Ollie, and as you rise, begin turning your shoulders and board 90 degrees in the opposite direction from a boardslide. Your focus is lifting your back truck high enough to get your back wheels completely over the rail.
Common mistake: Not popping high enough. Your back truck catches the rail, stopping you dead. The board drops straight down, and you stumble forward.
You’ll hear a hollow clack if the tail clips. That’s the sound of a failed attempt. A clean clearance is silent, your board just keeps rising.
3. Locking In the Landing
You’re now in the air, having cleared the rail. Now you must land the board squarely across it, with the deck’s center contacting the obstacle. This is where two schools of thought on foot placement collide, and your choice affects your deck’s survival.
Getskateai.com says land with both feet on the bolts. Skateboardhere.com advises landing with your back foot on the tail and your front foot just behind the front bolts to avoid pressure on the deck’s center. Oldschool.de simply says to land in the boardslide position.
For rails, Skateboardhere.com advises the tail-foot placement to reduce the risk of snapping the deck, while getskateai.com recommends landing with both feet on the bolts. The center of a skateboard deck is its weakest point. Landing with the rail directly between your feet creates a fulcrum that can snap the wood, especially on a thin metal rail. On a wider ledge, centering your weight is safer.
4. The Slide
Once locked in, keep your weight centered and your knees bent. This isn’t a passive ride, you’re actively balancing over a narrow point. Your back wheels should be sliding directly on the rail or ledge.
If your weight drifts too far forward or back, you’ll slip out. The slide feels gritty and loud on concrete, smoother and quieter on waxed metal or stone. It lasts the length of the slide on a successful attempt.
5. The Exit and Roll Away
As you reach the end of the obstacle, prepare to rotate out. Shift your weight toward your tail to unweight the front trucks, turn your shoulders and board forward, and roll off.
Oldschool.de details shifting all your weight to the tail wheels before turning. Getskateai.com says to turn back the way you came with weight centered. Skateboardhere.com says to slide off and turn 90 degrees to straighten out. The goal is the same: a clean dismount that doesn’t buck you.
Rails vs. Ledges: Which Breaks More Decks?
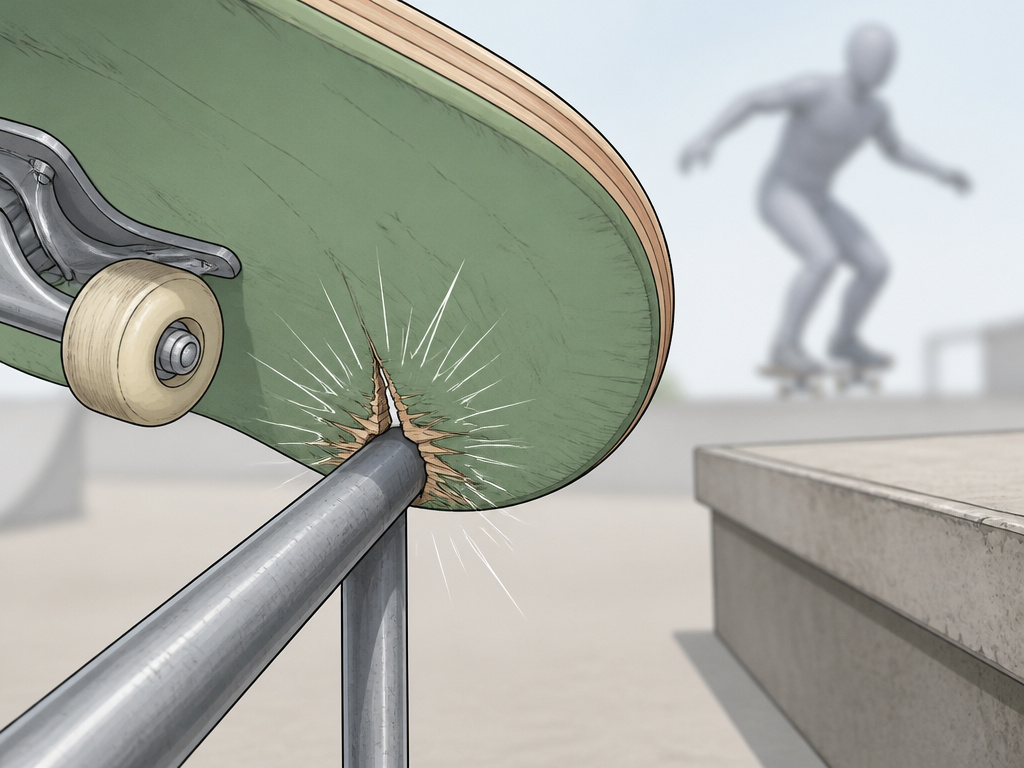
The obstacle changes everything. Skateboardhere.com states it plainly: performing a lipslide on a rail carries a high risk of snapping the skateboard deck. A ledge is far more forgiving.
The physics are simple. A metal rail is a narrow, hard fulcrum. A concrete ledge is wider and offers more surface area to distribute the impact. A deck can handle the pressure on a ledge long after it would splinter on a rail.
Where this goes sideways: Attempting a lipslide on a dry, narrow rail. The deck can’t flex, so it breaks. Always wax the rail or ledge first.
If you’re learning, start on a low, waxed ledge you’re already comfortable boardsliding. Getskateai.com echoes this. The only new variable is the entry direction when learning how to lipslide on a skateboard. Once that feels solid, you can consider a low flat rail.
| Obstacle | Risk Level | Best For | Preparation Needed |
|---|---|---|---|
| Low, Waxed Ledge | Low | Learning the entry and slide motion. | Wax the top where wheels will drag. |
| Flat Rail or Box | Medium | Solidifying the trick after ledge mastery. | Ensure it’s low and stable. |
| Round Rail | High | Advanced skaters only. | Heavy wax, high ollie, and a deck you’re willing to risk. |
Pro Tips and Common Troubleshooting
Even with the steps, things go wrong. Here’s what to fix, based on the most frequent stumbles.
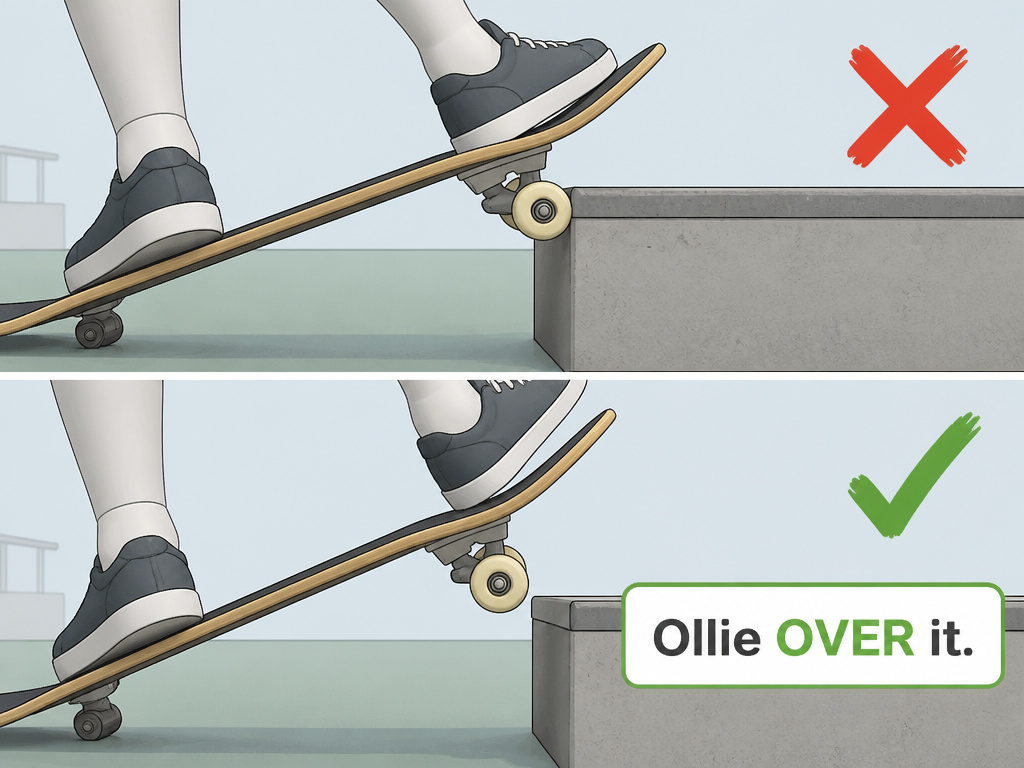
- Your back truck keeps catching the rail. You aren’t popping high enough through the turn. Focus on lifting your back foot higher. Think “ollie over it,” not “ollie to it.”
- You spin out mid-slide. You’re over-rotating. The turn is only 90 degrees to get into the slide. Once locked, stop spinning and focus on balancing.
- The board sticks and stops sliding. You didn’t wax the obstacle, or you’re going too slow. Speed is your friend. So is a block of skate wax.
- You can’t commit to the turn. This is mental, not physical. Practice the ollie-and-180 motion on flat ground until it’s muscle memory. Then visualize clearing the rail before you roll up.
Professional skateboarder Kelvin Hoefler boils it down to three things in his Olympians’ Tips video: high pop ollies, keeping your weight centered, and going out simple. Don’t complicate the exit before you’ve mastered the entry.
What to Learn Next
Once your lipslide is consistent, your rail game opens up. The natural progression path looks like this:
- Master the Boardslide. This is your absolute base.
- Learn the Lipslide. You’re here.
- Try a Tailslide. This shifts the slide to the tail of the board on a ledge.
- Attempt a Noseslide. The slide moves to the nose, requiring precise balance.
- Explore a Bluntslide. A more advanced slide involving the tail and a steep angle.
Each trick builds on the board control and commitment you develop here. Rushing ahead just means revisiting fundamentals later.
Frequently Asked Questions
What’s the hardest part of learning a lipslide?
Commitment. The mental hurdle of ollieing over the rail instead of just onto it is huge. Physically, getting the back truck high enough is the most common technical failure.
Can I learn a lipslide without knowing a boardslide?
No. Every source lists a solid boardslide as a prerequisite, though some also require a dependable ollie and comfort with 180s. The slide balance is identical; the lipslide just changes the entry.
Why does my skateboard keep breaking when I try lipslides on rails?
You’re likely landing with the rail between your feet, creating a bending point on the deck. Try the modified foot placement (back foot on tail) or switch to practicing on a ledge first. Also, ensure the rail is properly waxed.
How long does it take to learn a lipslide?
It depends entirely on your foundation. If you have a strong ollie, boardslide, and frontside 180, The time it takes to learn depends on your foundation. If those are shaky, it could take weeks of prep work first.
Is a frontside or backside lipslide easier?
Most skaters find frontside lipslides easier to learn because the obstacle is in front of you, making the approach and visual alignment simpler. Backside lipslides require more blind commitment and shoulder rotation.
Before You Go
One rule most guides skip: if you’re consistently catching your back truck, stop trying the full trick. Go back and ollie over the rail onto the ground on the other side. Just clear it and land on wheels. Do that ten times. Then add the slide.
The lipslide isn’t a mystery. It’s a boardslide with a different entry. The fear comes from the gap between knowing that and feeling it. So break the trick down smaller than any tutorial suggests. Clear the rail. Land on the other side. The slide will come when your brain trusts your feet. Start with the ledge.
