
How to Read a Skate Spot: Surface, Space, and Security
This post contains affiliate links. As an Amazon Associate, we earn from qualifying purchases.
To read a skate spot, you systematically assess its surface for smoothness, identify usable obstacles for tricks, and evaluate the surrounding environment for safety and security. It’s the skill of turning any curb, set of stairs, or empty lot into a viable skateboarding location by understanding its physical and social dynamics.
That assessment breaks into three concrete checks: the ground you roll on, the objects you can interact with, and the people or traffic you need to avoid. Most guides tell you to find spots; this one shows you how to judge them, including how to read a skate spot. By the end, you’ll know why a spot that looks perfect in a photo might be unskateable in real life, and how to spot the hidden gem everyone else drove past.
What follows: a field-tested method for the physical scout, the official safety specs that should change how you look at cracks, and how to manage the human element so you can skate longer.
Key Takeaways
- Smooth ground is essential, according to the Batavia Park District inspection guide, a crack wider than 1/8 inch can trip a wheel and needs addressing before you session.
- Always scout for an escape route, your first move at a new spot should be identifying where you’ll bail if a car approaches or security shows up.
- Helmet certification matters, the CDC states a proper skateboard helmet must have a label reading “MEETS NOCSAE Standard®”; a bike helmet isn’t enough.
- Surface dictates your approach, a rough asphalt lot demands harder wheels (99A+) and a focus on pushing, while buttery concrete opens up technical ledge tricks.
- The best time to hunt is off-peak, early mornings or weekday afternoons offer empty spots and less friction with pedestrians or property owners.
The 3-Step Spot Read: Surface, Space, and Security
Reading a spot isn’t about intuition. It’s a quick, three-part audit you run the moment you arrive. You check the literal ground, the objects on it, and everything around it. Skip one, and your session ends early with a slammed elbow or a conversation with security.
Start with the surface. Run your hand over it. You’re feeling for the tiny pebbles, raised cracks, and grit that will stop your wheels dead. The Batavia Park District’s official inspection procedure flags any gap wider than 1/8 inch as a trip hazard for skateboard wheels. That’s your benchmark. If you see a crack you can fit a credit card edge into, it’s a problem. A rough patch of asphalt might be okay for cruising, but it can hinder attempts at flip tricks. The surface decides your entire plan.
Next, map the space. Look at the obstacles not as benches or stairs, but as potential for specific tricks. A ledge needs a smooth, square edge for grinds. A set of stairs needs a clear run-up and a clear landing. A bank needs a consistent slope. Your brain should be cataloging: “That curb is a possible slappy. Those three stairs are a potential ollie gap. That flat rail is a boardslide.” This is what pros mean by the core skill of how to read a skate spot, seeing the tricks before they happen.
Finally, scan the security landscape. This isn’t just “look for cops.” It’s traffic patterns. It’s pedestrian flow. It’s sight lines from nearby buildings. It’s identifying your exit path if you need to leave quickly. The best spot in the world is useless if you’re constantly looking over your shoulder. Find the line you’d skate to get away, and note where you could stash your bag if you need to move fast.
Common mistake: Assessing a spot only for its best trick. You fall in love with a perfect hubba ledge but miss that the run-up is a minefield of gravel and the only exit funnels into a busy driveway. Judge the whole package.
From Map to Manual: The Physical Scout
You found a spot online or spotted it from the car. Now you have to get out and walk it. This is where photos deceive and potential becomes reality.
Your first tool is your feet. Walk the entire area. Listen. The crunch of gravel under your shoes is the same sound your wheels will make, a sure sign you need to sweep. Look for stains, moss, or polished sections. Stains can mean oil or water, which equals slick. Moss is a hard no. A polished, darker section of concrete is often a sign of heavy foot traffic, which usually means it’s smooth but also that people will be there.
Check the transitions. Where does the flat ground meet a curb or a wall? Is it a sharp 90-degree angle, or is it rounded? Rounded edges are harder to lock into for grinds but can be more forgiving for slappies. A sharp, clean angle is gold. Look for cracks radiating from the corners of curbs; that’s a sign the concrete is weakening and might crumble under impact.
Now, think about modification. This is the underrated part of spot reading. Can you improve it? A broom from a gas station can clear a patch of debris. A bottle of water can wash away slippery dirt. Sometimes, moving a small trash can or planter opens up a new line. I once spent ten minutes brushing pebbles off a schoolyard curb with my hat. It turned a sketchy maybe into a thirty-minute session. The willingness to do a little cleanup is what separates skaters who always have a spot from those who complain there’s nowhere to skate.
Where this goes sideways: Relying only on apps or maps. A spot can be pin-perfect on Google Maps but have a surface like a washboard or be permanently flooded. Digital tools get you there; physical scouting tells you if you can skate.
Decoding the Ground: Asphalt vs. Concrete and Why It Matters
Not all gray surfaces are equal. The material under your wheels changes everything.
Concrete is the premium choice. It’s poured in slabs, usually smoother, and offers consistent hardness. It’s what most skateparks are made of. When it cracks, it often forms clean, straight lines. Sources disagree on the size: the Public Skatepark Development Guide says chips become a safety concern at about ¼-inch or larger, while the Batavia Park District says gaps wider than 1/8” should be addressed. That’s a useful mental threshold. Concrete spots are where you’ll attempt technical ledge tricks, slides, and grinds. The feedback is predictable.
Asphalt is a mixed bag. It’s laid down in a continuous sheet, which means fewer trip-inducing seams, but it’s often softer and more porous. It wears down into a bumpy, pebbly surface over time. Asphalt is fantastic for cruising, pumping on pump tracks, and learning to push. It’s less ideal for learning kickflips, where you need a crisp, unyielding pop. The Batavia Park District notes that for graffiti removal on asphalt, you should not use petroleum-based products, as they can damage the surface. That’s a niche fact, but it tells you asphalt is more chemically sensitive.
The part nobody mentions: Temperature affects these materials differently. Asphalt gets gummy and soft on a hot day, swallowing your speed. Concrete stays fast. On a cold morning, that same asphalt can be hard and brittle, while concrete might have a dewy layer of condensation that’s slick as ice. Feel the ground before you commit.
Here’s a quick guide to match your session to the surface:
| Surface Type | Best For | Wheel Hardness | Key Thing to Check |
|---|---|---|---|
| Smooth Concrete | Technical tricks, grinds, slides | 99A – 104A | Look for cracks wider than 1/8″ and spalling (flaking surface). |
| Rough Asphalt | Cruising, pumping, learning basics | 78A – 92A | Check for loose gravel and oily patches; bring a broom. |
| New Skatepark Concrete | All disciplines | 99A – 101A | Inspect for fresh chips near coping and loose transition plates. |
Obstacle Assessment: From Ledges to Stairs
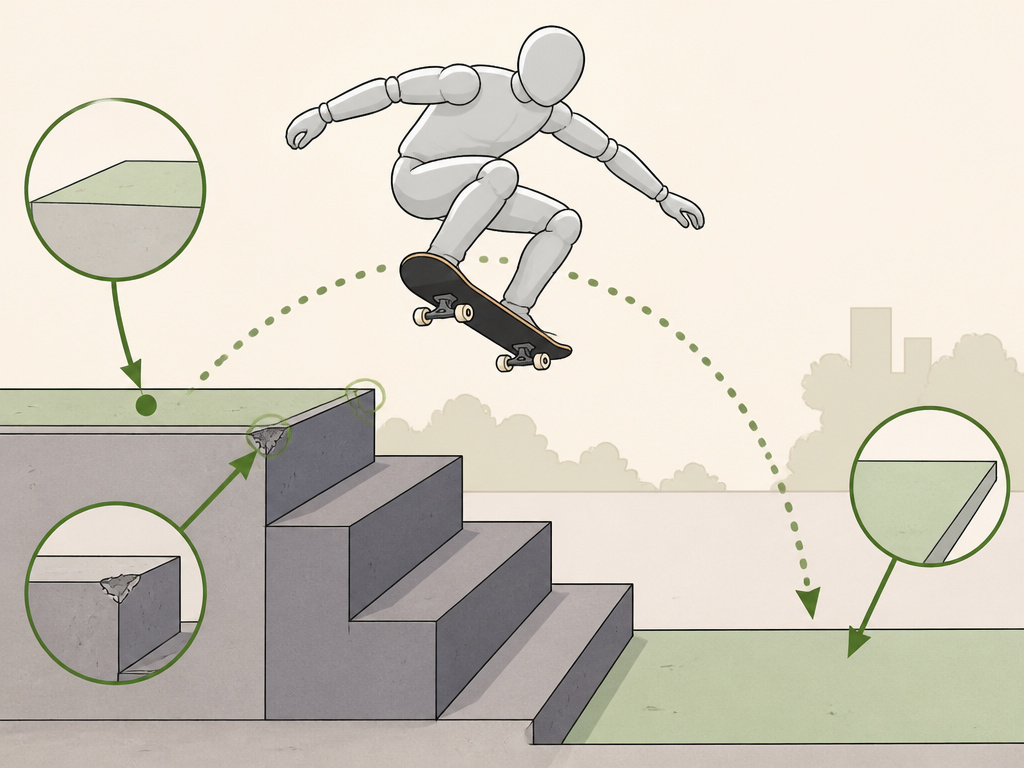
A spot is defined by what you can skate on it. Reading an obstacle means understanding its geometry and what it will do to your board.
Ledges and Curbs: The holy grail of street spots. You’re looking for a few things. Height: Is it low enough to ollie onto comfortably? Edge: Is the corner square and intact, or is it rounded and worn down? A square edge gives you a solid lock for 50-50s and boardslides. A rounded edge can cause slippage. Surface: Is the top smooth, or is it rough like aggregate concrete? A rough top can slow you down and wear down your deck. Finally, check the landing. Is it flat and clear for at least a board-length after the ledge?
Stairs and Gaps: These are about measurement and approach. Count the stairs. A three-stair is often considered a beginner gap; a seven-stair is typically more advanced. More important than the number is the run-up and landing. Do you have enough smooth, flat ground to build speed? Is the landing flat, or does it slope away? A downhill landing can add speed and difficulty. Check the stairs themselves, are the edges chipped? A chipped edge can catch your wheel during the ollie.
Manual Pads and Flatbars: These are simpler but require precision. For a manual pad, the height and length matter. Can you get enough speed to manual its full length? For a flatbar, check the stability. Give it a shake. If it wobbles in its mounts, it’s dangerous. Is it the right height for your comfort? A rail’s height affects the difficulty of tricks; one that’s too high can be intimidating, while one that’s too low may be harder to lock onto.
Banks and Transitions: Often overlooked in street skating, a sloped wall or a gentle bank is a treasure. Check the smoothness of the transition from flat to sloped. Is it a smooth curve, or is there a lip or seam? A seamless transition is key for carving and building speed. Look for graffiti or dirt that could make it slick.
Safety and Security: The Unseen Part of the Read
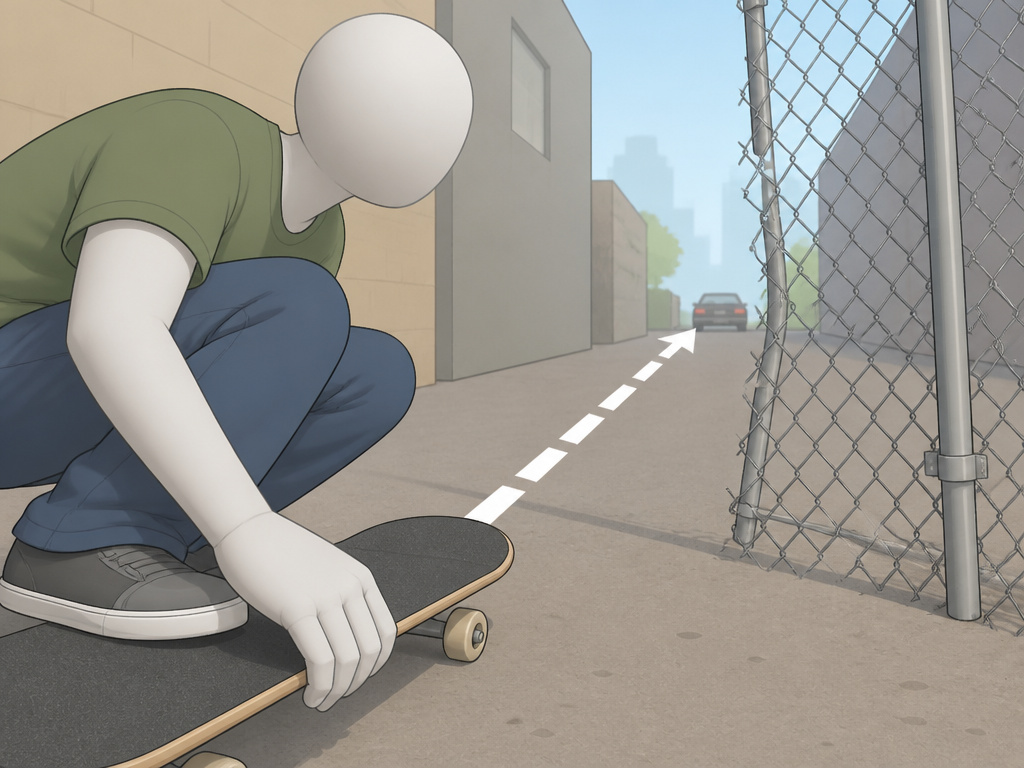
A spot can be physically perfect but socially impossible. Reading the human and legal environment is just as critical as reading the concrete.
First, traffic. Is this a active driveway, alley, or parking lot? What are the traffic patterns? The safest spots are in dead-end lots or on sidewalks blocked from the street by barriers. If cars use the space, identify the quietest times. Early mornings on weekends are often quieter for a reason.
Second, visibility. Are you in full view of houses, businesses, or police stations? Skating in front of a police station often attracts attention. A spot tucked away from main sight lines can be more sustainable. Look for natural barriers like fences, hedges, or terrain that hide you from the main thoroughfare.
Third, the escape route. Before you drop in, know your exit. If a security guard rolls up or a car speeds in, which way do you go that’s fast and safe? Can you grab your board and duck through a gap in a fence? Is there a path into a neighborhood? Having a planned exit removes panic.
Worth knowing before you start: The CDC’s skateboard helmet fact sheet is the authority on gear. It specifies that a proper helmet must fit snugly, with the front rim aligned with your eyebrows and the chin strap tight enough that only one or two fingers fit underneath. A bike helmet doesn’t meet the NOCSAE Standard® required for skateboarding’s multi-impact needs. Wearing the right gear is part of reading a spot’s risk level.
Etiquette is your best security system. Keep the session low-key. Don’t blast music. Don’t litter. If someone asks you to leave, be polite and go. Arguing can often get a spot burned for everyone. The goal is to skate, not to win a debate. Sometimes, asking for permission works, especially at schools after hours or in semi-public spaces. It sounds counterintuitive, but asking for permission can sometimes buy you more time than sneaking around.
DIY Spot Reading: When to Build Your Own
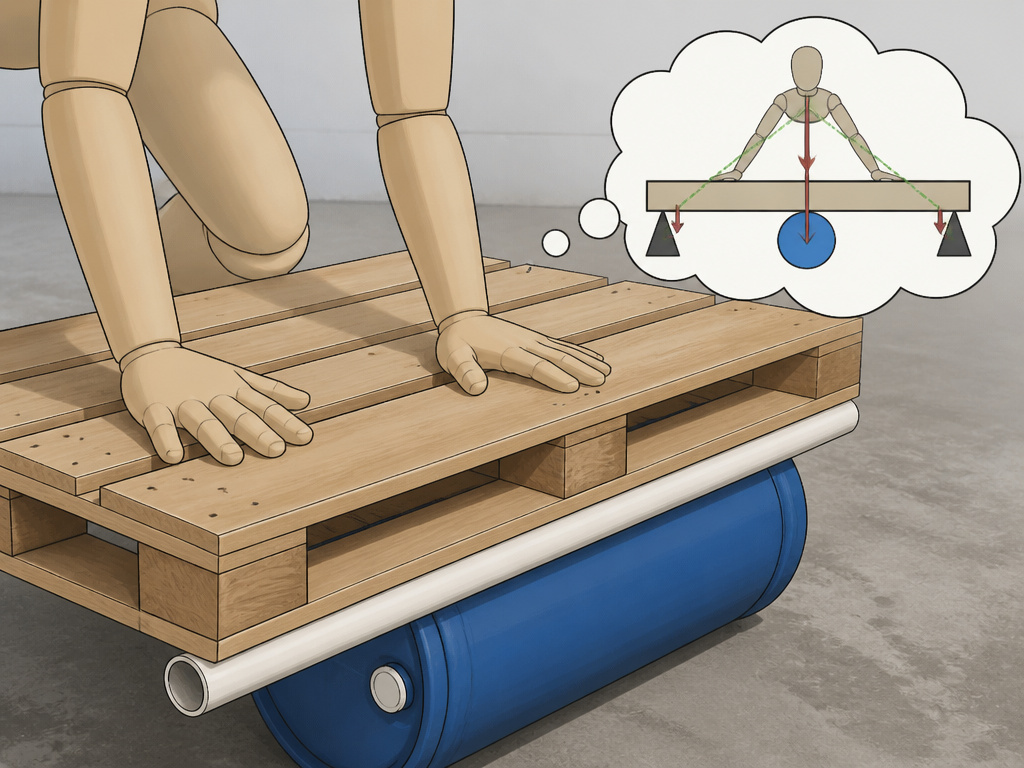
Sometimes, you read the entire landscape and come up empty. That’s when you consider making your own spot.
This starts with the same assessment skills. You need a smooth, flat base. A garage floor, a smooth section of basement, or a sealed warehouse space are prime candidates. You’re reading for size (enough room for the obstacle and a run-up), surface (sealed concrete is best), and privacy.
Then, you look for movable obstacles. This is the DIY skater’s art. Common objects like wooden pallets, plastic barrels with PVC, or planks can be repurposed into DIY skate obstacles. The read here is on structural integrity. Will it support your weight? Will it slide or tip over? Testing is key.
The community aspect is huge. Online, skaters share endless ideas for DIY spots. The creativity involved in seeing a piece of junk as a skateable object is the ultimate extension of how to read a skate spot. It turns the whole world into a potential park.
Where to find skate spots in my city
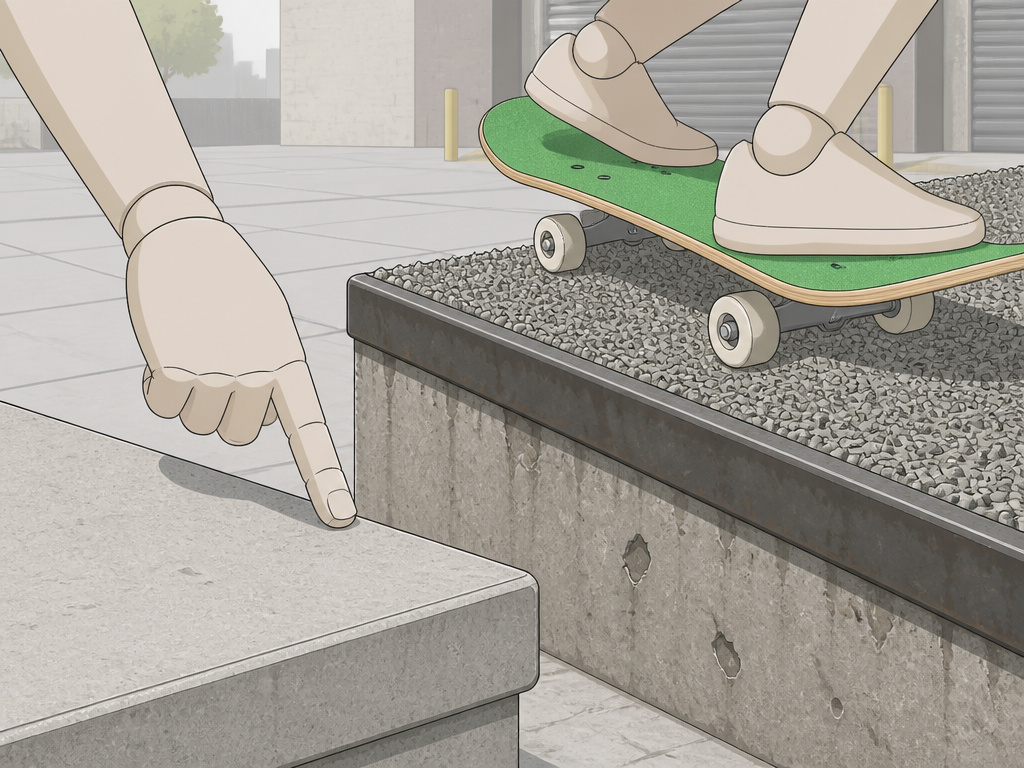
Don’t rely on outdated online lists. The best method is to put in the ground time. Skate the streets and pay attention to the architecture. Look for the common elements: smooth, low-traffic plazas with ledges, schools with empty lots and manual pads after hours, and industrial areas with loading docks. Talk to local skaters at the park or shop; they’ll know which spots are currently skateable and which have new security or rough surfaces. Remember, a spot’s status changes. A perfect ledge one month can be waxed and skated smooth, or it can be newly bolted or covered in rough anti-skate material the next.
How pro skaters find spots
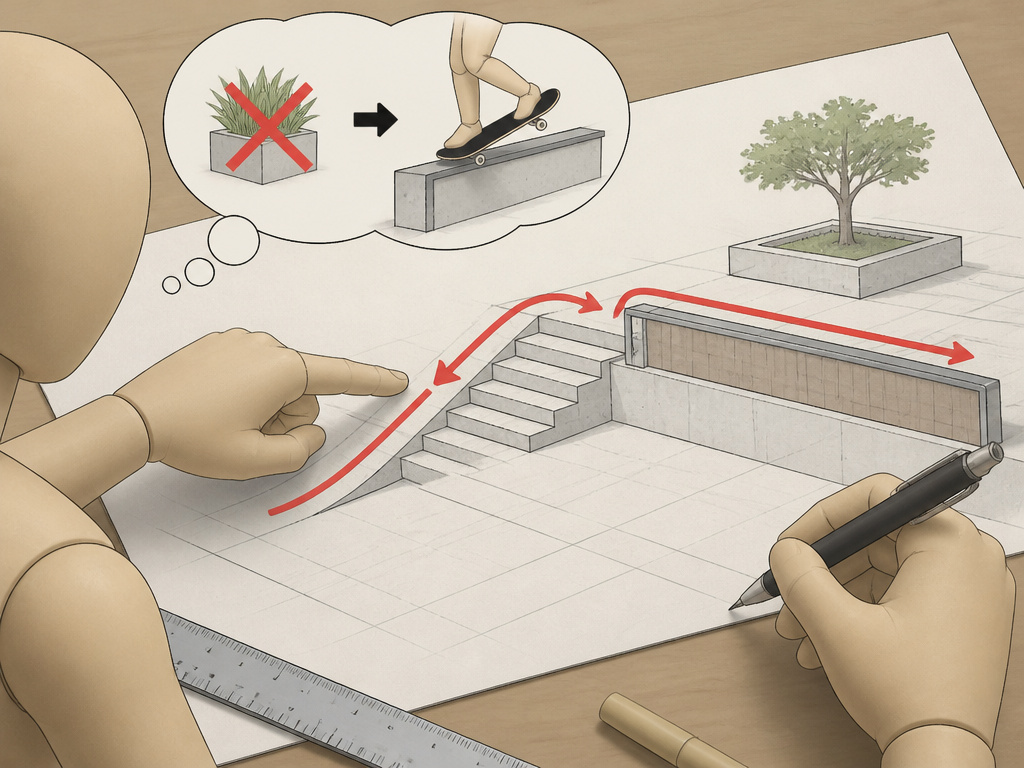
Watch a pro’s video part closely. They’re not just showing tricks; they’re teaching you how to see. Notice the types of locations they use: public sculptures, unique stair sets, and unconventional gaps. They demonstrate how to assess an object’s true potential beyond its obvious use. A bench isn’t just for sitting; its metal edge is a rail. A planter isn’t just for plants; its concrete corner is a hubba. Pros combine elements, using a bank to launch onto a ledge or a slanted wall to maintain speed. Their process is a masterclass in re-imagining everyday architecture, finding flow between obstacles, and reading the entire area for lines, not just single tricks.
Frequently Asked Questions
What is the most famous skate spot?
One of the most famous is Love Park (John F. Kennedy Plaza) in Philadelphia. Its combination of ledges, stairs, and iconic fountain made it a street skating mecca throughout the 1990s and early 2000s, featured in countless videos and magazines before being redesigned to deter skaters.
How do you tell where the front of a skateboard is?
The front of a skateboard, or the nose, is typically slightly longer and steeper than the tail. If your board has a graphic, it’s often oriented to be right-side-up when viewed from the nose-forward position. If you’re unsure, feel the kicks, the nose will have a sharper, more pronounced angle.
Where are some good skate spots in Philadelphia, Pennsylvania?
Beyond the legendary Love Park, Philadelphia offers FDR Skatepark (a massive, skater-built concrete park under I-95), the Philadelphia Museum of Art steps (a.k.a. The “Rocky” steps), and numerous street spots around City Hall and the surrounding commercial districts. Always scout for current skateability and security.
Is there an app for finding skate spots?
Yes, apps like Spot Hunter and others are built for this. They use maps and user submissions to mark skateparks and street spots. However, treat them as a starting point. A pin on a map doesn’t tell you if the spot is currently skateable, recently remodeled, or under heavy security.
How do you read an ice skate spot?
That’s a different activity entirely. “Reading” an ice skate spot likely refers to using a tool like a skate sharpener’s gauge to check the hollow of a blade, not assessing a location. For skateboarding, “reading a spot” is about evaluating a physical location for its skating potential.
The Bottom Line
Reading a skate spot is a skill you build, not a trick you learn. It starts with the official thresholds, a crack over 1/8 inch is a real hazard, and a helmet needs that NOCSAE Standard® label. It moves through the physical scout, where your hands and feet gather more data than your eyes. It ends with the social read, where timing and etiquette buy you the session.
The skaters who always have a place to skate aren’t lucky. They’ve just learned to see potential where others see a parking lot or a sidewalk. They know a broom is as important as a skate tool. This week, take ten minutes and walk your local block not as a pedestrian, but as a skater. Look at every curb, set of stairs, and flat patch of pavement. You’ll be surprised at what you’ve been walking past.
