
How to Teach a Friend to Skateboard: A Step-by-Step Guide
This post contains affiliate links. As an Amazon Associate, we earn from qualifying purchases.
To teach a friend to skateboard, start with protective gear, pick a safe, flat surface, and break the process into four foundational moves: getting on/off, finding their stance, pushing and rolling, and stopping. The CDC recommends smooth, flat surfaces, while a Nike tutorial advises a specific progression from grass to rubber to concrete. One-third of all skateboarding injuries happen in the first week, so patience and structured practice are critical.
That first-week injury stat isn’t a scare tactic. It’s a timing truth that changes how you approach a first lesson, including how to teach a friend to skateboard. If you treat the first session as a casual ‘let’s see if you like it’ hour, you are setting up for a literal fall. The goal isn’t to get them rolling fast; it’s to build the muscle memory that prevents a trip to urgent care.
What follows is a coach’s blueprint for how to teach a friend to skateboard. We’ll walk through the exact foot placement from a certified educator, compare the surface advice that even official sources debate, and lay out the gear choices that turn a scary wobble into a manageable stumble. By the end, you’ll have a repeatable 60-minute lesson plan that works for any adult beginner.
Key Takeaways
- One-third of skateboard injuries occur in the first week, per the American Academy of Pediatrics, so focus on balance and falling safely before any speed.
- Start on a smooth, flat surface like an empty parking lot, but know that some coaches recommend a grass-to-rubber progression for absolute beginners.
- Sources differ on gear emphasis: the CPSC states wrist guards are especially important, while the CDC recommends wearing a helmet, knee and elbow pads, and wrist guards.
- Foot placement is precise: the front foot should cover two of the front bolts, leaving the other two visible, according to Nike’s tutorial with USSEA founder Joe Eberling.
- Never skate alone, and always check local laws, some states prohibit skateboarding in certain public areas.
Before You Start: Safety is the First Lesson
Before you start: A head injury can happen from a standstill fall on flat ground. A skateboarding-specific helmet (hard shell with foam interior) must fit snugly with the chin strap fastened and sit level on the head, not tilted back. Wrist guards are non-negotiable for that first instinctual hand-out catch.
Your friend’s safety is your responsibility when you learn how to teach a friend to skateboard. That means verifying gear before a single foot touches the board. The U.S. Consumer Product Safety Commission is blunt: a loose helmet can come off on impact. The chin strap should be fastened snugly. Visually check that the helmet sits level on the head, not tilted back. If it rocks back to expose their forehead, it’s useless.
The other essential? The location. The Boy Scouts of America mandates that for any organized activity, surfaces must be free of defects and the area must be evaluated by a supervisor beforehand. Translate that to your session: walk the empty parking lot or tennis court first. Kick aside pebbles, note any cracks, and confirm there’s zero vehicle traffic. Public roads, sidewalks, and parking lots are where most young skateboarders get injured, so a controlled environment is your best defense.
Gear Up: The Non-Negotiable Kit
You can’t teach balance on a wobbly board. The CDC says to make sure your trucks are tightened and your wheels are spinning properly before each ride. If your friend is borrowing your board, spend five minutes checking it. The CPSC says to inspect for excessive play, cracks, and to ensure all nuts and mounting screws are tight. A wobbly truck isn’t a feature; it’s a failure point.
Here’s what they need to wear, in order of life-saving priority. This isn’t a fashion show.
| Gear | Why It Matters | Fit & Specification |
|---|---|---|
| Helmet | Prevents traumatic brain injury from any fall, even at low speed. | Must be skateboarding-specific (hard shell/foam). The helmet must be designed for skateboarding (hard shell with foam interior). |
| Wrist Guards | The CPSC singles these out as “especially important.” Most beginners fall backwards or forwards, putting hands down instinctively. | Should have a hard plastic splint on the palm and back. Straps should be snug but not cut off circulation. |
| Knee & Elbow Pads | Protects joints from abrasions and impact fractures. | Caps should be durable plastic; sleeves should not slide down when they bend their joints. |
| Shoes | Provides board feel and grip. Running shoes with rounded soles are a bad idea. | Flat, vulcanized rubber soles (typical skate shoes). Avoid thick, cushioned soles that deaden feedback. |
Forget the gear at your peril. I once tried to “quickly show” someone an ollie without making them put on knee pads. They slipped out, landed directly on a kneecap on rough asphalt, and spent the next month walking stiffly. The sound of denim scraping across pavement is a specific, awful kind of quiet. Now I keep a spare set of pads in my car.
The 4 Foundational Moves to Master (Step-by-Step)
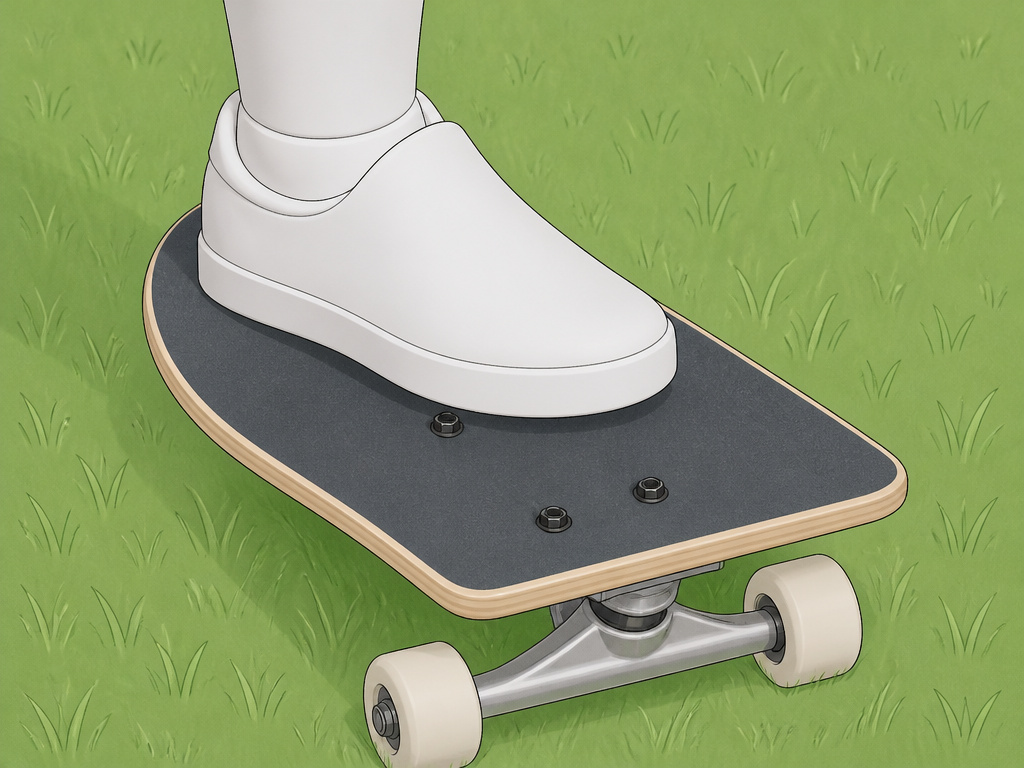
The part nobody mentions: You may need to spend an entire session just on Step 1. Joe Eberling’s Nike tutorial advises starting on grass, then proceeding to a rubber playground surface, then moving to concrete or asphalt. Rushing this is how people get hurt.
This is your lesson plan. Do not skip steps, and do not let your friend’s eagerness override the sequence. Each step builds on the one before, and each has a built-in “what happens if you skip it” consequence.
1. Get On and Off the Board (On Grass)
Start on grass. It sounds silly, but the grass provides a soft, high-friction surface that stops the board from rolling away. Have your friend stand beside the board.
Step 1: Front Foot On.
Tell them to place their front foot on the board, covering the two front bolts nearest the nose, leaving the two rearward bolts visible. This is the “sweet spot” for balance according to the USSEA tutorial. Have them bend their knees slightly, then lift their other foot just an inch off the ground. Have them hold the position, then place their foot back down. Repeat this to build balance. Consequence if skipped: Without this stability, their first push will send the board shooting forward without them, resulting in a split fall.
Step 2: Back Foot On.
Now, with their weight on that front foot, have them place their back foot on the tail, just behind the rear trucks. The back foot will naturally turn sideways. Have them rest it there for a few seconds, keeping most weight on the front foot, then lift it back to the ground. Repeat. Consequence if skipped: They’ll try to jump on with both feet at once, causing the board to tip or rocket out.
Step 3: The Dismount.
Teach them to step off backwards with the back foot first, then bring the front foot down. Not a jump. Not a leap. A simple, controlled step off the way they stepped on. Practice this multiple times to build muscle memory. Muscle memory here prevents panic bails later.
2. Find Their Natural Stance
People are “regular” (left foot forward) or “goofy” (right foot forward). Don’t assume. Have them try the Step 1 sequence with each foot forward. One will feel more instinctive within a few tries. Go with that. Forcing a stance is like writing with your wrong hand, possible, but it builds in a hesitation that never fully goes away.
3. Push and Roll (Move to Smooth Ground)
Once they can mount and dismount consistently on grass, move to your pre-inspected smooth, flat surface, an empty basketball court or parking lot is perfect.
The Push Sequence:
- Start in their stance, front foot covering the two bolts, back foot on the ground.
- Have them lean slightly over the front foot and push with the back foot 2-3 times gently, like a scooter.
- After the push, they should place the back foot on the tail, knees bent.
- Let the board roll to a stop, then step off using the dismount they practiced.
The goal isn’t speed or distance. It’s linking the motions: push, place feet, roll, stop, dismount. Do this for the entire rest of the session if needed. The transition from grass to pavement is a big sensory jump. The board will roll faster and feel less stable. Your job is to talk them through that wobble. “That feeling is normal. Bend your knees more. Look ahead, not at your feet.”
4. Stop and Step Off
The first stopping method is simply to step off with the back foot as they slow down. Once they’re comfortable rolling, introduce a foot brake: as they roll, they lift the front foot slightly and gently drag the sole of their back foot on the ground. It’s a light scrape, not a stomp. This teaches speed control without relying on bailing.
Where Should Your First Session Happen?
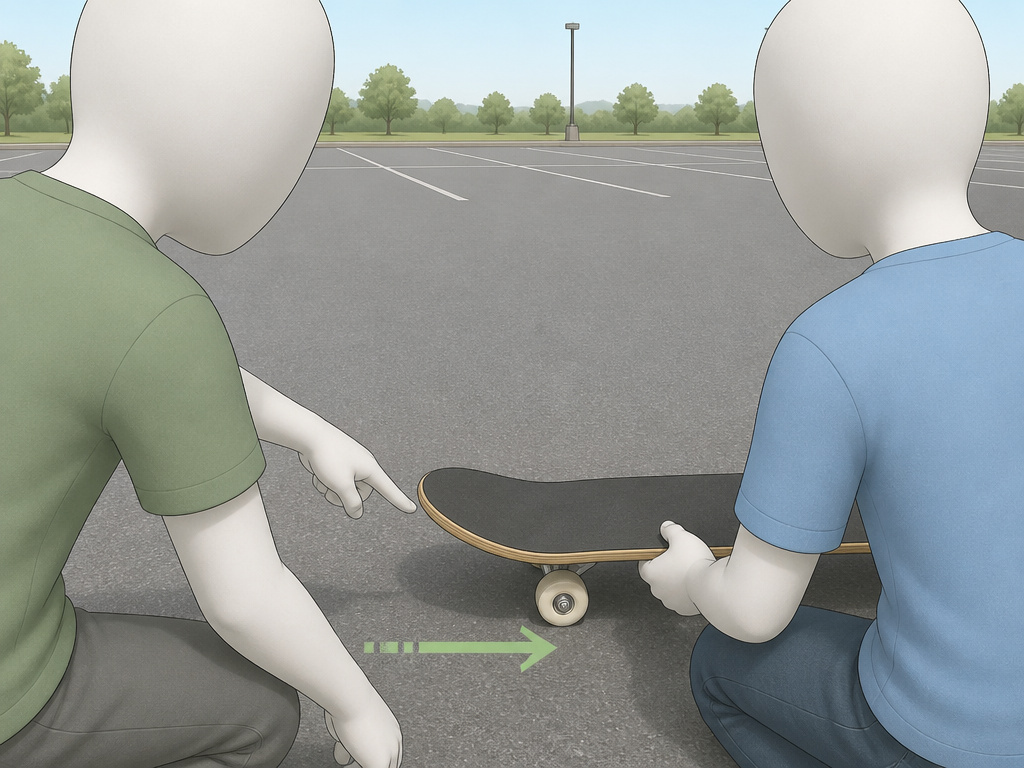
Here’s a conflict even the experts don’t agree on. Your choice changes the entire first hour.
| Source | Recommended Starting Surface | Best For |
|---|---|---|
| Nike.com / USSEA (Joe Eberling) | Grass -> Rubber Playground -> Concrete/Asphalt | Absolute beginners terrified of movement. The rubber surface “is level and slow, so the board won’t get away from you.” |
| CDC BAM! Resource | Smooth, flat surface (implies pavement) | Beginners with some comfort with physical risk. Gets them used to real rolling resistance faster. |
| Reddit Community Consensus | Empty parking lot, flat basketball court | Self-taught beginners; prioritizes real-world feel and space over padded progression. |
I side with the CDC here for most adults. The grass-to-rubber progression is brilliant for very young kids or profoundly nervous adults. But for a friend who’s reasonably coordinated, starting on smooth pavement gets them acclimated to the actual skating environment immediately. The key is that initial, terrifying roll-away speed. On grass, it’s zero. On pavement, it’s real. Start with a one-foot push so slight the board barely moves. Let them feel that incremental gain in momentum.
Where this goes sideways: Taking a first-timer to a skatepark because it has “smooth ground.” Beginner skaters often don’t know the flow of traffic and can unknowingly put themselves and others in danger. Empty flat ground is always the answer.
How to Talk Them Through the Fear (And Your Own)

You’re not a certified coach. You’re a friend who knows a bit more. That changes the dynamic. Your role is part spotter, part hype-man, part translator of physical feedback.
Use their words, not technical jargon. If they say “it feels like it’s going to shoot out,” say “That’s because you’re leaning back. Try putting more weight over that front foot.” If they say “I can’t turn,” say “That’s the trucks. They’re tight for stability. Try a little lean and see what happens.
Demonstrate everything slowly. Show them the foot placement. Show them the push. Show them the awkward, slow-motion fall you want them to practice (more on that next). Your confidence is contagious, but so is your hesitation. If you flinch when they wobble, they’ll panic.
Celebrate micro-wins. “You got your back foot on the board that time without looking down!” “You did five pushes without stepping off!” This isn’t patronizing. It’s focusing on the process, not the outcome. The outcome, rolling comfortably, is just a pile of these small successes.
Teaching the Art of the Fall
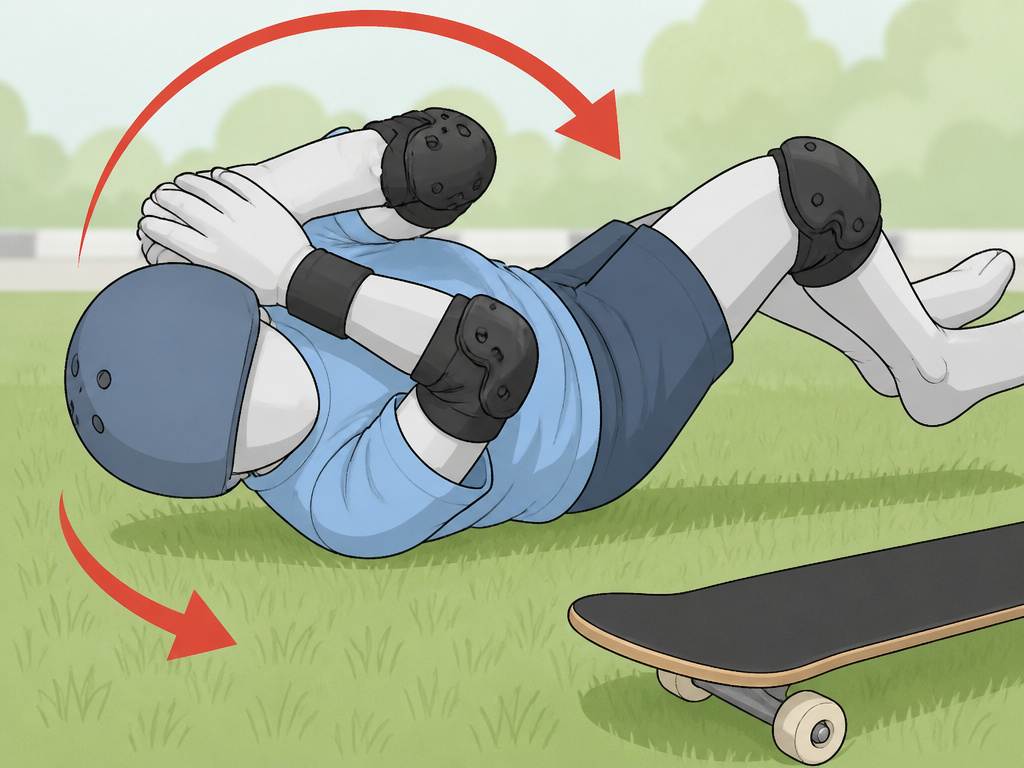
This is the single most important skill you can impart, and most guides bury it. Before they ever try a turn, spend time practicing falling safely.
The Drill:
- On grass, in full gear, have them stand on the board (or just stand if the board is too much).
- Have them practice crouching low and rolling onto their padded shoulders and back, tucking their chin.
- Then, have them practice sliding out on their knee and elbow pads, keeping their wrists up and off the ground.
- Finally, have them step onto the board on grass, create a tiny wobble, and intentionally step/run off the board, rolling or sliding as practiced.
The goal is to replace the instinct to stiffen up and stick their hands out with the instinct to get low, roll, and let the pads do the work. Wrist guards are a backup, not Plan A.
Navigating Supervision and Rules
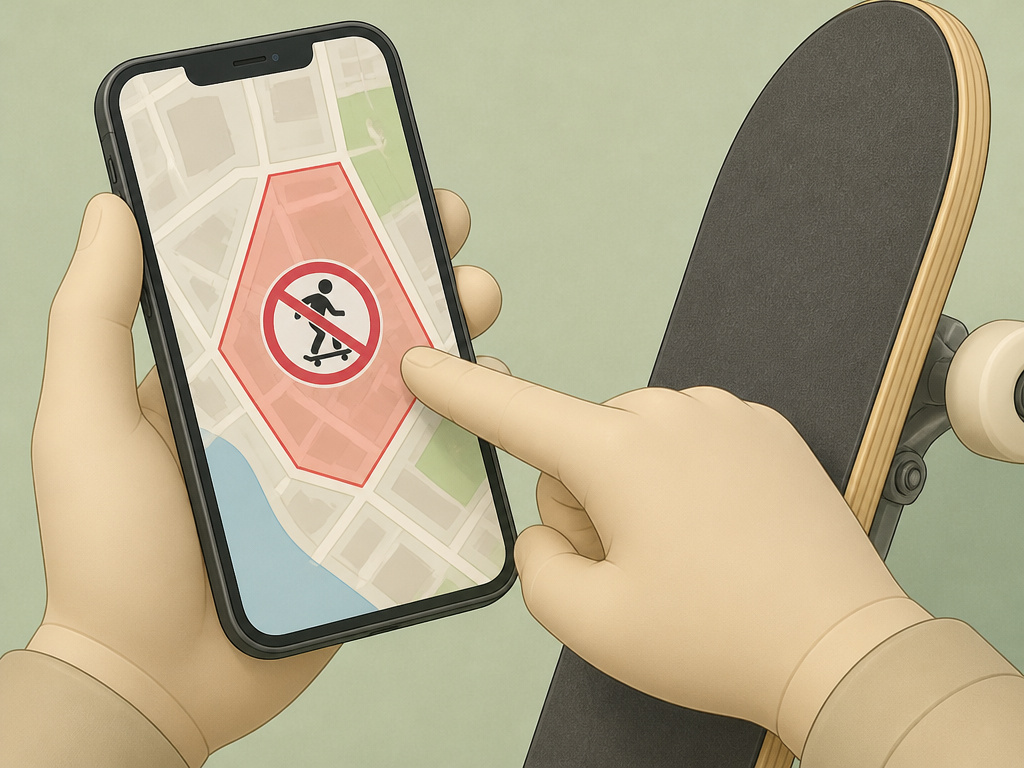
The official advice on supervision age is a perfect example of why you check sources. Sources offer different supervision age thresholds: the CPSC says children under 8 should be supervised closely, while the American Academy of Pediatrics says children aged 6 to 10 should have close adult supervision. And the Boy Scouts of America require an adult supervisor (21+, experienced) for any BSA activity.
What’s the takeaway?
Also, check your local laws. The Nike tutorial points out that some states prohibit skateboarding in certain areas. Your perfect empty lot might be private property or a no-skate zone. A quick search or a call to a local skate shop can save you a fine or a confrontation.
What About Electric Skateboards?
This is a hard line.
Teaching someone on a recalled or powerful electric board is a different, higher-stakes game. The basic principles of balance are the same, but the consequences of a motor cut-out at speed are severe. I would strongly steer a first-time friend toward a traditional skateboard. The fundamentals they learn there transfer later, and the risk profile is orders of magnitude lower.
Frequently Asked Questions
What’s the very first thing I should show them?
Putting on their helmet and wrist guards correctly. Then, how to stand on the board without it moving (on grass). The sequence of safety, then static balance, then movement is mandatory.
How long will it take for them to ride comfortably?
It varies wildly. Some adults get the hang of pushing and rolling in one afternoon. Others need three or four sessions to feel stable. The one-third injury stat in the first week is a warning: don’t measure progress by how fast they go, but by how controlled they are. Comfortable riding is about confidence, not speed.
Should I loosen the trucks for them?
Not for the very first session. The CDC and CPSC both stress that beginners should start with everything tightened properly for stability. Looser trucks are more turny but also more wobbly, a sensation that can overwhelm a first-day rider. After they can push, roll, and stop confidently, then you can discuss adjusting truck tightness to suit their style.
What if they’re really scared?
Go back to the grass. Use the Nike/USSEA progression. Let them spend the whole session just getting on and off. The goal is to leave them feeling like they can do it, not that they did it. Fear is often a fear of the unknown; make the board’s behavior known in the safest possible environment.
Is it okay to teach in a skatepark?
Only if it’s completely empty and you’re using a flat, open section. The flow of a skatepark, even a mellow one, is a language a beginner doesn’t speak. They won’t know where someone might drop in from. An empty parking lot, tennis court, or basketball court is always the better choice for a first lesson.
The Bottom Line
Your friend’s first experience on a skateboard will define their relationship with it. A rushed, painful session breeds fear. A patient, structured hour builds a foundation.
So here is your actionable plan: Gear check. Surface inspection. Practice mounting/dismounting on grass. Practice pushing and rolling on smooth flat ground. Practice falling safely. One bottle of water. Zero expectations of tricks.
Your success isn’t measured by how far they roll, but by whether they want to do it again tomorrow. If they finish with scraped confidence but intact elbows, you’ve failed. If they finish a little sore, a lot smiling, and already asking when you can go again, you’ve taught them to skateboard.
