
How to Paint a Skateboard Deck: Sanding and Priming
This post contains affiliate links. As an Amazon Associate, we earn from qualifying purchases.
To paint a skateboard deck, remove the trucks, clean and sand the surface, apply primer, paint in thin layers, and seal with multiple coats of clear. The exact grits, drying times, and product compatibility vary by brand, matching your primer to your paint and waiting for a full cure are what keep the finish from chipping or peeling.
That last sentence is the whole job. A deck is seven layers of maple, and every coat you add needs to bond to the one below it. Get the sequence right and you can skate the board for months. The key is knowing how to paint a skateboard deck correctly. Rush a step and the paint wrinkles, cracks, or lifts on the first tail drag.
What follows: the sandpaper grits manufacturers actually specify, the primer-paint-clear combinations that work, and the drying windows you cannot skip when learning how to paint a skateboard deck. This is the difference between a board that looks good for a week and one that holds up.
Key Takeaways
- Sources disagree on the recommended initial grit for raw wood: the Eastwood guide starts with 180 grit, while the Varathane data sheet recommends 120-150 grit for stripping old finishes in poor condition, then working up to P220.
- Match your primer to your paint type: water-based for acrylics and pens, spray primer for spray paint. A mismatch can cause peeling.
- Apply three thin coats of paint, not one thick one. Thin coats dry through; thick ones skin over and stay soft underneath, leading to wrinkles.
- Sources disagree on the wait time before varnishing: Golden Artist Colors warns acrylic on plywood must be ‘completely dry’ (potentially days) before varnishing, while Montana Colors states alkyd spray paint can be varnished between 15 minutes and 2 hours after the last coat.
- For a deck you will skate, apply at least three coats of a hard clear like Varathane Crystal Clear water-based polyurethane and wait for the full cure time (often 3 days) before riding.
Sanding: The Gritty Details Everyone Gets Wrong
You need to scuff the surface. But which grit?
The Eastwood guide for a custom paint job starts raw wood at 180 grit. Varathane’s data sheet, written for refinishing floors and furniture, recommends 120-150 grit for stripping old finishes in poor condition, then working up to P220. Both are right for their context. On a new blank deck, 180 grit followed by 220 creates a perfect tooth for primer. If you’re painting over a glossy factory graphic that’s intact, 220 grit is enough to dull the shine and give the primer something to bite, you’re not stripping it, just profiling it.
Common mistake: Sanding with the deck fully assembled. Grit and dust pack into the truck hangar and wheel bearings, and you can’t properly sand the concave near the bolts.
The goal when you learn how to paint a skateboard deck is a uniformly dull, slightly rough surface. Run your hand over it. If it feels slick in spots, hit those again. After sanding, you must clean off every speck of dust. A vacuum followed by a tack cloth works. Any dust left becomes a tiny bump under your paint.
| Surface Condition | Start Grit | Finish Grit | Goal |
|---|---|---|---|
| New, raw maple blank | 180 | 220 | Create a mechanical tooth for primer |
| Glossy factory graphic | 220 | 220 | Scuff shine to a uniform matte |
| Peeling/flaking old finish | 120-150 | 220 | Remove loose material, smooth surface |
| Previously painted deck | 150 | 220-400 | Level imperfections, feather edges |
Primer: The Layer That Actually Holds Your Paint
Primer is glue. It bonds to the sanded wood and gives your paint a consistent, porous surface to lock onto. Skip it and your paint might look fine for a week, but it will chip off in sheets the first time you do a tailslide.
The critical rule is system matching. Use a water-based primer like Zinsser Bulls Eye 1-2-3 under acrylics and paint pens. Use a spray primer like Rust-Oleum 2X under spray paint. Mixing systems, say, a solvent-based spray primer under water-based acrylic, can work, but it adds a compatibility risk you don’t need.
Drying times are not suggestions. The Zinsser Bulls Eye primer is touch dry in 30 minutes, ready for recoating after an hour, but fully cured in seven days. You can paint over it after that first hour, but the seven-day cure is why your finish stays flexible. The Eastwood 2K Aerospray Primer, used in their pro tutorial, gets three wet coats with ten minutes between each, then should cure for 3-4 hours before sanding or handling. The takeaway: read the can.
I learned the system-matching rule the hard way. I once sprayed a Rust-Oleum 2X primer, then painted over it with acrylics a few hours later. The finish looked great until day three, when a network of fine wrinkles appeared across the graphic. The solvent in the primer was still off-gassing and softened the acrylic film from below. Now I wait a full 24 hours between different systems, or just stick with one.
Paint Types: Acrylic, Spray, and Pens Compared
Your design dictates your paint. Big solid backgrounds and fades are easiest with spray paint. Detailed brushwork and blends call for fluid acrylics. Sharp lines and lettering belong to paint pens.
The brands matter because their chemistry sets the rules. Here’s what the data sheets say:
| Paint Type | Brand Example | Touch Dry | Recoat Window | Best For |
|---|---|---|---|---|
| Solvent Spray Paint | MTN 94 | 10 minutes | 15 min – 2 hours | Backgrounds, fades, stencils |
| Solvent Spray Paint | Rust-Oleum 2X Enamel | 20 minutes | Within 1 hour or after 48 hours | Solid colors, quick coverage |
| Water-based Acrylic (brushed) | Golden Artist Colors | Seconds to a day (varies by thickness) | No limit once dry | Blends, details, custom mixes |
| Acrylic Paint Pen | MTN Acrylic Marker | 10 minutes | After 12 hours (dry through) | Outlines, lettering, fine details |
Three thin coats are better than one thick one. The MTN 94 sheet states this directly. A thick coat skins over on top while the bottom stays wet, which leads to runs, drips, and a finish that takes weeks to fully harden. Thin coats dry fast and build a stable, flexible film.
Temperature matters. Most data sheets specify a minimum application temperature between 8°C and 13°C (46°F to 55°F). Golden Artist Colors notes that acrylic paint cannot form a continuous film below 9°C (48°F). Painting in a cold garage will give you a cracked, brittle finish.
Step 7: Paint in Thin Layers
This is where patience pays off. Work from the background to the foreground: spray your base color, let it cure within its recoat window, add stenciled shapes or brushwork, finish with pen details.
For spray cans, hold the can 25–40 cm (10–16 inches) away and keep it moving. Start your pass off the board, sweep across, and finish off the other side. Overlap each pass by about 50%. Two light passes spaced appropriately will give you even coverage without drips. If you see a run forming, stop immediately. Let it dry completely, then sand it flat with 400-grit paper and respray.
Where this goes sideways: Recoating outside the window. With MTN 94, you must recoat or varnish between 15 minutes and 2 hours. With Rust-Oleum 2X, you must recoat within one hour or wait 48 hours. Painting in the “no-go” zone (after 2 hours but before 48) can cause wrinkling as the new solvent reactivates the soft layer beneath.
Brush painters have more flexibility. Golden Artist Colors states acrylic over acrylic has no recoat limit, once a layer is dry to the touch, you can add another. But “dry to the touch” is not “dry through.” On a thick brushstroke, the surface can feel hard while the core is still soft. Give it time.
The Clear Coat Choice That Decides Durability
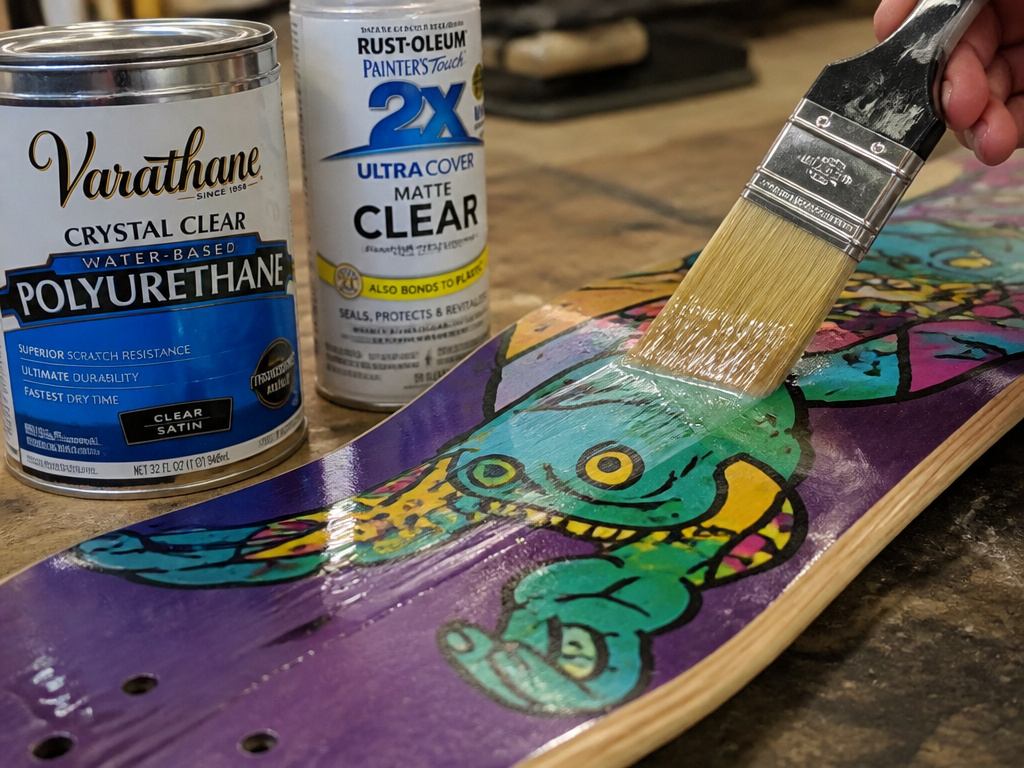
Clear coat is armor. For a wall-hanger, multiple thin coats of clear varnish will do. For a deck you plan to skate, you need a hard, buildable finish applied in multiple layers.
The two main contenders are water-based polyurethane (brushed on) and solvent-based spray clear. Your choice hinges on your paint layers.
- Brushed Water-Based Polyurethane (Varathane Crystal Clear): This is the gold standard for durability. It’s designed for floors. You apply at least three thin coats, waiting 2 hours between each. It’s light use after 24 hours, but normal use, meaning skating, only after 3 days. One caveat: the Varathane sheet warns it can discolor white or pastel paints. Test a corner first.
- Solvent-Based Spray Clear (Rust-Oleum 2X Clear): This gives a fast, even, glossy coat. It’s touch dry in 20 minutes and fully dry in 24 hours. The recoat rule is strict: recoat within 30 minutes or after 48 hours. The big warning, from the MTN PRO Acrylic Varnish sheet, is that solvent clear can crack or lift freshly applied acrylic or paint pen layers. Always test on a scrap.
The part nobody mentions: Plywood, which is what a skateboard deck is, releases trapped moisture more slowly than canvas or paper. Golden Artist Colors warns that varnishing acrylic on plywood before it is “completely dry” (which can take days) can lead to clouding or poor adhesion. Your paint might feel dry, but the wood underneath might not be ready.
Fixing Common Painting Mistakes
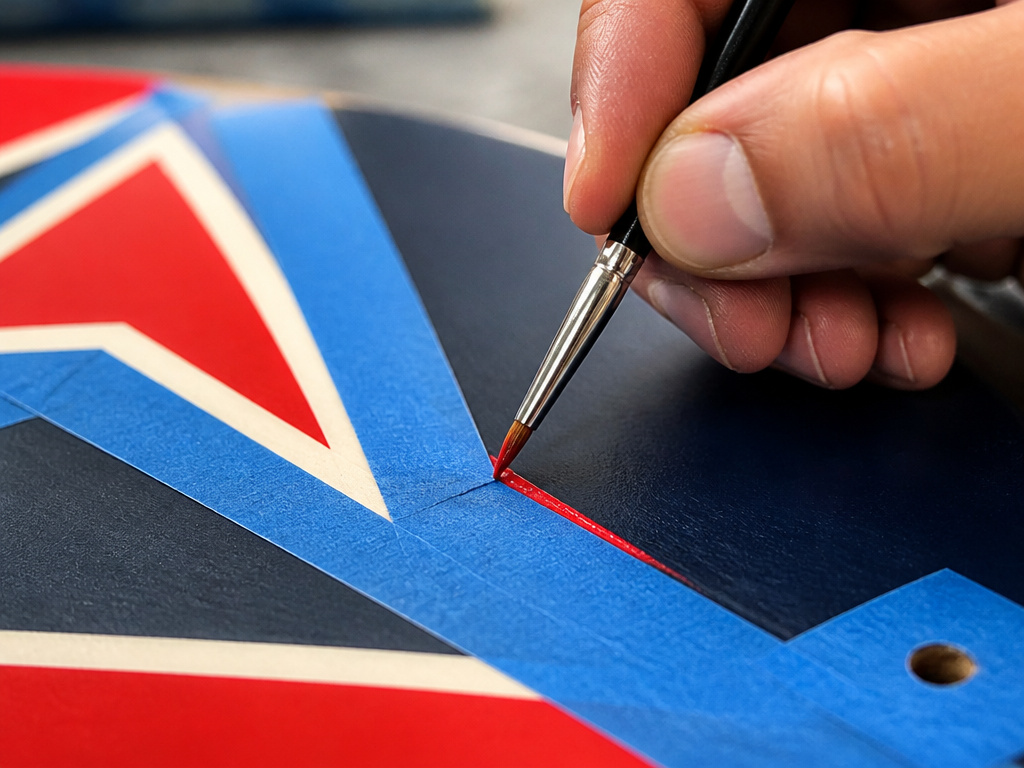
Mistakes happen. Here’s how to fix them without starting over.
Paint crept under tape or a stencil. Let the paint dry fully. Then, using a fine brush or a matching paint, carefully paint over the bleed with the neighboring color. A steady hand and good lighting are key.
A run or drip in spray paint. Do not touch it while wet. Let it harden completely. Then, sand it smooth with 400-grit paper, feathering the edges. Wipe clean and apply a new, very light coat.
Wrinkled coat. This is a chemical timing issue. A new coat was applied while the layer beneath was still curing. Montana Cans explains wrinkling as a drying layer pulling on an uncured one beneath. Let the board cure completely. Then sand the wrinkled area smooth and repaint.
Dust or a hair in the clear coat. Let the clear cure fully (which can take 24 hours to 3 days). Sand the imperfection lightly with 400-grit paper until it’s smooth. Apply a final, thin coat of clear over the entire area.
Painting Over Graphics vs. Starting Blank
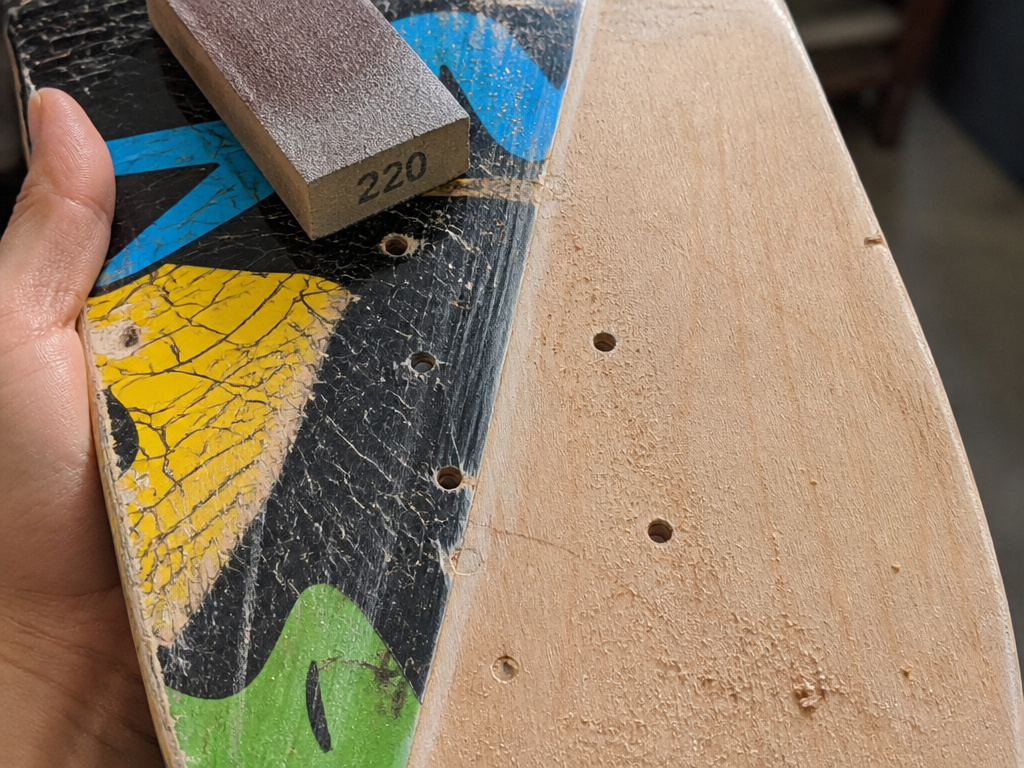
Should you paint over your board’s existing graphic or buy a blank? It depends on the graphic’s condition and your tolerance for sanding.
You’re starting with bare, sanded maple. Just follow the sanding steps for raw wood. A deck with a factory graphic has a hardened, glossy finish. You must sand it thoroughly with 220-grit to break that glaze, or the primer will have nothing to grip. If the graphic is cracked or flaking, you need to remove graphics entirely, which means sanding down to bare wood, a much longer job starting with 120-grit.
You skip the unknown variable of the factory finish and save time on aggressive sanding.
Should I remove the trucks and wheels before painting?
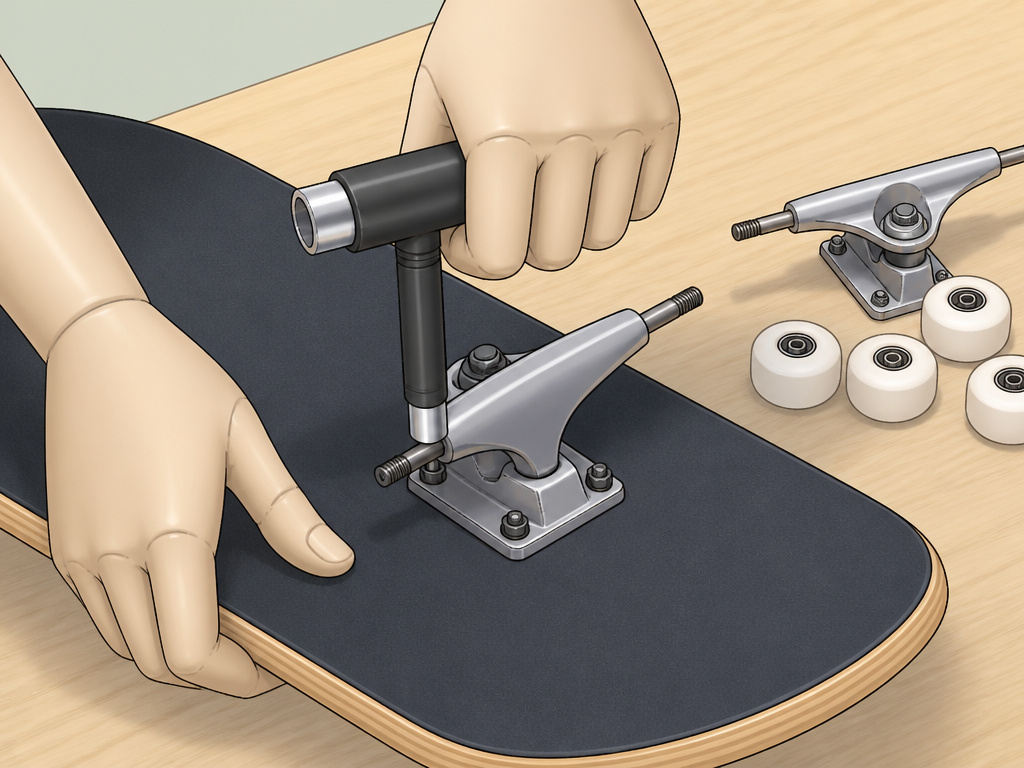
Yes, always take the trucks and wheels off the deck before you start. This isn’t optional. You need clear, unobstructed access to the entire surface, especially the nose and tail curves and the mounting holes. Painting around hardware will leave messy edges and weak spots where paint can chip off easily. Removing the trucks and wheels also allows you to lay the deck flat on a stable surface for sanding and spraying. This is important for an even coat. Once the deck is stripped down, you can also properly clean off any dirt and grease, let it dry thoroughly, and get into every corner for a professional finish.
Frequently Asked Questions
What kind of paint should I use on a skateboard deck?
For spray painting, you can use products like Rust-Oleum 2X or MTN 94. For detailed artwork, you can use fluid acrylics or acrylic paint pens. Always seal with a clear coat.
How long should I wait between coats of paint?
It depends entirely on the product. For MTN 94 spray paint, recoat between 15 minutes and 2 hours. For Rust-Oleum 2X enamel, recoat within 1 hour or wait 48 hours. For brushed acrylics, Golden Artist Colors states acrylic over acrylic has no recoat limit once dry.
Can I paint a skateboard deck that I’m going to skate?
Yes, but you must use a hard, durable clear coat like Varathane Crystal Clear water-based polyurethane and apply at least three coats. You also must let the clear coat fully cure, which data sheets indicate can range from 24 hours to 3 days, before riding. The finish will still scratch and wear.
Why did my clear coat crack or wrinkle?
This is usually a compatibility or timing error. Applying a solvent-based clear coat over acrylic or paint pen layers that aren’t fully cured can cause cracking. Applying a new coat of paint or clear before the previous coat has finished curing causes wrinkling. Always observe the drying and recoat times on the product data sheets.
Do I need to sand between coats of paint?
For a smooth finish, lightly sand with a fine grit between coats after the coat has fully dried. This knocks down any dust nibs or orange peel texture and helps the next layer adhere. Wipe away all sanding dust before applying the next coat.
Before You Go
The one rule that overrides all others is patience. Rushing a coat because you’re excited to see the design is how finishes fail.
If you’re unsure about a product combination, like using a solvent clear over acrylics, test it on a scrap piece of wood or the underside of the deck first.
Finally, remember that a painted deck you skate is a consumable work of art. It will get scratched. The edges will chip. That’s not failure; it’s proof of use. The goal isn’t a museum piece, but a personalized board that looks great until the pop is gone.
