
Skateboarding is a fun activity and game that not only is adventurous but also gives you the chance to become an artist. Being a skateboarder and having a creative mind gives you so many reasons to enjoy skateboarding with the customized skateboard.
You make this customized skateboard on your own with your thoughts and imagination of art via a painting on the skateboard. But wait! Do you know how to paint skateboard decks?
Painting a skateboard deck is not really difficult and complicated but is somehow tough to perform because it is a time taking task that demands attention and concentration. But when it comes to customization, skateboarders always prefer designing the board on their own, according to their choice with their imagination and their own painting skills.
Following is a guide to tell you how you can paint a skateboard deck and how you can make it more attractive, appealing, fun, and an adventure to ride.
How To Paint A Skateboard Deck?
These are the easy steps to paint a skateboard deck that are not only easy to follow but also very reliable and professionally recommended by most skateboard deck painters. Before jumping on to the procedure, I am going to elaborate what are the essential items that you should have before initiating the process. This includes,
- Sandpaper
- Spray paint
- Clear coat
- Design stencils
- Aerosol primers
- Tape
- Tools
Steps To Get The Best Painting Results
- The first and foremost important thing is to remove the trucks located at the downward side of the skateboard deck. Make sure you’re placing them in a secure place so that you can find them later on.
- Now go to the market and purchase a fine sandpaper that should only be of number 320 or 400.
- Now send the deck and make sure you are standing in a circular motion. Dip the sponge in soap water and rub it against the surface of the deck then Wash your deck and let it dry.
- Now make sure you have a tape with you. Set the tape at the screw holes located at both the top side and sides of your deck. This is to avoid the drips of paint to go into these holes. Wear the protective or paintball mask and eye protection, so that the primer you are going to apply in the next step on the surface of the deck does not harm you in any way.
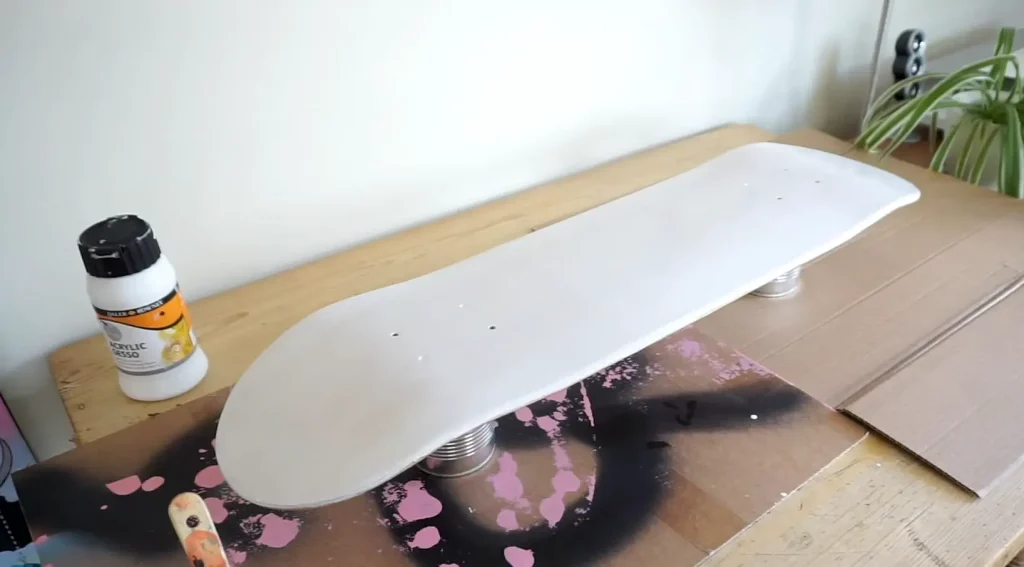
- It is time to apply the first coat that is of primer. Whether you have an aerosol primary or a hand primer, make sure you are spraying it evenly to the whole surface of the deck. What you have to keep in mind is that you are covering the deck properly.
- Leave the deck for 30 minutes and allow the primer to dry completely.
- After you notice that the primary is dried completely, use 150 grit sandpaper and re-sand the skateboard. Make sure there are no bubbles or blisters on the surface of the board. Move backward and forward with gentle pressure.
- Remove any of the sawdust that is present on the surface of the deck after sanding and applying primer. You can use a wet cloth for this purpose. Dry the deck properly.
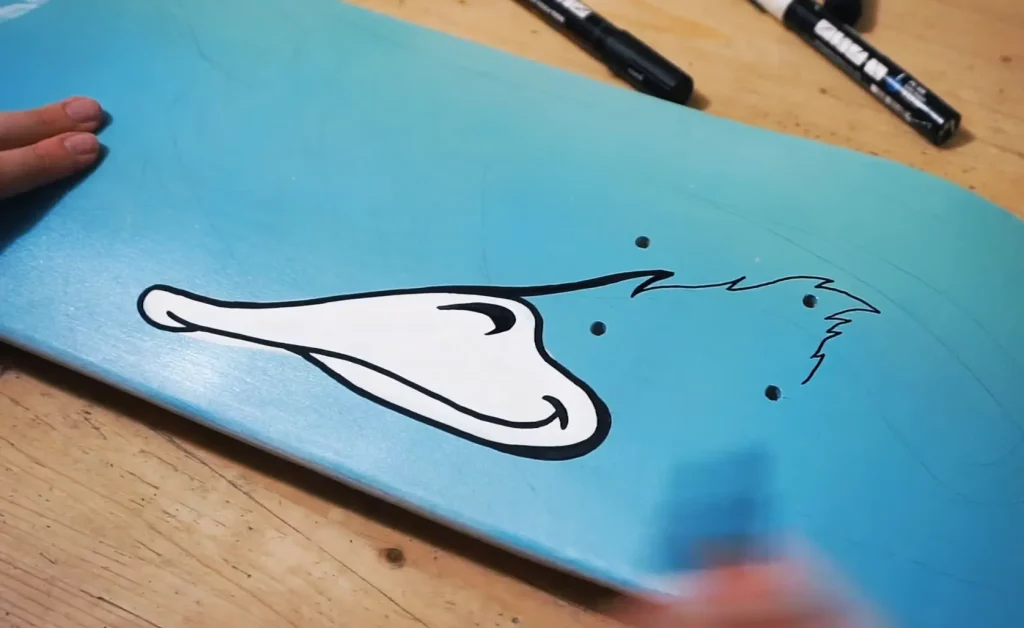
- Now is the time to prepare the design you want to paint on the deck’s surface. Use your imagination and creativity to create the design while keeping in mind the proportionality of outlines and shades and contrast that you are going to make on your deck.
- Sketch the design on paper and write down the colors you may need.
- One thing that you have to keep in mind while creating the design is that the more colors you want on your design, the more layers of paint you have to apply to the deck. Keep this in mind and make sure your limits to the colors and shapes.
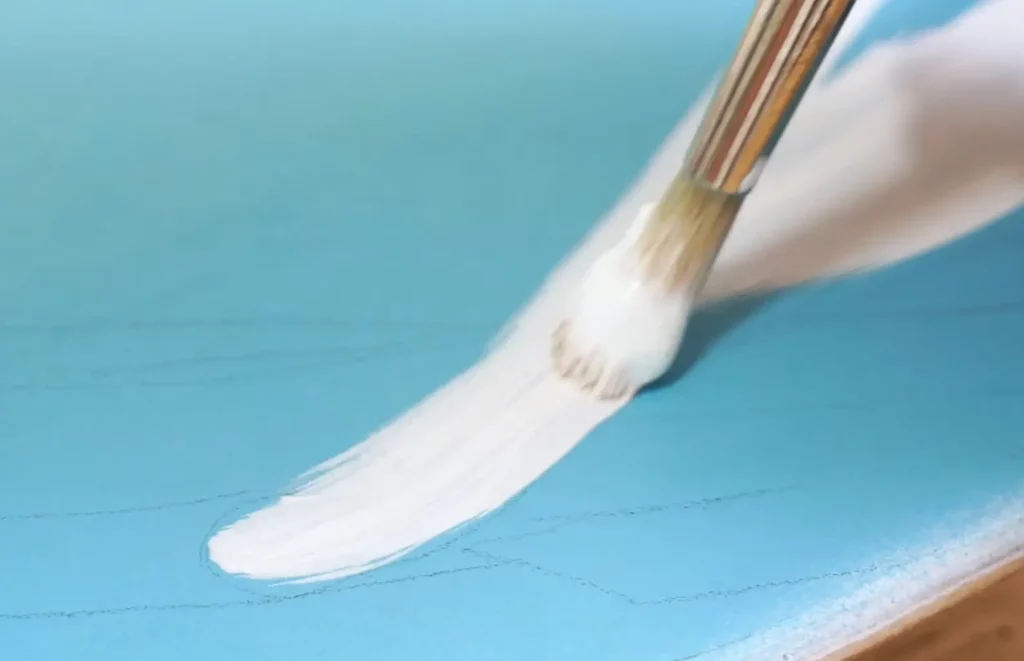
- I prefer going with white and black background color but you can go with whatever solid color you want. Make sure to select the color for the background so that the design you are going to make on top of it should stand out and should be prominent.
- After finalizing the color, spray the base color evenly just the way you have sprayed the primer on the deck. Ensure the paint is spread evenly without any sort of thickness or thinning at some points. It should be balanced, fine, smooth, and leveled from all of its sides.
- Now you can use a stencil to make the design on the deck. The first thing that you have to do is to take the stencil on the deck and apply the layer of colors, according to the paint and design you want.
- Now make the layers of colors according to the design and pattern you have selected. Spray the color evenly and keep one thing in mind and that is to make sure the first layer of the paint you have applied is properly dried, before applying the second layer. Similarly ensures that the second layer is dried before applying the third layer.
- After properly drying all of the layers of the paint you have applied, check out the final look and make sure that you have covered each and every part of the deck with the paint exactly according to your designs.
- Now is the time to remove the stencils and tape smoothly and gently. What you have to do is to drag the stencils first and then the tape. Keep your attention intact and remove them carefully with full attention to avoid any mishap.
- After careful removal of the stencils and tape, you are now able to view your complete design on the deck.
- After drying the layers of paint you have just applied on the deck, now is the time to apply a clear coat to give it a nice, shinier and fine look. The clear coat of the paint gives shine and glow to the design of the deck, in addition to providing it with safety against UV rays and heating from the Sun.
- This is the last step that involves the reinstallation of the trucks. But before re-installing the trucks make sure that all of the paint you have applied on the deck, including the final transparent coat, has been dried up properly and wholly.
- You can level up and advance your painting on the skateboard by using hand painting techniques and acrylic paints.

FAQs
Why is it important to sand the deck before painting on the surface of the skateboard?
Sanding is an important thing that you should have to do, before applying the primer coat. This is because sanding will remove any kind of bumps or ups and downs on the surface of the deck, making it easier for the painter to paint and get a smooth and fine outlook at the end.
What is the importance of adding a final clear coat on top of the painting on the skateboard deck?
The final clear coat when added to the top surface of the whole painting of the deck makes the deck look shinier and smoother. This shine and glow make it more appealing and attractive.
Moreover, the final clear coat ensures that the paint on the deck is away from direct reaching of the ultraviolet rays or heating from the Sun. This ultimately makes it durable and long-lasting.
How to enhance and step up the painting on the skateboard deck?
If you really want to make your skateboard deck painting better and more advanced, you can go on painting with the use of a hand and can give your design more precision, neatness, and perfection. In this way, you can use your own mind to enhance the outlook of the skateboard deck.
Final Thoughts
As of now, you are done with the painting on the deck. Painting the skateboard’s deck surface is not only fun but also interesting and helps you let out your creative and artistic mind. What you have to do is to have some accessories with you before starting the painting and should select the design that you really want to make on the deck beforehand.
There are a few simple steps that are mentioned about painting the skateboard deck on your own without much complications and complexity. You can follow the guide and can have the best painting experience with the best outlook and design.
Hi, I am Mian. I am the Owner and Founder Of Skateboard First. I am such a huge fan of skateboarding, and I am here to enhance your experience in skateboarding.