
How to Replace Skateboard Bushings: Step-by-Step Guide
This post contains affiliate links. As an Amazon Associate, we earn from qualifying purchases.
To replace skateboard bushings, you need a skate tool or a 9/16 inch socket, a new set of standard street skateboard bushings, and about ten minutes. The process is: loosen the kingpin nut, remove the old bushings and washers, install the new thicker bushing on the bottom and the smaller cone on top, reassemble the hanger, and tighten the nut to your preferred tightness. Softer bushings are for cruising, harder ones are for technical skating.
For a standard street skateboard kingpin nut, the iFixit guide specifies a 9/16 inch socket or skate tool, while the Tactics guide mentions a 1/2 inch wrench. Knowing how to replace skateboard bushings correctly starts with using the right tool. The difference between a smooth swap and a stripped bolt is one line on a socket.
What follows: the five-step breakdown, the exact tool debate, the one orientation detail most guides skip, and what to do when your board isn’t a standard street setup. By the end, you’ll know how to replace skateboard bushings and how to spot a worn bushing by sound and feel, not just by sight.
Key Takeaways
- Use a 9/16 inch socket or skate tool for the kingpin nut; a 1/2 inch wrench will strip it.
- According to iFixit, bushings need replacement every couple of years at most, but check them often for cracks or a “squirrelly” feel.
- For standard trucks, most sources like Tactics and Enuff Academy recommend installing the thicker barrel bushing on the bottom, while iFixit refers to it as the cylindrical bottom bushing.
- Match the kingpin nut tension from before disassembly to keep your turning feel consistent.
- New bushings have a break-in period of a few sessions where they may feel squeaky and exhibit auto-turn.
The 5-Step Process for Replacing Standard Bushings
A standard street skateboard kingpin nut requires a 9/16 inch socket or skate tool. The replacement process involves removing the old bushings and washers, then installing new ones with the thicker barrel bushing on the bottom and the smaller cone bushing on top, taking care to match the original kingpin nut tension during reassembly.
You can do this on a picnic table or a workbench. The only special tool you need is that 9/16 inch socket. If you have a multi-tool skate tool, it almost certainly has the right size.
Here is the step-by-step breakdown.
- Loosen and remove the kingpin nut. Crank it counter-clockwise with your socket or skate tool until the nut comes off. Set it aside where you won’t lose it.
- Slide off the hanger, top washer, and top bushing. The hanger is the T-shaped part that holds the axle and wheels. It will come away from the baseplate, along with the top washer and the cone-shaped bushing.
- Remove the bottom bushing and washer. These will be sitting on the kingpin, which is the big bolt sticking up from the baseplate. Slide them off.
- Install the new bottom bushing and washer. Take your new, thicker barrel bushing and slide it onto the kingpin, followed by its washer. Some guides, like the one from iFixit, note the bottom bushing has a slightly rounded edge that should face down toward the washer.
- Reassemble the hanger and install the top components. Place the hanger back onto the baseplate, ensuring the pivot arm seats into the pivot cup first. Then slide on the new top cone bushing and its washer. Thread the kingpin nut back on.
Now, tighten the nut. How much? Match the tension it had before you took it apart. The iFixit guide stresses this point: take note of how tight the nut was fastened so you can match that same tension during reassembly. This keeps your board’s turning feel consistent.
Common mistake: Cranking the kingpin nut down as tight as it will go. This compresses the bushings past their intended range, making your turns sluggish and dramatically shortening bushing life. Tighten just enough to remove side-to-side slop in the hanger.
When Should You Replace Your Bushings?
They don’t usually explode. Failure is subtle. According to the iFixit guide, bushings need to be replaced routinely every couple of years at most. But you should check them often.
How do you check? Look and listen.
Visually, search for deep cracks, splits, or a crushed, flattened shape. The Tactics guide says if your bushings are split or crushed on one or both sides, it’s probably worth replacing them.
The better test is feel. Does your board feel “squirrelly”? That vague instability is the bushings losing their rebound.
Another sign is sound. Worn bushings can create a faint, plastic-on-plastic squeak during turns.
| Symptom | Likely Cause | Action |
|---|---|---|
| Deep cracks or splits | Age, UV exposure, overtightening | Replace immediately |
| Crushed, flattened shape | Overtightening, rider weight mismatch | Replace and use harder bushings |
| “Squirrelly” or vague steering | Bushings have lost rebound and elasticity | Replace soon |
| Squeaking during turns | Bushings are dry or slightly worn | Can be cleaned/lubricated, or replace |
Let performance, not the calendar, be your guide.
Choosing the Right Replacement Bushings
Any standard street skateboard bushings will work. When considering how to replace skateboard bushings, the iFixit guide is clear on this: any hardness will be the same size and shape. This gives you room to experiment.
Hardness is measured by durometer. A higher number means a harder bushing. The general rule from iFixit is softer bushings are for cruising, harder for technical skating. Softer bushings compress more easily for cruising, while harder ones resist compression for technical skating.
Should you stick with your truck brand? The Tactics guide recommends it, stating it’s best to get replacement bushings that are the same brand as the trucks you are riding because they are specifically designed to fit the geometry of that truck. Brands like Independent, Thunder, and Venture design their bushings to match their truck’s pivot cup and hanger geometry.
That said, universal options exist. Tactics also notes that some brands like Bones and Shorty’s make bushings that will fit into several different brands of trucks. Bones Hardcore bushings are a popular aftermarket choice for their consistent performance.
It offers a balance of turnability and stability.
The Tools You Actually Need (And One You Don’t)
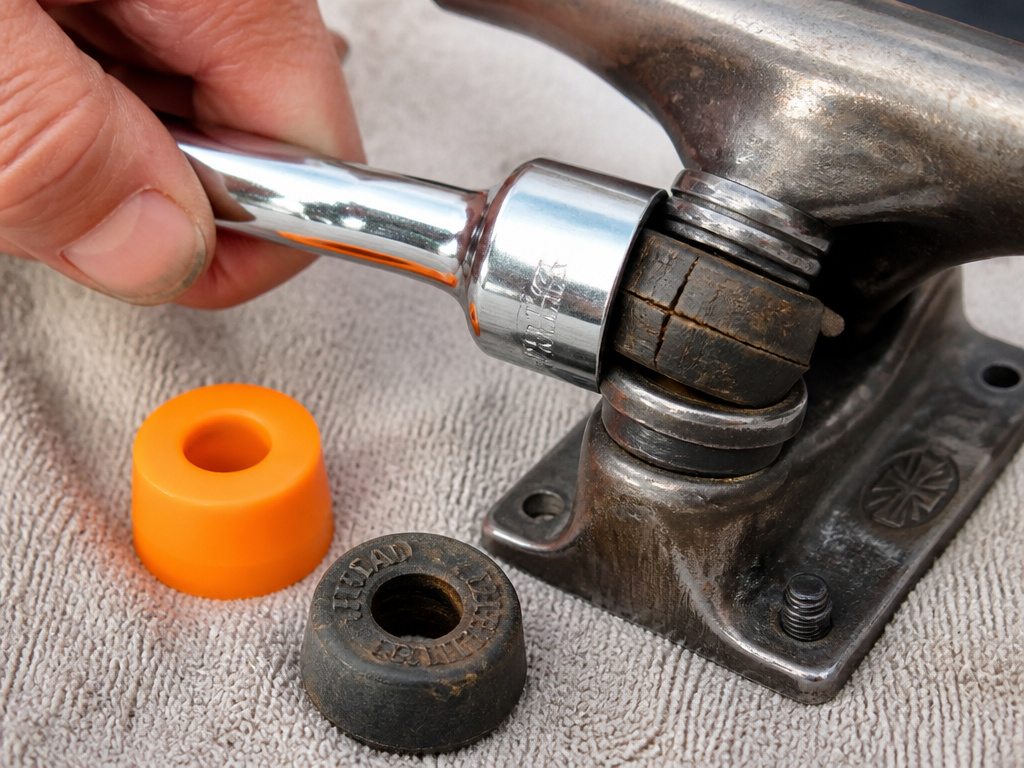
We can settle the tool debate now. The iFixit standard guide specifies a 9/16 inch socket or skate tool. The iFixit guide specifies a 9/16 inch socket or skate tool for a standard kingpin nut, while the Tactics guide mentions a 1/2 inch wrench.
For a standard street skateboard kingpin nut, the 9/16 inch size is correct. A 1/2 inch wrench will be too small and will slip, rounding off the nut’s corners.
Speaking of electric boards, they often break the standard. The iFixit guide for the Meepo Mini 5 electric skateboard notes it uses ‘TALL BARREL BUSHINGS‘ measuring 25mm x 19mm and requires a 1/2 inch wrench for the bushing bolt. This is a key exception.
Here’s what your toolkit should hold:
- 9/16 inch socket (or a skate tool with this size). This is required for standard trucks.
- Replacement bushings. A set covers both trucks.
- A clean workspace. A rag to lay parts on helps.
You do not need lubricant, a hammer, or power tools. Adding grease or oil to bushings attracts dirt and grit, which accelerates wear.
Navigating the Reassembly: Where Guides Disagree
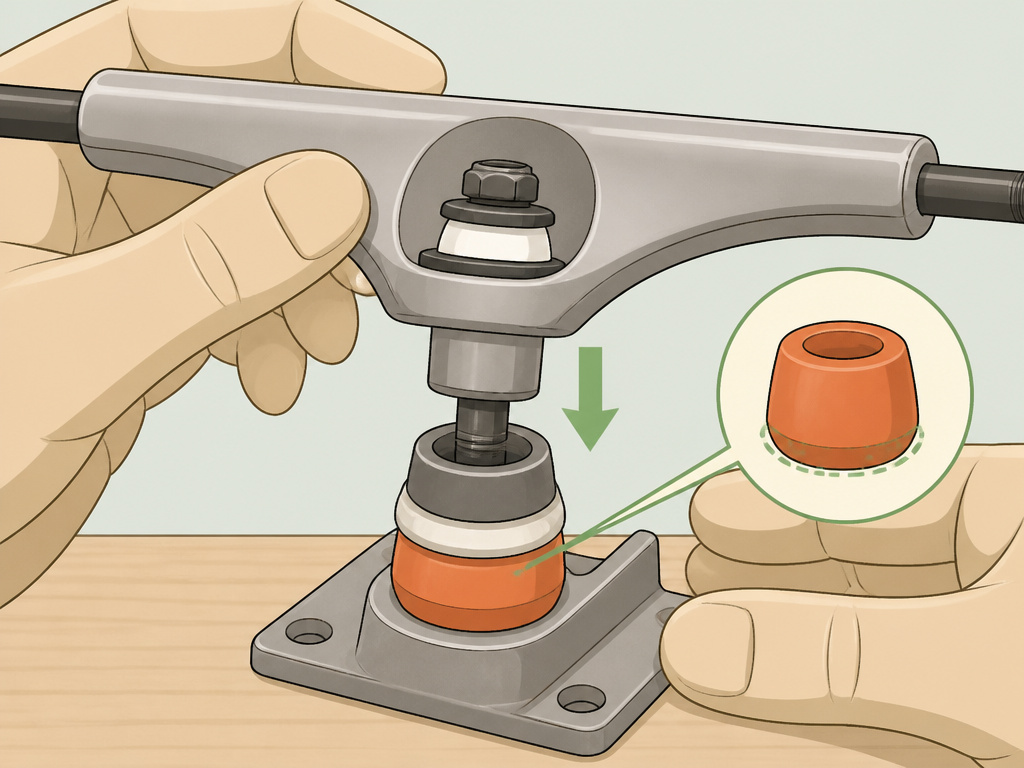
You’ve got the new bushings in hand. The old ones are off. Now you have to put it all back together, and this is where even reputable guides offer slightly different advice. Here is the clarification.
Disagreement 1: Which bushing goes on the bottom?
Most sources agree the thicker, barrel-shaped bushing goes on the bottom. The Tactics guide states plainly: “the thicker bushing should go on the bottom.” The Enuff Academy guide also says to take “a larger one” for this position. The iFixit guide calls it the “cylindrical bottom bushing.” Most sources, like Tactics and Enuff Academy, recommend the thicker bushing on the bottom, while iFixit refers to it as the cylindrical bottom bushing.
Disagreement 2: Does bushing orientation matter?
The iFixit standard guide adds a detail others omit: the bottom barrel bushing has a “slightly rounded edge” that should face down toward the washer. Other guides may not mention orientation. If your new bushings have a discernible rounded edge, follow iFixit’s advice. If they’re symmetrical, don’t worry about it.
Disagreement 3: Pivot arm or kingpin first?
When placing the hanger back onto the baseplate, the iFixit guide emphasizes inserting the pivot arm into the pivot cup first, then aligning the kingpin. The Enuff Academy guide simply says to “place the hanger into the cup hole.” The iFixit guide emphasizes inserting the pivot arm into the pivot cup first, then aligning the kingpin. Go pivot arm first.
Where this goes sideways: Forcing the hanger on at a wrong angle. If the pivot arm isn’t seated in its cup, the kingpin will be misaligned. Cranking the nut down in this state can damage the threads. Always ensure the hanger swings freely before final tightening.
What About Longboards and Electric Skateboards?
The standard procedure has boundaries. The iFixit standard guide explicitly excludes longboards because the trucks/bushings are different sizes. A standard street bushing kit will not fit.
Electric skateboards are another world. Using the Meepo Mini 5 as an example, its “TALL BARREL BUSHINGS” (25mm x 19mm) are not standard. If you ride an e-board, seek a model-specific guide like the one from iFixit. Don’t assume standard parts or procedures apply.
For longboard and e-board riders, the principle is the same—swap worn cushions—but the parts and specs are different. Always verify bushing dimensions and tool requirements for your specific setup.
Breaking In New Bushings and Final Adjustments
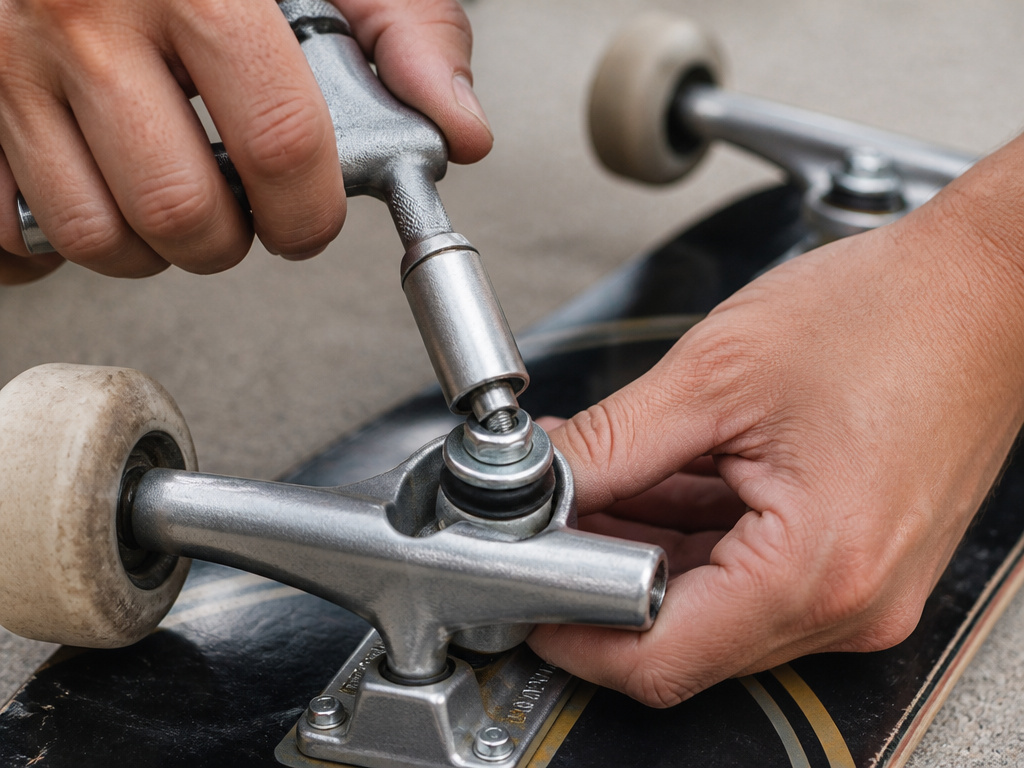
You’ve tightened the kingpin nut to match the old tension. You’re done, right? Almost. New bushings need a break-in period.
The Tactics guide explains it well: new bushings may take some time to break in, initially feeling squeaky and exhibiting auto-turn. Auto-turn is when the board wants to turn on its own without you actively leaning. This is normal.
After a few skate sessions, they should become smoother and more responsive. Don’t judge the feel immediately. Give them a few skate sessions to settle.
This is also your window for fine-tuning. If after break-in the board still feels too loose or too tight, make a quarter-turn adjustment to the kingpin nut. Clockwise to tighten and stiffen turns, counter-clockwise to loosen and increase sensitivity. The Enuff Academy guide puts it simply: the tighter you make them, the more effort it will take to turn your skateboard, and the looser you make them, the more sensitive your turning will be.
Make one small adjustment, then go skate before deciding if you need another.
Frequently Asked Questions
Can I use any brand of bushings on my trucks?
Yes, any standard street skateboard bushings will work, as they are all the same size and shape. However, brands like Bones and Shorty’s make universal bushings designed to fit several truck brands, while other brands optimize their bushings for their own truck geometry. For the most predictable results, matching your truck brand is often recommended.
How do I know if my bushings are too soft or too hard?
If your board turns too easily and feels unstable, your bushings may be too soft. If turning requires excessive force and the board feels unresponsive, they are likely too hard. Start with a medium durometer (92a-94a) and adjust from there based on your weight and skating style.
Can I reuse the old washers?
Yes, if the old washers are in good condition—flat, not bent, and without sharp edges—you can reuse them. The Tactics guide advises replacing them if they are damaged or deformed, as a warped washer can unevenly compress the bushing.
My new bushings are squeaking. Is this a problem?
Slight squeak during the break-in period is normal, as noted in the Tactics guide. This usually subsides after a few sessions. If squeaking persists, it could indicate dirt in the pivot cup or that the bushings are too dry.
Do I need to replace my pivot cups when I change bushings?
Not necessarily. Pivot cups, the plastic sleeves in the baseplate where the hanger’s pivot arm sits, wear out much slower. The Tactics guide suggests replacement if your pivot pops out or your trucks feel excessively loose and rattly. Inspect them for cracking or excessive play while your truck is disassembled.
Before You Go
The real upgrade isn’t the bushing swap itself—it’s the tuning that happens after. You now have a direct mechanical link between that kingpin nut and how your board carves. A quarter-turn is the difference between a board that feels planted and one that feels lively.
A harder bushing will feel tighter at the same nut position; a softer one will feel looser. After your first session on new bushings, stop and make that micro-adjustment. The perfect setup isn’t bought off the shelf; it’s dialed in on the pavement.
And if you’re swapping bushings for the first time and your board suddenly feels alien, give it those few sessions to break in. The initial auto-turn and squeak are the bushings telling you they’re not factory-fresh anymore. They’re becoming yours.
