
How to Rotate Skateboard Wheels: Step-by-Step
This post contains affiliate links. As an Amazon Associate, we earn from qualifying purchases.
Rotating skateboard wheels means swapping them in an X-pattern: front right to back left, and front left to back right. This evens out wear from slides and pushes, preventing flat spots and a lopsided ride. Tighten the axle nuts to a sweet spot where the wheel spins freely but has a tiny bit of play.
That sweet spot matters more than you think. A nut cranked down too tight kills your speed and grinds your bearings. Too loose, and the wheel wobbles, throwing off your balance mid-turn. The difference isn’t huge on the workbench, but it’s everything when you’re rolling. Knowing how to rotate skateboard wheels is part of the same careful maintenance.
What follows: the one tool that does 90% of the job, the exact swap pattern that fights coning, what to do if a nut won’t budge, and how often you really need to do this based on how you skate.
Key Takeaways
- Rotate wheels in an X-pattern (front right to back left, front left to back right) as needed to combat uneven wear.
- Tighten axle nuts to the sweet spot: the wheel should spin freely with a little side-to-side play, not locked down or wobbly.
- A seized axle nut can be freed by tightening it slightly first to break corrosion before loosening, preventing stripped threads.
- Combine rotation with a quick bearing check, spin each one by hand when the wheels are off to catch grit early.
- For inline skates, the pattern changes: hi-lo setups use a cross-skate flip, while standard four-wheel skates have two competing methods.
The Tools You’ll Need (And One You Might Not)
You don’t need a workshop. A skate tool is the only must-have. It combines a socket for the axle nut, usually 1/2″, with a socket for the kingpin nut, and sometimes a Philips head for the mounting bolts. The whole thing fits in a pocket. If you’re doing a full teardown, a ratchet with the right socket is faster, but it’s overkill for a simple rotation.
The one tool you might not think of is a rag or paper towel. When you pop a wheel off, you’ll see a fine gray dust on the truck axle, that’s urethane wear. Wiping it off before you put the wheel back on keeps that grit from grinding into the bearing. It takes two seconds and it’s the difference between a bearing that spins for months and one that seizes up in a few weeks.
A skate tool’s socket should fit snugly on the axle nut. If it slips or rounds the corners, the nut is likely corroded or over-tightened, stop and use the “tighten first” trick before you strip it.
While you have the wheels off, it’s a perfect time for a quick bearing inspection. Don’t make it complicated. Just spin the bearing with your finger. It should whirl quietly for a few seconds. If it feels gritty, jerks to a stop, or makes a scraping sound, it needs a cleaning. You can tackle that separately, but knowing is half the battle. For a deep clean, our guide on removing skateboard bearings walks you through the safe prying method.
Step-by-Step: The X-Pattern Rotation
This isn’t a car. You don’t rotate front to back. On a skateboard, your back foot is your push foot and your front foot is your steering foot. They wear the wheels in completely different ways. The back wheels get scuffed from pushing and braking; the front wheels get angled wear from carving and turning. An X-pattern balances that.
Here’s the move, broken down.
- Loosen the axle nut. Turn your skate tool counterclockwise. Don’t remove the nut all the way, just loosen it enough to slide the wheel off the axle. If it’s stubborn, see the next section.
- Pull the wheel off. Slide it straight off the axle. If the bearing sticks on the axle, gently rock it side-to-side. Don’t pry against the wheel’s core.
- Wipe the axle. Use your rag to clean the metal axle. That gray dust is wheel material.
- Swap in an X. Place the wheel from the front right position onto the back left truck. Place the wheel from the front left onto the back right truck. The front wheels move to the opposite rear spots.
- Slide it back on. Push the wheel onto the axle until the bearing seats against the truck hanger.
- Snug the nut. Finger-tighten the axle nut, then use the skate tool. You’re aiming for the sweet spot.
Where this goes sideways: Cranking the axle nut down until the wheel can’t move. This creates friction on the inner bearing race, which overheats the bearings, melts the lubricant, and locks them up within a few hard sessions.
The sweet spot has a test. With the nut tightened, try to wiggle the wheel side-to-side. You should feel a tiny bit of play. Then, spin the wheel with your hand. It should whirl freely for several seconds before slowing down. No play means too tight. Too much play or a wobbly spin means too loose.
| Symptom | Likely Cause | Quick Fix |
|---|---|---|
| Wheel won’t spin freely | Axle nut too tight | Loosen nut 1/4 turn |
| Wheel wobbles side-to-side | Axle nut too loose | Tighten nut 1/4 turn |
| Wheel spins but sounds gritty | Dirty bearings or worn axle | Clean bearings or inspect axle for wear |
| Uneven wear on one side of wheel | Not rotating often enough; coning | Rotate wheels and flip them (inside edge to outside) |
Bottom line: The X-pattern swap is the standard because it works. It addresses the different wear profiles of front and back wheels directly.
Why Rotate? It’s Not Just About Longevity
Sure, rotating makes your wheels last longer. But the real reason is performance and safety. Here is what happens if you don’t.
Coning is the classic failure. When you carve or slide more on one edge, the wheel wears down into a cone shape. A coned wheel has less surface area touching the ground, which kills traction. You’ll feel it as a vague, slippery feeling in turns, especially on smooth concrete. Island Water Sports notes this is a direct result of leaving wheels un-rotated.
Flat spots come from locking up your wheels during slides or hard stops on rough pavement. Once a flat spot forms, you’ll hear and feel a thump-thump-thump with every rotation. It vibrates through the deck and can throw off your balance at speed. Rotating distributes this abrasive wear before a single spot gets too deep.
Then there’s the lopsided pull. I learned this one the hard way. My back-right wheel wore down faster because I push mostly with my right foot. After a couple of months, my board would subtly drift to the right when I rode straight. I spent an afternoon checking my truck kingpins and bushings before I finally lined the wheels up and saw the height difference. A lopsided set changes your board’s geometry.
Rotating wheels helps them wear evenly, especially if you tend to slide on one side. It promotes even wear and prevents unwanted damage like flat spots.
The fix is simple and cheap. A set of wheels can last longer with regular rotation. Ignoring it turns a thirty-dollar set into a safety hazard in a few months. It’s the cheapest performance upgrade you can do, and it takes ten minutes.
How Often Should You Rotate Your Wheels?
The internet loves a schedule. The actual situation is less clear-cut. It depends on your weight, your wheel’s durometer (hardness), your skating style, and the ground you ride.
The Reddit surfskate community has the right idea: rotate as needed. For a daily street skater doing power slides, the how to rotate skateboard wheels routine might be more frequent. For a casual cruiser, it could be less frequent. I land in the middle, with regular skating, I check my wheels regularly and swap them if I see uneven wear.
Here are the triggers that tell you it’s time:
- Visual check: One wheel looks smaller than its opposite.
- Feel check: The ride feels wobbly or vibrates (a sign of flat spots).
- Sound check: You hear an odd thudding or scraping sound.
- Performance check: Your board pulls to one side when you ride straight.
For a lot of casual skaters, a seasonal schedule works. Some skaters pair rotation with other seasonal maintenance. That pairs nicely with a bearing cleaning, which is a more involved process. If you’re cleaning bearings, you already have the wheels off, rotating them adds zero extra time.
Dealing with Stuck Axle Nuts and Worn Axles
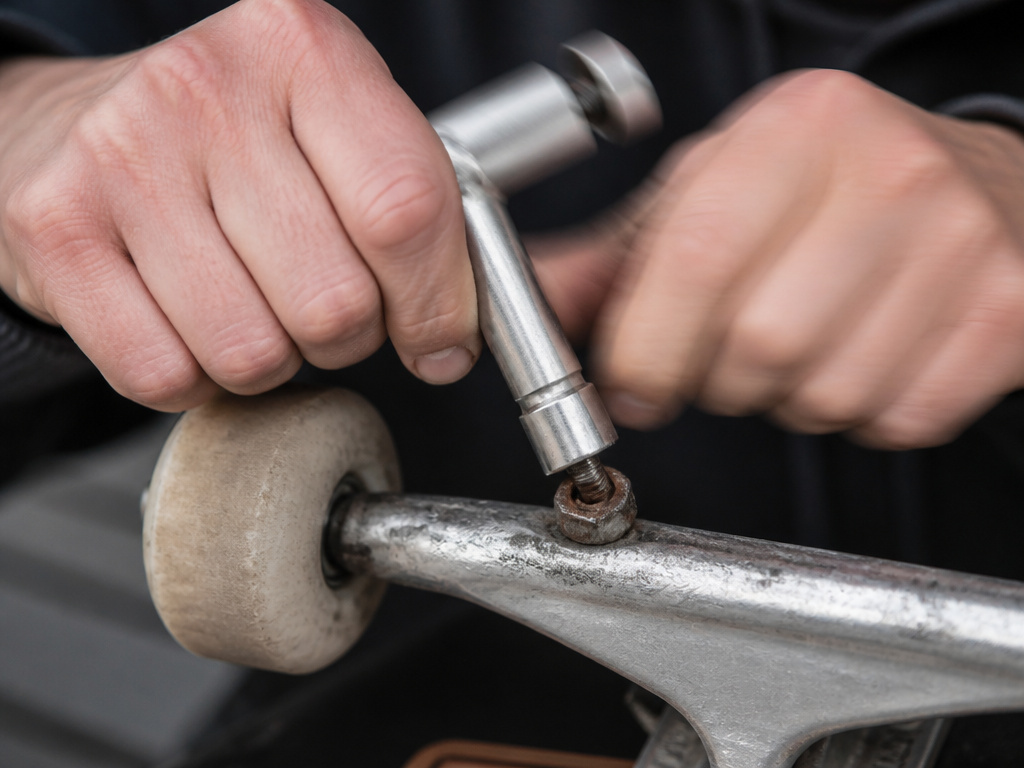
Sometimes the nut won’t budge. You lean on the skate tool, it slips, and you risk rounding off the nut. This usually means corrosion or a worn axle.
Element’s product guide has the pro tip: if the axle nut is difficult to remove, tighten it first. Give it a slight turn clockwise. This can break the corrosion seal binding the threads. Then try loosening it again. Repeat the tighten-loosen cycle a couple of times if needed. This “eases the tension” and prevents you from stripping the nut or the axle threads.
A worn axle is a different problem. If the axle threads are damaged or the metal is galled, the nut will bind. You might get it off, but putting it back on will be a fight. In that case, the fix is a truck replacement, not just a rotation.
Common mistake: Forcing a stuck nut with a wrench and a hammer. This almost always strips the threads, turning a simple wheel rotation into a truck replacement job. Always try the tighten-first method.
While you’re working on a stuck nut, consider your bearing spacers. If you have them, they sit between the bearings inside the wheel. They’re not always necessary, but they help keep bearings aligned under load. If you’re dealing with constant axle issues, a set of quality spacers can reduce side-load on the bearings, which might make future nut removal easier.
What About Inline Skates and Other Wheeled Gear?
The X-pattern is for skateboards. If you’re into inline skates, rollerblades, or even scooters, the rotation logic shifts because you have two separate skates and your weight distribution is different.
Why the split? The K2 method focuses on wear within the natural roll line of a single skate. The cross-skate method tries to balance wear between your dominant and non-dominant pushing legs. For aggressive skaters or hockey players, the cross-skate method is one approach to address inside-edge wear from hard turns.
| Standard 4-Wheel Inline | Sources disagree: K2 recommends same-skate swap (#1↔#3, #2↔#4); Inline Warehouse recommends cross-skate swap (Left 1&2 ↔ Right 3&4) | K2 focuses on wear within a skate’s roll line; cross-skate balances wear between legs. |
|---|---|---|
| Hi-Lo Inline (e.g., 76-80-80-76mm) | Cross-skate flip (Wheel 1 flips to Position 2 on opposite skate) | Maintains chassis rocker and wheel size sequence |
| Three-Wheel Inline | Front wheel ↔ Middle wheel on opposite skate | Limited wheel count demands creative swapping |
For a hi-lo chassis (wheels like 76-80-80-76mm), the Reddit inline hockey community has a specific drill: the first wheel gets flipped and put in the second position on the other skate. The second wheel gets flipped and goes into the first position on the other boot. This maintains the rockered setup while evening out wear.
The principle is the same as skateboarding: you’re fighting uneven wear. The patterns are just more complex because you have eight wheels across two platforms instead of four on one.
Frequently Asked Questions
How do I make my skateboard wheels spin better?
Start with the axle nut tension. Loosen it a quarter turn if the wheel doesn’t spin freely. If that doesn’t help, your bearings are likely dirty or dry. Pop them out and clean them with a bearing cleaner or isopropyl alcohol, then add a drop of speed cream or light lubricant. Avoid over-lubricating, a drop is enough.
What’s the difference between rotating and flipping wheels?
Rotating changes a wheel’s position on the truck (front to back, left to right). Flipping turns the wheel around on the same axle, so the inside edge becomes the outside edge. This is useful if you notice “coning”, wear on one side of the wheel. Do both: rotate in an X-pattern, and if a wheel is coning, flip it during the swap.
Can I rotate my wheels without taking off the bearings?
Absolutely. In fact, you should. The bearings stay pressed into the wheel core. You’re moving the whole wheel-and-bearing assembly to a new position. This is why it’s a quick job. Taking bearings out is for cleaning or replacement, not for routine rotation.
How do I know when to replace my wheels instead of rotating them?
Rotate until you can’t anymore. Replace wheels when they are visibly misshapen (severe coning or flat spots), have deep gashes or chunks missing, or have worn down so much that they are significantly smaller than a new set. For more on this threshold, see our guide on replacing skateboard wheels.
My wheel still won’t spin freely after loosening the nut. Why?
The culprit is usually the bearings. If the axle nut is correctly set but the wheel drags, the bearings are either dirty, damaged, or over-tightened by a bearing spacer. Remove the wheel and spin the bearing with your finger. If it’s gritty or stiff, it needs cleaning. If it’s smooth but binds when pressed into the wheel, your spacers might be too long.
Before You Go
The one thing that changes your rotation schedule more than anything else is the surface you skate. Rough asphalt eats wheels. Smooth park concrete is gentle. Match your rotation frequency to your terrain.
Start with a simple rule: the next time you clean your bearings, rotate your wheels. That pairs two essential maintenance tasks into one session. It’s how you get real mileage out of a set of wheels and keep your board rolling predictably.
If you’re new to working on your board, the process of installing skateboard wheels builds on the how to rotate skateboard wheels skill set. The goal isn’t perfection. It’s keeping the ride consistent so you can focus on the skating, not the hardware. A little play in the wheel is necessary for free spin. Now go check your nuts.
