
How to Use a Grip Tape File: Step-by-Step
This post contains affiliate links. As an Amazon Associate, we earn from qualifying purchases.
One common method for finishing grip tape edges is to first wear down the grit along the deck’s edge with a file or screwdriver, then cut the excess tape from underneath with a razor blade, and finally smooth the fresh edge with a scrap piece of grip tape.
That sequence, wear, cut, smooth, is one common method for a clean finish. It’s not just about looks. A rough edge catches on shoes and peels up after a few curb bashes, which is why many skaters reach for a file, though some manufacturers advise against it. A key skill is knowing how to use a grip tape file.
What follows: the three-step method, the tools you actually need, and when to ignore the manufacturer’s instructions entirely. We’ll also settle the filing vs. Cutting debate with the numbers that decide it.
Key Takeaways
- Wear down the edge grit before cutting to prevent the razor blade from catching and jagging the cut.
- Use a scrap of leftover grip tape as a sanding block for the final smoothing pass, it’s the perfect grit.
- Seismic Skate explicitly says for its Lokton tape: ‘Trim edges by cutting from the top. Do not bend or file.’
- A clean, rolled edge is more durable and peel-resistant than a frayed one.
- When filing, some advise using a shallow angle, like a plane taking off, not a steep one, to avoid over-grinding.
The Tools You Actually Need
You don’t need a specialty skate file. A standard mill file from the hardware store works. A flat bastard file is fine. I’ve even used the edge of a screwdriver in a pinch. The goal is to abrade, not to sculpt.
The other essential item is a fresh razor blade. A dull blade will tear the tape’s backing and leave a fuzzy, weak edge. The sound of a sharp blade cutting is a clean zip; a dull one makes a ragged, crunching noise. You’ll hear the difference.
A small hand roller is useful but not essential. If you have one, use it to seal the tape’s perimeter after filing. If not, the heel of your hand and some pressure work too. Your essential skate tools for this job are knowing how to use a grip tape file and a blade. Everything else is a bonus.
The 3-Step Filing Method
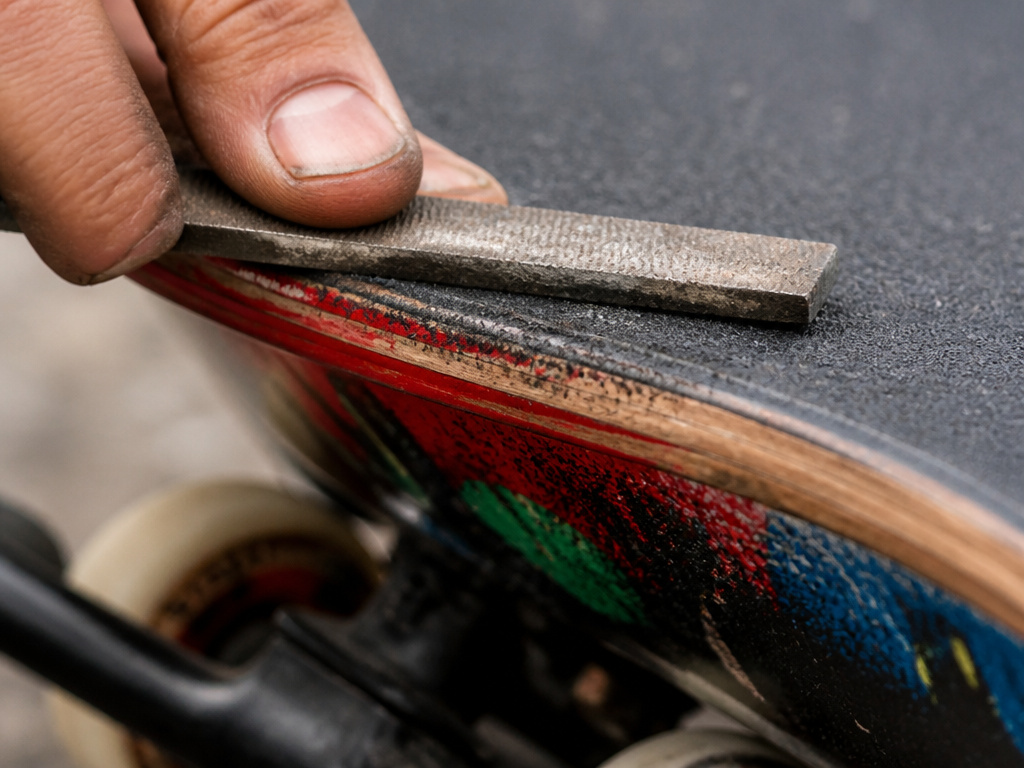
This is the technique passed around skate shops for decades. It works because it prepares the material for a clean cut.
Before you start: A file can slip. Keep your fingers clear of the cutting path. Work on a stable surface, not on your lap. A jagged razor blade edge is sharp enough to cut through shoe leather. I’ve got the scars on an old pair of Vans to prove it.
Step 1: Wear Down the Grit
Place the file flat against the edge of the deck, on top of the overhanging grip tape. Use moderate pressure and rub back and forth along the entire perimeter. You’re not trying to cut yet. You’re grinding the abrasive grit off the tape’s backing along the very edge. After a dozen passes, you’ll see a smooth, shiny plastic line appear. That’s your cutting guide.
Step 2: Cut From Underneath
Flip the board over. Insert a fresh razor blade into the smooth groove you just created. Hold the blade at a 45-degree angle and use the deck’s edge as a guide. Pull the blade toward you in one confident motion. The blade should glide through the now-smooth plastic backing without catching on any grit. This is how you cut grip tape cleanly every time.
Step 3: Smooth and Seal
You’ll have a sharp, clean edge, but it can still be a bit raised. Take a leftover scrap of grip tape, abrasive side out, and rub it firmly along the fresh edge. This acts as a sanding block, knocking down any microscopic burrs and rolling the edge over slightly. Finally, press the entire perimeter down hard with your hand or a roller. This final press ensures the adhesive bonds fully to the deck’s rounded edge.
| Step | Tool | Goal | What Happens If You Skip It |
|---|---|---|---|
| Wear Down Grit | File or screwdriver | Create a smooth cutting channel | Razor catches, creating a jagged, frayed edge that peels within a week. |
| Cut From Underneath | Fresh razor blade | Sever the tape cleanly at the deck edge | You cut through the grit, which dulls the blade instantly and tears the tape backing. |
| Smooth and Seal | Grip tape scrap & pressure | Roll the edge and ensure adhesion | The edge stays sharp and lifts with shoe friction, starting to peel after the first few sessions. |
When to File (And When Not To)
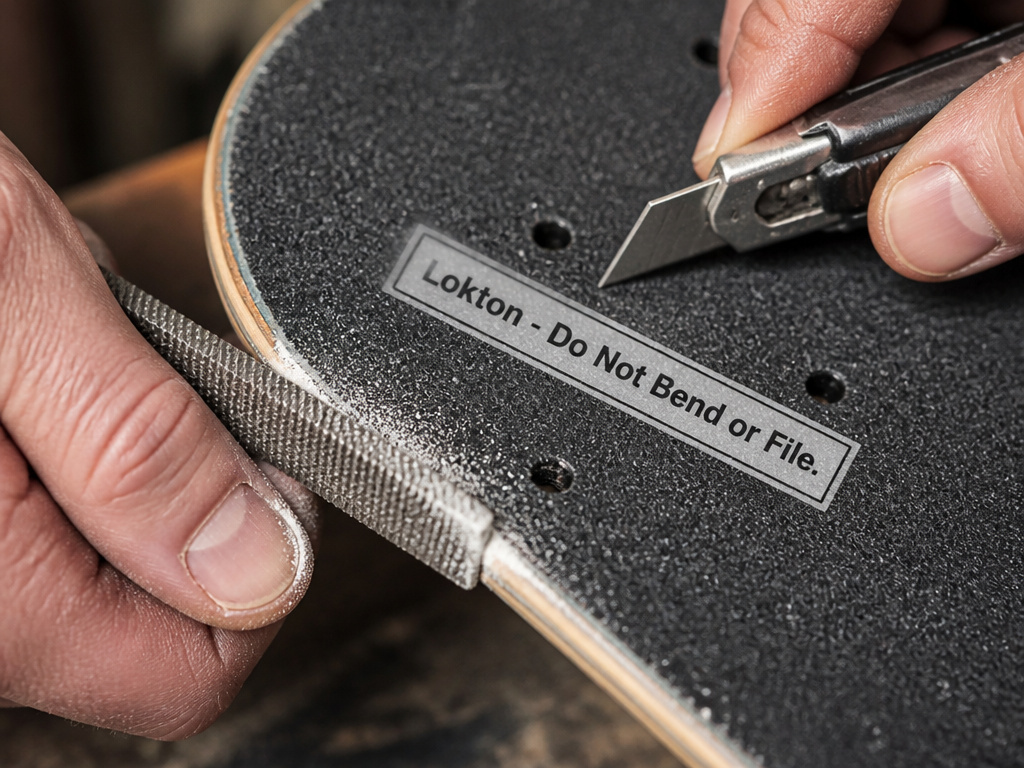
Here’s where it gets messy. Not all grip tape is meant to be filed. The manufacturer’s instructions matter, but so does the tape’s construction.
Seismic Skate is the big exception. Their Lokton grip tape uses a specific pressure-sensitive adhesive and a textured backing. Their tech page states plainly: “Trim edges by cutting from the top. Do not bend or file.” For Lokton, you follow their rule. Cutting from the top with a sharp blade works because the tape is engineered for that.
For almost every other brand. Mob, Grizzly, Jessup, the filing method is standard. The reason is physical. Filing first removes the abrasive crystals that would otherwise clog and dull your blade. You get a cleaner cut and a longer-lasting edge.
There’s also a disagreement on substrate prep. For replacing grit tape on a commercial stair tread, Tarkett (Johnsonite) says to clean the channel with denatured alcohol. For skate decks, Seismic Skate notes Lokton’s adhesive may not bond well to heavy lacquer and recommends buffing excess lacquer with fine sandpaper. The rule of thumb: sand a factory finish, alcohol-clean bare wood.
Common mistake: Filing Lokton tape because “that’s how it’s always done.” You’ll compromise the adhesive bond and the edge will lift faster than if you’d just followed the instructions. The tape might even delaminate.
Filing vs. Cutting: The Standoff
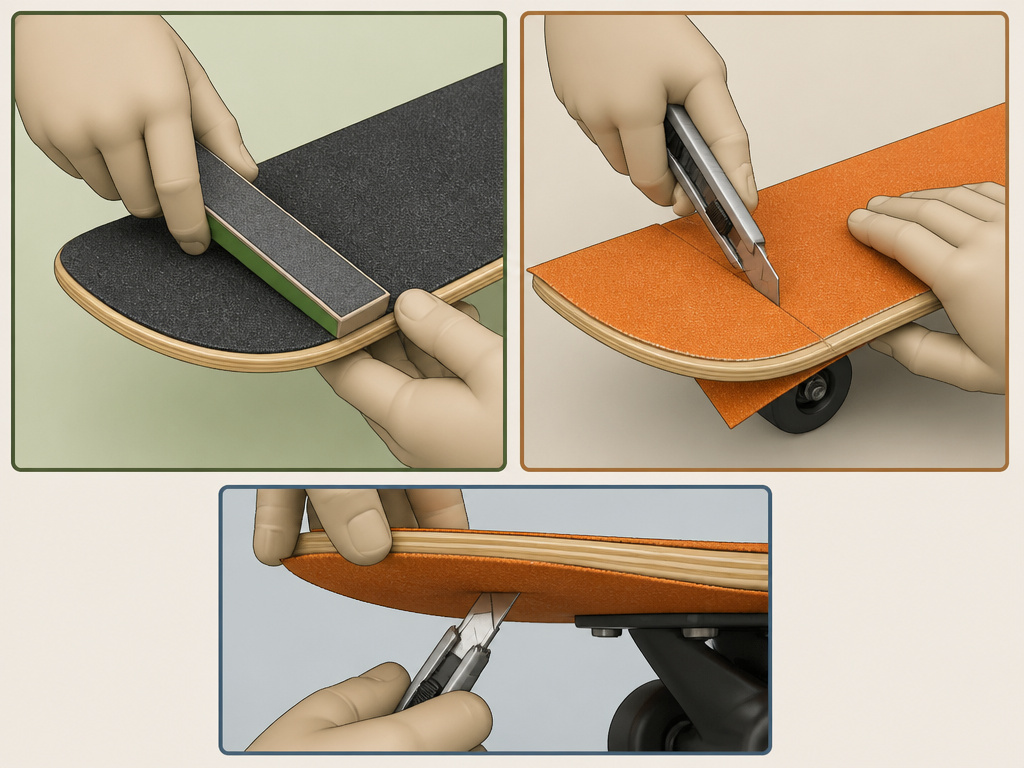
This isn’t just a preference. Different jobs call for different tools, and the manufacturers themselves can’t agree.
| Method | Best For | Biggest Risk | Manufacturer Stance |
|---|---|---|---|
| File-Then-Cut | Standard grit tapes (Mob, Grizzly, Jessup) | Over-filing and damaging the deck’s top-ply veneer. | Trampa’s manual says to file. Seismic says do not file. |
| Cut-From-Top | Lokton tape, pre-cut shapes, intricate custom designs | Blade catching on grit, causing a jagged line that needs re-work. | Seismic’s mandated method. |
| Cut-From-Underneath (no file) | Quick jobs, when you have no file | Frayed edges that peel up on the first curb hit. | A common Reddit workaround, not endorsed by any major brand. |
Some manufacturers instruct filing before cutting. That’s a direct instruction to file. Yet Seismic says the opposite. Who’s right? Both are, for their specific product. Your job is to know which tape you’re holding.
This is where knowing your tape and tools helps. Knowing how to use a grip tape file is considered essential by many for general tape work, but not for all brands.
Pro Tips for Cleaner Edges
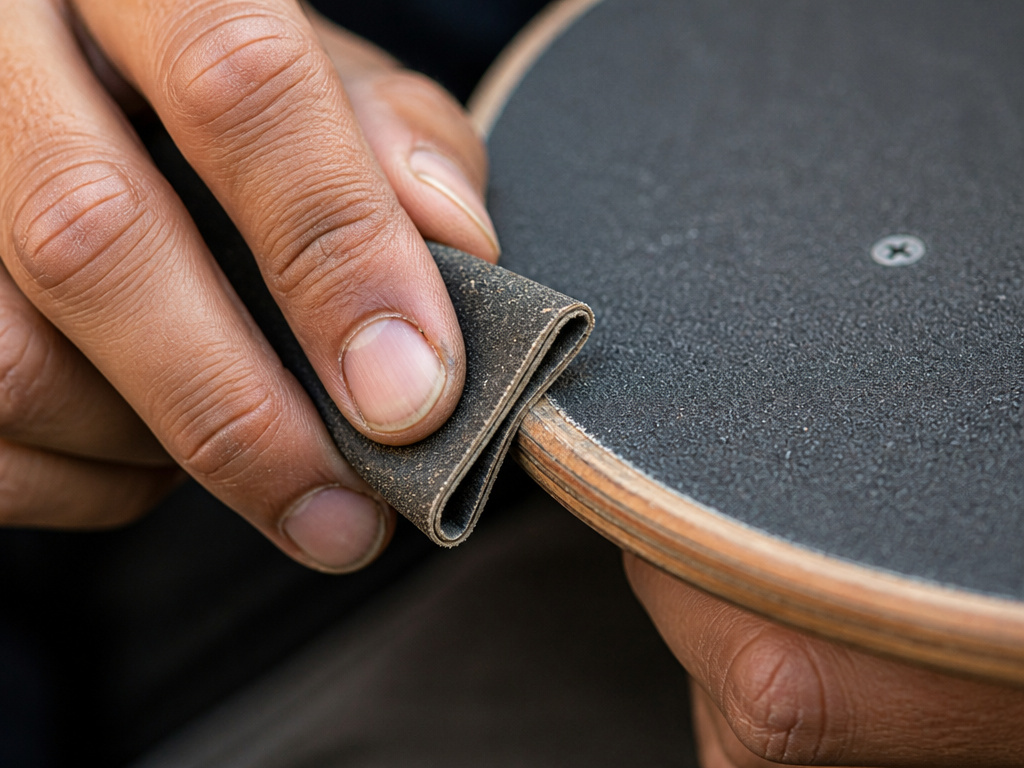
A clean edge is about more than the file. These small adjustments make the result look shop-done.
Mind the Angle. Don’t attack the tape with the file steep and hard. That gouges. Use the file like you’re smoothing a curve, with a shallow angle. In general, using a file at a steep angle with only the tip can cause over-grinding; using the file’s full length can promote an even finish.
Temperature Matters. Adhesive can bond better at warmer temperatures. If your garage is cold, warm the tape and the deck inside first. A cold, stiff adhesive won’t bond as well, and your filed edge might not seat properly.
The Sanding Block Secret. After filing and cutting, take that leftover grip tape scrap and fold it into a small pad. Use it to sand the very edge of the deck’s top-ply. This removes any wood fibers raised by the filing and ensures the tape’s adhesive has a perfectly smooth surface to grip. It’s the step most people miss.
Deal with Concaves. Deep concaves can be tricky. The filing method still works, but you may need to file in smaller sections, following the curve. For extreme shapes, laser-cut patterns like those in Seismic’s Lokton may conform more easily. Sometimes, the right grip tape application starts with choosing a tape made for your deck’s shape.
Frequently Asked Questions
What kind of file do I use on grip tape?
Standard mill file or flat bastard file from a hardware store works perfectly. You don’t need a special “skateboard file.” The goal is to abrade the grit away, not to perform surgery. A coarse file works faster, but a medium file gives you more control.
Can I use sandpaper instead of a file?
You can, but it’s slower and less precise. A file is a rigid tool that follows the deck’s edge cleanly. Sandpaper wrapped around a block can work for light smoothing after the cut, but for the initial grit-removal step, a file is the right tool for the job.
Why does my grip tape edge keep peeling up?
It’s usually one of three things. First, you didn’t wear down the grit before cutting, so the adhesive along the very edge never made full contact. Second, you didn’t apply enough final pressure to seal the edge. Third, you’re using a filing method on a tape like Lokton that explicitly forbids it. Press the edge down again with a roller; if it still lifts, you might need to re-grip.
Is it okay to just cut it with a razor and skip the file?
You can, but the edge won’t be as durable. Cutting through the grit directly dulls the blade instantly and often tears the tape’s backing paper. This creates a weak, frayed edge that catches on everything. The file-first method creates a stronger, cleaner finish that lasts months longer.
How do I smooth edges without a file?
If you have no file, use the side of a screwdriver or even the axle of your truck to wear down the grit along the edge before cutting. It’s not as effective, but it’s better than cutting through untouched grit. After cutting, use a scrap of the grip tape itself to sand the edge smooth.
The Bottom Line
Your grip tape edge is a high-wear zone. Trim edges by cutting from the top to make it last a full season. A rushed cut-and-tear job might fail in a month.
The one rule that overrides all others: check your tape brand. If it’s Seismic Lokton, put the file away and cut from the top. For other brands, many skaters find the three-step file method effective, though practices vary. It’s a small bit of extra work that pays off every time your shoe slides up the deck.
Now go make your board look sharp.
