
How to Install Skateboard Rails: The 4-Step Method
This post contains affiliate links. As an Amazon Associate, we earn from qualifying purchases.
To install skateboard rails, align them vertically between your wheels and horizontally 1-1.5 inches from the deck edge, then secure them with the supplied screws using a Phillips head screwdriver or a drill on a slow setting. The screws should sink flush with the rail surface, and you must periodically retighten them after skating. This is the basic method for how to install skateboard rails.
That 1-1.5 inch gap from the edge is the whole game. Get it right, and your boardslides feel fast and consistent. Get it wrong, and you either slide on your deck’s grip tape or risk your wheels biting the rail on a sharp turn. The difference is a smooth grind versus a sudden stop.
What follows: the exact tools brands specify, a four-step sequence that works on any deck, and the two alignment mistakes that ruin the job before the first screw goes in for anyone learning how to install skateboard rails.
Key Takeaways
- Position rails 1–1.5 inches from the deck edge for optimal slide; wider decks need them slightly further in.
- Use a Phillips head screwdriver for better control to avoid overtightening and stripping the wood, even though a drill is faster.
- Align rails evenly between your trucks to prevent wheel contact, which can throw you off balance mid-turn.
- Sink screws flush with the rail surface; proud screw heads catch on ledges and can snag.
- Retighten rails periodically after skating, as vibration loosens them within a few sessions.
Tools You’ll Actually Need
You can install rails with just a screwdriver. A drill is faster but risks stripping the screw holes if you are not careful. The right tool depends on the brand of rail you bought and how confident you feel with a power tool in your hand.
Common mistake: Using a drill on a high-speed setting. The self-tapping screws bite quickly, and too much torque strips the wood threads before you feel resistance. A drill is fine, but keep it slow.
You need three things: the rails with their screws, a Phillips head screwdriver, and your skateboard. Some brands, like Si-Boards, include longer bolts for certain setups. Their Creator Kit comes with 1″ bolts, but notes that if those are insufficient, you should use longer bolts with a 10-32 thread size. That is a specific hardware spec, not a guess, it is printed in their manual.
Sources disagree on whether clamps are necessary: Fulkit Skateboards recommends using clamps during installation, while Si-Boards says clamps are optional if using a bent board. For a flat deck, your hands work fine to hold the rail in place while you start the first screw. A clamp can help if you are working alone on a warped deck, but it is not a mandatory purchase.
The screwdriver versus drill debate central to how to install skateboard rails has a clear answer for beginners. A screwdriver gives you tactile feedback. You feel the screw bite into the wood and know when it is snug. A drill gets the job done more quickly, but that speed is the problem. It is easy to blow past the “just right” point and into stripped-wood territory. My first time, I used a drill and felt a soft crunch, the sound of the wood fibers giving way. The screw spun freely after that, and I had to move the rail over a quarter inch to find fresh wood.
Rail Placement: The 1–1.5 Inch Rule (And When to Break It)
Sources disagree on the ideal horizontal rail placement distance: Tactics and Slam City recommend 1–1.5 inches from the deck edge, while Fulkit Skateboards recommends approximately 2cm (0.79 inches).
The 1–1.5 inch standard gives a consistent slide point for boardslides and lipslides. Your weight naturally finds that sweet spot. The 0.79-inch placement puts the rail closer to the deck’s curve, which can feel more secure for certain grab tricks but offers a narrower, faster slide. For your first set, stick with the 1–1.5 inch rule. It is the safer bet.
Vertical alignment is simpler. Center the rail between your front and back wheels. Look down the length of your board. The rail should sit in the open space, not creeping toward the truck. If it is too far forward or back, your wheel will smack it during a hard turn, a sensation that ranges from a sudden stop to a full launch off the board.
Where this goes sideways: Installing rails dead-center on the deck’s width without considering its size. A rule from Tactics: wider decks need the rails moved slightly toward the middle. An 8.5-inch deck might need the rail a full 1.5 inches in, while an 8.0-inch deck could be fine at 1 inch. Eyeball it, then double-check your wheel clearance.
Once you have the position, press the rail firmly against the deck. Can you see light under the middle? Some bend is okay, the Si-Boards manual notes their rail allows for slight bending to conform to a bent board. But if the ends are lifted, the screws will pull the wood up as they tighten, creating a gap that never fully closes. Press down along the entire length before marking your spots.
The 4-Step Bump-Feed Replacement (and the One Step Nobody Skips)
This is the physical act of attaching the rail. The whole process shouldn’t take long if you go slow. Rushing is how you end up with a stripped hole or a rail that rattles after one session.
Step 1: Start with an end screw. Pick either end of the rail. Place a screw into the hole and begin turning it clockwise with your screwdriver. The screws are self-tapping, they cut their own thread into the wood. You will feel a firm bite after a few turns. Stop when the screw head is just above the rail surface.
Before you start: The screws are sharp. Keep your free hand clear of the screwdriver’s path. If you slip, the driver can jump off the screw head and into your finger. Use a firm grip and keep your other hand braced on the deck, not on the rail.
Step 2: Secure the opposite end. Walk to the other end of the rail. Do not tighten the first screw all the way yet. Insert and tighten the screw at the far end. This locks the rail flat against the deck and prevents it from spinning while you work on the middle screws. If you fully tighten one end first, the other end can lift, making the remaining holes misaligned.
Step 3: Work your way down the rail. Now tighten the first screw fully, then move to the remaining screws in sequence. Sink each one until the head is flush with the top of the rail. The goal is a smooth surface. A proud screw head will catch on concrete or metal, turning a smooth slide into a jarring stop.
Step 4: Check for flush contact. Run your finger along the rail. It should feel smooth and solid. If you feel a raised screw head, give it another quarter turn. If the rail has any play or you hear a click when you tap it, all screws need another half-turn. Do not crank them, tighten until the play disappears, then stop.
Vibration from impacts and slides works screws loose faster than you think. Check them after your first hour out, and again every few sessions. A loose rail feels sloppy and can shift position, ruining your careful alignment.
Drill vs. Screwdriver: The Control Trade-Off
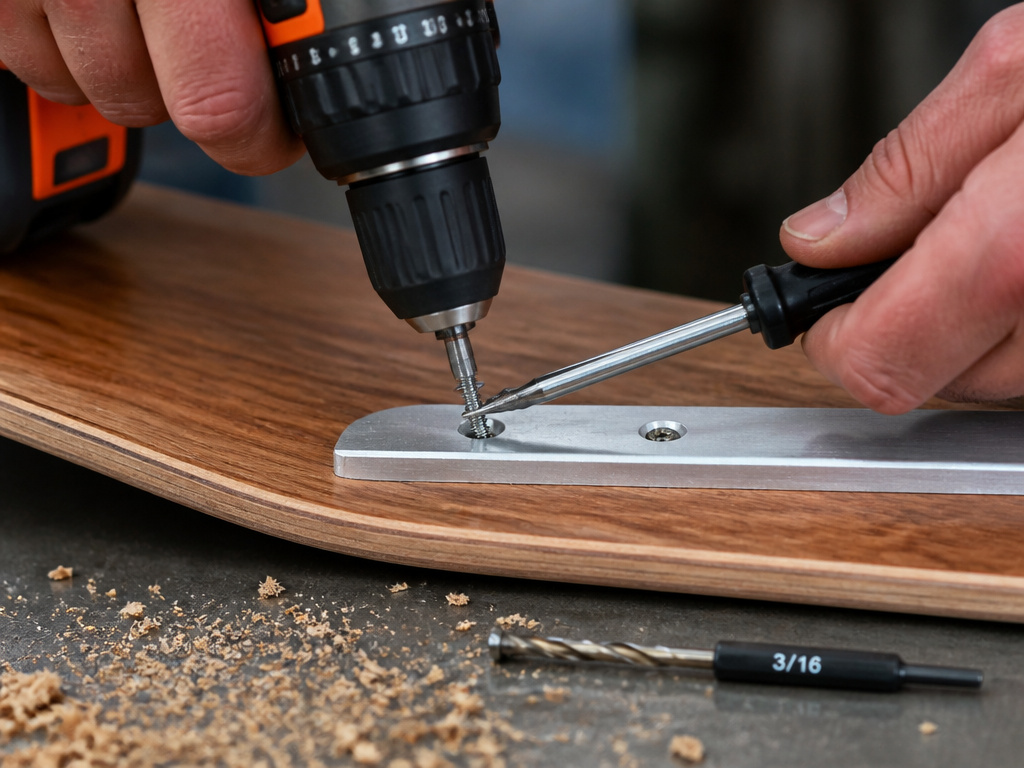
A drill is not wrong. It is a riskier tool. The Red Bull skate guide notes that “using a screwdriver can give you a better fit,” and that is the truth. The fit comes from control.
With a screwdriver, you feel every rotation. Your arm is the motor, and your brain gets direct feedback. When the screw seats, you feel a firm stop. With a drill, the motor does the work, and your job is to manage its power. Set the drill to a low speed and clutch setting if it has one. Apply steady downward pressure and pull the trigger in short bursts. The second the screw head touches the rail, release the trigger. Let the drill’s momentum stop, then finish by hand with a screwdriver for the last quarter turn. This hybrid approach gives you speed and a guaranteed proper fit.
Sources disagree on the recommended drill bit size for rail installation: Si-Boards specifies a 3/16″ bit for its Creator Kit rails, while Fulkit Skateboards recommends a 2mm bit.
Choosing Your Rails: Plastic, Metal, and Plywood Warnings
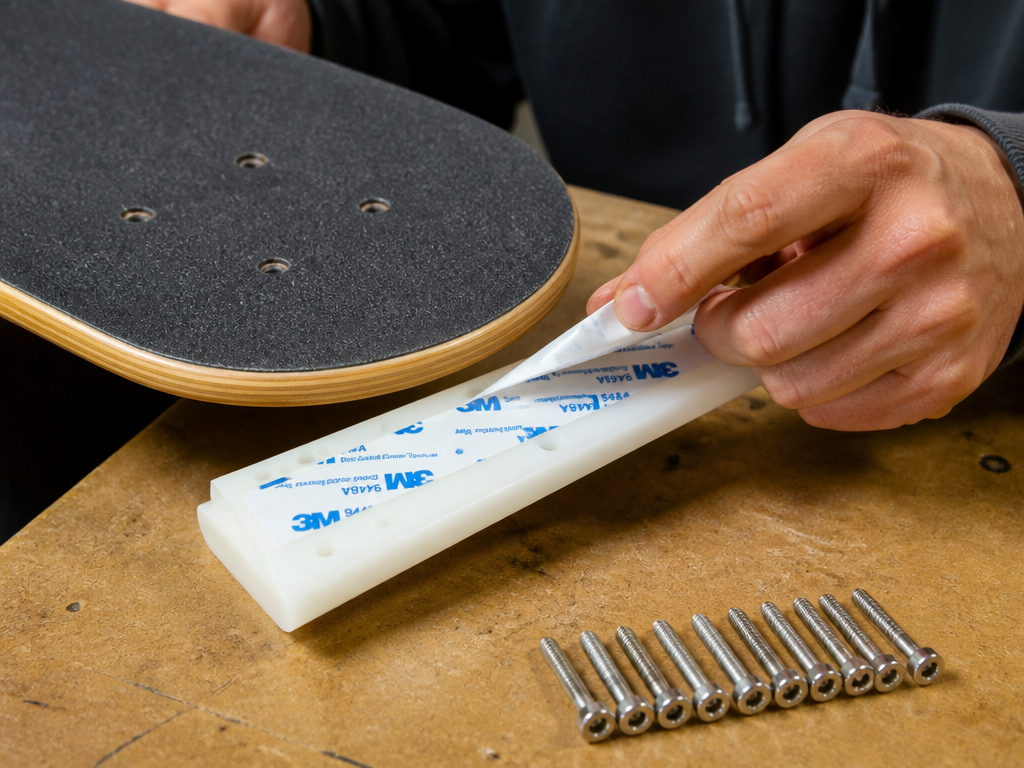
Not all rails are equal. Most are plastic, ultra-high molecular weight polyethylene (UHMW) is the quality grade you want. It is a durable plastic that stands up to abrasion. Cheap plastic rails wear down quickly and can crack. Metal rails exist but are less common; they are heavier and can grind down obstacles faster, which can damage obstacles.
Your deck’s construction matters. The Si-Boards manual is specific: for their rail system, use “at least a 7 ply skate deck or 9 ply flat wood.” For users over 200 lbs, they suggest “an 11 or 13 ply wood.” This is about the screw’s grip. A thin, low-ply deck offers less wood for the screw threads to bite into, increasing the chance of pull-out or stripping. If you have a budget complete board with a thin deck, be extra cautious not to overtighten.
When picking a brand, look at the screw quality. Some users note that certain brands include higher quality screws, while others include screws that are more aggressive. Good rails often come with a strip of double-sided tape, which helps hold them in place during installation and reduces vibration later.
For a reliable first set, look for rails made from quality materials like ultra-high molecular weight polyethylene (UHMW). They are widely available, use decent hardware, and that UHMW plastic slides predictably. They are a safe default pick. Installing them is a straightforward project, much like building a simple skate ledge for your backyard, both are about precise placement and secure fastening.
How to use adhesive strips with skateboard rails
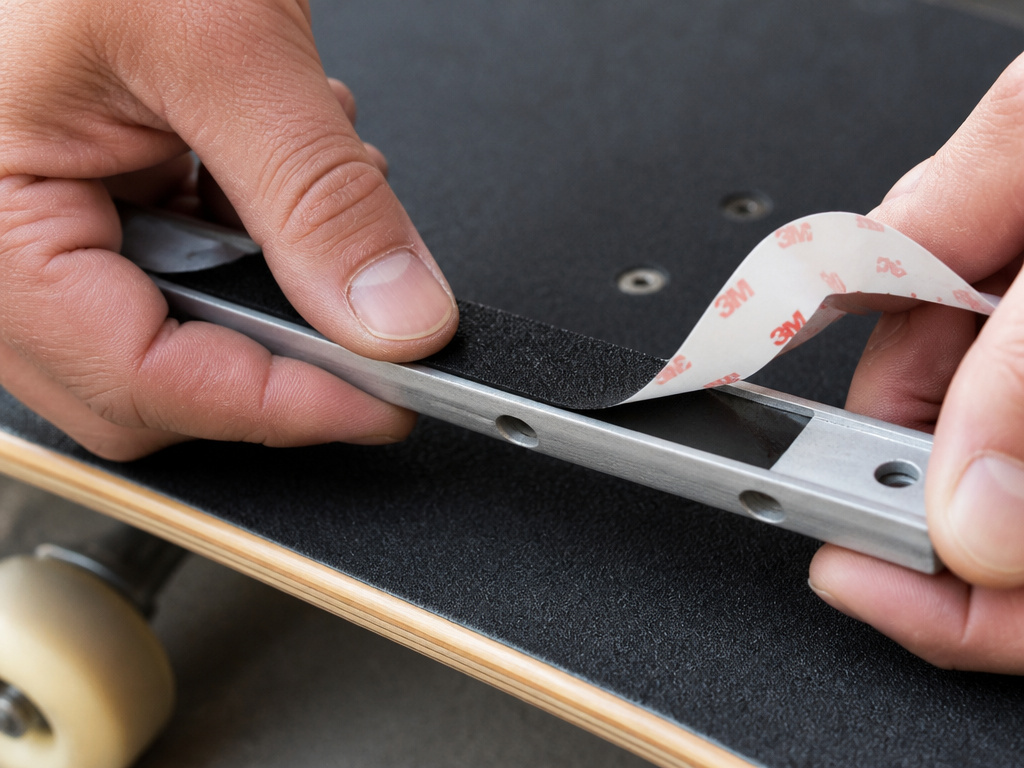
Some rail kits include adhesive strips. These are meant to help hold the rail in place before you drill and screw it down. If your kit has them, peel the backing off and press the strip firmly onto the bottom of the rail. Then position the rail on your deck. The adhesive will keep it from sliding around while you mark your drill holes or start the first screw. It’s a temporary helper, not a replacement for screws. The screws are what provide the permanent, secure hold you need for skating.
Frequently Asked Questions
How far from the edge should skateboard rails be?
Place skateboard rails 1 to 1.5 inches from the edge of your deck. This is the standard distance recommended by most skate shops and brands. It positions the rail in the ideal spot for boardslides and lipslides. Some brands, like Fulkit, suggest a closer 2cm (0.79 inch), but the 1–1.5 inch range is a safer starting point.
Can you install rails without a drill?
Yes, you can and should install rails with just a Phillips head screwdriver. A screwdriver gives you better control and feel, reducing the risk of overtightening and stripping the screw holes in your deck. A drill is faster but requires a light touch and a low speed setting to avoid damage.
Do skateboard rails ruin your deck?
No, properly installed rails protect your deck. They take the abrasion from slides and grinds instead of your deck’s wood and graphic. The screws do create small holes, but these are superficial and do not affect the deck’s structural integrity. The rails actually extend the life of the board’s bottom surface.
How tight should skateboard rail screws be?
Tighten skateboard rail screws until the screw head is flush with the top surface of the rail. You should not see any part of the screw head protruding. The rail should feel solid with no wiggle or play. Avoid cranking the screws with excessive force, as this can strip the wood threads.
Why do my skateboard rails keep coming loose?
Skateboard rails loosen due to vibration from skating. Impacts during tricks and landings gradually work the screws outward. This is normal. Check and retighten the screws after your first few sessions, and then periodically, like every few hours of skating, to keep them secure.
The Bottom Line
Installing rails is a twenty-minute job with a permanent impact on how your board slides. Follow the 1–1.5 inch rule, use a screwdriver for control, and sink the screws flush. Then go skate them, they will feel fast and foreign at first, but within a session, that strange plastic slide becomes your new normal. Remember to check the tightness after your first hour out. Everything else is just noise.
If you are keen on building more than just your setup, the same careful measurement and secure fastening apply to bigger projects, like constructing a quarter pipe or even a full home skatepark. Start with the rails. Get the feel right. Then go build something you can slide on.
