
How to Build a Skate Ledge: Step-by-Step (With Plans)
This post contains affiliate links. As an Amazon Associate, we earn from qualifying purchases.
To build a skate ledge, you need a wooden frame, a plywood top, and a metal grind edge. The classic DIYskate.com design is an 8-foot-long, 2-foot-wide, 1-foot-tall box built from 2x4s and plywood, with angle iron coping attached using offset screws to prevent truck hang-ups. This takes an afternoon, basic tools, and costs around $160 for lumber and screws.
The DIYskate.com plan gives you exact numbers: twelve 1′-9″ 2x4s for the top, six 1′-0″ pieces for the legs, and suggests nine cross-pieces spaced 1′-0″ on center for optimal strength, or five for a lighter box. That precision is the difference between a wobbly table and a solid ledge that holds your weight, which is the core of how to build a skate ledge.
What follows is a breakdown of that 8-foot plan for how to build a skate ledge, the tools you need, and the one drilling trick that keeps your grinds smooth. We’ll also cover the trade-off between a lighter box and a stronger one, what to do if this ledge lives outside, and when buying a pre-built ledge like the OC Ramps éS Shoe Box makes more sense than a saw.
Key Takeaways
- Build the frame perfectly square; a box that rocks means your grinds will feel unstable from the first try.
- Drill the coping holes with a 3/16″ bit and offset the top and bottom screws so they don’t hit each other inside the wood.
- For outdoor use, start with pressure-treated lumber and consider a composite top like Skate Lite; regular plywood warps in the rain within a season.
- A standard 8-foot ledge needs angle iron for the full length of the ledge; buy a little extra for mistakes.
- The U.S. CPSC skateboarding safety guide warns against homemade ramps unless built by an expert, treat this as a serious carpentry project, not a quick hack.
The DIYskate.com Standard Plan: An 8-Foot Box
This isn’t a vague suggestion. It’s a blueprint. The DIYskate.com grind ledge is specified as 8 feet long, 2 feet wide, and 1 foot tall. Every cut and placement in the following steps comes from that source. If you change the dimensions, the cut list below becomes wrong. Stick to the plan for your first one.
A standard DIY grind ledge is 8 feet long, 2 feet wide, and 1 foot tall. The top frame uses two uncut 2x4s for the sides and nine 1′-9″ cross-pieces placed every 1′-0″ on center. Six 1′-0″ pieces form the side supports, attached with four screws each.
What You’ll Need: Tools and Materials List
Gather everything before you make the first cut. Running back to the hardware store mid-build kills momentum. You need a saw (circular or miter), a drill with screwdriver bits, a measuring tape, a speed square, and safety glasses.
Here’s the shopping list, drawn straight from the source:
| Material | Quantity & Spec | Notes |
|---|---|---|
| 2×4 Lumber | (14) 8-foot boards | You’ll cut 12 to 1′-9″ and 6 to 1′-0″. |
| Plywood Sheet (3/4″) | (1) 4′ x 8′ sheet | Cut to 2′-0″ wide for the top, 1-0 3/4″ for the sides. |
| Angle Iron (for coping) | ~20 feet | 1.5″ or 2″ angle, steel preferred over aluminum for durability. |
| Exterior Wood Screws (3″) | 1 lb box | For framing. |
| Exterior Wood Screws (1.5″) | 1/2 lb box | For attaching plywood and coping. |
| Drill Bits | 3/16″, 3/8″ (for countersink) | The 3/16″ bit is for the coping holes; the 3/8″ countersinks the screw heads flush. |
A Reddit user reported a DIY ledge build cost $160 for all lumber and screws. Your mileage will vary with local lumber prices, but that’s a solid benchmark. It’s cheaper than most pre-built ledges, but the value is in the build, not just the savings.
Step-by-Step Assembly: From Frame to Grind
Follow this sequence. Jumping ahead, like attaching plywood before the frame is square, guarantees a redo.
Step 1: Cut All Your Wood to Length
Measure twice, cut once. It’s a cliché because it’s true. From your fourteen 8-foot 2x4s:
- Cut twelve 2×4 pieces to 1′-9″. These are for the top frame.
- Cut six 2×4 pieces to 1′-0″. These are the side supports that determine the 1-foot height. Leave the two remaining full-length 8-foot 2x4s uncut, they form the long sides of the top frame.
Cut the plywood. Use a circular saw with a guide for straight lines.
- The top piece is 2′-0″ wide.
- The two side pieces are 1-0 3/4″ wide.
Common mistake: Assuming all 2x4s are straight. Sight down each board before you cut; a badly bowed piece will throw the whole frame out of square. Set it aside for shorter bracing pieces later.
Step 2: Build the Top Frame
Lay the two uncut 8-foot 2x4s parallel on a flat surface. These are the long sides. Now, place nine of your 1′-9″ pieces across them, perpendicular. Space them every 1′-0″ on center, that means from the center of one cross-piece to the center of the next is exactly one foot.
Attach each cross-piece with two screws on each end, driving through the long side board into the end of the cross-piece. Check for square as you go. A speed square is your best friend here.
This is where the source presents a builder’s choice. The plan says nine cross-pieces for optimal strength. But it adds: “If your trying to make the box lighter, you can use only five of the 1′-9 long pieces here.” Five pieces means more space between them, which can make the box flex under weight. For a first build, use nine. You can always remove pieces later if portability is a nightmare.
Step 3: Attach the Legs
Flip the top frame over so the cross-pieces are facing down. Position the six 1′-0″ leg pieces vertically at each end and spaced evenly along the length. They should sit flush against the long side boards and the ends of the cross-pieces.
The DIYskate.com guide says to attach side supports with four screws each, two through each side. That means drill two screws through the outer face of the long side board into the leg, and two more through the inner face of the adjacent cross-piece into the leg. This creates a solid L-bracket connection.
Step 4: Square It Up and Sheathe It
Before you attach any plywood, you must check for square. Measure the diagonals of the box from corner to corner. If the two diagonal measurements are equal, the box is square. If not, push the long corners until they match. A wobbly frame becomes a wobbly ledge. It’s frustrating to fix later.
Once square, screw the plywood onto the frame. Place the large 2′-0″ top piece first, then attach the two 1-0 3/4″ side pieces. Use your 1.5″ screws here, spacing them along the edges. The plywood skin is what gives the box its torsional rigidity, don’t skimp.
Step 5: Attach the Grind Edge
This step has the most specific, mandatory instructions. It’s what separates a skateable ledge from a splintery wooden box.
Where this goes sideways: Drilling coping screws straight through. If the screws from the top and bottom flanges line up, they collide inside the wood, preventing either from tightening fully. The ledge feels solid until your truck hangs up on a proud screw head mid-grind.
The DIYskate.com guide specifies: “Drill a 3/16″ hole on each end on both sides where shown. The top and bottom dimensions are offset so the screws won’t hit each other.”
- Place your angle iron along the 8-foot edge of the box.
- At each end, drill a 3/16″ pilot hole through the top flange of the angle iron into the wood.
- Offset the next hole. Move down the length a few inches, and drill through the bottom flange of the angle iron. This staggering prevents internal collisions.
- On an 8-foot box, add “a couple more screws about 2′-6″ apart on each side” for security.
- Use your 3/8″ bit to countersink each hole so the screw head sits flush with, or just below, the metal surface. A protruding screw head is a grind-stopper.
Design Choices and Common Pitfalls
You have the steps. Now, the context that decides whether your ledge lasts a summer or a decade.
The Strength vs. Weight Trade-Off (9 vs. 5 Cross-Pieces)
We touched on this earlier. The source explicitly presents this choice. Nine cross-pieces, spaced 1′-0″ on center, creates a dense, rigid top frame. It can handle repeated impact and won’t flex when you land on it. It’s also heavier.
Five cross-pieces makes the box noticeably lighter, easier to move from the garage to the driveway. But the wider spacing between supports allows the plywood top to flex over time, especially if you’re doing drops or heavier stalls. For a beginner ledge focused on 50-50 grinds and slides, five might suffice. For anything more, nine is the safer bet.
Making It Last Outdoors
The DIYskate.com guide has a direct warning: “If this ramp is going to stay outside, it needs to be protected from the elements. Start with pressure-treated lumber, paint and a tarp.
Pressure-treated lumber resists rot and insects. But note: it’s treated with pesticides. Wear a mask when cutting it, and don’t use the offcuts for a fire pit. Paint all surfaces, including cut ends, with an exterior-grade paint. A tarp is a bare minimum; a shed or covered patio is better.
The guide also suggests composite materials like Skate Lite or Ramp Armor for the skating surface. These plastic-based sheets don’t waterlog or delaminate like plywood. They’re more expensive, but for a permanent outdoor fixture, they’re worth the investment. Regular plywood, even painted, will swell and warp after a few rainstorms.
How Big Should a Ledge Really Be?
The Reddit community offers a crucial, non-commodity insight on how to build a skate ledge here. One user critiqued a DIY ledge that was only 39 inches long: “That thing is way too short to grind period… A standard board length is about 32″, so your box is only 7″ longer than your deck.”
Their point is about target size. For learning grinds, you need runway. The 8-foot standard gives you plenty of room for error on approach and lock-in. A ledge shorter than 6 feet becomes a high-precision obstacle, frustrating for a beginner. The 1-foot (12-inch) height of the DIYskate plan is a common sweet spot, though commercial ledges vary; the OC Ramps Dave Bachinsky Crescent Ledge height transitions from 9″ to 14″, and the éS Shoe Box Ledge is 15.5″ high.
Compare that to commercial options: the OC Ramps Dave Bachinsky Crescent Ledge varies from 9″ to 14″ tall over its 10-foot length, while the éS Shoe Box Ledge is a fixed 15.5″ high. Taller ledges are for more advanced skaters. Start with the standard 12 inches.
Safety and Testing: Don’t Just Trust the Build

This is a YMYL (Your Money or Your Life) topic. The U.S. CPSC skateboarding safety guide includes a clear, conflicting warning: “Do not use homemade skate ramps unless they have been designed and constructed by an experienced builder.”
You are following a known design from DIYskate.com. That addresses the “designed by” part. The “constructed by an experienced builder” part is on you. Take it seriously.
Before you start: Wear safety glasses when cutting and drilling. Pressure-treated sawdust is toxic. Inspect all lumber for large knots or splits that weaken the structure. After assembly, test the ledge gradually, put your weight on it, bounce lightly, then try a stall before going full-speed into a grind.
The CPSC also mandates a helmet, wrist guards, knee pads, and elbow pads. That goes double when you’re skating on something you built yourself. Check the ledge before every session for loose screws, cracks in the plywood, or any shift in the coping.
Pre-Built Alternatives: When Buying Beats Building
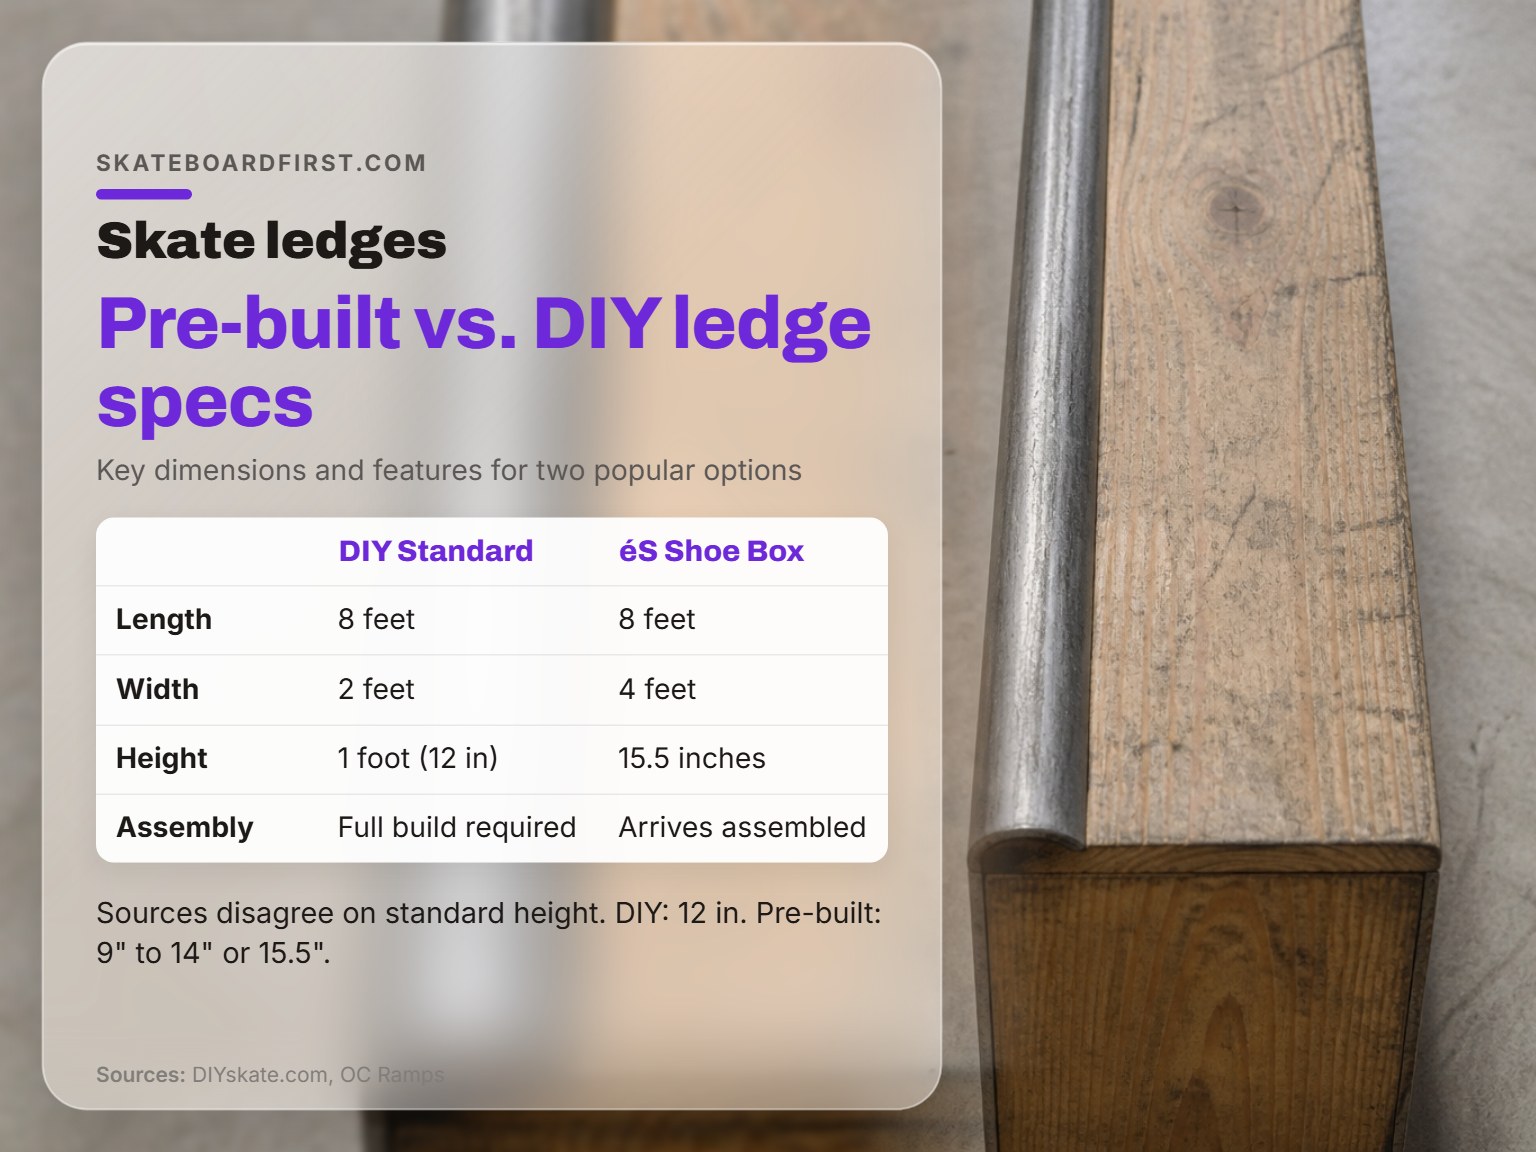
Maybe you don’t own a saw. Maybe your free time is more valuable than an afternoon of carpentry. That’s fine. Pre-built ledges exist, and they have their own specs worth knowing.
| Ledge Model | Length | Width | Height | Key Feature | Best For |
|---|---|---|---|---|---|
| DIYskate.com Standard | 8 ft | 2 ft | 1 ft (12 in) | Customizable, cost-effective (~$160) | The hands-on builder wanting a classic box. |
| OC Ramps Dave Bachinsky Crescent | 10 ft | 12 in | 9 in to 14 in | Curved profile, changing height | Skaters wanting a unique, mellow transition in their line. |
| OC Ramps éS Shoe Box Ledge | 8 ft | 4 ft | 15.5 in | Ships fully assembled, iconic look | Someone with more budget than time who wants a ready-to-skate, wide obstacle. |
The éS Shoe Box Ledge is notable because it arrives fully assembled. You just need to inspect it for shipping damage (OC Ramps stresses you must notify the delivery driver of any damage before they leave) and place it. Its 15.5-inch height and 4-foot width make it a substantial, stable obstacle, great for learning boardslides and 50-50 grinds. It’s the opposite end of the spectrum from the DIY project.
The Dave Bachinsky Crescent Ledge offers a different experience with its curved, 10-foot length and varying height. Its assembly is estimated at 30 to 45 minutes, which is mostly attaching pre-cut panels. It’s designed for outdoor use, much like the DIY version, but with a commercial-grade finish.
How to wax a skate ledge
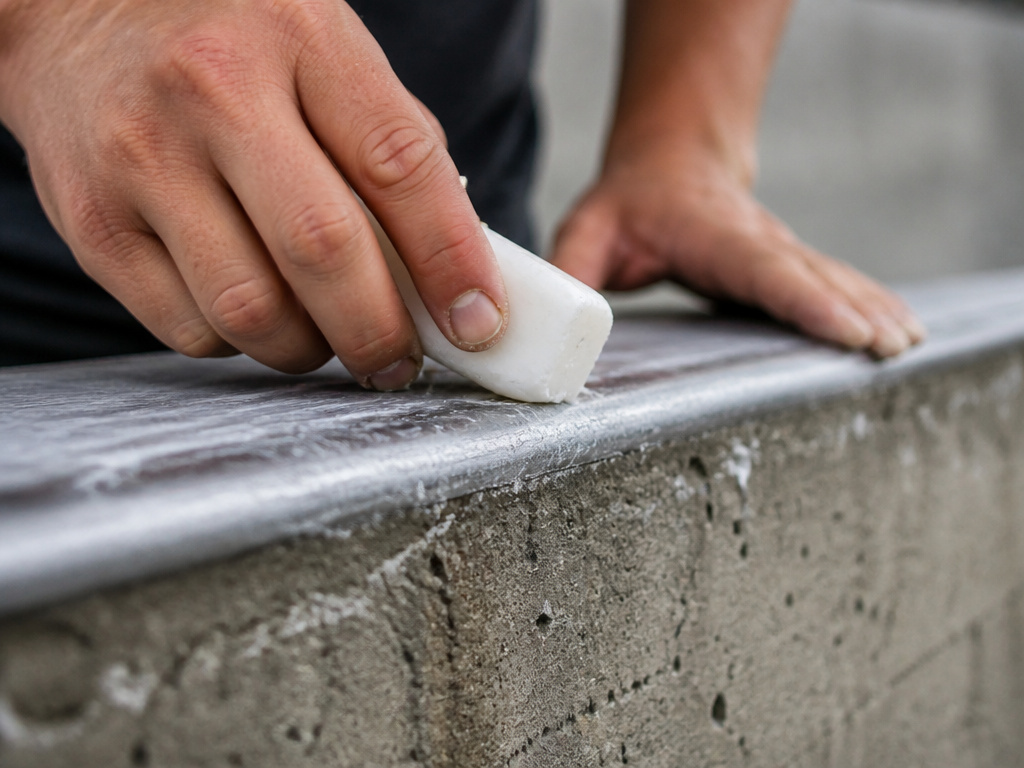
Waxing your ledge is essential for smooth grinds and slides. Apply skate wax or a dedicated rub brick directly onto the metal coping and the top edge of the ledge where your trucks will make contact. Use a back-and-forth motion to build up a thin, even layer. Don’t overdo it; too much wax can create a gummy, sticky surface. Start with a light coat, test it with a few practice grinds, and add more as needed. The goal is to reduce friction without making the surface dangerously slick for your approach.
Frequently Asked Questions
How do I build a skate ledge?
Follow the DIYskate.com 8-foot plan: build a rectangular frame from 2x4s (twelve 1′-9″ pieces, six 1′-0″ pieces), sheath it with 3/4″ plywood cut to size, and attach steel angle iron coping using offset screws to prevent internal collisions. The key is building the frame square and countersinking all coping screws flush.
What is the best material for the grind edge?
Steel angle iron, either 1.5″ or 2″ size. Aluminum angle is softer, wears down faster from grinds, and can bend under impact. Steel is more durable and provides the consistent, slick surface needed for smooth slides. You’ll need about 20 feet for an 8-foot ledge.
Is it cheaper to build a skate ledge or buy one?
Building is almost always cheaper upfront. A DIY ledge costs roughly $160 in lumber and screws, based on builder reports. A comparable pre-built ledge like the éS Shoe Box costs several times that. However, building requires tools, time, and skill. Buying saves labor and guarantees a professionally assembled product.
How do I make my DIY ledge portable?
To make it lighter, you can reduce the top frame cross-pieces from nine to five as the DIYskate plan allows. Use 1/2″ plywood instead of 3/4″ for the sheathing (though this sacrifices some stiffness). Adding handles or casters to one side is a common mod, but ensure they don’t interfere with the skating surface or stability.
How do I maintain a skate ledge outdoors?
Start with pressure-treated lumber and paint all wood surfaces. Cover it with a heavy-duty tarp when not in use, or store it indoors. Regularly check for loose hardware, wood rot, and rust on the coping. For a more permanent solution, use a composite skating surface like Skate Lite, which is immune to water damage.
The Bottom Line
Building a skate ledge is a rewarding project that puts a custom obstacle in your backyard. The DIYskate.com 8-foot plan is your bible, its specific measurements exist so you don’t have to guess. The two essential rules: build the frame square, and offset the coping screws.
If you get through the build and the ledge feels solid, the real work begins. Learning to ollie onto it is step one. Then, keep a brick of skate wax nearby to keep the grind edge slick. It might start as a simple box, but it’s a launchpad for everything from basic stalls to full grind rail tricks.
One final note from the forums: a Reddit builder warned about exposed pallet slats on a homemade box, where a limb could get caught. Your creation doesn’t need to be art, but it must be safe. Sand down splinters, cap any holes, and skate it within your limits. The best ledge is the one you can session tomorrow, not the one that’s being repaired.
