
How to Apply Grip Tape to a Skateboard: Step-by-Step
This post contains affiliate links. As an Amazon Associate, we earn from qualifying purchases.
Applying grip tape to a skateboard requires a clean, dry deck, a sheet of grip tape sized for your board (standard is 9″ x 33″), a sharp utility knife, and a screwdriver or file for finishing. You lay the sheet with an inch of overhang, press it down slowly from one end to the other to avoid air bubbles, score the edge with a tool, cut the excess at a 45-degree angle, and sand the edge smooth.
That process sounds simple, and it is, if you know where the traps are. The difference between a grip job that peels in a week and one that lasts for months comes down to three things: the order you press, the sharpness of your blade, and whether you sand the edge or just cut it. This is the core of how to apply grip tape to a skateboard.
What follows: the single most reliable method to avoid bubbles, the tool trick that creates a perfect cutting guide, and what to do when the sources you’re reading disagree on the right way to start.
Key Takeaways
- Start with a clean, completely dry deck; any moisture under the tape will kill the adhesive’s hold within days.
- Use a screwdriver or skate tool to grind a white scoring line around the deck edge, this is your cutting guide.
- Cut the excess tape with a sharp blade held at a 45-degree angle; a dull blade will tear the grit and leave a ragged edge.
- Sand the cut edge smooth with leftover grip tape scraps to prevent peeling and give a finished look.
The Tools You Actually Need
You can find kits with special rollers and files, but learning how to apply grip tape to a skateboard only requires four things. A sharp utility knife or razor blade is essential. A dull blade drags through the grit, snags, and leaves a jagged line that can lead to peeling. The second tool is a screwdriver with a rounded end, a skate tool works, but any hardware-store Phillips head does the job. You’ll use it to create the cutting guide. The third is the grip tape itself; a standard sheet for a shortboard is 9″ x 33″, according to Warehouse Skateboards. For a longboard, you might need a sheet up to 12″ x 4′. The fourth is something firm and flat like a credit card to smooth out any stubborn bubbles after the main application.
Before you start: A sharp blade can slip. Always cut away from your body and keep your free hand clear of the cutting path. A blade that catches on the grip can jump forward unexpectedly.
The 5-Step Method to a Bubble-Free Grip
The goal here is adhesion without air pockets. Air bubbles aren’t just ugly; they’re weak spots where your foot pressure will eventually break the adhesive bond, leading to peeling.
First, clean the deck. Use water and a toothbrush to scrub off any visible dirt or old adhesive residue, then towel it off and let it air-dry completely. A damp deck is the single fastest way to ruin new grip tape.
Second, peel the backing paper. Stand over your deck and plan the placement. You want the sheet centered with about an inch of overhang on all sides. Don’t stick it down yet.
Now, the part where sources disagree. SkatePro and Skateboards.com guides say to start pressing from the center of the board and move outward. Element’s guide recommends starting at one side and moving to the other. Skateboards.com recommends starting in the middle and moving out, while Element recommends starting at one side and moving to the other. Both work. This gives you control over the adhesive contact, similar to applying a large sticker, and pushes air out ahead of the sticky surface. If you start in the middle, you risk trapping air between your starting point and the edges.
So, peel back a few inches of the backing from one end. Align the tape and press it firmly onto the deck nose or tail. Then, with one hand pressing the stuck portion, use the other to slowly pull the backing paper toward the opposite end, smoothing the tape down as you go. Use the credit card or your palm to apply even pressure.
If a small bubble appears, you have two choices. Try to push it toward the nearest edge with the card. If it won’t move, pierce it with the tip of your utility knife and press the air out. A pinprick is invisible once the grit settles.
Cutting and Finishing the Edge
You have a sheet stuck to your deck with an inch of fringe hanging over. Now you need to cut it flush without gouging the wood.
Take your screwdriver. Press its rounded shaft against the grip tape right where it meets the deck’s edge, holding it at about a 45-degree angle. Push hard and drag it all the way around the board. You’re not cutting yet; you’re grinding the grit away to create a smooth plastic layer. A white line will appear, that’s your cutting guide. The harder you press, the more visible it gets.
Follow that white line with your utility knife, holding the blade at the same 45-degree angle (see our guide for cutting grip tape). Use the deck’s edge as a physical guide. Don’t saw; use a confident, steady pull. The goal is one clean pass. A sharp blade glides through the smoothed plastic; a dull one catches and jumps.
I used to trim the edges of my grip tape with scissors, which left jagged, peeling corners. Switching to this filing-then-cutting method made the grip tape last months longer. Sometimes the slower method is the better one.
Now you have a cut edge, but it’s still a sharp ridge; learn to smooth it with a grip tape file. Take a scrap of the leftover grip tape, grit-side out, and sand the freshly cut edge. A few passes will bevel it smooth. This step, noted by SkatePro and Skateboards.com, does two things: it removes any tiny flaps that could catch and peel, and it gives the edge a finished feel that doesn’t scrape your fingers.
| Common Mistake | Why It’s a Problem | The Fix |
|---|---|---|
| Cutting with dull scissors or a blade | Tears the grit, creates a ragged edge that peels immediately. | Use a fresh utility knife blade every one or two grip jobs. |
| Skipping the sanding step | Leaves a sharp edge that catches shoes and starts to lift. | Sand with a grip tape scrap around the entire perimeter. |
| Not creating a scoring line | Blade wanders, cut is uneven, risk of cutting into the deck. | Grind a white guide line with a screwdriver before the blade touches the tape. |
The Quick Method vs. The Standard Method
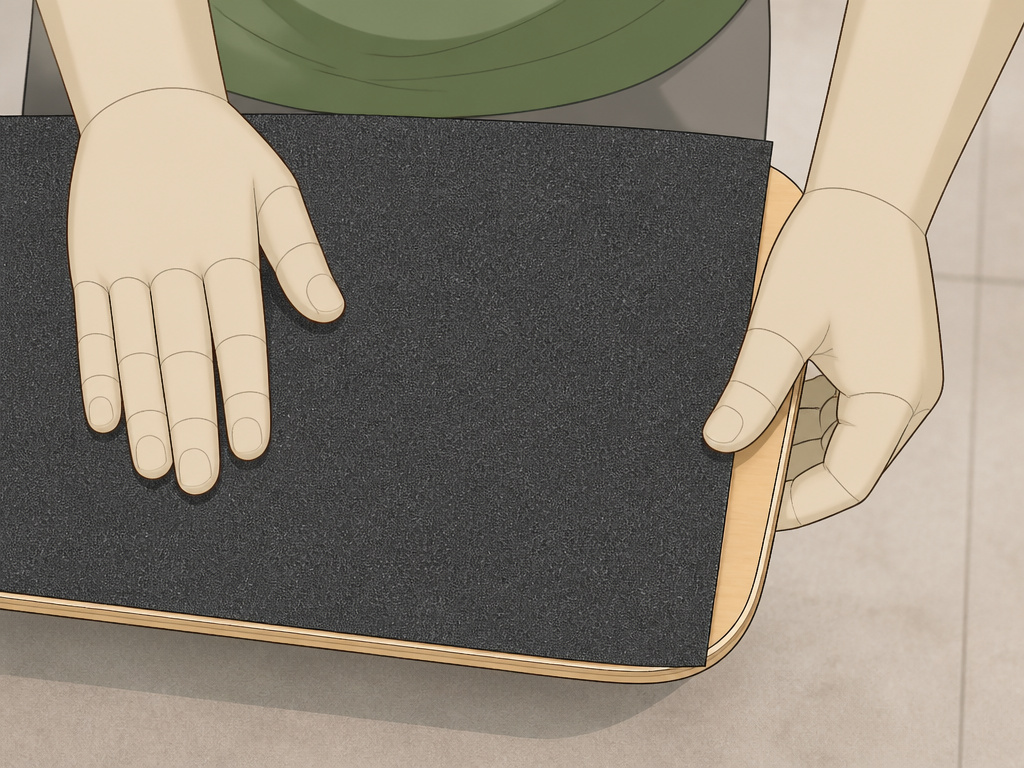
Here’s a real point of contention among guides. Element’s guide explicitly warns: “Avoid cutting the grip tape to your deck size before applying it; doing this means you have to line the grip up perfectly when you stick it down, which can be very tricky.” Skateboards.com, however, offers a quick method that starts with pre-cutting the tape to the deck’s shape.
So which is right? It depends on your confidence level. Pre-cutting is faster, you just peel and stick. But if your cut is off by even a few millimeters, you’ll have bare wood showing at the edges or tape overhanging. The standard method of applying the full sheet and cutting after guarantees coverage. It’s slower but foolproof. For a first timer, stick with the standard method. Speed comes later.
Where this goes sideways: Pre-cutting the grip tape and misaligning it by a quarter-inch. You’ll have a strip of exposed deck along one side, which becomes a slick spot the first time you try a trick. The board is still rideable, but that spot will haunt you.
Dealing with Air Bubbles and Imperfections
Even with perfect technique, a bubble or two might appear. The sound of a properly adhered grip tape is a soft, consistent scratch as you smooth it. A bubble makes a hollow pop when you press it.
If you find a bubble after the fact, don’t panic. Use the tip of your utility knife to prick a tiny hole in its center. Then, press down firmly from the edges toward the hole to force the air out. Sometimes heating the area briefly with a hairdryer can soften the adhesive enough for the bubble to settle.
For wrinkles, you usually have to lift the tape. Heat the area with a hairdryer to loosen the adhesive, carefully peel back the wrinkled section, and re-lay it using the slow, end-to-end pressure method.
Poking Truck Mounting Holes
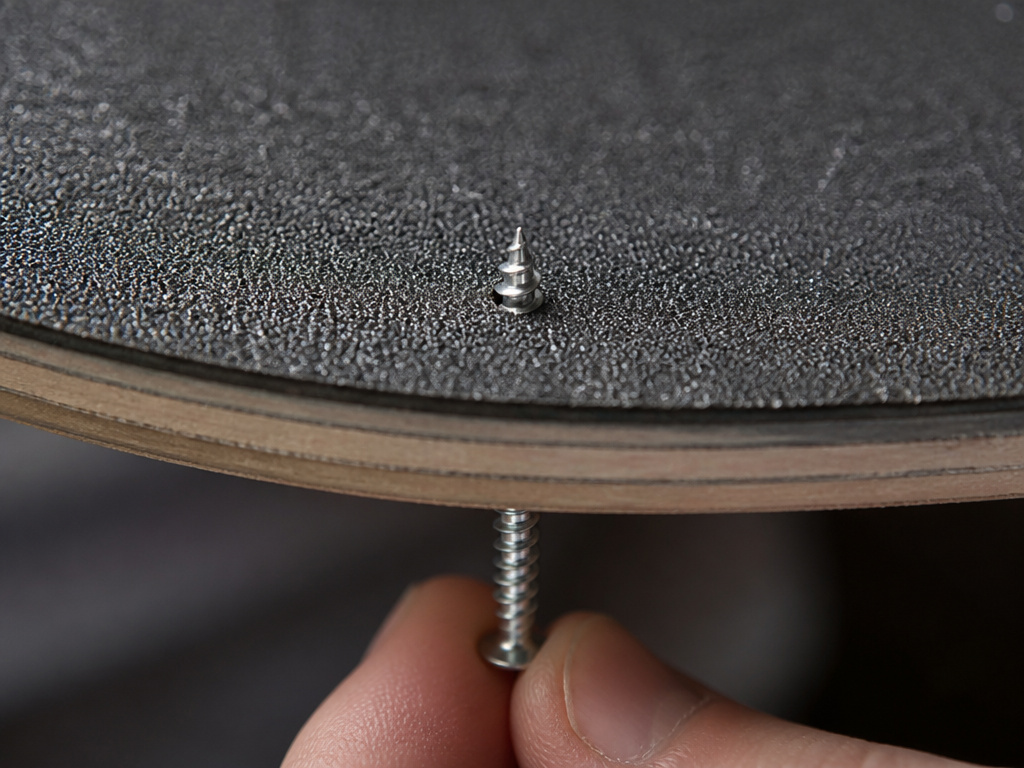
Your grip is on and trimmed. Before you admire your work, you need to mount the trucks. Flip the board over. You’ll see the pre-drilled holes in the deck. Take one of the truck mounting screws and push it through each hole from the bottom. It will puncture the grip tape from underneath, creating a clean hole. Don’t cut the holes from the top; you’ll likely tear the tape. This method, outlined by Element, ensures the holes are perfectly aligned and the grip tape is punched through cleanly.
Choosing Your Grip Tape
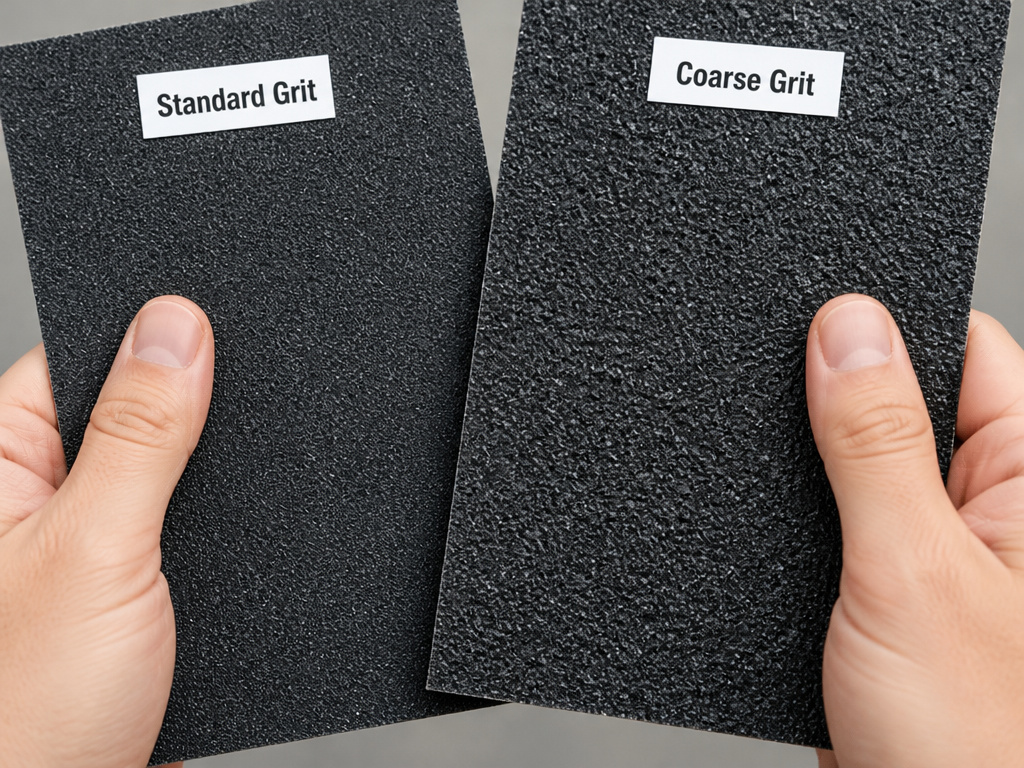
Not all grip tape is the same. The grit, the sandpaper-like coarseness, varies (see our grit guide for details). A brand like Jessup Manufacturing offers different lines for different needs. Their Jessup The Original® is designed for pool, cruiser, and shaped decks, offering a consistent, classic grip. Their Jessup® ULTRAGRIP™ is engineered for extreme performance with a coarser grit for enhanced traction, aimed at street skaters doing advanced tricks.
Your choice affects the application slightly; compare options in our best grip tape guide when you consider the how to apply grip tape to a skateboard process. Standard grit is more forgiving. For a first-time application, a standard black sheet from any major brand is the way to go. It’s predictable and works with the steps above.
Frequently Asked Questions
Should I start applying grip tape from the middle or the end?
Sources disagree. SkatePro and Element recommend starting from the center and moving outward. Skateboards.com and Tactics.com advise starting at one end and working to the other. For beginners, the end-to-end method is more reliable for avoiding air bubbles because it gives you control over the adhesive contact, much like applying a large sticker.
Can I cut the grip tape to shape before I stick it on?
You can, but it’s riskier. Element’s guide explicitly warns against pre-cutting because any misalignment will leave gaps or overhang. The safer, standard method is to apply the full sheet with overhang and cut it on the board, guaranteeing complete coverage.
What’s the best tool to cut grip tape?
Sharp utility knife or razor blade is essential. A dull blade will tear the grit and create a ragged edge that peels. Before cutting, use a screwdriver to grind a white scoring line around the deck edge, this creates a smooth plastic guide for your blade to follow.
How do I get rid of air bubbles after applying grip tape?
For small bubbles, try pushing them toward the nearest edge with a credit card. If they’re stubborn, pierce the bubble’s center with the tip of a utility knife, then press the air out. For larger bubbles, you may need to heat the area with a hairdryer to loosen the adhesive, peel back that section, and re-apply it slowly.
The Bottom Line
Applying grip tape is a rite of passage. It’s simple, but the details, dry wood, a sharp blade, a scored guide line, and a sanded edge, are what separate a pro job from a peeling mess. Don’t get hung up on the center-vs-end debate. Pick one method, go slow, and focus on pressure. If your first attempt has a bubble or a jagged edge, skate it anyway. The board is meant to be ridden, and the grip will wear into its own character. Your next deck will be cleaner.
One rule I live by now: always sand the cut edge. That two-minute step adds months to the grip’s life. Everything else is practice.
