
How to Change a Skateboard Deck: Step-by-Step
This post contains affiliate links. As an Amazon Associate, we earn from qualifying purchases.
To change a skateboard deck, you need a skate tool, new grip tape, and some time. The core process is removing the trucks from the old deck, applying new grip tape to the fresh deck, drilling holes for the hardware, and mounting the trucks. Decks do not come with grip pre-applied, so that’s a separate, essential step.
The trickiest part isn’t the physical swap. It’s knowing when your old deck has actually given up, and handling the edge cases that standard guides skip, like electric skateboards with wired motors or plastic Penny boards. Sources disagree on the main replacement trigger. Decathlon recommends replacing about every 3 months if skating 4 hours per week, while iFixit advises replacement for warping, breakage, or style change, and Skate Labs focuses on performance loss like dead pop or cracks. Knowing how to change a skateboard deck is the straightforward next step.
What follows is the step-by-step breakdown, the specific tool sizes you’ll actually use, and the warnings that keep you from snapping a battery case or riding a board that’s about to fold.
Key Takeaways
- Always check for cracks around the trucks before a session, a cracked deck can snap.
- Use a 7/8 inch bolt for most setups without riser pads; eight bolts and eight nuts are standard.
- When gripping, start from the middle of the deck and move outward to smooth air bubbles.
- For electric boards like the Fatdaddy Max-E, hand-tighten the truck nut to avoid crushing the riser pad.
- A dead pop or soft feel means the deck’s life is over, even if there’s no visible crack.
When Is It Time for a New Skateboard Deck?
You have three official answers, and they don’t perfectly agree. Decathlon’s support page says if you skate about four hours a week, plan to replace your board every three months. The wood softens from repeated impacts. The iFixit repair guide is more dramatic: replace the deck if it’s warped, broken, or you just want a new style. Catastrophic failure, snapping in half, is their key indicator.
The Skate Labs Field Guide adds a performance layer. They say replace a deck if it has cracks, a soft or dead feel when you pop, deep chips, or a tail worn thin. That “dead pop” is the real signal for anyone doing ollies or flip tricks. The board still rolls, but the snap is gone.
Common mistake: Riding a deck until it visibly snaps. A deck that feels dead and soggy underfoot is already failing; the pop goes first, the physical crack comes later.
Here is how those positions line up:
| Source | Primary Replacement Trigger | Key Metric |
|---|---|---|
| Decathlon | Time/Wear | 3 months at 4 hrs/week usage |
| iFixit | Catastrophic Damage | Warped, broken, snapped |
| Skate Labs | Performance Loss | Dead pop, cracks, thin tail |
Riding on a worn-out deck made flip tricks feel mushy and unpredictable. A fresh deck makes practice more fun. But if you’re just cruising, you can ride a deck until the tail is square.
The Tools You Actually Need (Not a Garage Full)
You can do this job with a single multi-tool. The Skate Labs guide specifically calls for a skate tool, the T-shaped tool with sockets and a screwdriver tip. It does nearly everything. For gripping, you need a sharp blade (a utility knife) and a file or screwdriver to mark the edge of the deck before cutting.
Safety: You’ll be using a blade. Work on a table, in good light, and take your time. Rushing is how people cut yourself.
The hardware is specific: 8 bolts and 8 nuts. A 7/8 inch length fits most setups without riser pads. If you’re buying new hardware, that’s the spec to look for. Don’t dig through a random jar of screws; mismatched lengths can strip the truck baseplate or not grip the deck properly.
A note on bearings: you don’t need to remove them from the wheels for a simple deck swap. Leave them pressed in. This keeps grit out and saves you the hassle of re-seating them.
The 8-Step Core Process (and the One Step Nobody Skips)
This is the universal sequence for a standard maple deck in how to change a skateboard deck. It assumes you’re moving your existing trucks and wheels onto a fresh board.
- Remove the wheels. Use the skate tool to loosen the axle nuts and slide the wheels off. Set them aside with the bearings still inside.
- Detach the trucks. Unscrew the four bolts holding each truck to the deck. The nuts are on the top side, under the grip tape. You’ll need to remove trucks completely. Keep the bolts, nuts, and any riser pads together.
- Strip the old grip. If you’re-using the old deck, you’ll need to remove grip tape. For a new deck, skip to step 4.
- Prepare the new deck. New decks are bare wood. If there’s any plastic film or sticker, peel it off. The iFixit troubleshooting guide says this is crucial for grip tape adhesion.
- Apply the new grip tape. This is the separate, essential step. Decks do not come with grip pre-applied. Center the sheet over the deck, starting from the middle and pressing outward to smooth bubbles. Use the file to scrape a clear line around the edge, then cut with the utility knife angled inward. For a full walkthrough, see our guide on how to apply grip tape.
- Drill the mounting holes. Use one of the old bolts to poke through the new grip tape at each truck hole location. Then, drill through the tape and wood to create clean holes for the hardware. Skipping this forces the bolt to tear through the grip, which can cause it to peel up later.
- Mount the trucks. Place the trucks on the deck, ensuring the kingpins face each other (toward the center of the deck). Thread the bolts through from the top and hand-tighten the nuts underneath. Here is a detailed guide on how to install trucks.
- Tighten the hardware. Using the skate tool, tighten the nuts in a cross pattern, like a car tire. Don’t crank them with all your strength, snug is fine. Overtightening can strip the wood threads in the deck. Then, reattach the wheels, ensuring they spin freely.
The step everyone tries to skip? Drilling the holes (Step 6). They just force the bolt through. The frayed, messy hole this creates allows the grip tape to begin peeling in a week.
Gripping the Deck: More Than Sticking on Sandpaper
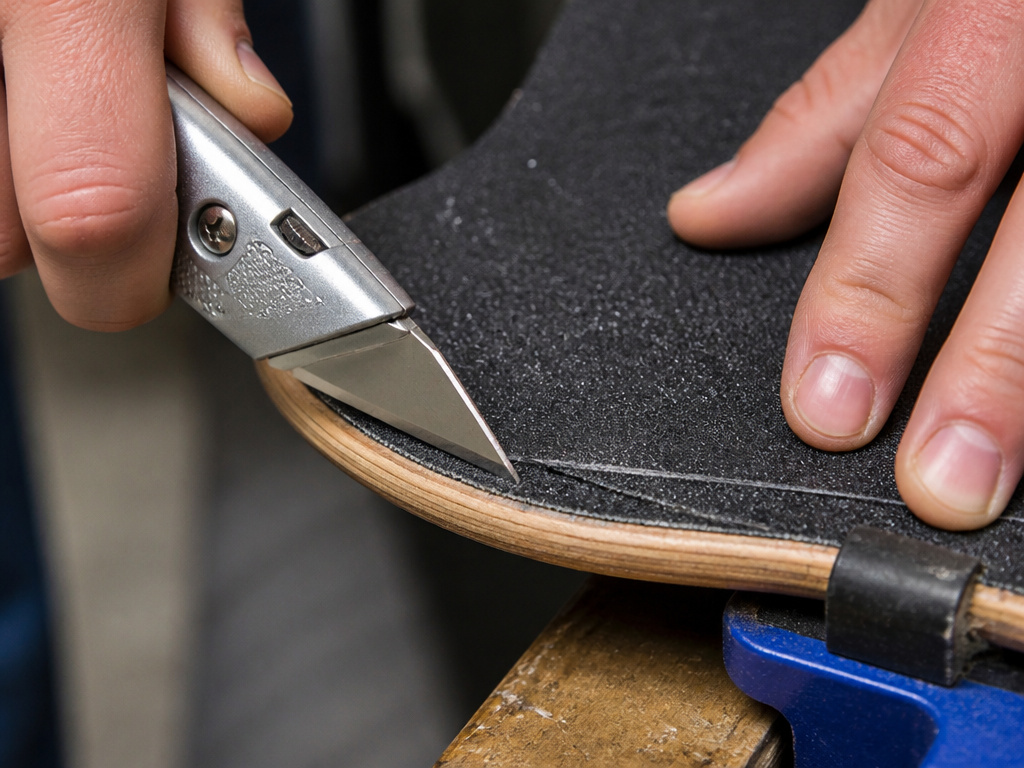
Applying grip tape looks simple. Applying it involves a struggle against air bubbles and crooked cuts. The iFixit method is the one to follow: begin by stripping any plastic or stickers from your skateboard deck to ensure the new grip tape will stick effectively.
Peel the backing, center the sheet, and lay it down starting from the middle. Firmly press down while smoothing outward. You’ll hear a satisfying crunch as the adhesive grabs. Use a screwdriver shaft to burnish the edge, creating a visible line.
I won’t recommend a razor blade without a handle for your first time. A utility knife is safer. The blade is shorter and your fingers stay farther from the cutting path.
When cutting, angle the knife towards the inside of the skateboard. This bevels the edge of the grip tape under itself, giving a cleaner finish. Always keep the knife pointed away from yourself. If air bubbles remain, poke a tiny hole in the center with the knife tip and press the air out.
Mounting the Trucks and Final Assembly
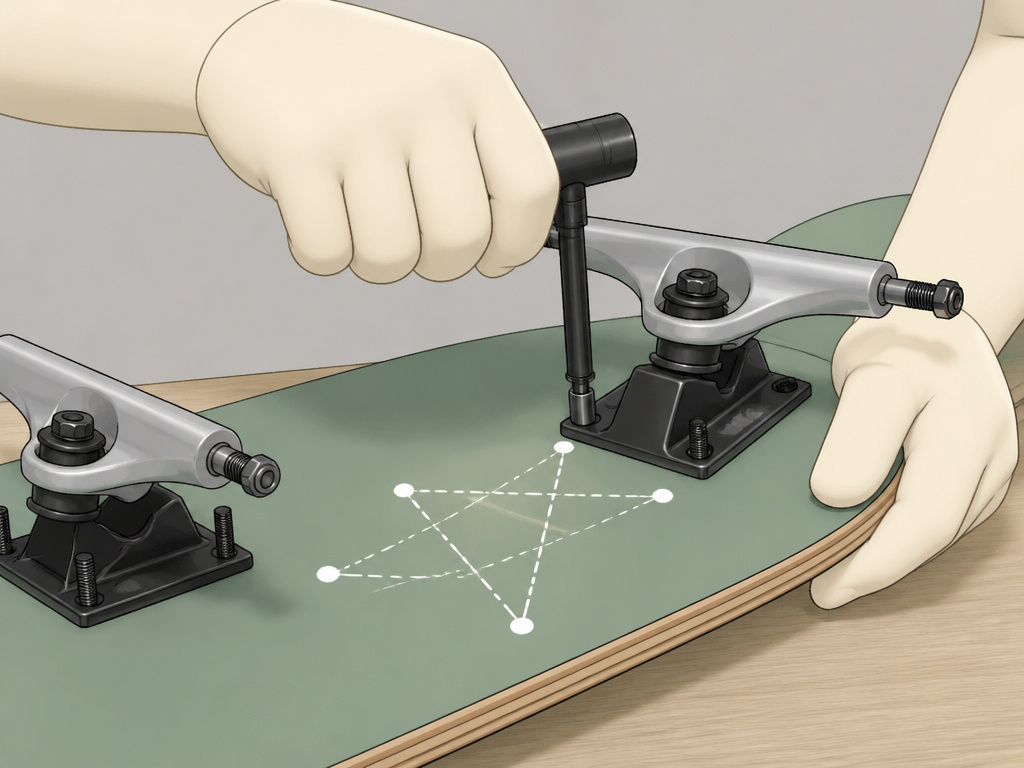
With the grip on and holes drilled, you’re ready to install hardware. The process is straightforward, but a few details matter.
Place the trucks so the kingpin (the big central bolt) faces the nose or tail of the board, this is the “kingpins in” rule. If they face outward, you’ll catch them on curbs. Hand-start all eight bolts before reaching for the tool.
Tighten the nuts in a star pattern. This applies even pressure and prevents the truck from sitting crooked on the deck. The goal is snug, not welded. You should be able to move the truck with firm hand pressure.
Finally, put the wheels back on. Hand-tighten the axle nut until it just contacts the bearing spacer, then give it a quarter-turn with the tool. A wheel that’s too tight won’t spin freely. One that’s too loose will wobble.
Tuning Your Setup After the Swap
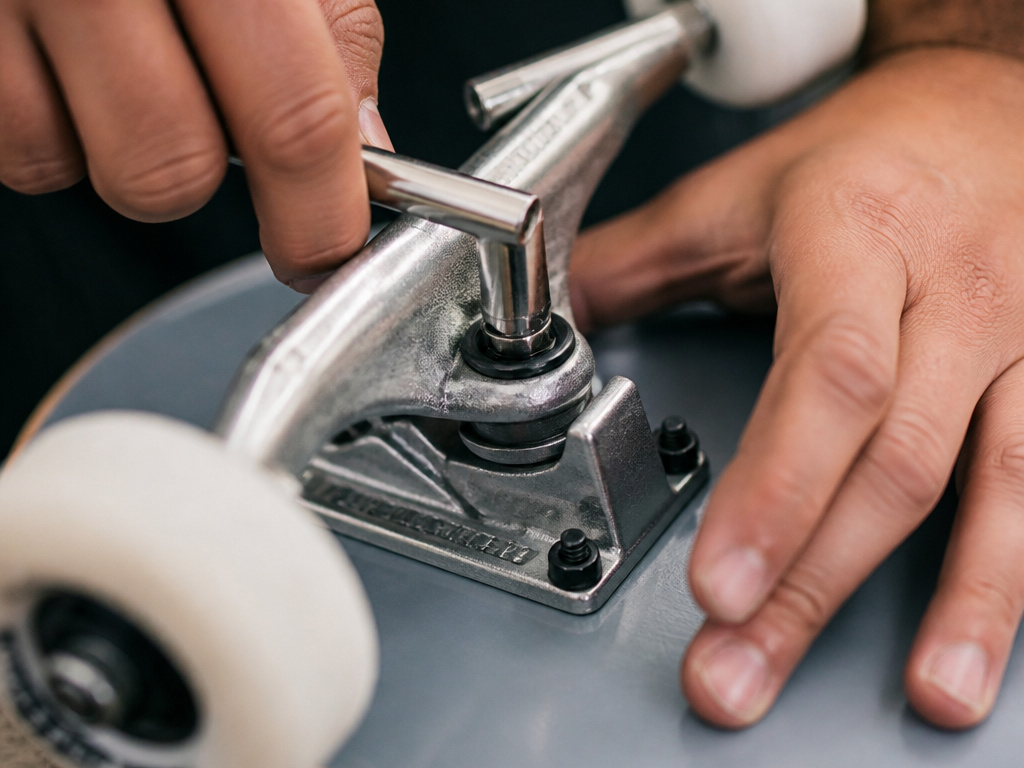
A new deck can change how your board feels. This is the time to tune your trucks, not before. The Skate Labs guide advises going a quarter turn at a time on the kingpin nut and riding between changes. Set both trucks the same tightness to start.
Safety: Never loosen the kingpin nut so far that it barely hangs on. Keep the nut fully threaded onto the kingpin, or it can work its way off while you ride.
If your board turns sideways by itself after the swap, the bushings might be crushed or the trucks crooked. Loosen and re-seat them. A bent kingpin may require truck replacement. Swap bushings if they crack, squash flat, or won’t hold a setting.
This is also a good moment to choose a deck that better fits your style if you’re making a change. Deck width matters for stability.
Electric and Plastic Board Edge Cases
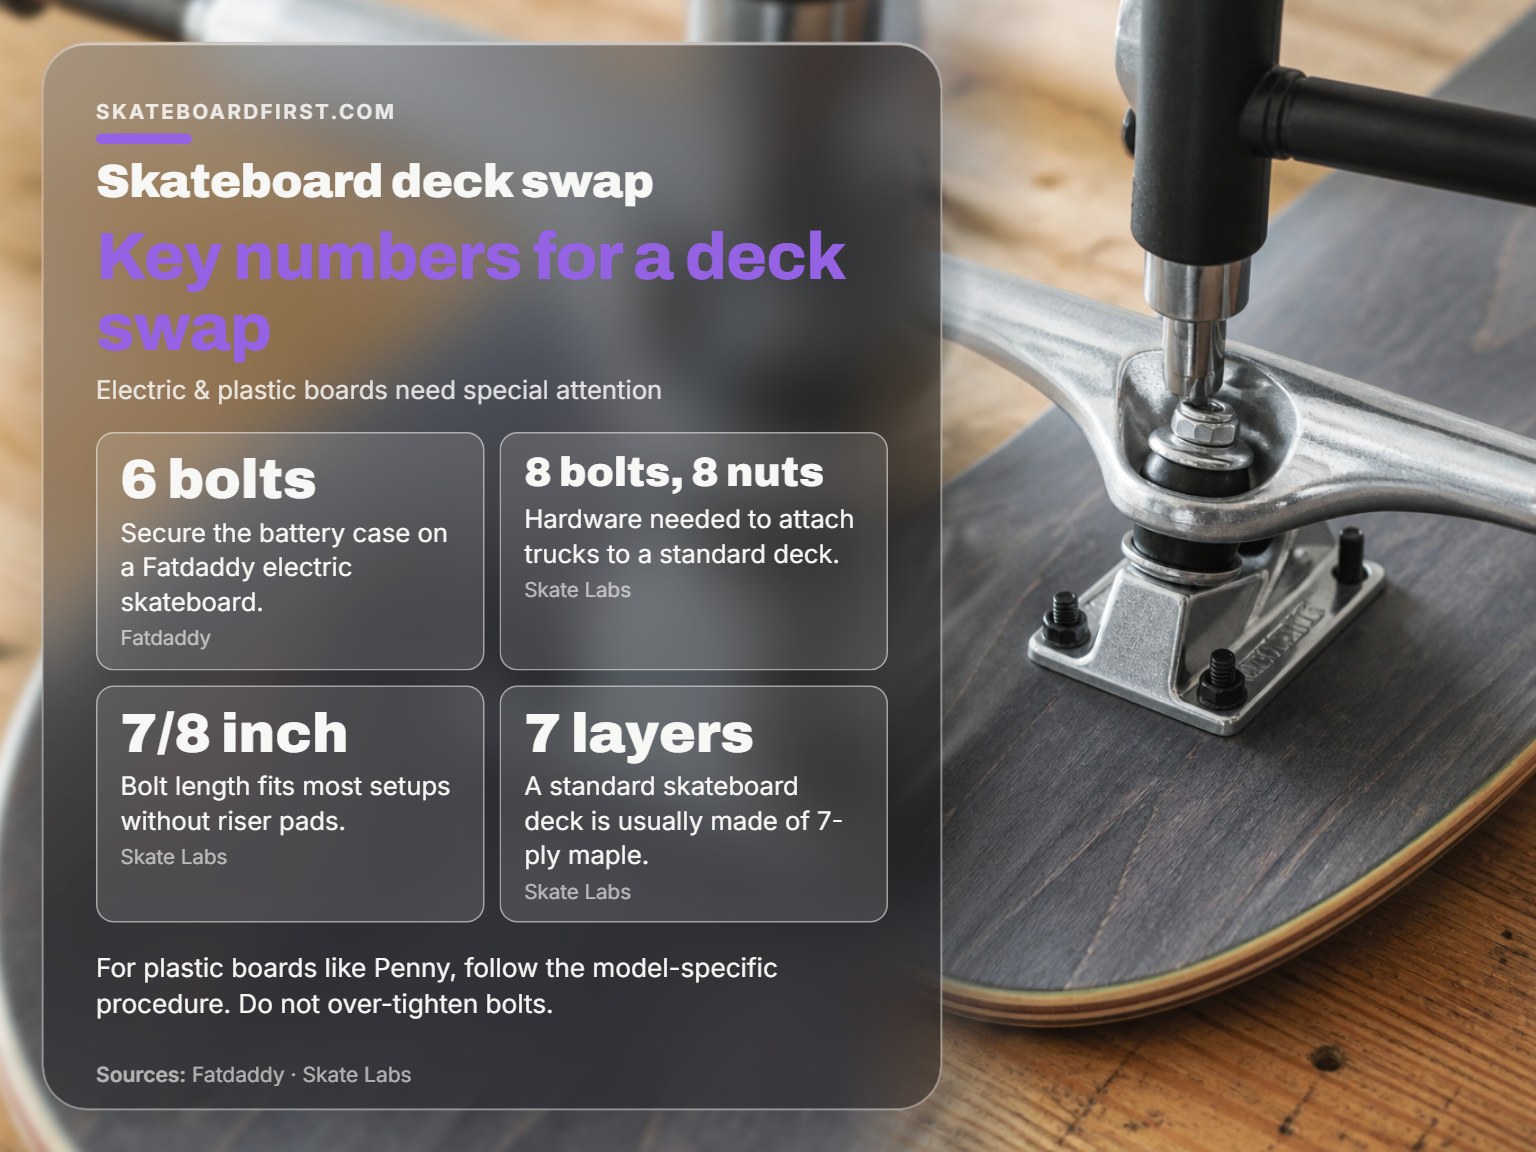
Standard guides fall apart here. If you have a Fatdaddy Max-E or Min-E electric skateboard, the deck swap involves a wired motor and a battery case. The Fatdaddy blog says the battery case is secured by 6 bolts. You must remove it carefully.
The rear truck riser pad has a cut-out section facing to the right (looking down the length of the board). Get this wrong and the wiring won’t seat. When re-attaching, tighten the truck nut hand tight until the riser pad is gripped. Too tight and the riser pad loses its cushioning effect. Do not over-tighten these bolts as this can snap the battery case.
For plastic Penny Skateboards, the deck replacement procedure is model-specific. The plastic substrate doesn’t grip or drill like maple. Follow Penny’s official care page. The principles are the same, but the feel is different.
Before Your First Ride on the New Deck
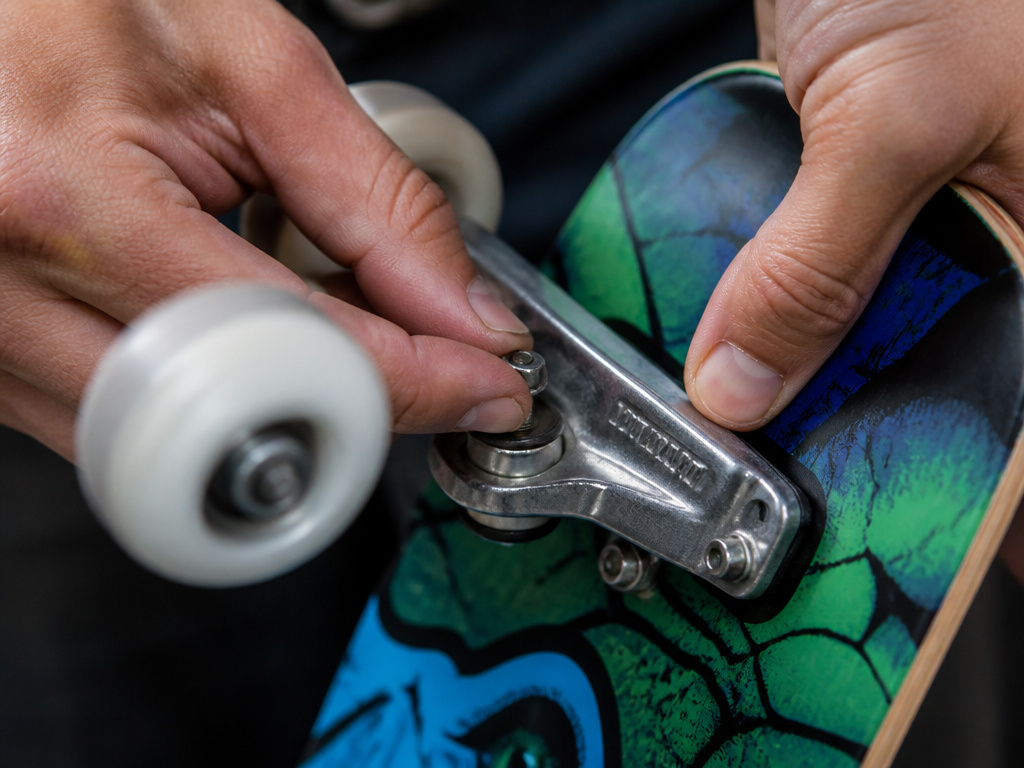
Do the Skate Labs pre-session check: bolts (nothing loose), wheels (spin freely, no wobble), deck (no new cracks, especially around the trucks). This step is essential after any assembly work.
Take it for a slow test roll in a safe, flat area. Get a feel for the new deck’s pop and concavity. It will feel different, maybe stiffer or more responsive. That’s normal.
Now is also the best time to measure a deck if you’re documenting your setup or planning another change. Knowing your exact width and wheelbase helps replicate a feel you like.
Frequently Asked Questions
Can I reuse my old hardware?
Yes, if the bolts aren’t stripped and the threads are clean. Visually inspect them. If they’re rusty or the threads are damaged, buy a new set of 8 bolts and 8 nuts, 7/8 inch length.
How long does it take to change a skateboard deck?
Your first time, budget some extra time. With practice, you can do it more quickly if you’re organized and have all tools ready.
Do I need to buy new grip tape every time?
Absolutely. Grip tape is a consumable. Old grip won’t stick properly to a new deck, and removing it from your old deck is difficult and often damages the sheet.
What if my new deck feels too high or too low?
Riser pads between the truck and deck adjust ride height. Thicker risers raise the board for larger wheels; thinner ones or none lower it. Match the riser thickness to your wheel size.
My board got wet during storage. Can I still use the deck?
Maybe. The Skate Labs guide says to avoid water to prevent warping. IFixit says if it was only sprinkling rain, dry it in the sun. If it sat in a storm for hours, there may be damage. Inspect closely for warping or delamination.
The Bottom Line
Changing a deck is a fundamental skateboard maintenance skill, and the core of how to change a skateboard deck. It’s less about strength and more about patience with a utility knife and a skate tool. The three-month rule from Decathlon is a good calendar reminder, but your feet will tell you the real deadline, when the pop dies, the deck is done.
Keep the blade sharp, the bolts snug, and the kingpins facing in. And always drill the holes, don’t tear them.
