
How to Commute on a Skateboard: Step-by-Step
This post contains affiliate links. As an Amazon Associate, we earn from qualifying purchases.
Commuting on a skateboard means picking a stable board (a cruiser or longboard), fitting it with soft wheels (65mm+), mastering a reliable stop like footbraking, and knowing your local traffic laws. It’s slower than a bike but offers a portable, fun way to cover short trips if you plan a smooth route and wear a helmet.
The core challenge isn’t balance, it’s translating skate skills into predictable, repeatable transportation. A trick board built for park laps is a liability on cracked sidewalks, and a route that’s fine for walking becomes a gauntlet on hard wheels. Anyone learning how to commute on a skateboard must consider these factors.
What follows: the board specs that matter for pavement, the essential safety drill, how to read local ordinances that ban riding in specific zones, and the daily maintenance that keeps a commuter board rolling for years, all central to the how to commute on a skateboard question.
Key Takeaways
- Choose a cruiser or longboard with wheels 65mm or larger, smaller, harder wheels stop dead on pebbles and cracks.
- Master footbraking before you commute; sliding a foot is the only reliable stop you control at any speed.
- Your local municipal code, like Portland’s, overrides general guidelines, banning skating on specific streets and requiring lights after dark.
- Daily commuting wears bearings and wheels fast; a basic skate tool and bearing cleaner saves more money than a shop visit.
- Integrate with public transit by knowing your bus or train’s fold-and-carry policy, a cruiser is often easier to manage than a bike.
The Cruiser vs. Longboard Choice (It’s About Distance)
The FHWA-HRT-04-103 research report gives us the hard numbers. “Long boards,” defined as over 35 inches long, and cruisers with larger wheels (often 65 mm or more) are the practical tools here. A trick board’s narrow deck and sub-60mm wheels are built for agility in a skatepark, not for absorbing sidewalk seams, a key distinction in how to commute on a skateboard.
A commuter board isn’t about looking pro. It’s about stability over distance. The wider platform and softer, larger wheels roll over obstacles that would send a street skater flying.
For a 1-3 mile flat commute, a cruiser is the default pick. Many brands make completes that are ready to roll. They’re short enough to maneuver on crowded sidewalks and light enough to carry onto a bus. If your trip is over 3 miles or involves long, gentle hills, a longboard adds stability at speed. The trade-off is portability, a longboard can be awkward in a crowded cafe.
The wheel spec is critical. Hard, small wheels vibrate on rough pavement and hang up on pebbles. Softer, larger wheels roll over cracks and absorb vibration. You feel the difference in your knees after ten minutes.
How to Stop Effectively (Footbraking Is the Foundation)
You cannot commute if you cannot stop predictably. The fancy power slides you see in videos require waxed pavement and advanced skill. For daily riding, footbraking is the essential skill. It’s simple: you lower your pushing foot and drag the sole flat against the ground to create friction.
Here is what actually worked for me. I spent my first month learning to stop, which sounds boring until you meet the curb that taught me. The instinct is to tap your toe down lightly. That doesn’t work. You need to shift your weight to your front foot, lower your back foot deliberately, and press the full sole down. Start at walking speed in a parking lot.
Step-by-Step Footbrake Practice:
- Find a smooth, flat, empty lot. A school parking lot on a weekend is perfect.
- Push to a slow, comfortable speed. You should be able to run it off if needed.
- Shift your weight forward. This lightens the back foot.
- Lower your pushing foot smoothly. Aim to place the ball of your foot down first, then roll to the full sole.
- Apply pressure gradually. Grit your teeth against the vibration and drag. Increase pressure until you stop.
- Practice from slightly faster speeds each session.
Skipping this drill means you’ll panic and jump off at speed, which is how most commuting injuries happen. Your shoes will wear out faster. That’s the tax for safe riding. Once footbraking is automatic, you can learn other stops, but this one works on any surface, wet or dry.
The 4 Tools That Replace a $200 Service Visit
Daily riding grinds dirt into bearings and wears down wheels asymmetrically. A basic maintenance kit costs less than a single professional tune-up and allows you to fix issues before they strand you.
The Essential Commuter Toolkit:
- A skate tool that combines allen wrenches for trucks, a socket for kingpins and axle nuts, and a screwdriver for mounting hardware. This combines allen wrenches for trucks, a socket for kingpins and axle nuts, and a screwdriver for mounting hardware.
- Bearing cleaner and lubricant. Rubbing alcohol in a sealed container works in a pinch.
- A small rag or shop towels.
- A few spare bolts and nuts that match your truck hardware.
A commuter’s most common mechanical failure is a seized bearing. You’ll hear a grinding noise and feel the board drag. The fix takes five minutes: pop the bearing shields with the tip of your skate tool, soak the bearings in cleaner, let them dry, add a drop of lube, and re-seat them. Doing this every few months quadruples their life.
Truck tightness is the other big one. Loose trucks are wobbly at commuting speed; overtightened trucks won’t turn smoothly. There’s no universal setting. Crouch on your board and lean, you want enough turn to navigate a standard sidewalk width without kicking the tail. Adjust one quarter-turn at a time.
Planning a Commuter Route (Sidewalk vs. Street vs. Bike Lane)
This is where theory meets local law, and the FHWA model state regulations clash with reality. The FHWA Model State Regulations recommend that PTD users should be permitted to ride on both streets and sidewalks, subject to rules that protect safety, but local codes like Portland’s explicitly prohibit skateboarding on specific streets, roadways, and sidewalks in dense commercial areas and residential areas during nighttime hours.
Take Portland, Oregon. The Portland City Code 16.70.410 explicitly bans skateboarding on sidewalks in the entire downtown core (bounded by SW Jefferson, Naito Pkwy, NW Hoyt, and 13th Ave). It also bans riding on specific streets like SW 5th Avenue between SW Lincoln and Burnside. Hillside residential streets have a nighttime curfew from 10 p.m. To 7 a.m. The penalty for violating these geographic rules starts at a $115 fine.
| Where to Ride | Pros | Cons & Legal Risks |
|---|---|---|
| Sidewalk | Protected from cars, smooth surface often. | Illegal in many downtown areas (e.g., Portland). Must yield to pedestrians. |
| Bike Lane | Legal in many areas, directional traffic. | Must ride with traffic, often rough pavement near curb. Cars may not see you. |
| Residential Street | Low traffic, often legal. | Parked cars can door you. Uneven surfaces common. Nighttime bans may apply. |
| Multi-Use Path | No cars, scenic, long distance. | Shared with bikes, runners, dogs. Often crowded. May be far from your destination. |
Before your first commute, map your route on Google Maps in “biking” mode to find the flattest, most continuous path. Then, cross-reference it with your city’s municipal code. Look for the sections on “skateboards,” “roller skates,” or “personal transportation devices” in your city’s municipal code. A 20-minute online search can save you a $115 ticket.
Integrating with Public Transport (The Fold-and-Carry Rule)
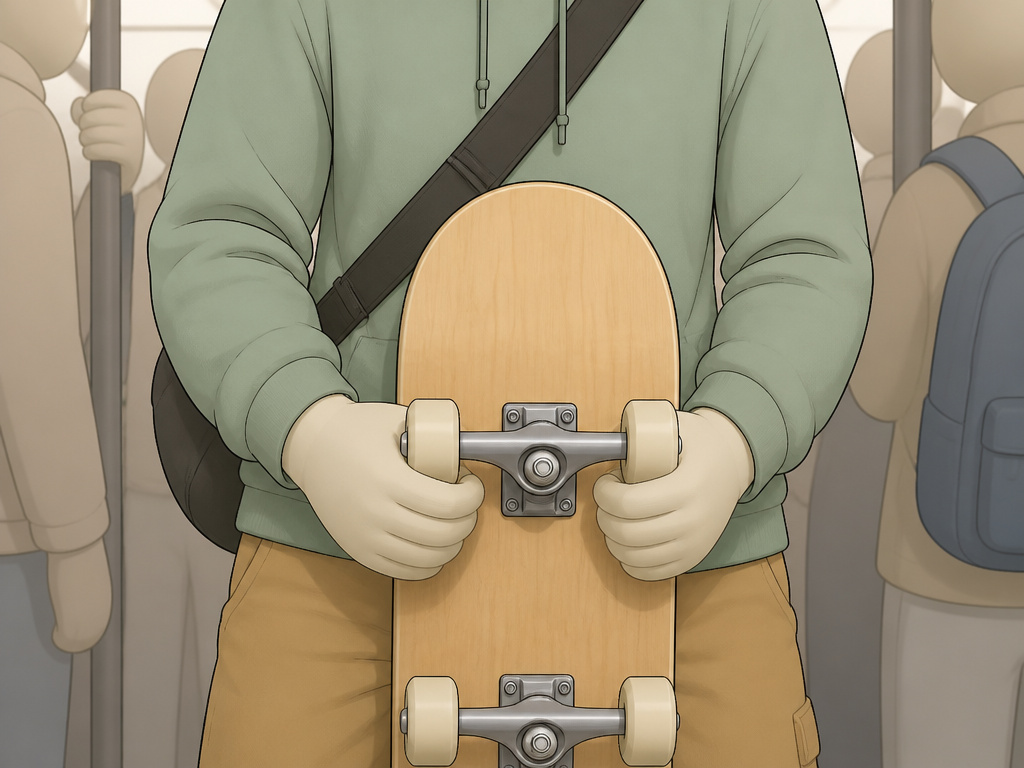
A skateboard’s biggest advantage over a bike is portability. You can cover the “last mile” from the bus stop to your office door. But transit agencies have their own rules.
Most buses and trains allow skateboards if they are not obstructing aisles. The unwritten rule is be courteous and carry it. Don’t ride on the platform. When the vehicle is crowded, hold the board vertically between your legs. A cruiser is generally more acceptable than a massive longboard. Some light rail systems explicitly prohibit riding on the board in stations, walk it.
For a mixed-mode commute, a simple shoulder strap or a dedicated skateboard backpack makes carrying effortless. Practice getting on and off while holding your board before your first real attempt during rush hour.
Safety Gear That Actually Gets Used
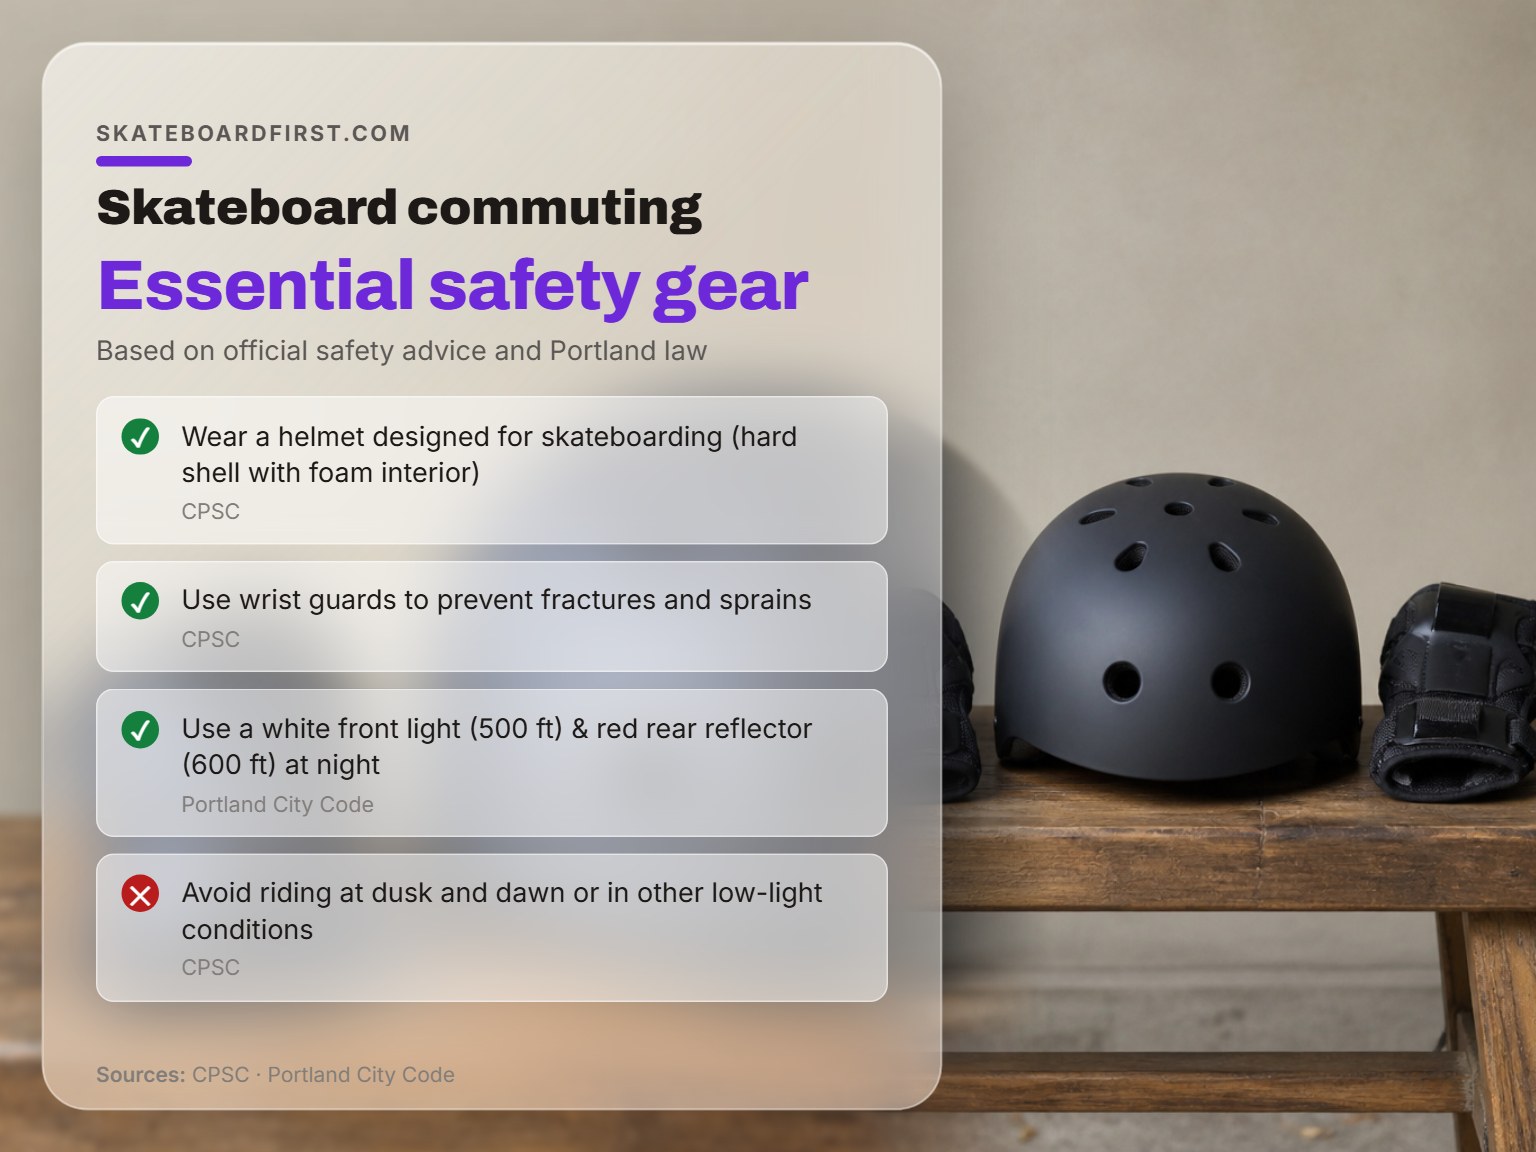
The CPSC Skateboarding Safety Fact Sheet is blunt: “Wearing a helmet can mean the difference between life and death.” For commuters, this isn’t about trick risk, it’s about the car that pulls out unexpectedly or the wet manhole cover you didn’t see.
Common mistake: Buying a bulky, multi-sport helmet. A proper skate helmet has a hard, smooth shell and dense foam designed for multiple impacts on pavement. A bike helmet’s aerodynamic shape and vents are wrong for the back-of-head falls common in skating.
Local laws add a layer. Portland’s code requires all persons under 16 to wear a helmet on any street, sidewalk, or bridge. For adults, it’s a strong recommendation that becomes a lifesaver.
Wrist guards are the second-most important piece. When you fall, and you will, your instinct is to put your hands out. Wrist guards distribute that impact. They look dorky until you need them. After a minor fall that sprained my wrist sidelined me for two weeks, I never ride without them now.
| Gear | Commuting Priority | Why It Matters |
|---|---|---|
| Skate Helmet | Non-negotiable | Protects against concussions from unexpected falls onto curbs or pavement. |
| Wrist Guards | High | Prevents fractures and sprains from instinctive hand-catching falls. |
| Lights | Legal Requirement | Portland Code requires a white front light (visible 500 ft) and red rear reflector (600 ft) at night. |
| Sturdy Shoes | High | Footbraking destroys sneaker soles. Flat, grippy shoes provide board feel and durability. |
Lights are a legal must after dark. Don’t rely on streetlights. A simple LED clip-on light for your backpack and a red blinker for your board satisfy the Portland City Code lighting requirements and make you visible to drivers.
Weather and Seasonal Considerations
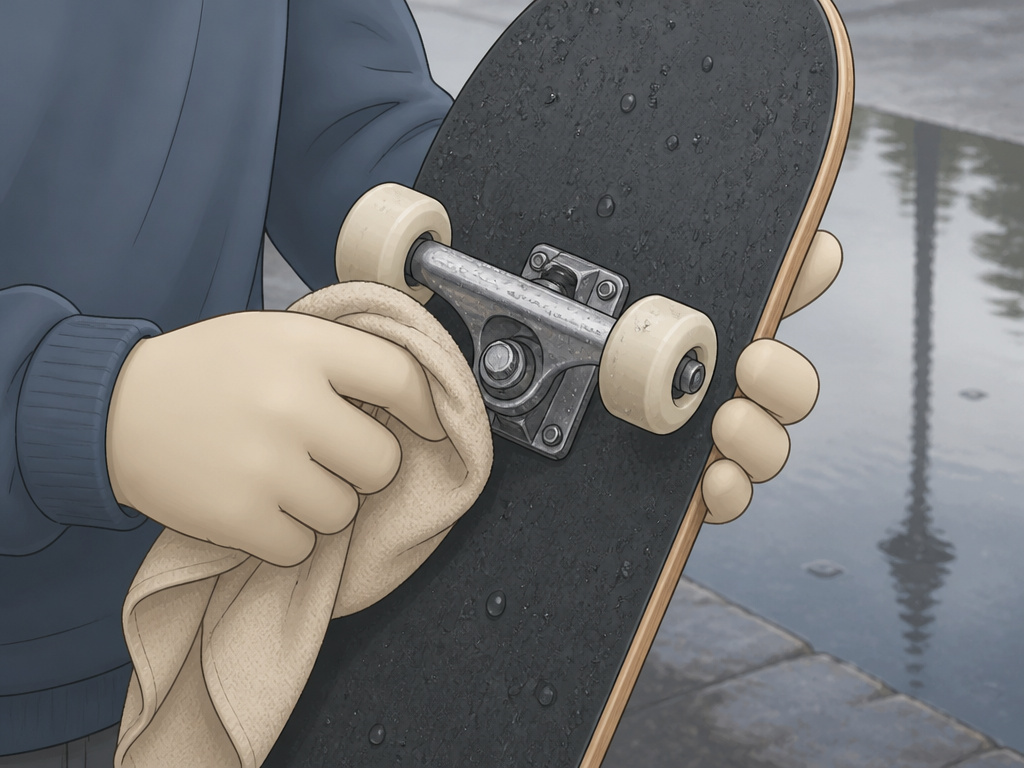
Skateboarding is a fair-weather friend. Rain isn’t just unpleasant; it’s dangerous. Water ruins wooden decks (causing delamination), rusts bearings instantly, and makes pavement slick. A wet leaf is as hazardous as ice.
If you get caught in a drizzle, dry your board thoroughly as soon as you can. Pull the wheels and wipe down the bearings with a dry cloth. Let the deck air-dry, never near a heater, which can warp it.
For year-round commuting in a rainy climate, have a backup plan. This might be a bus pass, a foldable electric scooter, or accepting that some days you’ll walk. Trying to power through daily rain will destroy your board within a season.
Cold weather affects performance too. Rubber in wheels and bushings hardens in cold weather, giving you less grip and slower turning. Allow more time for braking and cornering on chilly mornings.
How should a beginner start skateboard commuting?
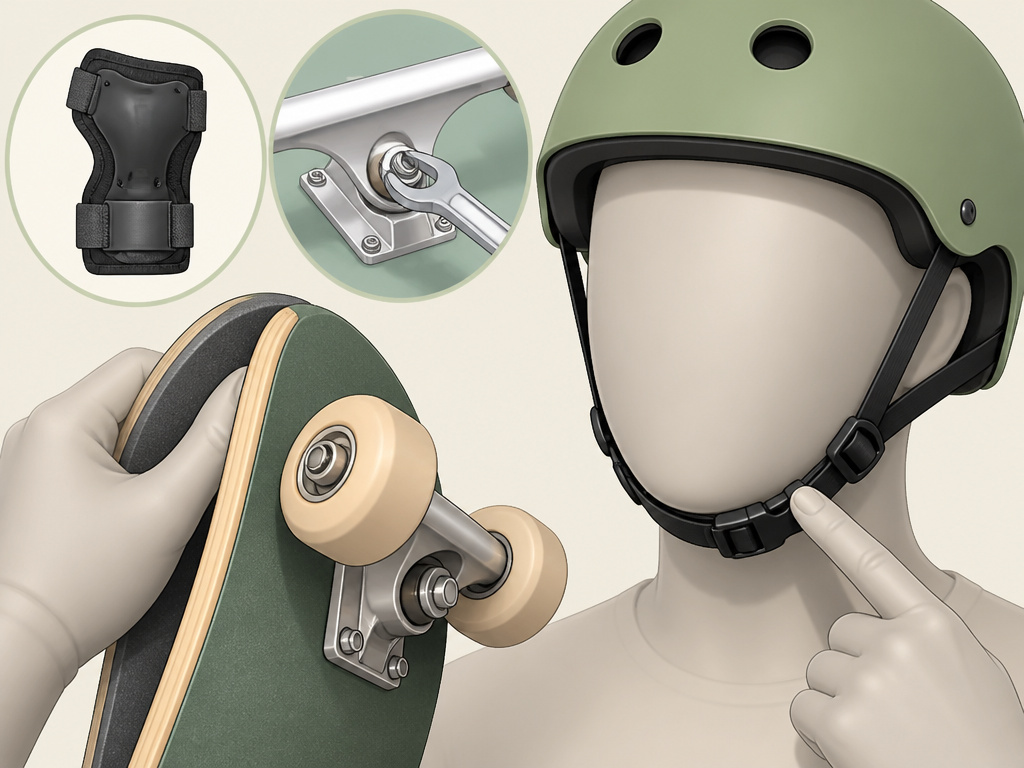
Start by wearing a helmet designed for skateboarding; it should fit snugly and sit level on your head. Wrist guards are especially important. Before every ride, check for excessive play and any broken parts on your board. Always inspect your route for holes, rocks, and debris. Don’t ride faster than you can handle, and avoid riding at dusk, dawn, or in other low-light conditions. Practice in a safe, empty area first. Never ride alone; ride with friends and bring a phone. Keep your trucks, wheels, nuts, and mounting screws tightened properly for stability.
Frequently Asked Questions
Is 27 too late to start skateboard commuting?
Absolutely not. The learning curve is about balance and confidence, not age. Start in a safe, flat area and focus purely on pushing, turning, and stopping for the first few weeks. Your progress will be faster than a kid’s because you’re motivated by utility, not tricks.
How do people travel with skateboards on airplanes?
Most airlines treat a skateboard as a personal item or carry-on. The safest method is to remove the trucks (using your skate tool) and pack the deck in a backpack or carry-on bag, with the trucks and hardware in a separate pouch. This prevents baggage handlers from tossing a complete board and breaking it. Always check the airline’s specific sporting equipment policy first.
What is the fatality rate for skateboarders?
The CPSC data shows skateboarding has a lower fatality rate than cycling per hour of participation, but the severe injury rate (especially head injuries) is significant. This is precisely why helmet use is essential for commuters sharing space with cars. The majority of serious incidents involve collisions with motor vehicles.
Do most skaters ride goofy or regular?
Skaters ride either “regular” (left foot forward) or “goofy” (right foot forward). There’s no advantage to either. Your body will naturally choose one stance the first time you step on a moving board. Go with what feels stable; trying to switch for perceived benefits will only slow your learning.
Before You Go
Commuting on a skateboard works if you treat it as a system: the right board, a practiced stop, knowledge of local laws, and consistent maintenance. It won’t replace a car for groceries or a bike for a 10-mile trip, but for the 1-5 mile urban journey, it’s a uniquely efficient and enjoyable option.
The one rule most guides skip: if your commute involves a hill you’re not 100% confident footbraking down, walk it. Saving three minutes isn’t worth the emergency room visit. Build your skills on flat ground first. Everything above assumes you’re in control, if speed feels scary, you’re going too fast for your current ability. Slow down.
