
How to Skate a New Skatepark: Step-by-Step
This post contains affiliate links. As an Amazon Associate, we earn from qualifying purchases.
Skating a new park starts with a walk-through to identify beginner zones, flow lines, and the main waiting spots. The goal is to map the park mentally before your wheels touch the ground, focusing on safety and spatial awareness over tricks.
That initial walk is your most important tool. It reveals the park’s design logic, where the designers intended you to build speed, where you should stand to avoid collisions, and which features are friendly to your current skill level. This process turns an intimidating maze into a navigable space, and it’s the first step in learning how to skate a new skatepark.
What follows is a five-step method to scout, assess, and ride a new skatepark, answering the core question of how to skate a new skatepark. It covers how to read the terrain, understand the unspoken rules, choose your starting point, and build a session that leaves you confident, not rattled.
Key Takeaways
- Walk the park first to identify flat zones, gentle banks, and the main traffic flow, this scout prevents collisions and builds confidence.
- Start on the flat ground or a gentle bank to warm up and get a feel for the park’s surface texture and speed.
- Wear a helmet at minimum, and consider pads; the CIRSA skatepark safety guidelines note that enforceable rules include required safety equipment.
- Watch and learn from others to understand the local rhythm and etiquette before joining the flow.
- Communicate your intentions clearly with a nod or a “going in” call to avoid surprises and respect the shared space.
The 5-Step Scout and Ride Method
Your first visit to an unfamiliar skatepark shouldn’t be a gamble, which is why learning how to skate a new skatepark matters. Following a structured approach minimizes the risk of getting in the way, picking a feature that’s over your head, or missing the best spot to practice.
Step 1: The Perimeter Scout (5 Minutes, Feet on the Ground)
Before you even unstrap your board, walk the entire perimeter of the park. Keep your board tucked under your arm. Look for three things: the flattest open area, the most mellow bank or ramp, and the spots where other skaters are congregating or resting.
A “Flow Line,” as defined by World Skate facility certification rules, is “the ability to skate through the whole course in various ways with an adequate speed to perform tricks… Without any forced interruption caused by design of the course.” Your scout is finding those lines visually.
This isn’t just looking. Notice the surface. Is it smooth concrete, gritty asphalt, or a prefab composite? The ASTM F2334 skatepark standard covers safety, performance, and maintenance requirements for various materials, but the ride feel changes completely. A buttery concrete park carries speed differently than a textured modular one. Your first push will tell you everything, but your eyes can warn you first.
Step 2: Gear Check and Surface Test
Now strap on your helmet. If you have knee and elbow pads, put them on. This isn’t just about safety, it’s a signal to yourself and others that you’re taking the session seriously. It changes your mental approach from “maybe I’ll try something” to “I’m prepared to learn.”
Find your identified flat zone. Don’t try a trick. Just push around. Get a feel for how the board rolls. Listen to the sound of your wheels on the surface, a consistent hum is good; a chattery, bumpy sound means you’re on rougher terrain that will suck your speed. This is your calibration lap. Do five laps. Get comfortable turning. This is how you plan a skate session with intention, starting with the absolute basics.
Step 3: Identify and Ride a Beginner-Friendly Obstacle
With the flat ground feeling familiar, move to the most beginner-friendly obstacle you spotted. According to the Dallas skatepark design guidelines, modern parks should be around 50% “street” (ledges, rails, stairs) and 50% “transition” (ramps, bowls). A beginner-friendly feature is usually a low, wide bank or a very mellow quarter pipe.
| Feature Type | Best For Beginners | Common Beginner Mistake |
|---|---|---|
| Wide, low bank | Learning to pump, kick-turns, building comfort with incline. | Trying to turn too sharply at the top and sliding out. |
| Mellow quarter pipe | Practicing roll-ins, getting used to vertical transition. | Dropping in before being comfortable rolling in from the coping. |
| Flat bar or low ledge | Learning to ollie onto and off of features. | Approaching at an angle instead of straight on. |
The key is repetition. Ride up the bank and back down fakie (backwards) multiple times. Then try a small kick-turn at the top. The goal is muscle memory, not style. This is where you start to learn transition skating safely, one repeated motion at a time.
Step 4: Observe, Integrate, and Communicate
After you’ve warmed up on your chosen feature, take another break. Stand in a designated rest area (usually a flat spot with seating or a fence line) and watch. Pay attention to the rhythm.
Who is skating which line? How do skaters signal they are about to drop in? How long does a typical “turn” last on the main bowl or street course? This observation is your crash course in skatepark etiquette rules.
Common mistake: Snaking, dropping in on a feature or line while another skater is already riding it. This is the fastest way to cause a collision and lose respect in the park. Wait your turn, and make eye contact or a verbal call like “You going?” before you start your run.
When you’re ready to join a busier area, communication is everything. A simple nod to the skater next to you, or saying “I’ll go after you,” establishes order. It feels awkward the first few times. Do it anyway. This is how you share a skatepark safely with riders of all types and skill levels.
Step 5: Build a Mini-Line and Exit While Confident
Don’t wait until you’re exhausted or frustrated to leave. Plan your exit around a small victory. Your goal for the first session should be to link two or three basic actions. For example: push from the flat ground, ride up the beginner bank, kick-turn, ride back down, and roll to a controlled stop.
You’ve now successfully found your line in a new park. You’ve scouted, warmed up, practiced a feature, observed etiquette, and linked maneuvers. That’s a complete, positive first experience. Pack up and leave. Ending on a controlled, successful note makes you eager to return, not apprehensive.
Decoding Skatepark Design and Flow
Understanding why a park is built a certain way takes the mystery out of skating it. Design standards and community guidelines directly influence what you’re riding on.
How Big is a Skatepark, Really?
Footprint matters. It dictates how many people can comfortably skate at once and what kind of features fit. Guidelines offer ranges, not fixed sizes.
| Source | Facility Type | Minimum Size | Maximum Size | User Capacity (per source) |
|---|---|---|---|---|
| World Skate | Street-style course | 950 sqm (10,000 sq ft) | 1900 sqm (20,500 sq ft) | Not specified |
| World Skate | Park-style course | 800 sqm (8,600 sq ft) | 1700 sqm (18,300 sq ft) | Not specified |
| Skateboard GB | Large skatepark | 1,000 sqm | 3,000 sqm | 50 to 100 users at any one time |
| CIRSA (citing IASC) | General area | N/A | N/A | 50-60 skaters per 10,000 sq ft |
The takeaway? A park around 10,000 square feet can feel crowded with 50 people, or spacious with 20. Your scout tells you the real story. The Skateboard GB design toolkit emphasizes that large parks are social spaces first, the user count includes people chatting and resting, not just skating.
Concrete vs. Prefab: The Surface Under Your Feet
The debate on materials isn’t just academic; it changes your ride. The Dallas guidelines state: “Skate parks should be designed only out of concrete. Do not use prefabricated materials, wood, or steel,” while the ASTM F2334-18 standard explicitly covers “above-ground” facilities commonly built from prefabricated wood, steel, and composites. However, the ASTM F2334-18 standard explicitly covers “above-ground” facilities, which are commonly built from prefabricated wood, steel, and composites.
As a skater, you’ll feel the difference. Concrete is generally faster and smoother. Prefab surfaces can be grippier or have more seams. Neither is inherently “better” for a beginner, but knowing what you’re on helps you adjust. A prefab park might require a slightly harder push to maintain speed. This knowledge is part of learning to choose a skatepark that matches your preferences.
Essential Skatepark Etiquette and Safety Rules

The rules aren’t there to stifle fun; they’re the traffic laws that prevent chaos in a shared, dynamic space. Knowing them is as important as knowing how to ollie.
The Unwritten Rules (That Are Often Written Down)
Many parks post rules. The most critical ones, per the CIRSA safety handbook, are often printed verbatim on signs:
- “USE OF THIS SITE IS AT YOUR OWN RISK.”
- “Use of safety equipment including helmets, gloves, knee and elbow pads, wrist supports, and proper shoes is required.”
Beyond posted rules, the unwritten code governs daily use:
- Wait Your Turn: This is the cardinal rule. Don’t “snake” someone’s line.
- Clear the Landing Zone: After bailing, immediately move your board and yourself out of the way of other skaters.
- Respect the Flow: Don’t stand or sit in the middle of a commonly used run-up or landing area. Use designated rest spots.
- Watch Your Language: Parks are public spaces frequented by all ages.
- Help Out: If someone loses a board that’s headed for others, a quick foot to stop it is a community service.
These rules are the foundation of sharing a skatepark safely. They work only if everyone follows them.
Gear Up: What “Safety Equipment” Actually Means
The CIRSA list, helmets, gloves, knee and elbow pads, wrist supports, can seem extreme to a street skater. Here’s a practical translation for a first-timer:
- Helmet: You must wear one. A head injury can end your skating career before it starts.
- Knee Pads: Highly recommended if you’re trying anything new on transition (ramps, bowls). Concrete is not forgiving.
- Wrist Guards: The single best investment for a beginner. Most falls involve putting hands down to catch yourself.
- Proper Shoes: Flat-soled skate shoes. Running shoes have rounded, grippy soles that can catch on the board during kickflips and cause nasty ankle twists.
You don’t need a full suit of armor. But a helmet and wrist guards are the difference between a scuffed palm and a broken wrist. I’ve fallen without them and learned the hard way.
Building Your Skills: A Progression Plan for New Parks

Trying to hit the biggest ramp on day one is a recipe for injury and discouragement. A logical progression path builds confidence and real skill.
- Session 1: Scout and Flat Ground. Goals: Complete the 5-step scout. Comfortably push, turn, and stop on the park’s flat surface. Leave without attempting any features.
- Session 2: Banks and Mellow Transitions. Goals: Ride up and down a low bank consistently. Practice kick-turns at the top. Begin to feel the pump on a very mellow quarter pipe.
- Session 3: Linking and Etiquette. Goals: Link a push from flat ground into a bank ride. Successfully wait your turn and integrate into a busier session. Attempt a roll-in on a small quarter pipe.
- Session 4: Introducing Obstacles. Goals: After mastering banks, identify a simple skatepark feature like a low ledge or flat bar. Practice approaching it and ollieing over it on flat ground next to it before trying to slide or grind.
This plan forces patience. It aligns with the design philosophy in many guides, like the Skateboard GB design toolkit, which values “simple functional spaces” that encourage organic progression.
How to physically get to/access the new park (in-game)
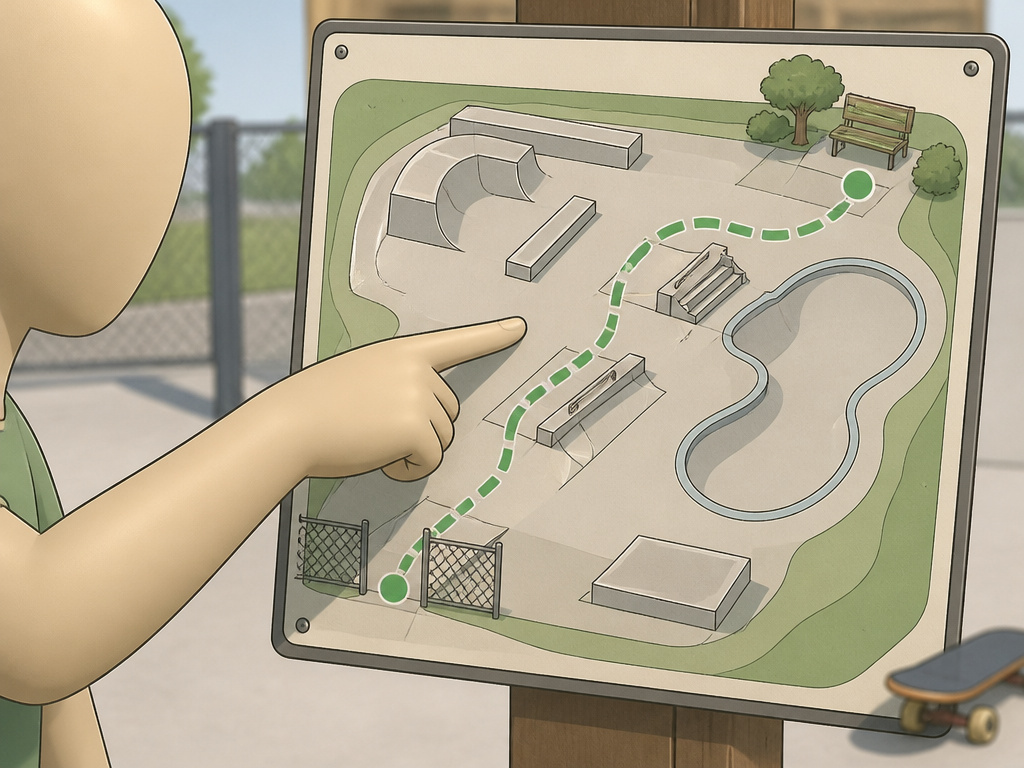
Your first move is to locate the main entrance and identify the flow. Look for the designated entry point, which should be clearly marked and separate from any competition or high-traffic zones, as defined by the concept of a ‘Flow Line’. Official guidelines define a ‘Flow Line’ as the ability to skate through the whole course without forced interruption, so your access path should let you enter without cutting across active lines. Check for any posted rules about required safety gear or usage policies at the entrance. Once inside, take a moment to observe the layout from a safe, out-of-the-way spot before rolling onto any riding surface.
Frequently Asked Questions
What should I do at a skatepark as a complete beginner?
Walk it first. Then, stick to the flattest, most open area. Practice pushing, cruising, turning, and stopping. Your only goal for the first few visits is to be completely comfortable riding your board in that space. Observing others is part of the session, watch how they move and where they stand.
How do I know if a park is too advanced for me?
If you can’t identify a single flat practice area or a very gentle bank, it might be a park designed for experienced riders. Also, if every feature is tall, steep, or has deep bowls, it’s likely an advanced spot. Use online photos or videos to scout before you go. Look for parks labeled “all-skills” or “beginner-friendly.”
Is it okay to just cruise around and not do tricks?
Absolutely. Cruising is the most fundamental skill in skateboarding. It builds board control, balance, and confidence. Many skaters spend entire sessions just carving around a bowl or pumping through a flow course. No one will judge you for riding your board as intended.
What if I get in someone’s way?
It happens to everyone. If you accidentally snake someone or block a line, a quick, sincere “Sorry, my bad!” is all that’s needed. Don’t over-apologize or make a big scene. Acknowledge it, move out of the way, and be more mindful next time. Most skaters are understanding if you’re clearly learning.
How long should my first session be?
Keep it short and positive. Keep your first session short and positive. Fatigue leads to sloppy form and more falls. It’s better to leave wanting more than to leave sore, frustrated, and intimidated. Quality of practice always beats quantity, especially when you’re new to a space.
Before You Go
The single most useful thing you can do before your next park visit is to decide on one, specific, achievable goal. Not “get better,” but “ride up and down the small bank 20 times without putting a foot down.” Or “successfully wait my turn and call my drop-in.”
This focus turns a sprawling, unfamiliar park into a simple training ground. Remember, every skater in that park, no matter how skilled, had a first day where they didn’t know where to stand. Your scout, your gear, and your respect for the flow are your tickets past that initial hesitation. Now you have the map. The rest is just rolling forward.
