
How to Wax a Skateboard Ledge: Step-by-Step
This post contains affiliate links. As an Amazon Associate, we earn from qualifying purchases.
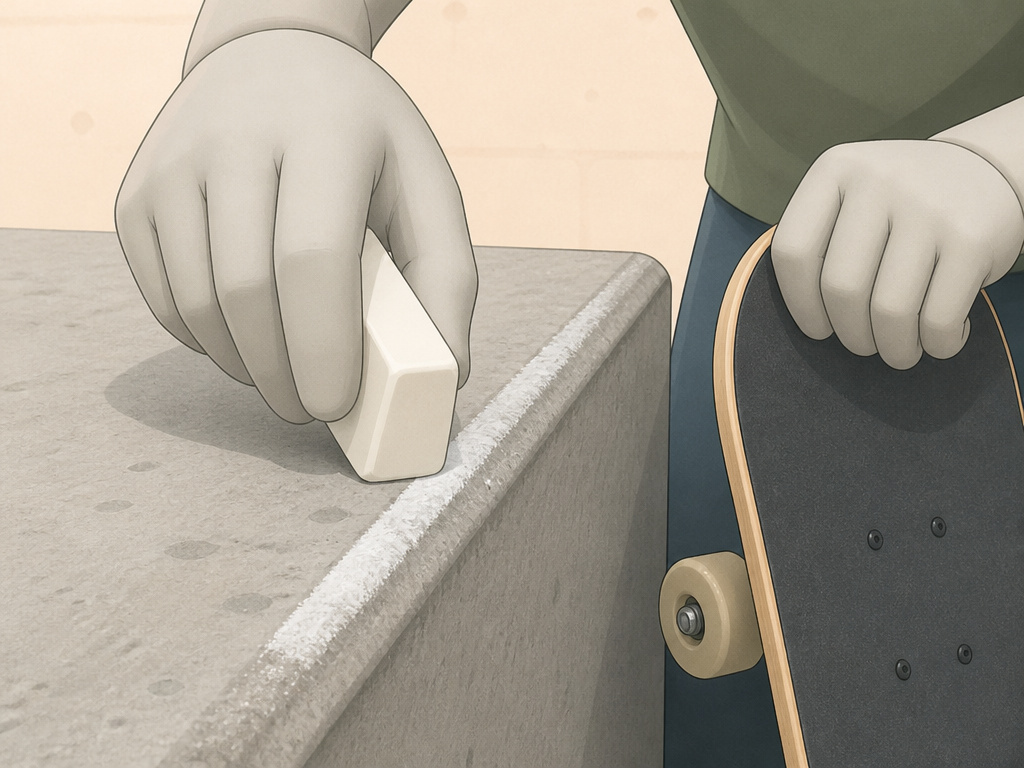
To wax a skateboard ledge, rub a paraffin-based skate wax block firmly along the exact line your trucks will travel until you see a faint white residue. This takes about thirty seconds and creates a slick layer that lasts for several sessions. A light, targeted application beats coating the whole ledge.
That faint white line is your signal. It means you’ve deposited enough paraffin to actually reduce friction, not just smear the surface. If your ledge still feels gritty or sticky to the touch, it’s telling you the job isn’t done. This is a key step in how to wax a skateboard ledge.
What follows: the exact steps for a standard ledge, a separate method for rough concrete that involves a rub brick, the common traps that ruin the slide, and the one rule about wax that keeps spots skateable for everyone.
Key Takeaways
- Wax only the specific line your trucks will grind; coating the whole ledge makes it dangerously slick for other skaters.
- A well-applied layer of paraffin wax holds up for several sessions according to Skateboard-Guide.com, but anecdotal YouTube sources note it melts and becomes useless in direct summer heat.
- For a rough, “crusty” concrete ledge, Tactics.com recommends smoothing it first with a rub brick and sealing it with clear lacquer before waxing, while some Reddit users warn that clear paint/lacquer can seal out wax and prevent proper seasoning.
- Never wax in the rain, water prevents the wax from adhering and creates a slippery, unpredictable surface.
- Test the slide with your hands before committing to a trick; if it catches, add more wax to that exact spot.
The 30-Second Wax Job
The basic how to wax a skateboard ledge process is straightforward. If your ledge is already smooth from use, this is all you need.
First, run your hand along the grinding edge. You’re checking for grit and stickiness. A surface that’s already slick from other skaters might not need wax at all. If it feels rough or grabs at your skin, it’s a candidate.
Apply short, firm strokes with a dedicated skate wax block along the precise path of your trucks. Focus on the top corner and the vertical face they’ll contact. Build up a visible white residue, a thin smear won’t cut it.
I learned this the hard way on a new bank ledge at a local park. I gave it two quick passes, figured it was good, and went for a boardslide. The truck hung up immediately and sent me sprawling. The problem wasn’t my balance; it was that I hadn’t built up enough wax. That visible white line is essential.
Your tools matter here. A dedicated skate wax block is formulated for this. In a pinch, a plain paraffin candle can work, but it wears off faster.
After you’ve built up that layer, do a test grind by hand. Push your board along the ledge. If it still catches or feels sluggish, apply more wax to that specific spot. This hand-test saves you from a high-speed surprise.
When a Ledge Doesn’t Need Wax
Not every obstacle requires intervention. A well-used skatepark ledge, polished by thousands of truck slides, is often slick enough on its own. Waxing it is a waste of wax and makes the surface hazardous for manuals or lip tricks that need some grip.
The visual cue is a polished sheen from use. If your board slides smoothly during a hand test, leave it alone. Your job is to reduce friction, not eliminate it entirely. An over-waxed ledge is a community nuisance.
Common mistake: Waxing a ledge that’s already slick from use. You’re not helping; you’re turning a predictable surface into an ice rink for anyone not trying to grind.
This ties directly into skate spot etiquette. Public ledges on private property, like outside a business, are often sensitive. Visible wax residue is a clear sign of skating, which can lead to the spot being busted or removed. Always consider the location. The best spots are away from high-traffic areas and businesses.
The Rub Brick & Lacquer Method
Sometimes wax alone isn’t the answer. If you’ve found a perfect-looking concrete ledge only to have your trucks screech to a halt, the surface is likely too rough and porous. This is where the rub brick comes in.
Tactics.com details this Pacific Northwest method for “crusty” ledges. The goal is to create a smooth, sealed base for the wax to adhere to, rather than letting the rough concrete absorb it.
| Step | Tool | Purpose | Skip It If… |
|---|---|---|---|
| 1. Smooth the ledge | Rub brick (concrete rubbing stone) | Removes gritty texture and high spots that cause friction. | The ledge is already smooth to the touch. |
| 2. Seal the surface | Clear spray lacquer | Creates a non-porous barrier so wax sits on top, not inside the concrete. | The concrete is already sealed or painted (wax may not stick well). |
| 3. Apply wax | Skate wax block | Provides the final slick coating for the grind. | The lacquered surface is already slippery enough (test first). |
The process is labor-intensive but definitive. You scrape the rub brick along the top, edge, and side of the ledge to wear down the roughness. You must wear a mask, concrete dust is no joke. Sweep away the dust as you go.
Once smooth, you spray on a clean coat of clear lacquer. This seals the pores. Let it dry completely. Then you apply a generous amount of wax. Tactics.com advises not to skimp on the wax for a newly prepared ledge, while Skateboard-Guide.com recommends using a light, targeted layer rather than coating an entire ledge. Finally, test the slide with your board in your hands. This method creates a more permanent, clean-looking spot according to Tactics.com, while some Reddit users argue a rub brick and lacquer are far superior to wax for most stuff.
What Most People Get Wrong
The how to wax a skateboard ledge process seems simple, so the errors are subtle but costly. They usually revolve around timing, amount, and location.
Waxing in the rain or on a wet surface. Water beads on wax, preventing adhesion. The Skateboard-Guide.com source is clear: wet surfaces don’t hold wax well. The mix of water and wax creates a slippery film that’s unpredictable for footing. Wait for a dry day.
Using wax in extreme heat. When the temperature soars, paraffin wax softens and melts. It becomes a greasy, ineffective mess. A YouTube tip notes that in hot weather, wax is useless. If the temperature is very high, paraffin wax can soften and become ineffective.
Over-waxing an entire ledge. This is the biggest etiquette foul. You only need to wax your grinding line. Coating the whole top makes it impossible for skaters working on nose slides, tail slides, or manuals. Be surgical.
Assuming one type of wax fits all. Different surfaces need different amounts. A slick metal rail needs a few passes. A gritty new concrete curb might need the rub brick treatment. The rule from a YouTube tutorial is solid: only wax what you skate.
DIY Skate Wax: The 60-40 Rule
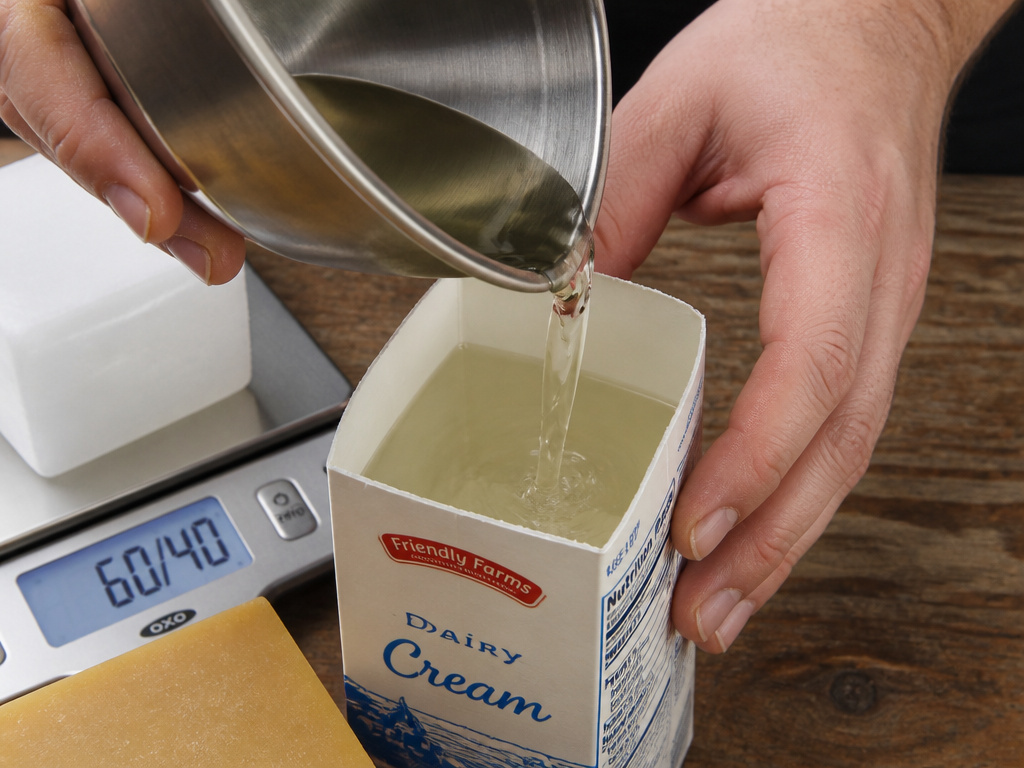
You can make your own wax. The Red Bull guide provides a specific ratio: 60% paraffin to 40% beeswax. That’s your best bet.
More beeswax makes the mix too soft, especially in summer heat. Straight paraffin can be brittle. The 60-40 blend gives you a durable bar that rubs on smoothly. Melt the two together in a double boiler, pour it into a mold (an old cardboard milk carton works), and let it cool.
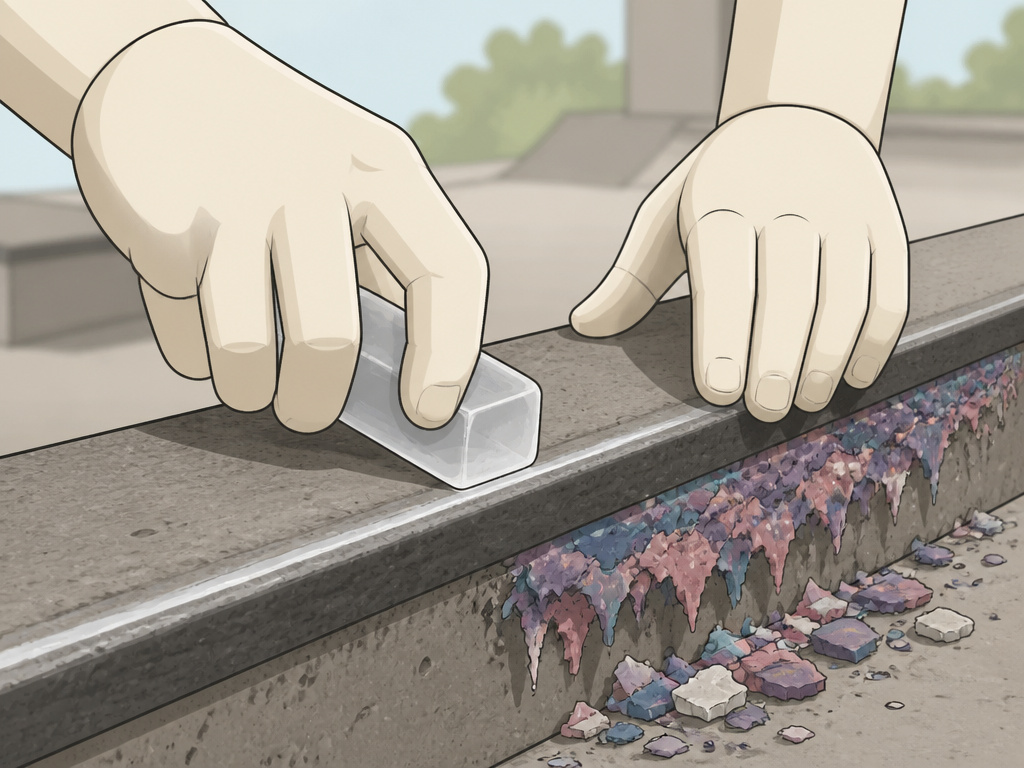
If you go the DIY route, please make it clear. As a Reddit thread points out, brightly colored or opaque wax is a dead giveaway on a ledge and attracts unwanted attention from property owners. Clear wax is discreet.
This isn’t about saving money, a block of Gulf Wax is cheap. It’s about understanding the material. Knowing what’s in your wax demystifies the process. You realize you’re not applying magic; you’re depositing a specific blend of hydrocarbons to fill microscopic pores.
Waxing Etiquette and Spot Preservation
Wax is a tool, not a right. Its use has consequences for the spot and the skaters who come after you.
The core principle is simple: leave the spot skateable, not vandalized. A lightly waxed line on a public curb is a minor modification. A ledge slathered in thick, colored wax is damage. It looks terrible, flakes off onto shoes, and guarantees the spot gets cleaned off or destroyed.
Where this goes sideways: Waxing a ledge on clear private property without permission. Skateboard-Guide.com notes street spots on private property may not welcome visible wax residue. Getting a spot torn out because of wax is a community loss.
There’s also the mini-ramp rule, straight from a YouTube comment: never wax the mini ramp. If the coping is sticking, wax your trucks instead. Waxing the coping creates a dangerous, unpredictable surface for every other rider. Don’t be that person.
The lifespan of your work matters too. A well-applied wax layer typically holds up for several sessions. You’re not doing this every day. If you find yourself constantly re-waxing the same spot, the ledge might be too porous and need the rub brick and lacquer treatment.
How to Spread Wax Evenly on a Ledge

Apply a light, targeted layer rather than coating the entire ledge. Use the edge of a plastic card or the side of your skateboard truck to rub the wax block back and forth across the specific area you plan to grind. This method helps press a thin, even film into the concrete. After applying, test the slickness by moving your board along the ledge with your hands. If it’s not grinding as easily as you would like, add a bit more wax and repeat the spreading process. A well-applied layer typically holds up for several sessions before needing a touch-up.
Frequently Asked Questions
Will deodorant work as skate wax?
In a true emergency, maybe for one attempt. But deodorant contains oils, alcohol, and antiperspirants that leave a sticky, gummy residue. It will gum up your trucks and attract dirt, making the ledge worse than before. It’s a terrible substitute. Stick to paraffin.
What can I use for skateboard wax?
Plain paraffin candle is the closest household substitute. A bar of soap can work temporarily but wears off fast and can get gummy. For any real skating, a dedicated skate wax block is small, cheap, and lasts a long time. It’s worth having in your bag.
Should you wax your skateboard?
No, you wax the obstacle, not your skateboard. Waxing your deck or trucks serves no purpose and can make your grip tape less effective. The goal is to reduce friction between your trucks and the ledge, not between your shoes and your board.
How do I make a ledge skateable?
It depends on the ledge. If it’s smooth, some Reddit users suggest it just needs a ton of wax, while Skateboard-Guide.com advises using a light, targeted layer rather than coating an entire ledge. If it’s rough and gritty-looking, you need to smooth it with a rub brick and likely seal it with clear lacquer before waxing. For a brand new, porous concrete curb, it might take an hour of prep work to get it sliding properly.
Before You Go
Waxing a ledge is a thirty-second skill that removes a major variable. It turns “Will I stick?” into “How do I balance?” That’s a huge shift for learning grinds.
The one rule I won’t bend: if you’re at a public park, wax only your line. The rest of the ledge isn’t yours to modify. That keeps the spot functional for everyone, from the kid learning nose slides to the local working on switch crooks.
Everything above assumes you have a smooth-ish surface to work with. If your dream ledge is a chunky, unfinished concrete monster, accept that the rub brick and lacquer method is your first step. It’s more work, but it’s the only way to build a foundation for grinding. Wax can’t fill canyons.
Go push down the block once today.
