
Skateboard Wax Guide: How to Use, Choose, and Make It
This post contains affiliate links. As an Amazon Associate, we earn from qualifying purchases.
Skateboard wax is a combination of waxes designed to be slick under pressure and shear well on a grind, making obstacles like curbs and rails slippery enough to slide on. Common DIY versions use beeswax and paraffin, and while household candles can work, purpose-made skateboard waxes are formulated for consistent performance.
That “slick under pressure” part is the whole point. A curb isn’t slippery until you put your board’s weight onto it at speed, that’s when the wax needs to give just enough to let you slide, not so much that you slip out. Getting that balance wrong is why some spots become skatepark legends and others become ankle-breakers. Choosing the right product is covered in any good skateboard wax guide.
What follows: how to apply wax without creating a hazard, the real difference between store-bought and homemade, and how to pick wax for the obstacle you’re tackling using a skateboard wax guide. We’ll also cover the one safety rule every skater ignores until they see someone eat concrete.
Key Takeaways
- Apply wax in thin, crossed layers and test with your shoe first, a spot that feels slightly tacky is perfect, while a glossy sheen means it’s dangerously slick.
- For DIY wax, a simple mix of beeswax and paraffin melts safely at low temperatures, while some users melt down dollar store candles, which can contain unknown additives.
- Wax harder obstacles more, a concrete ledge needs more wax than a painted metal rail, because the rougher surface grabs more.
- Clean off excess wax after your session; leaving a thick, gloopy patch makes the spot unpredictable for the next person and can ruin shoes.
- Skip the scented, colored waxes for serious skating; the added perfumes and dyes can gum up on the obstacle and transfer gunk to your board’s trucks.
What Skateboard Wax Actually Does
It’s not a lubricant in the traditional sense. You don’t grease a rail like you would a bike chain. The wax sits on the obstacle’s surface and, under the pressure and friction of a grind, it shears off in microscopic layers. This controlled shearing action reduces the grip between your truck’s metal and the concrete or steel, letting you slide instead of stick.
The shearing action is why a waxed ledge feels “fast.” The wax sacrificially layers itself between the moving parts, which is the same principle high-end sword preservation waxes like Renaissance wax use to protect metal from air and moisture.
If the wax is too hard, it won’t shear, you’ll stick and stall. If it’s too soft or you apply too much, it shears too easily and you lose all control. That’s the tightrope.
The 3-Step Wax Application (That Actually Works)
Most tutorials tell you to rub the wax on. That’s only step one, and doing just that creates the classic “waxed-to-death” spot that sends everyone flying.
Step 1: Clean and Dry the Spot
Find your target, a ledge, rail, or curb. Brush off loose dirt, gravel, or leaves with your hand or a shirt. A dry surface is essential. Wax won’t adhere to dust, and water turns wax into a useless, cloudy film. If the obstacle is wet, wait for a dry day or bring a towel.
Step 2: Apply in a Cross-Hatch Pattern
Hold your wax like a bar of soap. Don’t just rub back and forth in one direction. Apply firm pressure and make a tight grid pattern: a few strokes up and down, then a few strokes side to side. You’re aiming for thin, even coverage, not a thick blob. The wax will warm from friction and leave a faint, matte white residue. If you see a shiny, translucent layer, you’ve used too much pressure or gone over the spot too many times.
Common mistake: Waxing in circles. This creates an uneven, glazed surface that can cause one truck to slip while the other grips, spinning you out on a boardslide.
Step 3: The Shoe-Test Before You Skate
Before you commit a trick, test the spot with your shoe. Give the waxed area a few light slides with the sole of your skate shoe. It should feel a little tacky, with a slight drag. If your shoe slides with zero resistance, the spot is too slick, you’ve either over-waxed or the wax is too soft for that surface. In that case, rub some dirt or dust onto the spot with your foot to knock down the slipperiness.
Choosing the Right Wax for the Job
Not all wax is the same, and the “best” one depends entirely on what you’re skating.
| Wax Type | Best For | What Happens If You Choose Wrong |
|---|---|---|
| Hard Bar Wax (e.g., Mob Grip, Black Magic) | Concrete ledges, rough stone, brick. | On smooth metal, it barely transfers and feels sticky. |
| Soft/Cube Wax (e.g., Independent) | Metal rails, smooth painted surfaces, coping. | On rough concrete, it melts too fast and gums up. |
| DIY Beeswax/Paraffin Mix | Low-stakes practice spots, DIY projects. | Inconsistent hardness can vary between batches. |
Hard waxes are dense. They withstand the abrasive texture of concrete but need more force to transfer onto the obstacle. Soft waxes are formulated to melt and shear more easily on slick surfaces. For your first bar, a purpose-made skate wax recommended in a skateboard wax guide can be versatile. It works on both concrete and metal without being too temperamental.
The high-end sword manufacturer Albion recommends and uses Trewax clear paste wax for protecting carbon steel swords. That’s a clue: for a smooth, finished metal rail, a harder, purer paste wax can sometimes outperform a soft skate cube. It’s a niche pick, but it works.
DIY Skateboard Wax: What Works and What’s a Mess
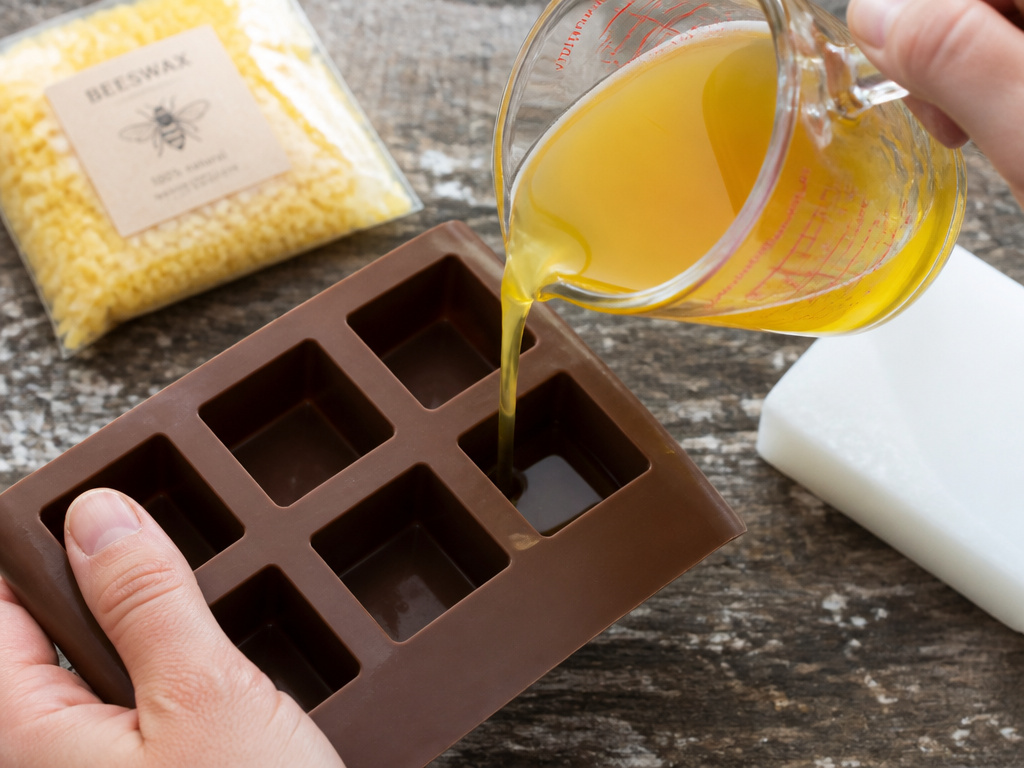
You can absolutely make your own wax. The Reddit-skater classic is a simple combo of beeswax and paraffin. The beeswax adds durability and a slight tack, while the paraffin makes it brittle enough to shear.
What you’ll need:
- Beeswax pellets or a bar (This is the backbone. Don’t skip it.)
- Paraffin wax (This makes it slide. You can find it in canning sections.)
- A double boiler or a heat-safe bowl over a pot of water (Never melt wax directly on a stove burner.)
- Silicone ice cube tray or muffin tin (For molding.)
The Process:
- Melt beeswax and paraffin wax together.
- Melt them together in your double boiler, stirring slowly until fully liquid.
- Carefully pour the mix into your molds.
- Let it cool completely at room temperature, don’t rush it with the fridge.
Where this goes sideways: Melting dollar-store candles. A forum user mentioned their husband does this, and it “works great.” It might, but you have no idea what’s in that candle, perfumes, dyes, softeners. That unknown cocktail can melt at a weird temperature, gum up on your trucks, or leave a sticky residue that attracts dirt. Beeswax and paraffin are predictable.
Your first batch will be a learning experience. If your wax is too crumbly, add more beeswax next time. If it’s too gummy and doesn’t slide well, add more paraffin. Label your batches with the ratio so you can replicate what works.
Waxing Specific Obstacles: Rails vs. Curbs vs. Ledges
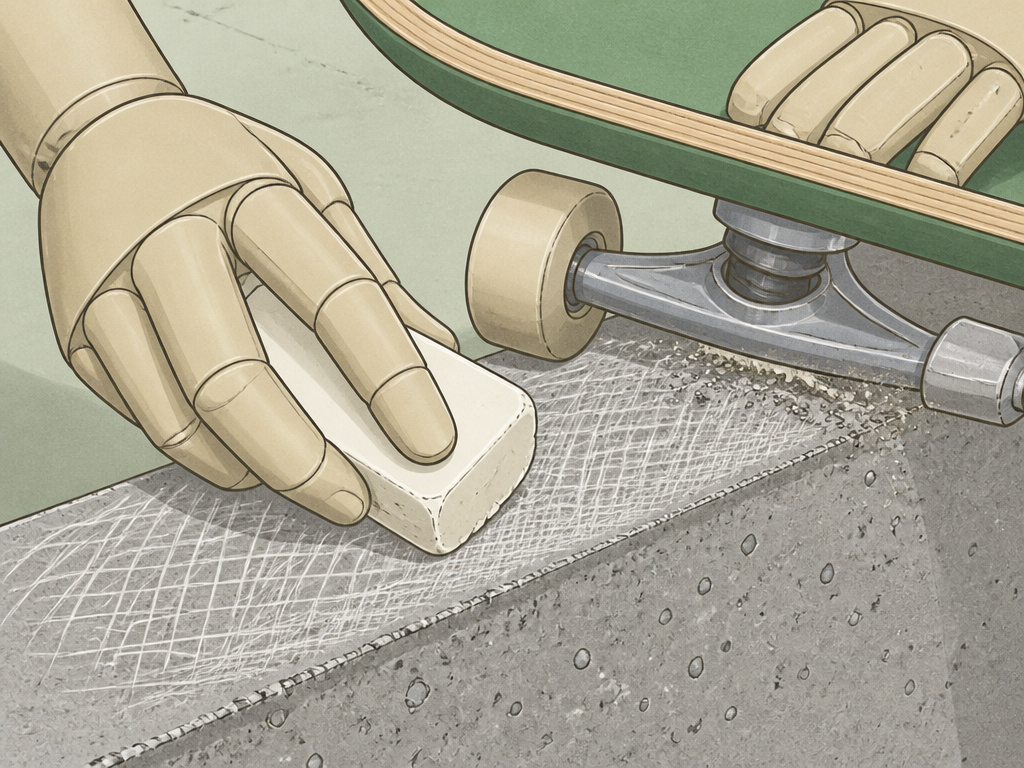
The material and texture change everything. A painted metal rail is already somewhat slick. A rough concrete curb is like sandpaper. Your approach should adapt.
For a metal rail or smooth coping: Use less wax. A few solid passes with a soft or medium wax are enough. The goal is to lay down a thin transfer film. Over-waxing here is the most common error, it makes the rail dangerously fast and can cause you to slip out on the dismount.
For a concrete curb or ledge: You’ll need more wax. Start with the cross-hatch method, then do a second, lighter pass. The concrete is porous and will absorb the first layer. Test it frequently. You’re done when your shoe slides with a consistent, light drag across the whole surface.
For a brick or stone obstacle: This is hard-wax territory. You’ll be rubbing harder and longer to get enough wax onto the rough surface. Be patient. It might take a few sessions of reapplication before the spot truly “breaks in” and becomes consistently slideable.
Common Wax Problems and How to Fix Them
The spot is too slippery.
You over-waxed or used a wax that’s too soft for the surface. Fix: Rub dry dirt, sand, or a handful of grass clippings over the waxed area. This will embed tiny particles into the wax, creating micro-texture and grip. Don’t use water, it makes a pasty mess.
The wax isn’t working; I’m still sticking.
The obstacle might be too rough or dirty, or your wax is too hard. First, clean the spot more thoroughly. If you’re still sticking, try a different wax. A hard concrete ledge might need a dedicated hard bar wax, not a general-purpose cube.
There’s a gummy, colored residue on my trucks.
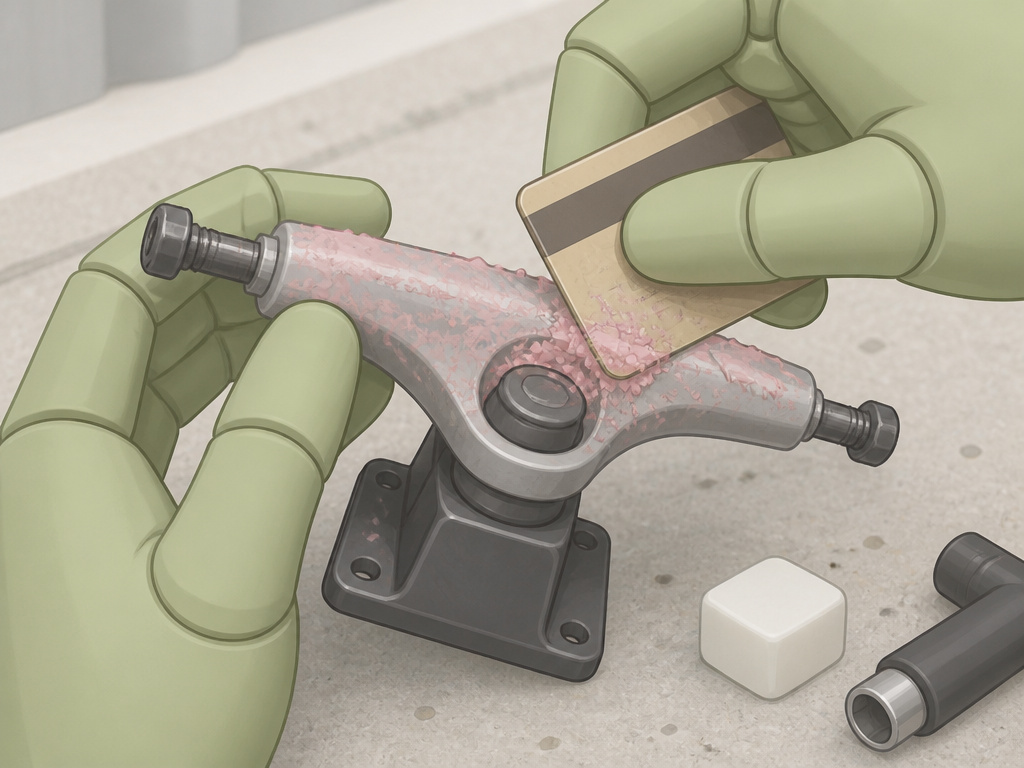
You used a scented or dyed wax. The added perfumes and colorants don’t shear cleanly and leave a residue. This gunk can actually make your trucks stickier over time. Scrape it off with a skate tool or old credit card, and switch to a plain, undyed wax for skating.
How often should I reapply wax?
There’s no set schedule. Reapply when you notice your grinds are starting to stick or sound gritty. On a popular spot, this could be every few sessions. On a less-skated curb, a waxing might last for weeks. Let the obstacle’s performance tell you.
Wax Etiquette and Safety

Waxing a spot is a shared responsibility. A well-waxed ledge is a community asset. A recklessly waxed one is a hazard.
Do:
- Test the spot yourself with shoes first.
- Use just enough wax to make it slide.
- Clean off obvious globs and drips when you’re done.
Don’t:
- Wax picnic tables, benches, or any public furniture not meant for skating.
- Wax on or near stairs where people walk.
- Leave a spot a greasy, glazed mess for the next person.
The safety part is straightforward: a spot that’s too slick is dangerous for everyone, not just you. If you wouldn’t want to accidentally step on it in regular shoes, you’ve used too much wax.
Frequently Asked Questions
What wax do skateboarders use?
Most skaters use purpose-made skate wax. These are formulated to have the right hardness and shearing quality. Some skaters make their own from beeswax and paraffin, and a few even melt down plain candles, though that’s less consistent.
How do I wax my board for the first time?
You don’t wax your skateboard itself. You wax the obstacle, the ledge, rail, or curb, you want to grind on. Applying wax directly to your board’s trucks or deck won’t help and will just make a mess.
Are you supposed to wax your skateboard?
No. Never wax the board. The wax is for the obstacle. Any wax that gets on your trucks from grinding should be cleaned off periodically with a rag or scraper to prevent gunk buildup.
What is the best recipe for skate wax?
The most reliable DIY recipe is a 1:1 mix by volume of beeswax and paraffin wax, melted together and poured into molds. It’s simple, uses predictable ingredients, and allows you to adjust the hardness (more beeswax for durability, more paraffin for slickness).
Before You Go
Wax is a tool, not a magic trick. It lowers the friction on an obstacle, but it doesn’t replace technique. A perfect wax job won’t save a sloppy grind.
Start with a small, inconspicuous curb to practice your application. Get a feel for how much pressure it takes to leave that matte, white layer. Listen to the sound your board makes when you grind, a smooth, quiet slide means the wax is working; a chattery, gritty sound means you need more or the spot needs cleaning.
One rule to take to the park: always test with your shoe before you commit the board. Your feet are the best judges of whether a spot is ready, too slick, or not ready at all. Keep a small bar of reliable best skate wax in your backpack, know how to wax a ledge properly, and you’ll never be the skater helplessly rubbing a brick wall with a melting candle again. If you do experiment with wax alternatives, test them somewhere low-stakes first. And if you make a mess, just know how to remove wax cleanly.
Go find a spot and break it in.
