
Skateboard Wall Mount Guide: Step-by-Step (Without Damage)
This post contains affiliate links. As an Amazon Associate, we earn from qualifying purchases.
To mount a skateboard on the wall, you match the method to your board’s status, active or retired, and your wall type. Gravity Grabber advocates for edge-holding racks for boards you still ride, while other brands like Rack and Ride describe mounts that work for any complete board without making that distinction. Gravity Grabber recommends through-deck mounts for retired boards, while other brands like Rack and Ride describe truck-cradling mounts for any complete board without that distinction. For example, the Rack and Ride Vertical Mount requires a 6mm drill bit and wall plugs for solid walls, and an 11mm bit and molly plugs for plasterboard/drywall.
That distinction between active and retired changes everything about how you should hang it. It’s not just about looks; it’s about preserving a tool you still use versus displaying a piece of art you don’t. For active boards, a guide that clarifies the distinction between mounts for active and retired boards is essential.
What follows is a skateboard wall mount guide to the four main mount types, the specific hardware each one needs, and the step-by-step process to get it level and secure. We’ll also cover the no-drill options for renters and the one mistake that sends boards crashing to the floor.
Key Takeaways
- Mount a board you still ride vertically on its edge using a rack that holds the deck between the trucks, like a Gravity Grabber. This protects the grip tape and graphic.
- For a retired board or bare deck, truck-cradling mounts (Rack and Ride) or through-deck mounts are fine; the board isn’t going anywhere.
- Match your hardware to your wall type: use a 6mm drill bit and wall plugs for solid walls, and an 11mm bit with molly plugs for plasterboard/drywall.
- Always check for hidden cables and pipes before drilling, and never hang an adhesive-mounted deck above a bed or seating area.
- A board’s wheelbase, typically 13-1/2 to 14-1/2 inches, determines the spacing for a pair of mounts if you’re hanging it horizontally by the trucks.
The Truck vs. Deck Decision: Active vs. Retired Boards
The first question isn’t about your wall. It’s about your board. Is it a tool you grab on Tuesday afternoon, or is it a retired piece of wall art? Your answer picks the mount.
Manufacturers disagree here, as a guide that clarifies the distinction between mounts for active and retired boards would clarify. Gravity Grabber states wall mounts that screw through the deck are for boards you’ve retired. For a board you still ride, they advocate for edge-holding racks. Other brands, like Rack and Ride, describe mounts that work for any complete board without making that distinction. This isn’t a minor detail.
Where this goes sideways: Using a through-deck mount for a board you skate regularly. The repeated pressure of taking it on and off, combined with the board’s natural flex, can stress the screw holes in the deck over time. It’s a display method, not a storage solution for an active setup.
If the board still has life in it, you want a system that holds it by the deck’s edges, between the trucks. The Gravity Grabber Mini opening is 1.5 inches. The screws go into the wall, the rubber-lined arms clamp the deck’s edges, and the graphic never touches anything. It’s storage that happens to look good.
For a board you’ve retired or a bare deck you’re displaying, you have more options. A Rack and Ride Vertical Mount cradles the board by its trucks, letting the deck rest against the wall. A Deck Dock Mounting System uses the existing truck holes in a bare deck to secure it directly to a wall block. These methods are perfect for display but aren’t designed for daily on-and-off use.
The Four Mount Types, Broken Down
You’re really choosing from four categories. Each has a job.
1. Edge-Holding Racks (For Active Boards)
These are the Gravity Grabber model. The Gravity Grabber Mini is 4.66 inches wide. You turn the board on its edge, wheels facing out, and lower the deck between the trucks into the rack’s opening.
- Best for: Boards you ride regularly.
- Hardware: The Gravity Grabber Mini uses three 1.25-inch screws and three anchors per rack. Each rack is its own 30 lb mount, and a complete skateboard is well under that.
- Spacing: The Gravity Grabber Mini is 4.66 inches wide.
2. Truck-Cradling Mounts (For Retired Completes)
These hold the board by its wheels or trucks. The Rack and Ride Vertical Mount is a rail the trucks sit onto. The ModWall Sport mount is a cradle that the wheels drop into. The board hangs flat against the wall.
- Best for: Retired complete boards, long-term display.
- Hardware: Varies by wall. The Rack and Ride manual specifies a 6mm drill bit and wall plugs for solid walls, and an 11mm drill bit with molly plugs for plasterboard.
- Sizing: ModWall Sport makes a “V-375” for standard 3.75-inch trucks and a “V-600” for 6-inch cruiser/longboard trucks. You must pick the V-375 for 3.75-inch trucks or the V-600 for 6-inch trucks.
3. Through-Deck Systems (For Bare Decks)
These are for decks only, no trucks attached. The Deck Dock Mounting System uses blocks that bolt through the deck’s existing truck holes. The block then attaches to the wall.
- Best for: Displaying bare decks, artwork-focused setups.
- Hardware: Deck Dock includes wall plugs, metal screws, and plastic screws for permanent mounting. It also includes 3M Command non-marking removable tape for a temporary, no-drill option.
- Limitation: The Deck Dock system only caters for mounting decks, not with parts attached. Don’t try to use it with trucks on.
4. No-Drill Options (For Renters)
These avoid wall damage entirely. They lean on adhesive technology or standalone furniture.
- Adhesive Strips: Heavy-duty removable picture strips (like 3M Command) can hold a bare deck. A bare 7-ply skateboard deck weighs roughly 1 kg. The risk is the force applied to the strips and paint damage.
- Picture Ledges or Shelves: Let the deck lean against the wall, secured by a lip. Zero wall damage, easy to rearrange.
- Floor Stands: No wall contact at all.
| Mount Type | Best For | Wall Damage | Board Contact | Ease of Removal |
|---|---|---|---|---|
| Edge-Holding Rack | Active boards | Screw holes | Deck edges only | One-handed, instant |
| Truck Cradle | Retired completes | Screw holes | Trucks/wheels | Two-handed, lift up |
| Through-Deck System | Bare decks | Screw holes or none | Inside truck holes | Requires tool to unbolt |
| No-Drill (Strips/Ledge) | Renters, temporary | None (if strips) | Full back of deck | Pull tab (strips) or simply lift |
Tools and Materials You’ll Actually Need
Skip the fancy kits. Your list depends on your chosen mount and your wall.
For Any Screw-In Mount:
- Mount itself (e.g., Rack and Ride Vertical Mount, HIDEit DSkate).
- Drill/Driver
- Level (a small 9-inch torpedo level is perfect)
- Pencil
- Measuring Tape
- Safety Glasses (wear appropriate personal protective equipment when installing)
Wall-Specific Hardware:
This is the most important part. Using the wrong anchor is why mounts fail.
The part nobody mentions: Plasterboard (drywall) is hollow. A standard wall plug just spins. You need an anchor that spreads out behind the wall, like a molly plug or a toggle bolt. The Rack and Ride assembly instructions specify an 11mm drill bit and molly plugs & screws for plasterboard/drywall.
| Wall Type | Drill Bit Size | Anchor Type | Example Mount Spec |
|---|---|---|---|
| Solid Wall (Brick, Concrete, Stud) | 6mm | Wall plug (plastic or nylon) | Rack and Ride: 6mm bit, wall plugs (A), screws (B) |
| Plasterboard / Drywall | 11mm | Molly plug or heavy-duty self-drilling anchor | Rack and Ride: 11mm bit, molly plugs & screws (C) |
| Any Wall (No Drill) | N/A | 3M Command Strips | Deck Dock includes strips rated for the weight. |
For Through-Deck or Adjustments:
- Phillips Head Screwdriver: For tightening the Deck Dock’s plastic screws or adjusting truck tightness after mounting.
- Allen Keys / Skate Tool: If your mount uses hex bolts.
Mounting Step-by-Step
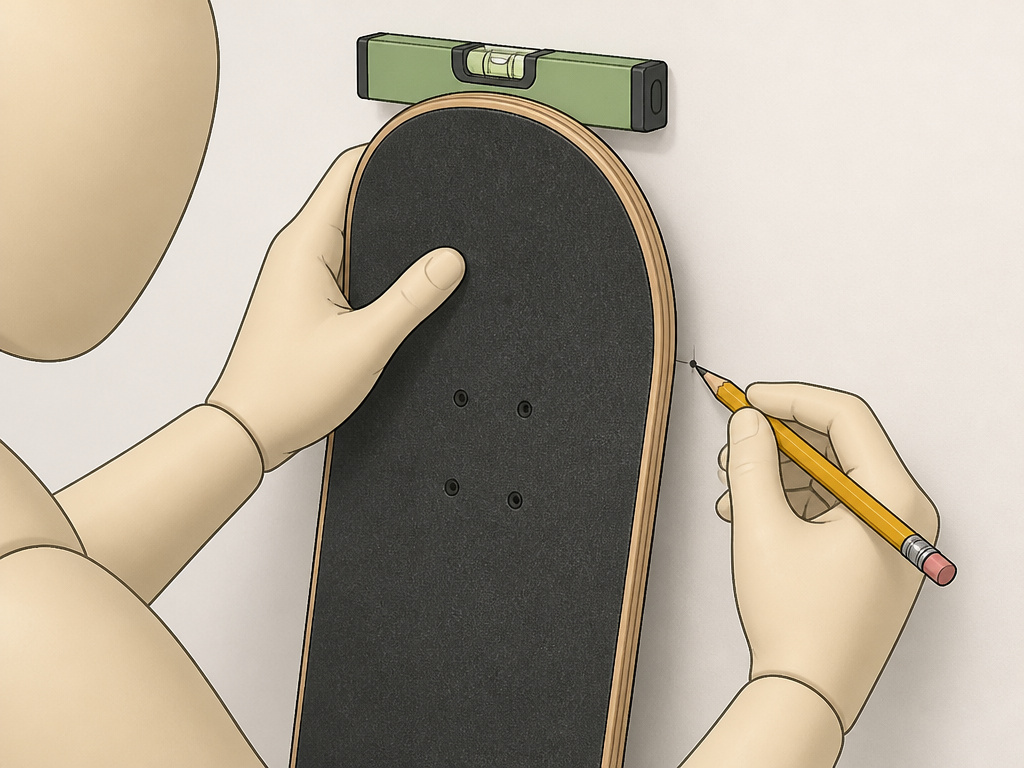
The process is similar for most screw-in mounts. The differences are in the prep.
1. Plan and Mark
Hold the board (or just the deck) against the wall in the position you want. For a Gravity Grabber-style edge mount, hold the board vertically with the tail near the floor and mark where a rack between the trucks would sit. Use the level on top of the mount itself, then mark the screw holes with a pencil.
- Spacing for Two Mounts: If you’re using a pair of cradles (like for a DIY horizontal mount), measure your board’s wheelbase, the distance between the trucks. A typical skateboard wheelbase is between 13-1/2″ and 14-1/2″.
2. Drill and Anchor
Before you start: Check the wall for hidden electrical cables and water pipes. If you hit resistance that isn’t uniform like wood or masonry, stop. Put on your safety glasses. Drill your holes straight and perpendicular to the wall using the recommended drill-bit diameter.
3. Fix and Hang
Screw the mount securely to the wall. Don’t overtighten, you can strip the anchor or crack the mount. For a Rack and Ride mount, before letting go of the board, make sure both trucks are fully and securely seated on the rail.
4. Final Adjustments
Stand back. Is it level? Does the board sit flush? With the Deck Dock system, if the tail of your board touches the wall, back off the plastic screws slightly and move the board back from the wall. For boards with high curvature, HIDEit suggests positioning the bar closer to the bottom bushing of the trucks instead of the base of the trucks for a more secure hold.
Common Mistakes and How to Avoid Them

I’ve seen these happen. They’re easy to prevent.
Mistake 1: Using the Wrong Anchor
The classic error. Putting a plastic wall plug into drywall. It feels tight as you screw it in, but it’s just chewing up the drywall inside. The fix is in the table above: molly plugs or toggles for hollow walls.
Mistake 2: Mounting Too High (or Too Low)
Aesthetic, but also functional. For kids’ boards, mount lower so they put it back themselves. Think about daily use.
Mistake 3: Ignoring Board Clearance
This is for edge mounts and longboards. When you slide the deck into a Gravity Grabber rack, the wheels and trucks hang above and below. Give a wide longboard a little more room on each side when mounting. Dry-fit the board before finalizing screw holes.
Mistake 4: Overtightening Everything
From the Rack and Ride manual: “Do not overtighten the screws, and retighten them after some time of use if needed.” Overtightening can split wood mounts, strip plastic threads, or crush drywall anchors, reducing their grip. Snug is sufficient. You can always tighten it more later if it loosens.
Mistake 5: Poor Long-Term Placement
A dry place that is away from moisture and out of high-traffic areas is ideal for skateboard storage. Sunlight will fade graphics over time. A mount right next to a radiator or in a damp basement isn’t doing your deck any favors. Also, never hang a deck with adhesive strips above a bed or seating.
Frequently Asked Questions
Can you hang a skateboard without drilling?
Yes, with caveats. You can use heavy-duty removable adhesive strips (like 3M Command) on a smooth, painted wall for a bare deck. The Deck Dock system includes this tape. You can also use a picture ledge or a free-standing floor stand. These options are best for renters or temporary displays.
How much weight can a skateboard wall mount hold?
It depends on the mount and the wall. The Rack and Ride Vertical Mount has a max load of 8 kg (depending on wall type). The Gravity Grabber rack is rated for 30 lbs per rack. A complete skateboard is well under both limits. The weak point is almost always the wall anchor, not the mount itself.
What’s the best way to hang a skateboard with the graphic showing?
For the full graphic to face out, you need to hang the board vertically on its edge. An edge-holding rack like the Gravity Grabber is designed for this. The board stands upright, wheels to the side, and the full deck graphic is visible. Horizontal mounts typically have the board flat against the wall, hiding the graphic.
How do you hang a longboard on the wall?
The principles are the same, but you need a mount sized for wider trucks. The ModWall Sport “V-600” model is made for 6-inch wide trucks common on cruisers and longboards. An edge-holding rack like the Gravity Grabber OG will also work, but give the longboard more side room so the wheels don’t bump adjacent walls or objects.
Is it bad to hang a skateboard by its trucks?
For a board you no longer ride, it’s fine. Truck-cradling mounts are designed for this. For a board you still skate, hanging by the trucks allows the deck to swing and slap against the wall, which can damage the tail and graphic over many cycles. It’s better to hold the deck itself.
Before You Go
One rule cuts through all the options: if you’re going to skate it, don’t mount it in a way that stresses the deck or makes it a chore to take down. The edge-holding rack is the tool for that job. For everything else, the retired board, the art piece, the vintage deck, pick the method that shows it off without worrying about wear.
The other essential factor is your wall. Spend the two minutes to identify what it’s made of and use the correct anchor. That’s the difference between a display that lasts for years and a phone call to a drywall repair guy. Now, go clear a spot on that wall. Your board’s waiting.
