
Skateboard Tool Guide: Sizes, Uses & How to Choose
This post contains affiliate links. As an Amazon Associate, we earn from qualifying purchases.
A skate tool is a single-handled, multi-function wrench designed for skateboard maintenance. Its standard sockets fit truck and wheel nuts, and its built-in screwdriver tightens hardware. The right tool prevents stripped bolts and allows you to adjust your setup anywhere.
That single tool replaces a drawer of separate wrenches and screwdrivers. You carry one thing, not six. The difference between a smooth session and a trip home early often comes down to a loose truck you can’t fix on the spot, which is why a skateboard tool guide is essential.
What follows: the standard sizes you need, a step-by-step walkthrough for trucks and wheels, and how to pick a tool that lasts. We’ll also cover the extra tools that matter for electric boards and how to deal with the most common hardware failure.
Key Takeaways
- The 3/8″, 1/2″, and 9/16″ sockets fit virtually all truck and wheel nuts. A tool missing one of these sizes is incomplete.
- Tighten the axle nut all the way, then back it off a touch so the wheel spins freely with almost no side-to-side play. This is the single most important wheel-installation step.
- For electric boards, add a set of Allen keys or hex wrenches to access motor mounts and belt tensioners.
- Never loosen the kingpin nut so far that it barely hangs on. Keep the nut fully threaded onto the kingpin, or it can work its way off while you ride.
- A simple silicone-based lubricant is the right choice for truck pivots and bushings. Oil-based lubes attract dirt and grit.
Standard Skate Tool Sizes & What They Fit
A skate tool isn’t a mystery. It’s three socket sizes and a screwdriver. Get those right, and you can handle 95% of skateboard maintenance.
If a tool is missing one of these, skip it. You’ll end up carrying a separate wrench anyway, which defeats the purpose of a complete skateboard tool guide.
The 9/16″ socket fits the kingpin nut, the 1/2″ socket fits the axle nut, and the 3/8″ socket is a backup for older hardware. A tool missing any of these three is not a complete skate tool.
Some tools include a flathead, but it’s less critical. The real test is whether the screwdriver tip is hardened steel. A soft tip will strip the heads of your hardware after a few uses, turning a simple tighten job into a extraction nightmare.
When you’re looking at a tool, spin the sockets. They should turn smoothly. Grip the handle—it should have some texture. A perfectly smooth, chrome-plated handle will slip out of your hand the first time you try to loosen a nut that’s been on there for a year. I learned this the hard way.
How to Use a Skate Tool: Trucks, Wheels & Hardware
Using the tool is straightforward, but a few specific techniques save your hardware and your knuckles. Here are the main jobs.
Adjusting Your Trucks
The kingpin nut lives inside the truck hanger. Fit the 9/16″ socket over it. To tighten (make trucks stiffer), turn clockwise. To loosen (make trucks more carvy), turn counter-clockwise. The key is to go a quarter-turn at a time, then test ride. Cranking it down all the way will squash the bushings and kill any turnability. On the flip side, going too loose creates speed wobbles.
Where this goes sideways: Loosening the kingpin nut until only a thread or two is engaged. The nut can vibrate off mid-ride, causing the truck to disassemble itself at speed. Always keep the nut fully threaded on.
Some manuals, like the Parsec Aero manual, specify using a small amount of silicone-based lube here, not oil-based. Oil attracts dirt and turns into grinding paste.
Installing Wheels and Bearings
This is where most people overtighten. The process is simple: slide a bearing onto the axle, press the wheel on, add the second bearing, then put on the washers and nut. The Skate Labs guide gives the perfect final step: Tighten the axle nut all the way, then back it off a touch. You want the wheel to spin freely for a few seconds when flicked, with the tiniest amount of side-to-side play. If you crank it down tight, you pinch the bearings and they’ll grind themselves to dust in a week.
I used to tighten by feel and hope for the best. Over time, I had a loose nut here and a stripped thread there. A skate tool and a quick check every session, as outlined in a skateboard tool guide, replaced that habit. Now, I give the axle nut a final quarter-turn counter-clockwise after it’s snug. The wheel rolls better, and the bearings last months longer.
For a full walkthrough on this process, our guide on how to install skateboard wheels breaks it down step-by-step.
Tightening Deck Hardware
Use the Phillips screwdriver to secure the eight bolts that hold your trucks to the deck. The goal is firm, not Hercules-tight. You’re compressing seven layers of maple; over-tightening can cause the wood to dimple or crack around the bolt head. Tighten until the bolt head is flush with the grip tape, then give it one more gentle quarter-turn. If you’re installing new trucks, our skateboard hardware installation guide covers the right bolt length and sequence.
T-Tool vs. Y-Tool & How to Choose One
The two main shapes are the T-tool and the Y-tool (sometimes called a triangle tool). The difference isn’t just looks—it changes leverage and portability.
My personal reach is for a T-tool. The extra mechanical advantage matters when an axle nut is rusted on, and I don’t mind the slight bulk. But if you’re a minimalist who just wants to tweak truck tightness at the park, a Y-tool is a fantastic choice. For a deeper look at the trade-offs, check our analysis of skateboard multi-tool pros and cons.
Our best skate tools list highlights models that pass this test.
Tool Maintenance, Stripped Nuts & Electric Board Upgrades
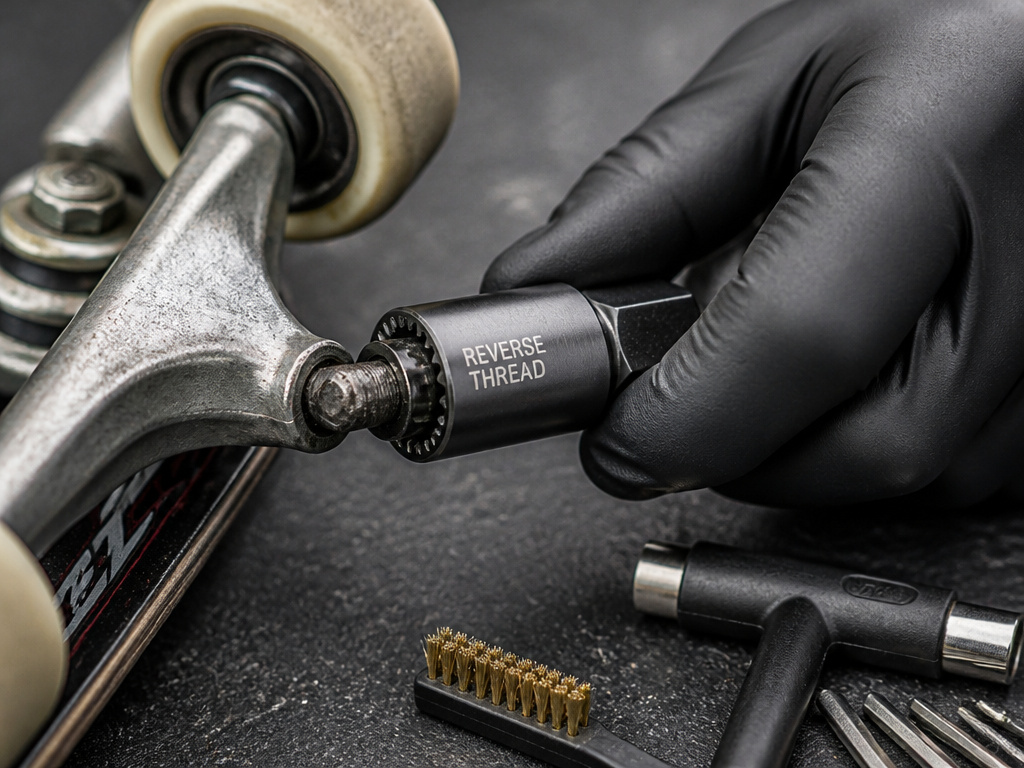
Your skate tool needs care too. Wipe it down with a dry cloth after use, especially if your hands were sweaty or the pavement was wet. A little surface rust on the tool can transfer to your axle nuts, making them harder to remove next time. If it does get rusty, a light scrub with a brass brush or some fine steel wool will clean it up.
Dealing with Stripped Nuts
This is the most common hardware headache. It happens when you use the wrong size socket, a worn tool, or just brute force. If the nut is rounded but the axle threads are okay, a rethreader tool can save you. It’s a small, reverse-threaded socket that bites into the damaged nut as you turn it counter-clockwise. You can find these as standalone tools or as an extra feature on some premium skate tools.
Electric Skateboard Specifics
Electric boards add a few more fasteners. Motor mounts, belt covers, and battery enclosures often use Allen (hex) bolts. The most common sizes are 2mm, 2.5mm, 3mm, and 4mm. Your standard skate tool won’t have these. This means your skate tool kit needs an expansion: a small set of hex keys or a multi-bit driver.
Torque matters more on e-boards. Overtightening a motor mount bolt can strip threads in the deck or mount. Under-tightening can let the motor shift, throwing off belt alignment. Some brands, like Linn Power, publish exact specs: their kingpin screw (M5 x 16mm) requires 10–12 N·m of torque with Loctite 243. Without a torque wrench, that’s hard to hit. The practical takeaway is “firm, plus a little more,” and always use thread-locker on critical fasteners. For the full scope of what you might need, our list of tool alternatives includes hex keys and drivers.
Some manufacturers, like Parsec, recommend lubricating bearings every 300 miles or 500 km. Your basic skate tool gets the wheel off; a bearing press or a clean axle makes putting new ones in much easier.
The Complete Toolkit Beyond the Multi-Tool
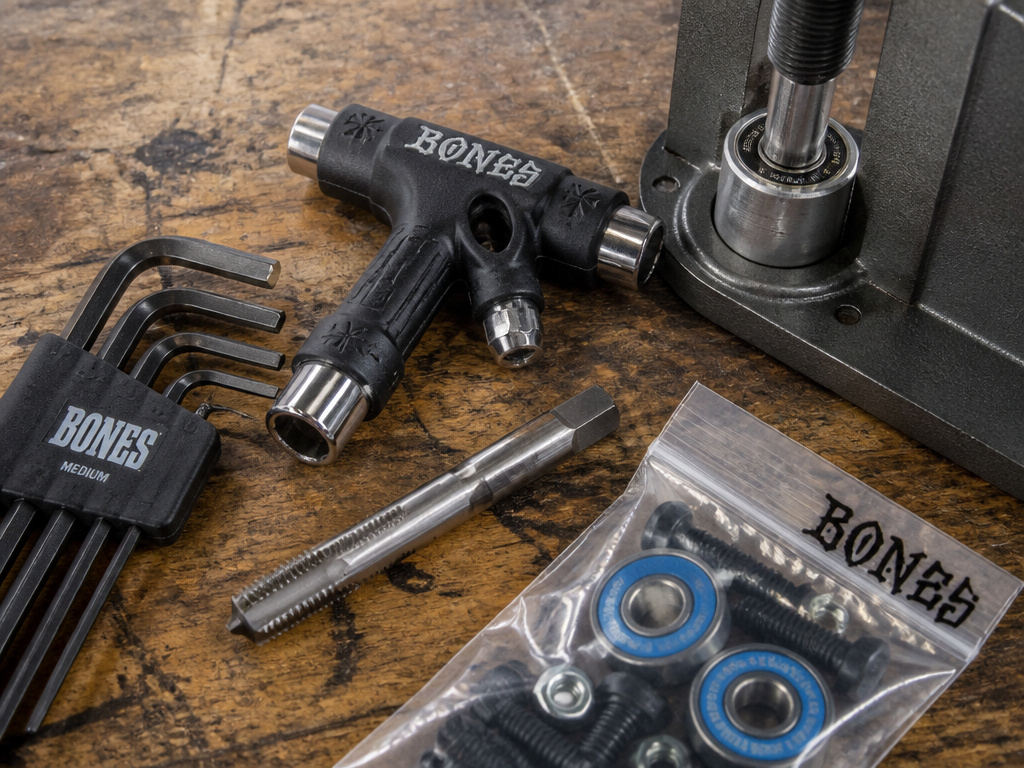
A skate tool handles the basics, but a full setup requires a few more items. You don’t need them every day, but when you do, they’re invaluable.
I have carried a pocket skate tool for years. It allows me to fix a loose truck or swap a bolt right at the spot. That small habit has saved me from cutting sessions short many times. But in my car or at home, I keep a small toolbox with the extras: a bearing press, a rethreader, hex keys, and a bag of spare parts. The multi-tool is for the field; the toolbox is for the workshop.
Frequently Asked Questions
Can I use regular wrenches instead of a skate tool?
You can, but it’s less convenient. You’d need separate wrenches for the 9/16″ and 1/2″ nuts, plus a screwdriver. You’ll also lack the recessed slot for bearing work. A skate tool consolidates all that into one, pocket-sized package. For a list of what might work in a pinch, see our page on household skate tool alternatives.
How do I know if my skate tool is worn out?
Do I need a skate tool as a beginner?
Yes, from day one. Learning involves adjusting your setup. Trucks that are too tight make turning hard; wheels that are too loose can fall off. A skate tool allows you to adjust the board to your comfort level, which is crucial for building confidence. You can learn the fundamentals of adjustment with our T-tool usage guide.
Are expensive skate tools worth it?
What’s the one thing a skate tool can’t do?
The Bottom Line
Get a single, solid skate tool with the three socket sizes and a screwdriver. Use it to keep your trucks adjusted, your wheels spinning free, and your hardware tight. For electric boards, add a set of hex keys to your kit.
The real habit is the quick check before you ride. Thirty seconds with the tool can catch a loose nut that would have sent you walking home. It turns maintenance from a chore into a simple ritual that keeps your board rolling smoothly.
Go tighten one thing on your board today.
