
What to Do When a Skateboard Deck Cracks?
This post contains affiliate links. As an Amazon Associate, we earn from qualifying purchases.
When a skateboard deck cracks, you have three choices: ignore it, repair it, or replace it. The right move depends on the crack type. Minor stress cracks around the truck bolts are normal wear and often safe to skate; deep structural cracks across the deck’s width are a failure point that requires immediate replacement. For chips and small cracks, a wood putty repair can extend the deck’s life, but note that warranty implications vary (Stoked Ride Shop warns it can void the warranty, while NHS excludes stress cracks from coverage).
That split between “normal” and “dangerous” is where most guides stop. They’ll tell you epoxy fixes cracks. They won’t tell you that the NHS warranty explicitly excludes stress cracks, or that the iFixit repair guide specifies letting wood putty dry for an hour or more. Knowing what to do when a skateboard deck cracks is the line between a board that lasts another month and one that snaps under your feet.
What follows: a clear breakdown of crack types, a sourced repair method from iFixit and Decathlon, the warranty implications you must know, and a final call on when to spend $10 on putty versus $50 on a new deck.
Key Takeaways
- Stress cracks around truck bolts are common and often cosmetic; structural cracks across the deck width are a safety hazard and mean replace immediately.
- The NHS warranty does not cover stress cracks, and the Stoked Ride Shop blog warns that riding a damaged board can void a manufacturer’s warranty.
- For chip repairs, use wood putty or filler (per iFixit and Decathlon guides); drying times vary (iFixit suggests an hour or more, while Decathlon advises checking the product label).
- Perform a pre-ride check inspired by the RazorX manual, which recommends checking the deck for cracks, inspecting wheels periodically, and ensuring all hardware is secure before every ride.
- Store your board in a cool, dry place out of direct sunlight (per Skate The Foundry) to prevent UV and moisture damage that accelerates cracking.
The Two Types of Cracks: Stress vs. Structural
Not all cracks are created equal. Mistaking one for the other is how people end up skating on a time bomb or retiring a perfectly good deck too soon.
Stress cracks (often called pressure cracks) are the fine, web-like lines that radiate from the truck bolts. They appear in the top ply of wood. You’ll see them after a few months of hard riding, especially if you land tricks off-center or have your trucks cranked down tight. The Reddit community calls them a normal part of deck life. One user noted their deck with pressure cracks lasted another two months before they changed it, and it never snapped.
Common mistake: Treating all cracks as equally dangerous. Stress cracks are a wear indicator, not a failure point. Riding on them is usually fine, but they signal your deck is aging.
Structural cracks are different. They run through multiple plies, often across the width of the deck, and you can sometimes feel them flex when you press on the board. A loud crack during a hard landing is a classic sign. The Skate Labs guide is blunt: “A cracked deck can snap, so retire it.” This is the failure mode that leads to a broken deck mid-trick.
| Crack Type | Appearance | Location | Risk | Action |
|---|---|---|---|---|
| Stress / Pressure Cracks | Fine lines, spider-web pattern | Around truck bolts, top ply only | Low | Monitor. Can keep skating. |
| Structural Crack | Deep, visible gap, may flex | Anywhere, often across deck width | High | Stop riding. Replace deck. |
| Chip / Splinter | Missing chunk of wood, sharp edge | Nose, tail, or edge | Medium | Repair with wood putty or replace if large. |
Tap the deck near the crack. Tap the deck near the crack. A solid thunk means the wood layers are still bonded. A hollow click or a visible separation suggests delamination, a structural problem.
What the Manufacturers Say: Warranty and Replacement Rules
This is where the online repair advice collides with the fine print. Manufacturers have strict rules, and ignoring them can cost you.
The NHS warranty (covering brands like Santa Cruz, Independent) has specific terms and explicitly states: “This warranty does not apply to damage resulting from impact or improper use, stress cracks, water damage, user error, improper set up or maintenance, or normal wear.” It explicitly states: “This warranty does not apply to damage resulting from impact or improper use, stress cracks, water damage, user error, improper set up or maintenance, or normal wear.” In their view, stress cracks are normal wear, not a defect. Their maintenance page simply says to “replace the deck or any individual components when worn.”
Ookkie Skateboards takes a harder line. Their maintenance guide states: “Inspect your deck regularly for chips or cracks. If any are found, discontinue use and replace.” They also warn that modifications or using non-Ookkie components will invalidate your warranty.
Meanwhile, repair guides from iFixit and Decathlon advocate fixing chips with wood putty or filler. Retailer blogs like Stoked Ride Shop even detail methods for reinforcing pressure cracks with plywood or epoxy. This creates a direct conflict: the brands say replace, the DIY community says repair.
Where this goes sideways: Riding a board you’ve repaired. The Stoked Ride Shop blog warns that “riding a damaged skateboard can void the manufacturer’s warranty.” If you need to make a warranty claim, a botched repair job gives them an easy out.
The takeaway? Repair for yourself, not for the warranty. If your deck is under 120 days old and has a major crack, contact the manufacturer before you break out the epoxy. For an older deck or one with minor damage, a careful repair is a practical way to squeeze out more sessions when you know what to do when a skateboard deck cracks.
Your Repair Options: From Duct Tape to Wood Putty
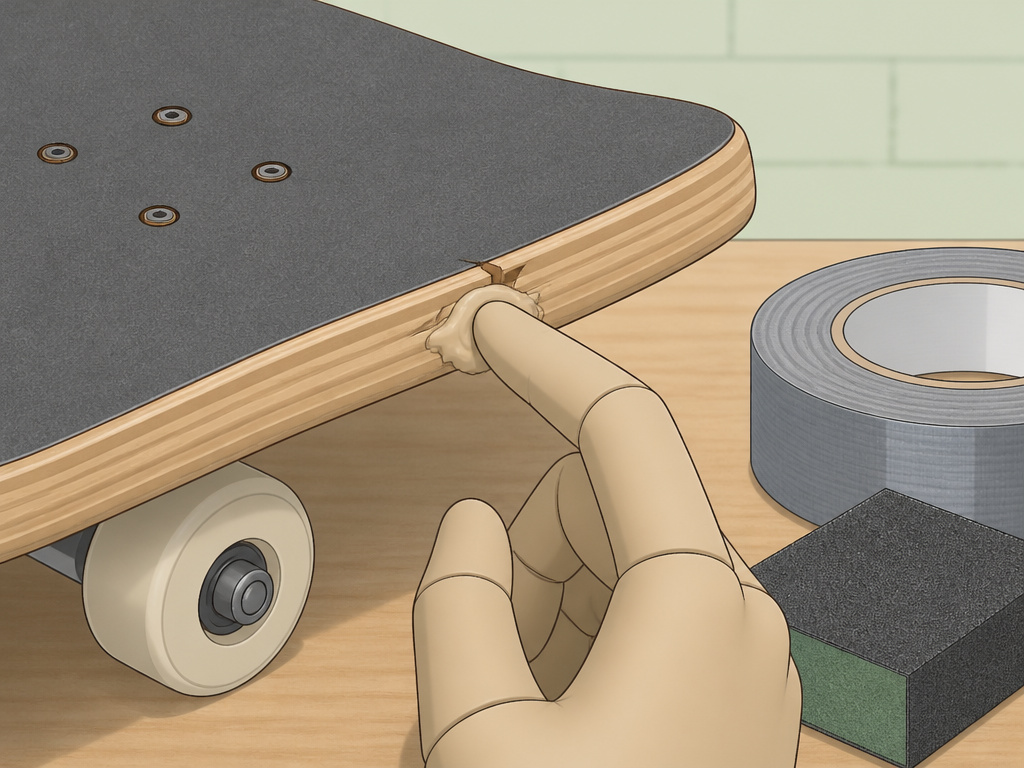
When you decide to repair, the method depends on the damage and how much longer you want the deck to last, which is the core of what to do when a skateboard deck cracks. The goal is to restore strength and a smooth surface, not to make it look brand new.
Temporary Fix: Duct Tape
For a crack that’s gone most of the way through the deck, a few wraps of duct tape can get you home or through one more session. It’s the classic field fix. Overlap the tape generously for strength. Understand this is a bail-out move. The deck will be weaker and more flexible at that spot. It’s a solution measured in hours, not weeks.
Permanent Repair for Chips: Wood Putty/Filler
For chips, splinters, and small cracks, wood putty is the go-to. The iFixit repair guide specifies using wood putty, a sanding sponge, and letting the putty dry for an hour or more. Decathlon’s German repair guide recommends Holzpaste oder Spachtelmasse (wood paste or filler) and advises checking the product label for drying time.
Here’s the combined, sourced procedure:
Step-by-Step: Repairing a Chip with Wood Putty
- Remove the Grip Tape. Use a hairdryer to warm the adhesive and peel it back carefully. If the chip is on the edge, you might only need to peel back a corner.
- Clean the Area. Brush away all dirt and loose wood fibers with a stiff brush. A dry toothbrush works. The Decathlon guide emphasizes this step to ensure the filler bonds.
- Apply the Filler. Press wood putty or paste firmly into the chip, overfilling slightly. Both iFixit and Decathlon note you’ll sand off the excess later.
- Let it Dry. This is the variable step. IFixit says an hour or more. Decathlon says to wait for the filler to dry (check product label). For deep fills, 2-3 hours is safer.
- Sand it Smooth. Once fully dry, use a sanding sponge (iFixit) or old grip tape/sandpaper (Decathlon) to level the patch with the deck surface.
- Re-apply Grip Tape. If you removed it, lay down new grip tape. If you only lifted a corner, carefully re-stick it, ensuring no bubbles over the repair.
I learned the hard way that skipping the full dry time is a waste. I patched a tail chip and was too eager to skate. The putty was soft underneath, and my heel dug right through it on the first push-off. That extra hour of patience would have saved the repair.
For larger cracks: Epoxy and Reinforcement The Skateboards.com blog details an epoxy repair for cracks that haven’t broken the deck in half. It involves cleaning the crack, injecting epoxy, and letting it set for 24 hours before sanding, though other sources recommend different drying times for repair materials. For pressure cracks, the Stoked Ride Shop blog suggests adding an extra layer of plywood or reinforcement bars underneath the deck, glued and screwed in place.
These are more advanced repairs. They add weight and can affect the board’s pop and your ability to grind. If you’re doing complex tricks, a repair this invasive might change the deck’s feel enough to hinder your progress. Sometimes, the most skilled repair is knowing when to change your deck.
The 5-Minute Pre-Ride Check That Prevents Catastrophe
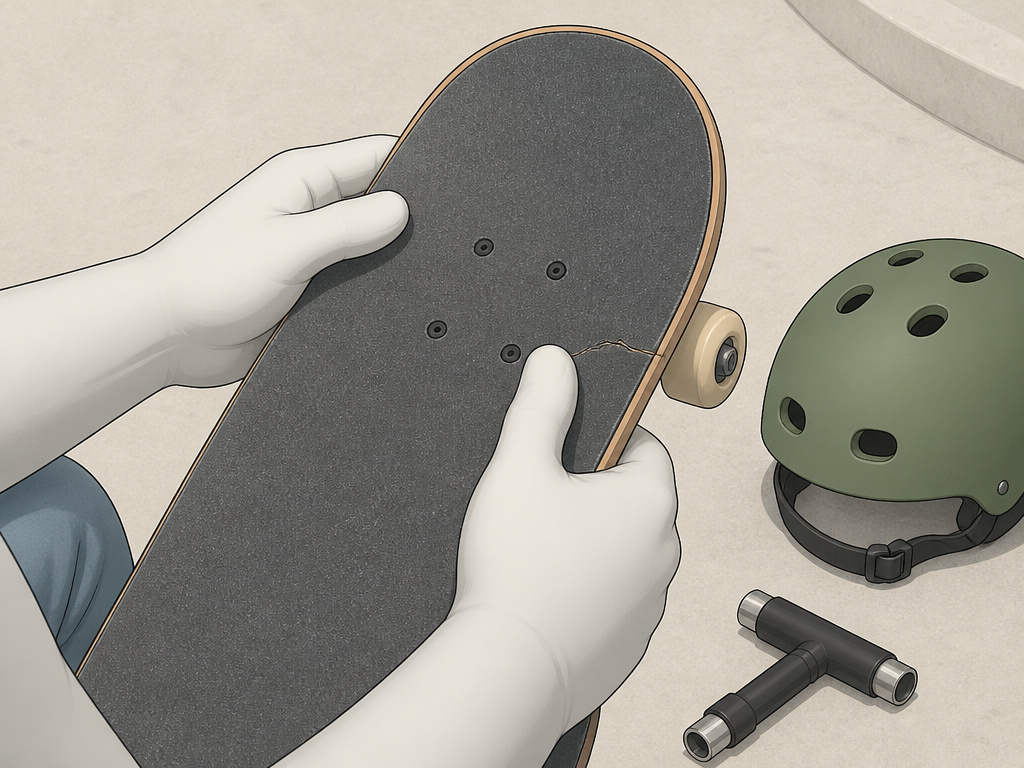
The best repair is the one you never have to make. Building a quick inspection into your routine catches small problems before they become big ones.
The RazorX Cruiser Electric Skateboard manual has a rigorous pre-ride checklist, and it recommends checking the deck for cracks or broken connections before every ride.
- Deck: “Check for cracks or broken connections.” Do this before every ride.
- Wheels: “Periodically inspect the wheels for excessive wear.”
- Hardware/Loose Parts: “Before every ride, check all parts, such as nuts, bolts, fasteners, etc., to ensure they are secure.”
- Safety Gear: Always wear your helmet and pads.
- Laws and Regulations: Know where you’re allowed to skate.
For a standard skateboard, simplify it. Before you step on, glance at the deck around the trucks. Give each wheel a spin to listen for gritty bearings. Shake the board lightly, any rattles mean a nut needs tightening with your skate tool. This 30-second habit, done every session, is more effective than a frantic hour-long overhaul every six months.
When to Repair vs. When to Replace: A Cost-Benefit Look
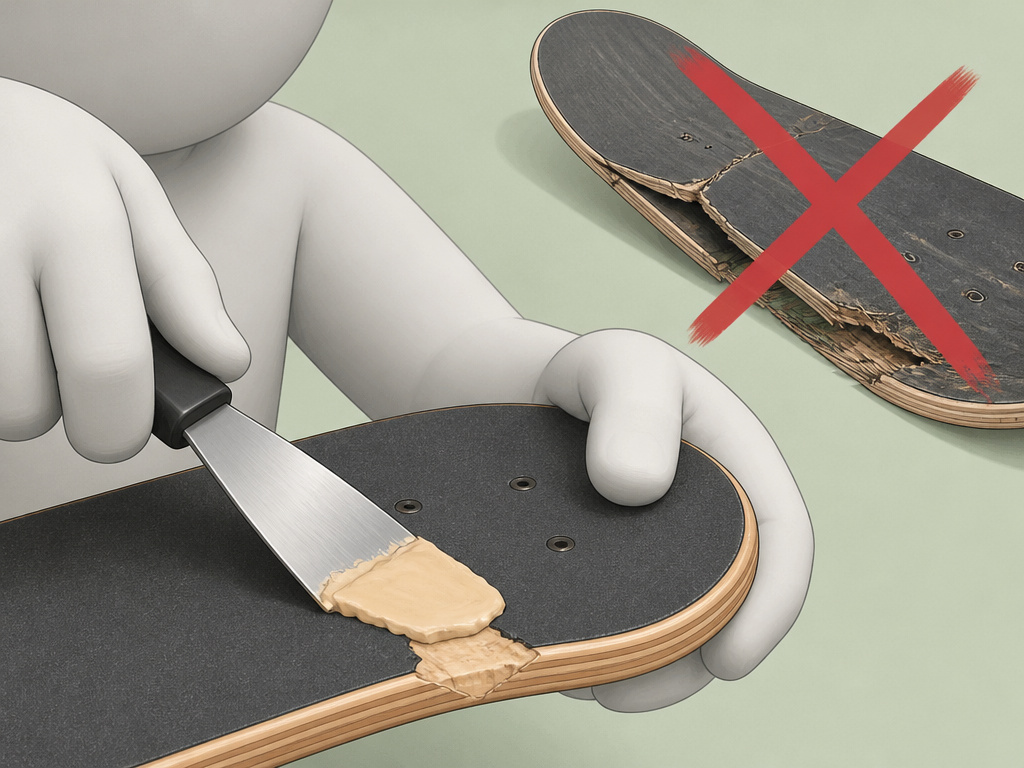
This is the core decision. We can examine this using the available data.
Repair makes sense when:
- The damage is a chip or shallow crack (not structural).
- The deck still has good pop (it feels snappy when you tail press).
- The cost of materials (wood putty, sandpaper) is relatively low.
- You’re comfortable with a DIY project.
- The deck is out of warranty or the damage isn’t covered.
A successful repair of a chipped deck can add weeks or even months of life. It’s a great skill to learn and can extend your deck’s life significantly.
Replacement is the only safe choice when:
- There’s a deep structural crack or the deck is visibly bent.
- The deck feels dead and soggy with no pop.
- The tail is worn to a sharp razor tail that affects braking and pops.
- The board has been waterlogged, causing layers to delaminate.
- You rely on your board for commuting or high-impact tricks.
The part nobody mentions: A repair adds weight and often stiffness in one localized area. For a beginner learning to push and turn, this is irrelevant. For an intermediate skater working on flip tricks, that changed balance point can throw off muscle memory. A repaired deck is a functional deck, not necessarily a performance-identical one.
Consider your own progression. If you’re trying to land kickflips consistently, a fresh deck with predictable pop might be worth the investment. If you’re just cruising, a repaired deck is perfectly fine. Knowing the signs of deck wear helps you make this call before the deck fails.
How to Fix a Cracked Skateboard Deck
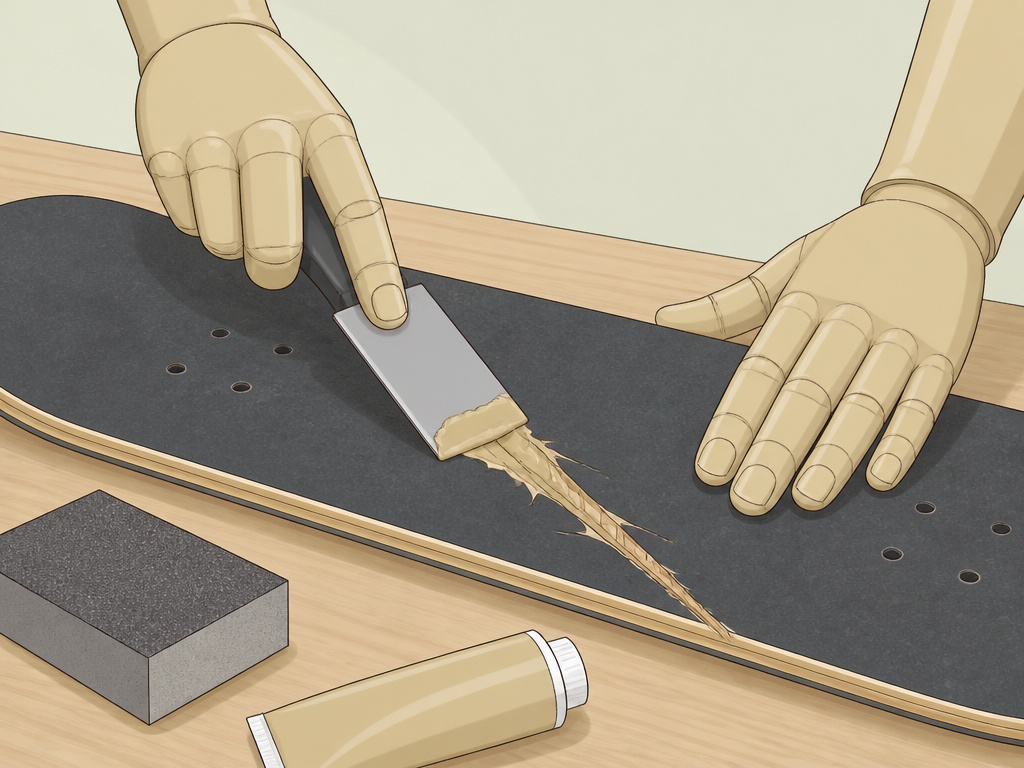
Start by cleaning the crack area thoroughly. Apply a wood filler or paste into the crack, pressing it deep to ensure it bonds. Use a flat tool to scrape away any excess material so the surface is smooth and level. Let the filler dry completely; drying times vary, so check the product label for specifics. Once dry, use a sanding sponge to smooth the repaired area flush with the deck’s surface. Remember that a cracked deck can snap, so consider this a temporary fix and inspect it carefully before each ride.
What You Need to Repair a Skateboard Crack
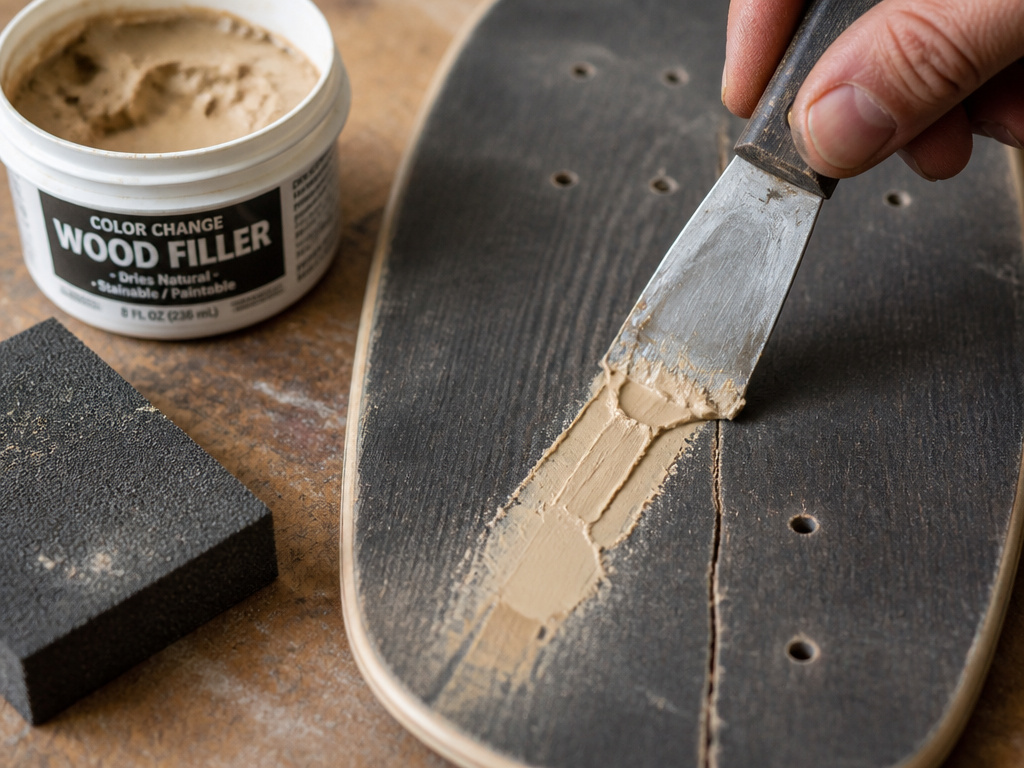
To attempt a repair, you will need a few basic items. You’ll require a wood filler or paste specifically designed for wood repairs. A sanding sponge is necessary for smoothing the dried filler. Have a tool for applying and scraping the filler, like a putty knife. It’s also practical to have a skate tool handy for removing and reattaching trucks if needed. Keep in mind that repairs using non-original parts or modifications can void your board’s warranty, and stress cracks are typically not covered.
Frequently Asked Questions
Can you fix a cracked skateboard?
Yes, but it depends on the crack. Minor stress cracks don’t need fixing. Chips and small cracks can be repaired with wood putty or epoxy. A deck that is cracked across its width or is delaminating cannot be reliably fixed and should be replaced for safety.
How can I fix cracks in my deck boards?
For small cracks and chips, use wood putty. Clean the area, press in the putty, let it dry for at least an hour (per iFixit), then sand it smooth. For larger cracks, epoxy resin is an option, but it requires removing grip tape and letting the epoxy set for 24 hours. Always assess if the repair is worth the effort versus the cost of a new deck.
What is the average lifespan of a skateboard?
There is no single average. A deck’s life depends on the skater’s weight, riding style, trick level, and maintenance. A deck’s lifespan varies greatly depending on the skater’s weight, riding style, trick level, and maintenance. Regular inspection and proper storage (cool, dry, out of sun) can maximize lifespan.
Are stress cracks normal?
Yes. Stress cracks (pressure cracks) around the truck bolts are a normal result of the deck flexing under load. Most manufacturers like NHS consider them part of normal wear, not a defect. They are often cosmetic and don’t significantly weaken the deck until they become very severe.
The Bottom Line
Here’s the one rule to walk away with: if the crack is deep and structural, or if the deck flexes unnaturally at that spot, it’s a replacement job. For everything else, chips, splinters, web-like stress cracks, you have options.
Repair with wood putty when you want to learn and save a few bucks. Replace when you value performance and safety above all. And no matter what, make that pre-ride deck check as automatic as putting on your helmet. That single habit is the cheapest, most effective repair tool you own.
Start your next session with a quick look over your board. It’s the simplest way to ensure your deck doesn’t have the final say in how your ride ends.
