
How to Repair a Chipped Skateboard Deck: The 5-Step Fix
This post contains affiliate links. As an Amazon Associate, we earn from qualifying purchases.
To repair a chipped skateboard deck, clean the area, fill it with wood putty or epoxy, let it cure, sand it smooth, and reapply grip tape. The exact method depends on the chip’s depth and whether the grip tape needs removal, some guides say to take it off, others work around it.
That one sentence covers the consensus. The real work starts with a simple question: is your chip cosmetic or structural? A small splinter on the tail edge is a weekend project; learning how to repair a chipped skateboard deck is key here. A crack spidering from a truck mount is a death sentence. The difference decides your weekend.
What follows is a breakdown of the two repair paths for how to repair a chipped skateboard deck: putty for surface chips and epoxy for deeper damage. We’ll also cover the duct tape field fix for a board cracked in half, when to call it quits, and the one tool you shouldn’t skip.
Key Takeaways
- A surface chip can be filled with wood putty in about an hour of drying time, but epoxy for deeper cracks requires a full 24-hour cure.
- Removing grip tape is hotly debated; the iFixit method works around it, while Decathlon and Skateboards.com mandate full removal to prevent adhesive damage.
- A board cracked in half can get a temporary field fix with duct tape, but it weakens with every ride and is not a long-term solution.
- Pressure cracks around the trucks often need reinforcement with extra plywood or epoxy resin, not just filling.
- Riding a damaged deck voids the manufacturer’s warranty and can lead to dangerous failure if cracks spread to the truck mounts.
The 5-Step Repair for a Surface Chip (Using Putty)
The iFixit guide lays out a straightforward process for how to repair a chipped skateboard deck for a shallow chip, and it’s the method I default to for tail and nose wear. You need a Phillips #2 screwdriver, 8x25mm screws and 8×3/8 nuts for reattachment, wood putty, sandpaper, and a clean rag.
Step 1: Clean the chipped area. Dab a rag with a quick-evaporating solvent like isopropyl alcohol and wipe the chip. You’re removing dirt and grease so the putty bonds. Skip this, and the filler pops out on the first hard tail slap.
Step 2: Apply wood putty generously. Press it into the chip, overfilling slightly. The Decathlon guide says to apply liberally, excess gets sanded off later. Use a putty knife or even a stiff piece of cardboard to spread it.
Step 3: Let it dry. Here’s where sources offer a range. IFixit says “an hour or more.” Skateboards.com notes “putty will only need about an hour to set.” Decathlon rightly says to check the product label. In my experience, a full hour in a warm, dry spot is the safe minimum. Rushing this step means sanding gummy, uncured filler.
Step 4: Sand it smooth. This should take 5 to 10 minutes, according to iFixit. Use a medium-grit sandpaper to knock down the bulk, then switch to a finer grit to blend the repair flush with the deck contour. The goal is a surface you can’t feel with your thumb.
Step 5: Re-grip (if necessary). If you trimmed the existing grip tape around the chip, you’re done. If you removed it entirely, you’ll need to apply new grip tape to the whole deck.
Where this goes sideways: Sanding before the putty is fully cured. You’ll create a gummy mess that clogs the sandpaper and pulls away from the wood, forcing you to start over. Wait the full hour.
To Remove Grip Tape or Not?
This is the biggest procedural disagreement in the sources, and it changes your repair scope.
| Source | Method | Reasoning |
|---|---|---|
| iFixit | Repair without removing grip tape; trim excess around the chip. | Faster, preserves existing grip if it’s still good. |
| Decathlon | Remove grip tape using a hairdryer before any repair. | Prevents splitting the deck’s top ply when pulling tape. |
| Skateboards.com | For epoxy repair, first remove grip tape. | Ensures a clean bond for structural adhesive. |
My take: for a small, cosmetic chip, the iFixit trim-and-fill method is fine. If your grip is already peeling or you’re doing a major epoxy fill, take the time to remove it properly with heat. Pulling cold tape risks delaminating the deck’s top veneer, a much worse problem.
Epoxy for Deeper Cracks and Delamination
When a chip is more of a crack, or you see layers starting to separate (delamination), wood putty won’t hold. You need a structural adhesive like two-part epoxy resin.
The process from Skateboards.com is more involved. First, remove the grip tape completely. Scrub the exposed area with a bristle brush and water to remove dirt. Dry it thoroughly. Mix your epoxy as directed and fill the crack, overfilling slightly. Then, you must walk away.
Epoxy requires 24 hours to set. This isn’t a suggestion. A repair that feels solid at hour 12 can still be flexible internally and will fail under impact. I learned this the hard way on a deck with a stress crack near the rear truck. I gave it 18 hours, thought it was fine, and the board snapped cleanly at that spot on my first attempt at a drop. The pop was dead, and the feel was mushy long before it broke, a sure sign the core hadn’t cured.
After the full cure, sand the area smooth with fine-grit sandpaper. At this point, you can regrip the deck. For delamination, where the plies are separating, some specialized repair blogs describe a “professional sandwich method”: inject high-strength epoxy between the layers and clamp them until cured. This is a more advanced fix.
The part nobody mentions: Epoxy and wood glue repairs can seal a crack cosmetically, but they rarely restore the deck’s original “pop.” The board often feels dead underfoot afterward, which is a safety and performance issue. Consider it a temporary extension of the deck’s life, not a full restoration.
When Duct Tape Is Your Only Option (And When It Isn’t)
Imagine you’re at the park and your deck cracks in half. Not a chip, a full break. Skateboards.com outlines a purely functional field fix.
Overlap the two sides and wrap duct tape around the overlapped portion several times. The more you overlap, the shorter your board becomes. The more wraps, the more durable the temporary repair.
But here’s the critical warning from the same source: this repair isn’t durable. The board becomes weaker and weaker with each ride. It’s a “get you home” or “finish the session” move, not a solution. Fiber-reinforced tapes like FiberFix add some structure, but they’re still a bandage.
I keep a roll of heavy-duty duct tape in my skate bag for this exact scenario. It has saved a session. It has never saved a deck.
Pressure Cracks and Structural Reinforcement
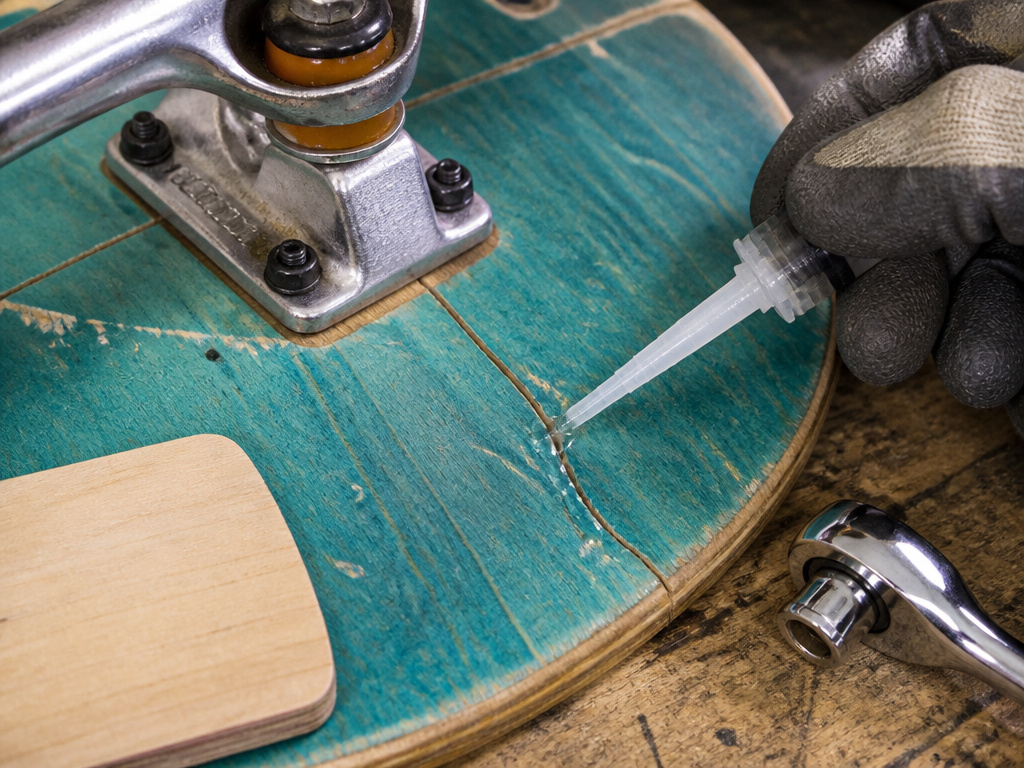
Not all cracks are created equal. Pressure cracks are those hairline fractures that appear around the truck mounts, caused by the deck flexing under stress. The Stoked Ride Shop guide is clear: filling them with putty or epoxy alone often isn’t enough.
These cracks need reinforcement to prevent spreading. You can add an extra layer of thin plywood to the top of the deck (under the grip tape) or attach reinforcement bars to the underside. Epoxy resin can be added to the cracks first to fill them, then the reinforcement layer is applied.
After reinforcing, you must ensure your trucks are tightened correctly with a truck wrench or socket. Loose trucks exacerbate flex and crack propagation.
If pressure cracks are extensive, deck replacement is the last resort. Riding on a deck with unchecked pressure cracks is dangerous, they can cause the deck to separate from the trucks.
The Tools You Actually Need (And One You Definitely Do)
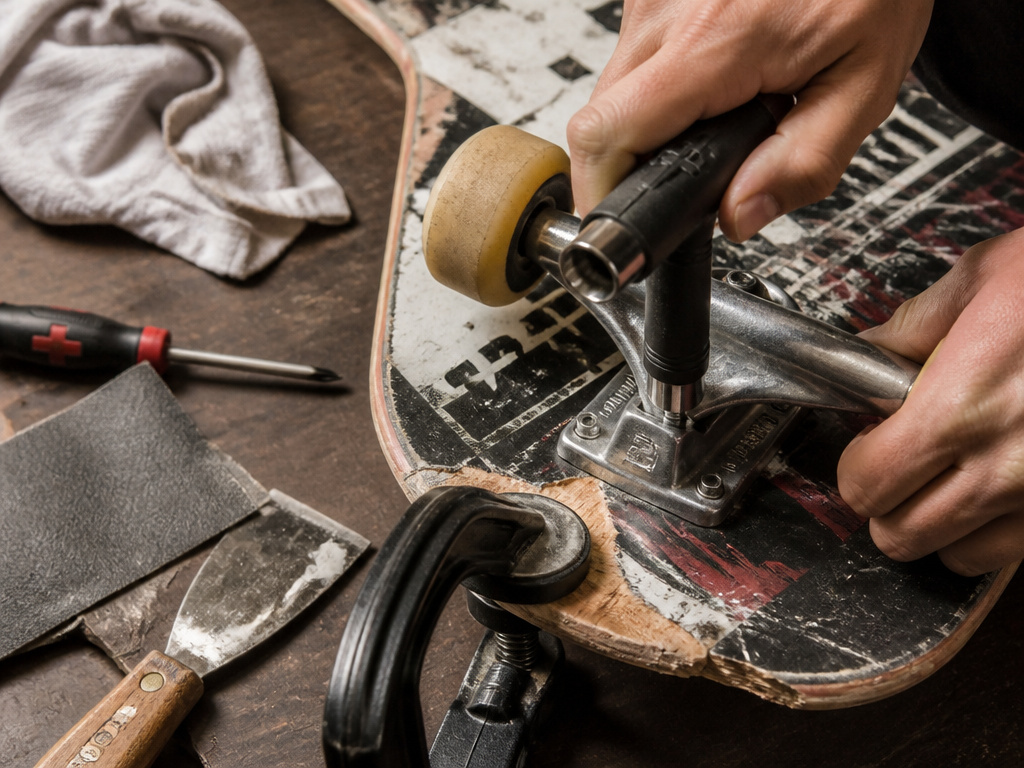
You can overcomplicate this with specialty products, but the core toolkit is simple.
- A T-Tool or Skate Tool: Decathlon calls this essential, and they’re right. It combines the wrench sizes you need for truck hardware and often includes a Phillips head. Having one in your bag lets you handle tasks like deck replacement and truck adjustments on the fly.
- Phillips #2 Screwdriver: For removing and reattaching trucks. The iFixit guide specifies this for the 8x25mm screws.
- Sandpaper (Multiple Grits): From 100-grit for shaping to 220+ for finishing.
- Putty Knife or Scraper: For applying filler.
- Clean Rags and Isopropyl Alcohol: For prep.
The one tool you shouldn’t skip is a clamp or heavy weight. If you’re repairing delamination or a crack that needs to stay closed while epoxy cures, a clamp provides the necessary pressure. A stack of books works in a pinch.
Diagnosing a Dead Deck: When to Retire, Not Repair
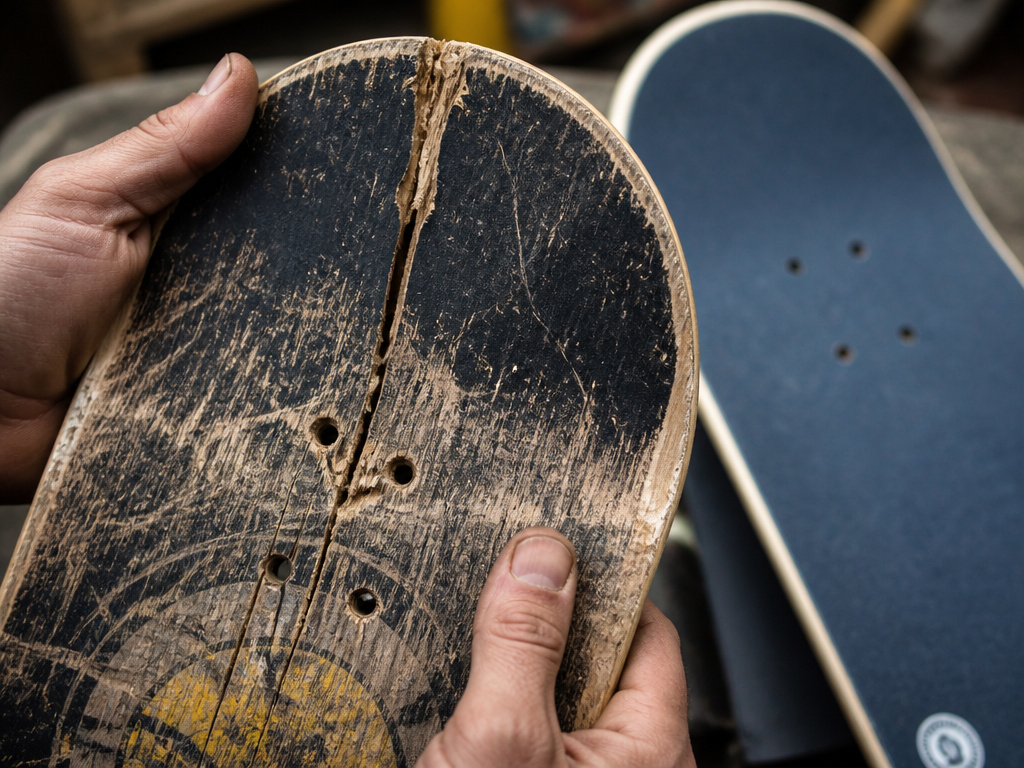
All repairs have limits. A deck is a consumable item. Decathlon notes a deck’s lifespan ranges from a week for a pro to several months for a casual rider.
Retire the deck if:
- A crack runs directly through a truck mounting hole. The concentrated stress here is a death knell.
- The chip or crack is so large it significantly changes the deck’s shape or wheelbase.
- The board has lost its concave or feels soggy and flat, even without visible damage. This means the internal plies are compromised.
- You’ve already repaired it once and the damage recurs. The structure is gone.
Pushing a deck too far isn’t just about performance. The Stoked Ride Shop points out that riding a damaged skateboard can void the manufacturer’s warranty. More importantly, a sudden failure at speed can cause a serious fall. Knowing when to change your deck is a key maintenance skill.
Sometimes, the smarter repair is cosmetic. For old boards with sentimental value, consider how to paint a skateboard deck or turn it into wall art. A deck with major cracks is often better retired from riding.
Frequently Asked Questions
Can I skate on a chipped deck without fixing it?
You can, but you shouldn’t for long. Small, cosmetic chips on the tail or nose are common and may not immediately affect performance. However, skating on it allows moisture and dirt into the exposed wood, weakening it further. A chip can evolve into a crack. If the chip is near a truck or large enough to catch your finger, fix it before your next session.
What’s the difference between wood putty and epoxy?
Wood putty is for filling voids. It’s a paste that hardens to a sandable solid, perfect for surface-level chips. Epoxy is a two-part structural adhesive. It bonds chemically and is much stronger, designed for gaps, cracks, and gluing materials together. Use putty for cosmetic fixes, epoxy for structural repairs like cracks or delamination.
How long does a skateboard deck last?
It depends entirely on use. As Decathlon notes, some riders change decks after a week, others after several months. Factors include your weight, how often you skate, the tricks you do (impact), and the deck’s quality. Regular maintenance, like checking for razor tail damage and tightening hardware, can extend its life.
Will repairing a chip affect how my board rides?
Surface fill with putty, properly sanded, won’t change the ride. A structural epoxy repair, however, can deaden the board’s “pop” and make it feel stiffer or less responsive. The repair adds mass and changes the flex pattern slightly. It’s often a trade-off between extended life and perfect performance.
Can I repair pressure cracks myself?
Yes, but it’s more advanced. Filling the cracks with epoxy is the first step, but as Stoked Ride Shop advises, reinforcement with an extra plywood layer or bars is often needed to stop them from spreading. If you’re not comfortable working with epoxy and clamps, or if the cracks are extensive, taking it to a shop or replacing the deck is the safer choice.
The Bottom Line
Repairing a chipped deck is a rite of passage. It teaches you about your board’s construction and saves you money. The rule of thumb is simple: match the method to the damage. Putty for chips, epoxy for cracks, and duct tape for emergencies.
But the real skill is diagnosis. Learning to tell a surface wound from a structural fracture will save you hours of futile repair work. A ten-minute inspection every few weeks, checking hardware, feeling for soft spots, looking for crack origins, beats any major surgery.
When in doubt, lean toward replacement. The cost of a new deck is almost always lower than the cost of an injury from a deck that fails because you pushed a repair too far. Keep your old board for parts, for art, or as a reminder of the sessions you got out of it. Then move on.
