
How to Ride Over Cracks on a Skateboard: Step-by-Step
This post contains affiliate links. As an Amazon Associate, we earn from qualifying purchases.
To ride over a crack on a skateboard, you shift your weight back to lift the front wheels, let the board roll over, then shift your weight forward to clear the rear trucks. The goal is to unweight the wheels hitting the crack so they don’t catch and stop the board. Speed helps, but control matters more.
That sequence is the physical answer. The next layer is why it works, and where it fails if you’re on an electric board, riding the wrong wheels, or following manufacturer warnings that say to never do this at all. Government safety guides like the CPSC skateboarding safety fact sheet treat crack inspection as a standard risk-mitigation step, while electric skateboard manuals from Boosted and Evolve tell you to categorically avoid cracks and uneven surfaces. Understanding how to ride over cracks on a skateboard is therefore fundamental. Your board’s electronics, wheel size, and deck stiffness change the stakes.
What follows breaks down the move, the gear that makes it easier, and how to read the conflicting advice on the how to ride over cracks on a skateboard topic so you don’t get hurt or fry your board’s motor.
Key Takeaways
- Shift weight, don’t jump. Lift the front wheels by leaning back slightly; a full hop can destabilize you unless the crack is massive.
- Speed is your friend, but only if you’re balanced. Going too slow lets wheels catch; going too fast without control leads to speed wobble.
- Softer, larger wheels deflect less over cracks than hard, small wheels, reducing the jarring stop that throws beginners.
- Boosted Board‘s manual warns against cracks for a reason. Water damage and sudden power loss are real risks; treat its “never ride” warnings as serious.
- Look ahead, not down. Your feet feel the board; your eyes should be scanning the path three feet ahead for the next obstacle.
The 3-Step Bump-Clear Sequence
This isn’t an ollie. You don’t need to pop the tail. You’re just temporarily taking weight off the wheels that are about to hit the obstacle.
The basic technique: As the front wheels approach the crack, shift your weight onto your back foot. This lifts the front wheels just enough to roll over. Once the front trucks are clear, recenter your weight or shift slightly forward to help the back wheels over. Keep your knees bent and your eyes looking ahead, not at the crack.
I learned this the hard way on a cheap complete with rock-hard plastic wheels. Every sidewalk seam felt like a curb. I’d stare at the crack, tense up, and either stop dead or wobble off. The problem wasn’t the crack, it was my frozen stance. Relaxing my knees and committing to the weight shift turned a jarring stop into a manageable bump.
Step 1: Spot the crack early. Look ahead on your path, not at your feet. Identify the crack while you’re still a few pushes away. This gives you time to adjust your speed and stance calmly.
Step 2: Pre-load your back foot. As the front wheels get within a foot of the crack, press down slightly with your back foot. You’re not doing a manual; you’re just transferring enough weight to make the front end light. The front wheels should rise an inch or two.
Step 3: Roll and recover. Let the board roll over the crack. As soon as the front trucks are clear, smoothly transfer your weight forward onto your front foot. This helps the back wheels climb over without catching. Stay low and keep rolling.
If you lean back too hard, you’ll shoot the board out from under you. If you don’t shift weight at all, the front wheel will jam into the crack and you’ll go flying over the handlebars. Find the middle, a gentle, controlled lift.
When the Crack is Too Wide for a Simple Lift
Sometimes a weight shift isn’t enough. For gaps wider than your wheel, you need a small hop, both feet leaving the board momentarily so the entire board can float over.
This is where the community advice from r/NewSkaters clicks: “do a little hop so when your back trucks go over the crack, they just roll over.” The trick is to hop straight up, not forward. Let the board’s momentum carry it under you. Landing stiff-legged guarantees a buck-off. Bend your knees to absorb the impact.
For electric boards, this gets trickier. A hop can momentarily break contact between the remote and the board, causing a lurch when you land. It’s safer to find an alternate line or slow down and step off.
Why Electric Skateboard Manuals Say “Never”
If you ride a Boosted Board or an Evolve, your manual is blunt: “Never ride in cracks, train tracks, gravel, rocks, or any obstacles that could cause a loss of traction.” The Consumer Product Safety Commission guidelines frame it differently, advising riders to “inspect your riding terrain” for hazards like cracks, treating them as a managed risk, not a forbidden zone.
This isn’t a disagreement over technique. It’s a difference in liability and failure modes. For analog boards, a crack might stop you or cause a fall. For electric boards, a crack can hide water, jam the motor, or short the electronics.
Where this goes sideways: Riding in wet conditions or through puddles can damage the board’s electronics and cause the board to lose power or stop suddenly. Water damage voids the warranty on brands like Evolve.
A sudden power loss at 15 mph on an electric board is a different kind of crash. You’re not just falling; you’re falling while the board might brake unexpectedly or roll away. The manufacturers aren’t being overly cautious, they’re outlining the specific, expensive ways their product breaks.
| Board Type | Primary Risk Over Cracks | Manual Stance | Real-World Approach |
|---|---|---|---|
| Analog Skateboard | Wheel catch, forward fall. | Inspect and manage. | Weight shift, hop, or go around. |
| Electric Skateboard | Electronics water damage, sudden power loss, motor jam. | Never ride over them. | Avoid when possible; absolutely avoid if wet. |
| Electric Skateboard (All-Terrain) | Reduced traction, battery drain. | Use caution. | Slower speed, prefer grass/gravel mode if equipped. |
The takeaway? If you’re on a motorized board, the “never ride” warning is about protecting the board’s guts. Ignore it, and you’re risking a several-hundred-dollar repair. For traditional skaters, the crack is a skill check, not a death sentence.
Wheels and Decks That Eat Vibrations
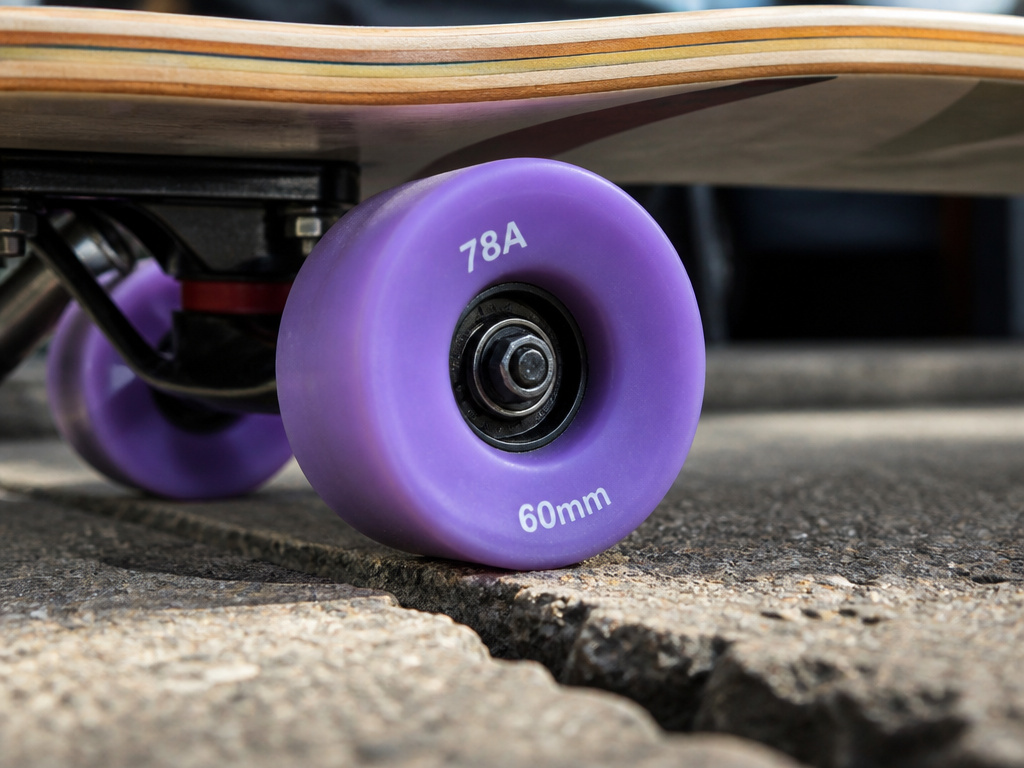
Your technique does most of the work, but your gear decides how much margin for error you have. Hard, small wheels transmit every bump directly to your feet and are more likely to catch. Softer, larger wheels absorb impact and roll over obstacles more easily.
The TechGearLab review of the Meepo V5 electric skateboard noted that its “90mm wheels deflected more than larger wheels” over cracks, and the “relatively flexy maple deck helped soften the feel of teeth-jarring hits.” That’s a quantified difference: bigger wheels and a deck with some give physically change the experience.
Wheel Hardness (Durometer):
- 78A–86A (Soft): Ideal for rough roads. They absorb vibrations and grip better, making cracks feel smaller. Brands like OJ Wheels and Ricta Clouds excel here.
- 90A–101A (Hard): Designed for smooth skatepark concrete. On cracked pavement, they chatter and catch easily, throwing off your balance.
Wheel Diameter:
- 54mm and under: Agile for tricks, but sink into cracks more easily. They require more precise weight shifts.
- Mid-sized wheels (e.g., 54mm–60mm) can offer a balance of agility and obstacle clearance for street skating.
- 60mm+ (Cruiser/Longboard): Roll over almost anything but make the board taller and less flickable for tricks.
If you’re constantly battling your local sidewalks, investing in a set of best wheels for rough pavement is the single biggest upgrade for a smoother ride. It turns a scary, jarring ride into something you can actually practice on.
Speed, Balance, and the Dangers of Going Slow
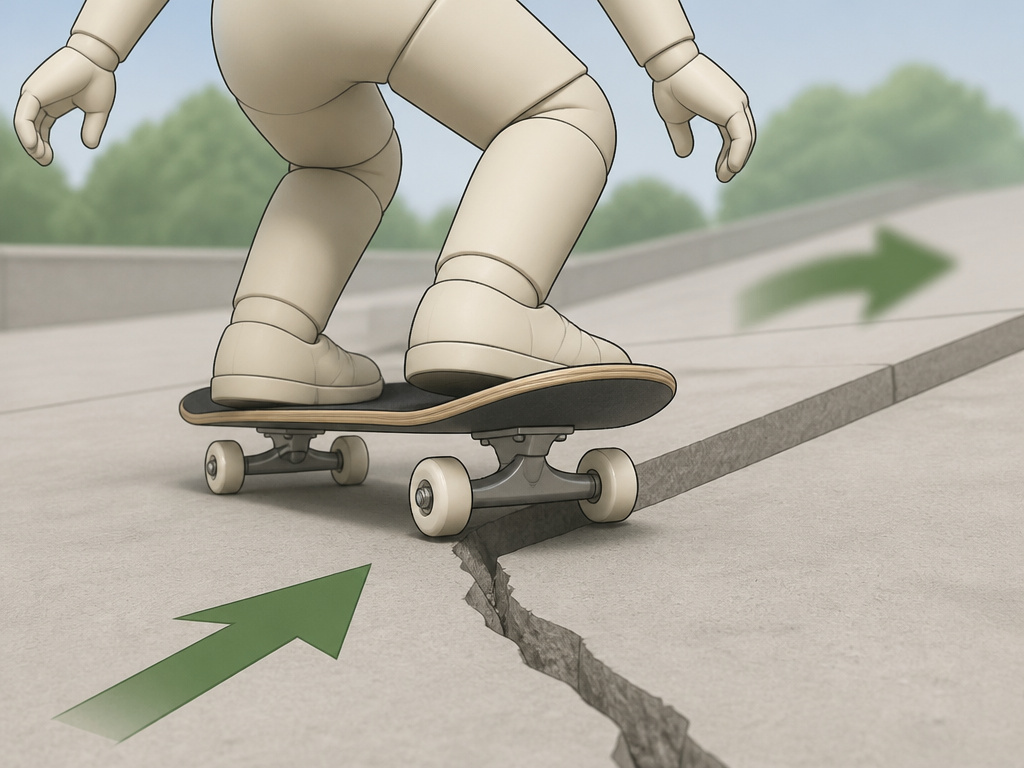
It feels safer to slow down when you see a crack coming. It’s often the wrong move. Too little speed means your wheels don’t have the momentum to roll up and over the lip of the crack, they just dig in and stop.
You need enough forward momentum to carry the board through the weight shift. A moderate, controlled pace is better than a crawl. How do you find it? Practice on a known crack. Start too slow, feel the catch. Then add a bit more speed until the board rolls over smoothly. Your feet will learn the minimum viable speed.
But there’s a ceiling. The CPSC fact sheet warns about “speed wobble,” which happens when a board begins to shimmy violently at higher speeds. Hitting a crack while wobbling is a guaranteed crash. If you’re going fast, your stance needs to be stable, knees bent, weight centered, ready to absorb the impact.
Common mistake: Staring at the crack as you approach. Your body follows your eyes. Look past it to where you want to go, and your balance automatically improves. This is the same focus you need when learning to ride off a curb, commit to the landing zone.
Electric Skateboards: The Battery and Power Drain
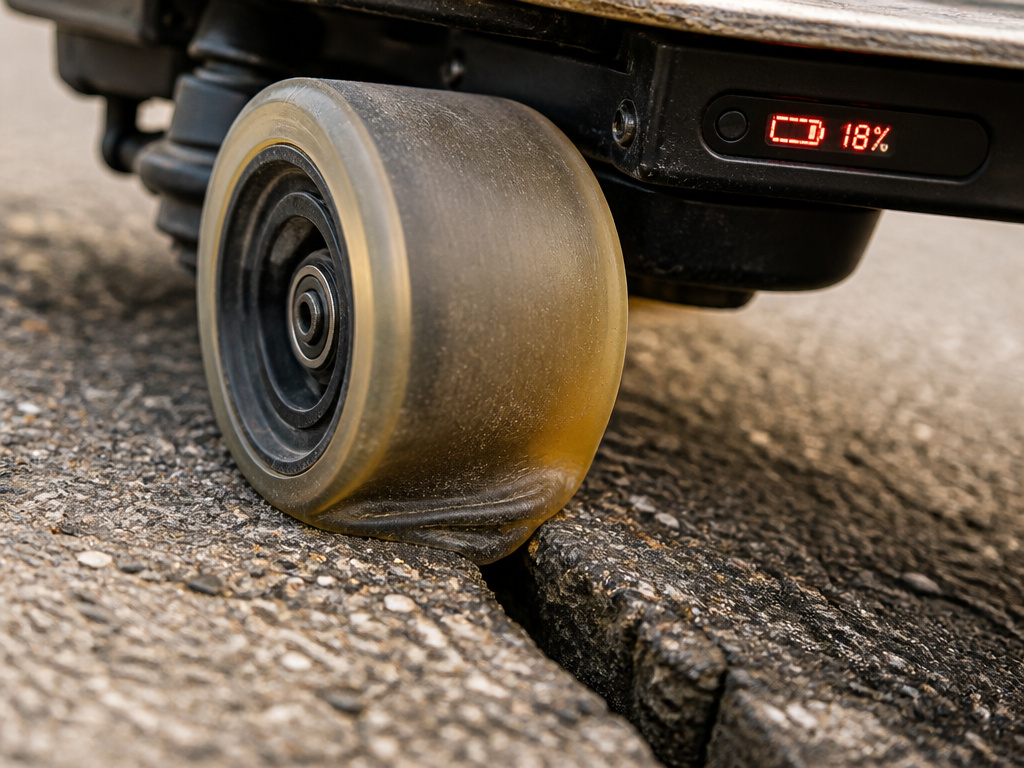
For electric riders, cracks aren’t just a balance problem, they’re an energy problem. The Evolve GT manual states: “If you ride up hills, accelerate heavily, and ride over grass you should expect the battery meter value to drop quickly.”
This has a practical limit. The manual advises: “Avoid accelerating heavily in GT or riding up big hills or grass when the % value is less than 15% to prevent the Auto ECO mode from being activated.” If your battery is low, a series of cracks on a hill could trigger the board’s low-power mode, drastically cutting your speed and leaving you stranded.
The TechGearLab review of the Meepo V5 noted that its stock PU wheels picked up more vibration over cracks and that the how to ride over cracks on a skateboard technique on an incline can cause the battery meter value to drop quickly. Smaller 90mm polyurethane wheels simply deflect more, wasting energy that larger pneumatic wheels would use for forward motion. If your commute is cracked and hilly, plan for shorter range or consider an all-terrain setup.
Practicing Safely and Building Confidence
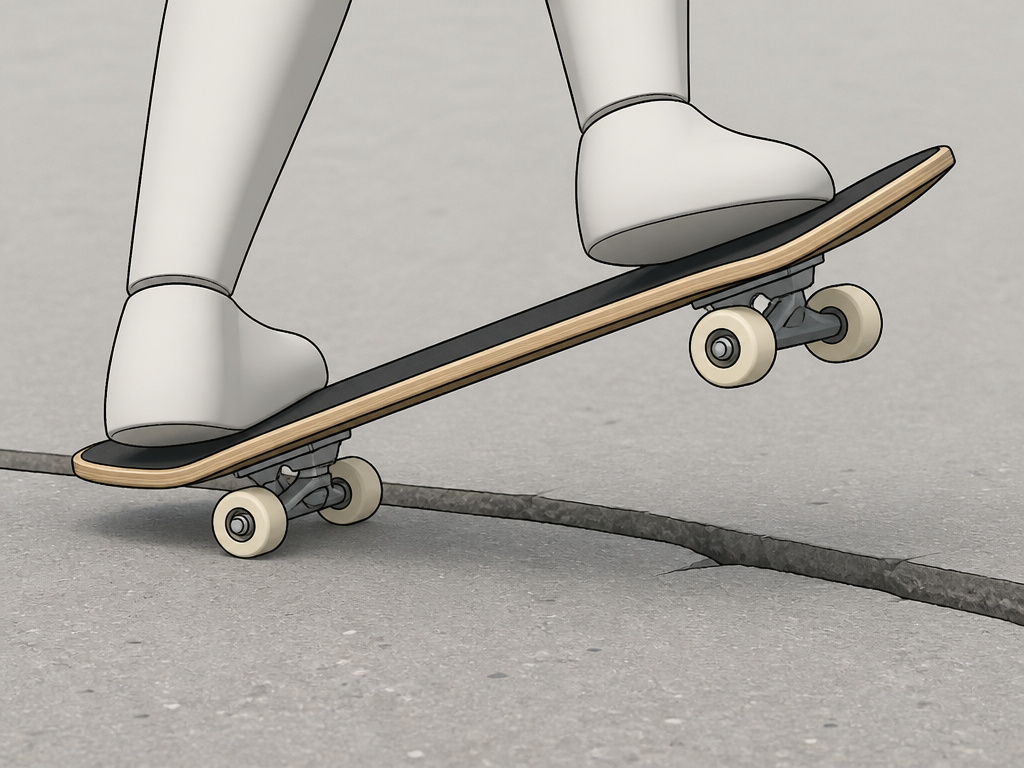
Start in a parking lot. Find a painted line or a small seam in the asphalt. Practice the weight-shift sequence there, where a mistake means a stumble, not a spill into traffic. Once that feels automatic, graduate to actual sidewalk cracks.
Drill 1: The Manual Lift. Practice lifting just your front wheels while rolling slowly on smooth ground. Get a feel for how much back-foot pressure it takes. This is the core of the crack roll.
Drill 2: Crack Hopping. Find a series of small, evenly spaced cracks. Practice timing your hops so you float over each one. This builds the coordination for larger gaps.
Boosted Board advises to always wear a helmet when riding. Knowing how to fall safely turns a scary spill into a manageable roll.
Your local skateboard surfaces vary wildly. A crack in dry Arizona concrete is different from a water-filled seam in Seattle. Learn to spotting debris and other hazards early, and always inspect your path. The CPSC’s advice here is timeless: a quick scan can prevent a nasty fall.
Frequently Asked Questions
Is it bad to skateboard over cracks?
For a traditional skateboard, no, it’s a normal part of street skating. With proper technique, you can roll over most cracks safely. For electric skateboards, yes, it can be bad. Cracks can hide water that damages electronics, and hitting them hard can jam motors or drain the battery faster. Always check your manufacturer’s manual.
How do you skate over big cracks?
For cracks wider than your wheels, you need a small hop. As you approach, bend your knees and jump straight up, letting the board’s momentum carry it under you. Land with bent knees to absorb the impact. This requires more speed and balance than a simple weight shift.
What kind of skateboard is best for cracks?
Longboards and cruisers with soft, large wheels (60mm+, 78A–86A durometer) are best. Their longer wheelbase adds stability, and the big, soft wheels roll over cracks easily. For standard skateboards, choose softer, larger wheels (54mm–56mm) and a deck with some flex.
Why does my skateboard stop at every crack?
This is usually a combination of hard/small wheels and going too slow. Hard wheels don’t deform to roll over the lip, and slow speed gives them no momentum to climb. Upgrade to softer, larger wheels and maintain a bit more speed as you approach.
Can you ride an electric skateboard over cracks?
You can, but you shouldn’t make a habit of it. Electric skateboard electronics are not waterproof, and a wet crack can cause a short circuit or motor failure. If you must, go slow and straight, avoid any visible water, and be prepared for a sudden loss of power.
The Bottom Line
Clearing a crack on a skateboard is a fundamental skill, not an advanced trick. It comes down to a timely weight shift and enough forward speed. But the rules change if there’s a battery and motor involved, what’s a manageable bump on a traditional board becomes a potential hardware killer on an electric one.
Start by practicing the lift on a harmless line. Get your gear right: soft wheels over hard, larger over smaller. And read your manual if you ride electric. The Evolve and Boosted warnings exist because the failure mode is expensive and sudden, not just a scraped knee.
One rule most guides skip: if you’re on an electric board and the ground is even slightly damp, find another route. Three blocks of dry sidewalk are faster than a warranty claim. For everyone else, relax your knees, look ahead, and let the board roll.
