
How to Clean Skateboard Bearings: Step-by-Step Guide
This post contains affiliate links. As an Amazon Associate, we earn from qualifying purchases.
To clean skateboard bearings, you need to remove them, take off any shields, soak them in a solvent like isopropyl alcohol or Gumout carburetor cleaner for 15-20 seconds, scrub away dirt, dry them thoroughly, and then apply 1-2 drops of oil or a small amount of grease before reinstalling. Never add lubricant to dirty bearings, as it pushes grit deeper and causes damage.
That final step, applying fresh lubricant to a perfectly clean bearing, is where most guides stop. They treat it as the finish line. The real work starts after you put the wheels back on. A freshly cleaned and lubed bearing needs about an hour of use to reach its peak performance, according to Bones Bearings. During this break-in period, the lubricant spreads evenly over the super-finished steel races. Skip it, and your board might feel slow or gritty for the first few pushes, which can trick you into thinking the clean didn’t work. Many people search online for how to clean skateboard bearings, but few mention this crucial post-cleaning phase.
What follows is the full process, from pulling the wheels to that crucial break-in ride. This guide lists the tools you actually need (not the fancy ones), uses manufacturer data to settle the oil-versus-grease debate, and shows how to tell when cleaning isn’t worth it and replacement is smarter.
Key Takeaways
- Clean bearings only when they feel gritty or sound rough, cleaning on a schedule wastes solvent and can shorten bearing life if done incorrectly.
- For bearings with removable rubber shields, wipe shields with warm soapy water instead of soaking them in solvent, which can cause the rubber to blister (per Bones Bearings).
- Sources disagree on lubricant type and quantity: Bones Bearings recommends 2 drops of Speed Cream for steel bearings, SkatePro suggests 1-2 drops of oil or 3mm of grease, and SMB Bearings advocates for grease, filling 15-20% of the internal space.
- Sources disagree on drying methods: Bones Bearings advises drying immediately and re-lubricating if using water, iFixit recommends using compressed air, and anecdotal sources suggest an air compressor or blow dryer.
- Some guides warn against using WD-40 as a lubricant, stating it can cause damage, while anecdotal sources suggest using it as a cleaner followed by grease.
The Step-by-Step Cleaning Process
This isn’t about making them look new. It’s about restoring the microscopic clearances inside the bearing. Bones Bearings notes their tolerances are smaller than 1/1000th of an inch, thinner than a human hair. A single grain of sand or hair can clog that gap.
You’ll need a few tools: a skate tool to remove wheels, a small container with a lid (a old jar works), a cleaning solvent, a toothbrush or small stiff brush, paper towels, and your chosen lubricant. A pin or small flathead screwdriver helps pop off bearing shields.
Submerge your bearing in the cleaning container for 15-20 seconds to allow the solvent to soak in. Agitate the container to help loosen dirt, then remove the bearing and scrub it with a brush before a final rinse in fresh solvent.
- Remove the wheels and pull the bearings. If you’re unsure how to remove bearings safely, that’s your first step. Place each bearing on a clean paper towel and note its orientation.
- Remove the shields or seals. For rubber shields, gently pry them off with a pin. If your bearings have metal shields held by a C-clip, remove the clip first. For labyrinth shield models, both shields must be removed for cleaning and they are identical, according to Bones Bearings.
- Soak and agitate. Place the bearings in your container with enough solvent to cover them. Isopropyl alcohol (90%+ purity), Gumout carburetor cleaner, or acetone are all effective. Seal the lid and shake to agitate.
- Scrub and rinse. Remove the bearings and scrub the races and balls with your brush. For a final rinse, use fresh solvent in a second container to avoid re-contaminating them.
- Dry thoroughly. This is critical. Shake off excess solvent, then use compressed air (like a can for electronics) or a blow dryer on a cool setting to blow out any remaining liquid. Let them sit on a fresh paper towel until dry. Any residual solvent will dissolve new lubricant.
- Apply lubricant. Once bone-dry, apply your lubricant. For Bones steel bearings, that’s 2 drops of Bones Speed Cream. For their Swiss Ceramic bearings, use 1 drop. If using grease, aim to fill 15-20% of the bearing’s internal space.
- Reinstall shields and bearings. Put the shields back on, then install bearings back into your wheels. Don’t forget to clean wheels while they’re off the truck.
For very dirty bearings, the cleaning process may need to be repeated 2-3 times, according to SkatePro.
What to Use (and What to Avoid)
When figuring out how to clean skateboard bearings, the best cleaner is the one that dissolves old grease and flushes out grit without damaging the bearing components. Your choice also dictates your safety gear.
| Cleaning Agent | Best For | Precautions & Notes |
|---|---|---|
| 90%+ Isopropyl Alcohol | General cleaning, safe for all materials. | Flammable. Work in a well-ventilated area. Less effective on heavy grease than stronger solvents. |
| Gumout Carburetor Cleaner | Cutting through caked-on, old grease and grime. | Highly toxic fumes. Wear rubber gloves and use outdoors or with powerful ventilation. |
| Acetone | Fast-evaporating, thorough cleaning. | Extremely flammable, damages rubber. Do not use on rubber shields. |
| Citrus-Based Cleaner | Eco-friendly option, less harsh. | May leave a slight residue (per Bones). Rinse thoroughly. |
| Warm Soapy Water | Cleaning rubber shields only. | Do not use on the bearing internals unless you can dry them instantly to prevent rust. |
Do not use WD-40 as a cleaner or lubricant. It’s a water-displacer, not a durable lubricant. It will thin out and attract dirt, creating a slurry that grinds down the raceways. It’s a shortcut that leads to a dead bearing.
My routine settled on isopropyl alcohol for most cleans. It’s easy to find, and the fumes won’t knock you out in a small room. But after a wet session where grit got past the seals, I reach for the carburetor cleaner. The difference in how freely the bearings spin after is noticeable.
Why Grease vs. Oil Matters
Here’s where official sources disagree, and your choice changes maintenance frequency. Sources disagree on lubricant: Bones Bearings recommends their Speed Cream oil, SkatePro suggests 1-2 drops of oil or 3mm grease, and SMB Bearings argues grease is better than oil. SMB Bearings, a specialist distributor, argues grease is a better option for skate bearings.
The why-layer is viscosity and retention. Oil is thin, flows easily, and is perfect for high-speed machinery. In a skate bearing, it can also leak out or get thrown out under load, requiring more frequent re-application. Because it’s thin, it also attracts and holds dirt more readily if over-applied.
Grease is oil suspended in a thickener. It stays put. SMB Bearings states that despite being thicker, low-viscosity grease creates minimal extra drag and actually softens as it warms up from use. Its main advantage is sealing out dirt and lasting longer between services.
| Lubricant Type | Pros | Cons | Best For |
|---|---|---|---|
| Light Oil (e.g., Bones Speed Cream) | Easy to apply, low initial friction, manufacturer-recommended for many brands. | Can attract dirt if overused, may need reapplication more often. | Everyday skating, bearings with tight seals, riders who clean bearings frequently. |
| Grease | Longer-lasting, better dirt exclusion, stays in place. | Slightly more drag on initial spins, can be messier to apply. | Longboarders, cruisers, riders in dusty/dirty environments, less frequent maintenance. |
If you choose grease, the technique changes slightly. You need to evenly distribute a small amount, about 3mm per bearing or 15-20% of the internal space. After applying, rotate the bearing by hand several times to work the grease into the raceways.
Common mistake: Using 3-4 drops of oil because “more must be better.” Excess oil doesn’t increase speed; it seeps out, attracts abrasive dirt, and creates a grinding paste inside the bearing. Stick to 1-2 drops.
Handling Shields, Cages, and Other Parts
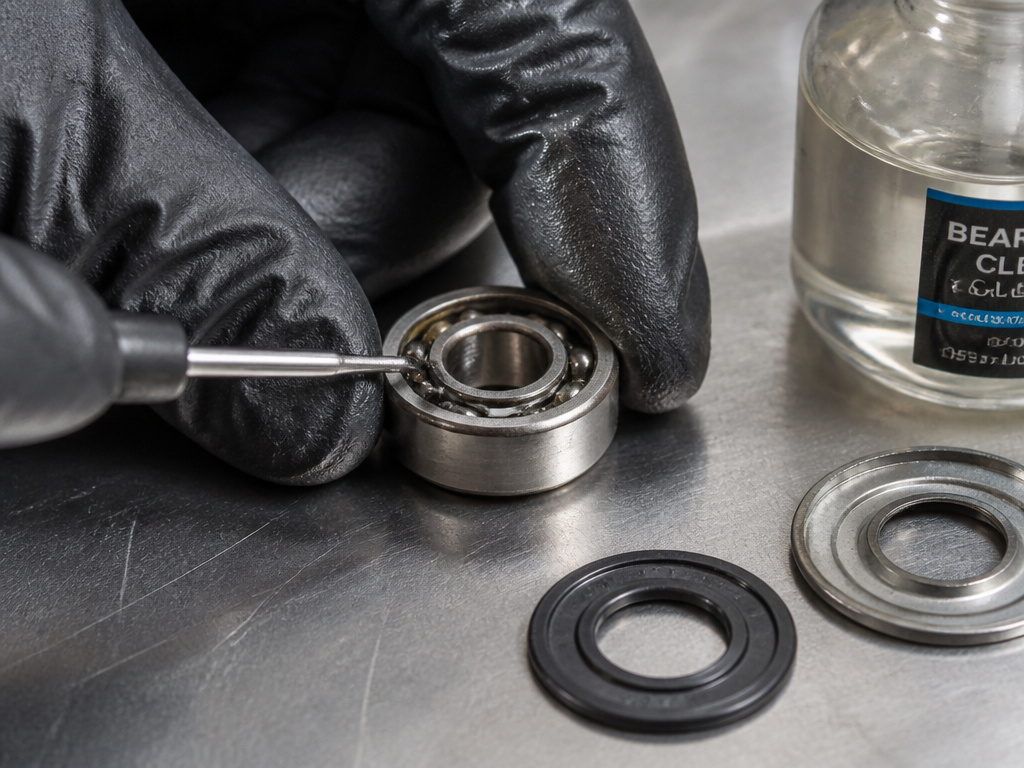
Not all bearings are created equal, and their construction dictates your cleaning approach.
Rubber Shields: This is a clear rule. Bones Bearings instructs: “Do not use solvents to clean the rubber shields! Just wipe the rubber shields down with warm soapy water.” Solvents can cause the rubber to blister, swell, or degrade. Pop them off, wipe them clean, dry them, and set them aside while you clean the metal bearing core.
Metal Shields & C-Clips: These can be submerged in solvent. A small flathead or pin can pop off the C-clip, then the metal shield lifts out.
The Cage (Ball Retainer): Should you remove the cage to clean each ball individually? Bones says cage removal is “optional and only recommended for use with the Bones Bearing Cleaning Unit or for experienced users.” The risk is bending or distorting the delicate cage, which can misalign the balls. For most home cleans, soaking and agitating the whole bearing with the cage intact is sufficient. SMB Bearings notes that nylon cages (common in their bearings) are more forgiving if dirt enters.
Labyrinth Shields: Found on some sealed models, these often require both shields to be removed for cleaning, and they are usually identical.
When to Clean (And When to Give Up)
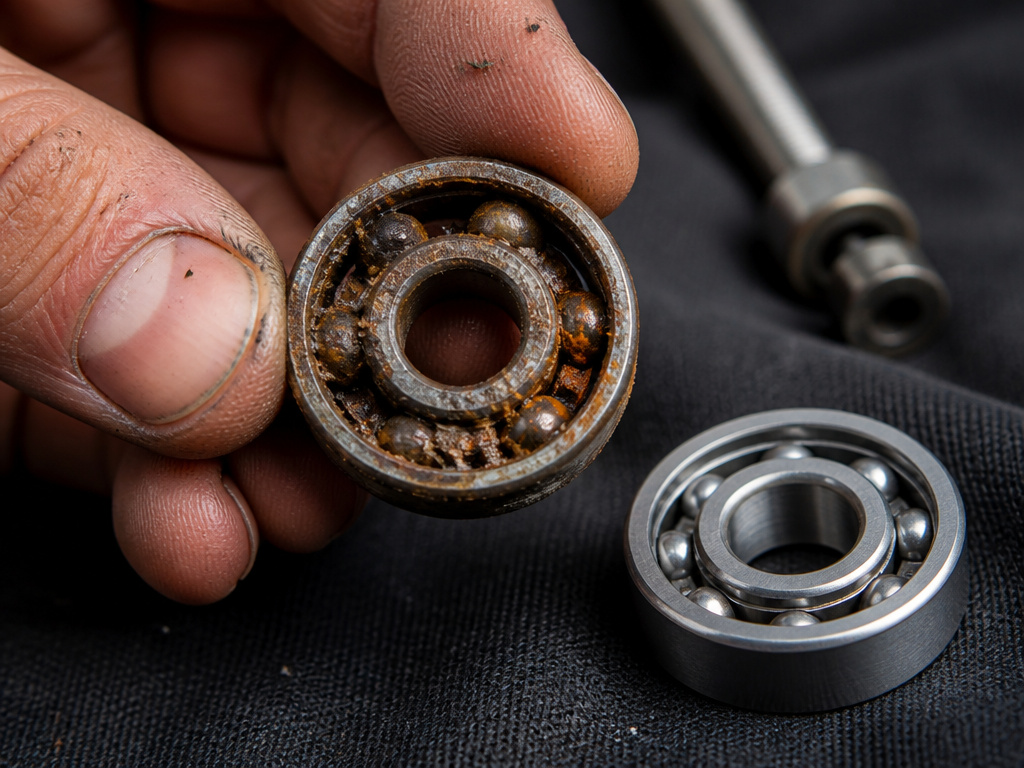
You don’t need to clean bearings every month. Clean them when performance drops. Spin your wheel, if it slows down quickly with a gritty, grinding sound, it’s time. A quiet, slow-spinning wheel might just need a lubrication top-up, not a full clean.
Where this goes sideways: Adding oil to dirty bearings because they feel slow. The oil flushes the existing dirt further into the bearing races. It might spin faster for a session, but you’ve just accelerated the wear on the precision surfaces. Always clean first.
Clean bearings when they feel gritty or sound rough, as recommended by Bones Bearings in their guide on how to clean skateboard bearings. Riding near an ocean or in consistent dampness drastically shortens bearing life. After a beachside session, I’ll do a quick clean even if the bearings still sound okay.
If your bearings have visible rust, you can try a dedicated rust removal process. Surface rust might clean off. But if there’s pitting on the balls or races, or if the bearing has side-to-side play, no amount of cleaning will fix it. A permanently gritty feel even after a proper clean and lube means the metal is damaged. That’s your sign to replace them.
Drying and the Break-In Period
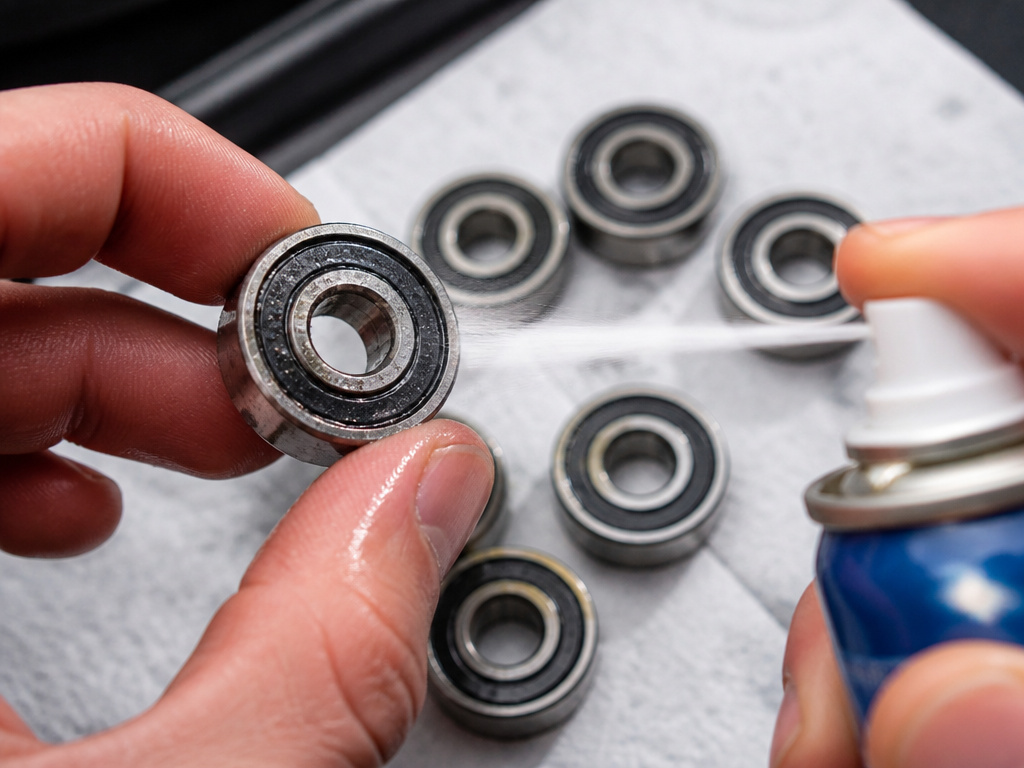
The most critical, and most skipped, step. If any solvent or water remains, it will dilute your new lubricant or cause rust.
After the final rinse, shake the bearings hard to fling out liquid. Then, use a can of compressed air to blow through the bearing from both sides. An air compressor or a cool blow dryer works too. Let them sit on a paper towel until completely dry. They must be completely dry.
Once lubricated and reinstalled, the bearings aren’t at their best yet. Bones states high-precision bearings need about an hour of use to reach peak performance. This break-in period allows the lubricant to fully distribute. Don’t judge your cleaning job until after that ride.
Frequently Asked Questions
What should I use to clean my skateboard bearings?
Use a solvent that dissolves oil and grease without leaving residue. The most common and accessible is 90% or higher isopropyl alcohol. For heavier grime, Gumout carburetor cleaner or acetone are stronger options. Always work in a well-ventilated area.
Does WD-40 ruin skate bearings?
Using WD-40 as a lubricant will ruin bearings over time. It is not a durable lubricant; it’s a water displacer and penetrant. It attracts dirt and lacks staying power as a durable lubricant. It is not recommended for bearing maintenance.
Can I use isopropyl alcohol to clean my skateboard bearings?
Yes, isopropyl alcohol (90% purity or higher) is an excellent and safe choice for cleaning skateboard bearings. It effectively dissolves old lubricant and dirt, evaporates quickly, and is less toxic than many other solvents. Ensure bearings are completely dry before relubricating.
What must be avoided when cleaning bearings?
Avoid using water as a primary cleaner unless you can dry the bearings instantly. Avoid adding new lubricant to dirty bearings. Avoid using solvents on rubber shields. Avoid over-lubricating, more than 2 drops of oil or a glob of grease attracts dirt. Never use a damaged or seized bearing.
Why are my bearings still squeaky after cleaning?
Persistent squeak after cleaning often means there’s still dirt or old, hardened lubricant in the raceways, or the bearings were not dried thoroughly before lubrication. It could also indicate worn races. Try cleaning them again. If the squeak remains, the bearing may be damaged. For more, see our guide on why do skateboard bearings squeak.
The Bottom Line
Cleaning bearings isn’t about following a rigid calendar. It’s a response to how your board feels and sounds. The goal is to preserve those microscopic tolerances inside the bearing for as long as possible.
Keep a simple kit: a jar, some alcohol, a brush, and your lubricant of choice. Learn to recognize the gritty spin that says “clean me” and the dry, rough spin that says “replace me.” And remember the one essential rule: a bearing must be perfectly clean and dry before you add the first drop of fresh lubricant. Everything else is just details you can adjust as you go.
