
How to Lubricate Skateboard Bearings: Step-by-Step
This post contains affiliate links. As an Amazon Associate, we earn from qualifying purchases.
To lubricate skateboard bearings, first clean them thoroughly, then apply 1-2 drops of a light oil like Bones Speed Cream or a small bead of high-speed grease, distributing it by spinning the bearing. The core choice is between oil (faster, requires more frequent application) and grease (longer-lasting, better at sealing out dirt).
The 1-2 drop rule comes directly from manufacturer specs, but the real debate is what you put in those drops. Oil and grease change how the bearing feels under your weight, not just how it spins in your hand, which is a key consideration when learning how to lubricate skateboard bearings.
This guide walks through the tools you need, a clear step-by-step process for how to lubricate skateboard bearings, and the specific warnings that keep a simple job from ruining your bearings. You’ll also get a direct comparison between oil and grease, how to fix common post-lube problems, and what to do if you just want to add a quick drop without a full teardown.
Key Takeaways
- Always clean bearings before lubricating; adding oil to dirt creates an abrasive paste that grinds the races.
- Use 1-2 drops of oil or a 3mm bead of grease; over-lubrication attracts dirt and creates drag.
- Never use WD-40 as a lubricant; it’s a solvent that dries out bearings and leaves a sticky, dirt-catching film.
- Sources disagree on the validity of a finger-spin test: SMB Bearings and Skate FAQ state it’s a terrible way to test as it doesn’t replicate load conditions, while SkatePro recommends testing by holding the inner ring and giving it a light spin.
- Expect a short break-in period; bearings roll best after about an hour of riding post-lubrication.
Why Lubrication Matters (And What Happens Without It)
A skateboard bearing has clearances and tolerances considerably smaller than 1/1000th of an inch. Dirt, water, and grit that get inside act like sandpaper. Lubricant coats the metal balls and races to reduce friction.
Without it, the metal-on-metal contact creates heat and wear. You’ll hear a gritty, crunchy noise. Eventually, the bearing can seize. That doesn’t just slow you down—it can stop a wheel dead and throw you off the board.
Common mistake: Adding oil to dirty bearings. This flushes the grit further into the bearing races, creating an abrasive slurry. The bearing might feel smoother for a minute, but the damage accelerates.
The fix is always cleaning first. This isn’t a suggestion; it’s the rule for how to lubricate skateboard bearings. A proper routine for cleaning your bearings is the essential first step.
The Oil vs. Grease Decision
This is where the experts don’t fully agree. Your choice changes maintenance frequency and how the board feels.
Bones Bearings, the manufacturer, explicitly designs its Bones Speed Cream oil for its bearings. Their maintenance guide calls for 2 drops for steel bearings, one drop for their ceramic ones. SkatePro, a major retailer, recommends 1-2 drops of oil or 3 mm grease evenly distributed around in the bearing.
SMB Bearings, a specialist industrial supplier, takes a different stance. Their technical guide states grease is a better option for skate bearings than oil. They recommend filling 15-20% of the bearing’s internal space with a high-speed, low-torque grease, like the Klueber brand they use.
Why the split? Oil is less viscous, so it creates less initial drag and is what most factory bearings are packed with. Grease is thicker, stays in place longer, and better seals out new dirt and moisture. Grease can feel slightly slower at first.
| Lubricant Type | Best For | Key Trade-off |
|---|---|---|
| Light Oil (e.g., Bones Speed Cream) | Riders wanting maximum initial speed; street skating in dry conditions; following OEM manufacturer advice. | Requires more frequent re-application (every 1-2 months with regular use). |
| High-Speed Grease (e.g., Klueber) | Riders prioritizing bearing longevity and dirt protection; wet or gritty environments; longer intervals between maintenance. | Can feel slightly draggy for the first few miles until excess is expelled. |
So, who wins? For a beginner or someone following the manufacturer’s lead, oil is the straightforward pick. If you skate in damp conditions, hate frequent maintenance, or have a specialist bearing supplier’s grease handy, that’s a valid alternative. I keep a bottle of Speed Cream on my bench because it’s made for the job and the dosing is foolproof.
Tools and Supplies You’ll Need
You don’t need a professional workshop. Here’s what actually gets the job done, drawn from the source guides.
For Cleaning (Mandatory First Step):
- A cleaner: Isopropyl alcohol (90%+ purity), citrus-based cleaner, or mineral spirits. The Concrete Waves handbook lists the last two.
- A small container with a lid (a old jar works).
- Lint-free cloths or paper towels.
- (Optional) A soft-bristled brush.
For Bearing Access:
- A pin, small flathead screwdriver, or knife tip. This is for prying off the rubber or metal shield. If your bearings have a C-clip, you’ll need the pin to pop that out first.
For Lubrication:
- Your chosen lubricant: Bones Speed Cream oil or a high-speed skate grease.
- A way to apply small amounts: The bottle tip on Speed Cream is perfect. For grease, a toothpick or small dab on a screwdriver shaft.
For Safety:
- Rubber gloves (especially if using strong solvents).
- Work in a well-ventilated area.
Gather this first. Fumbling for a tool with greasy fingers is how small parts get lost. If you need a refresher on getting the bearings out of the wheels, our guide on how to remove bearings covers it.
Step-by-Step Lubrication Process
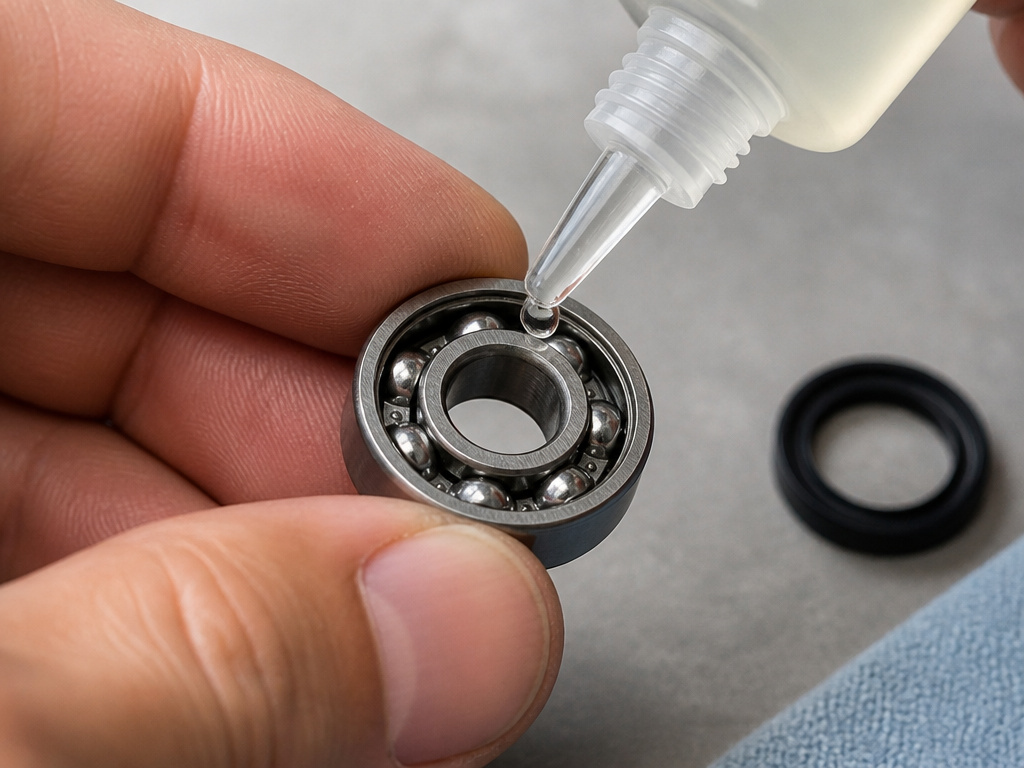
Follow this sequence. Rushing or skipping steps is how bearings get worse, not better.
1. Remove and Open the Bearings
Pop the bearings out of your wheels. Then, you need to get inside them. Most skate bearings have a removable rubber shield on one side. Slide your tool under the shield’s edge and gently work it around until it pops off. Some bearings have a metal shield held by a tiny C-clip; remove the clip first with your pin.
If your bearings are sealed and you cannot remove the shield, your lubrication options are limited. You can try adding a drop of oil at the seam where the shield meets the inner race, but it’s less effective. This is why knowing your bearing types and designs matters.
2. Clean Thoroughly (The Non-Negotiable Step)
Place the open bearings in your container with your chosen cleaner. Seal it and shake vigorously for a few minutes. This dislodges old, gummy lubricant and grit.
Where this goes sideways: Using a water-based cleaner (like some citrus formulas) and not drying immediately. Bones Bearings warns this causes rust. If you use one, dry the bearings IMMEDIATELY after rinsing.
Remove the bearings and dry them completely. Spin them to fling out cleaner, then place them on a clean cloth. Let them air-dry completely. Any residual cleaner will dilute your new lubricant.
3. Apply the Lubricant
This is the precision step. Do not drown the bearing.
- For Oil: Hold the bearing vertically. Apply 1-2 drops of oil directly into the channel around the bearing balls. For Bones Swiss Ceramic Bearings, the spec is one drop.
- For Grease: Using a toothpick, place a 3mm bead of grease into the same channel. The goal is to coat the balls and races, not pack the cavity full.
Sources disagree on the perfect amount: Bones Bearings recommends 2 drops for steel bearings and one drop for ceramics, SkatePro recommends 1-2 drops of oil or 3 mm grease, and SMB Bearings recommends filling 15-20% of the internal space with grease. More is not better. Excess lubricant gets flung out, making a mess and attracting dirt.
4. Distribute the Lubricant
You need to work the lubricant into the bearing. Spin the inner race with your fingers. For a more thorough job, you can mount the bearing on a pencil or the shaft of a powered-down drill and spin it. This evenly coats the internal surfaces.
5. Reassemble and Reinstall
Snap the shield back onto the bearing. Make sure it’s seated evenly all around. Then, press the bearings back into your wheels. A proper bearing installation process ensures they sit straight and don’t get damaged.
Troubleshooting: After Lubrication Problems

What if you’ve cleaned and lubed, but things still aren’t right? Here’s a quick diagnostic table.
| Symptom | Likely Cause | Fix |
|---|---|---|
| Bearing still sounds/feels gritty | Incomplete cleaning; dirt left inside. | Repeat the cleaning process with fresh solvent. |
| Bearing spins less freely than before | Too much lubricant (especially grease). | Spin the bearing aggressively to expel excess, or partially disassemble and wipe out a little. |
| Wheel still seems slow when riding | Lubricant type mismatch or bearing is worn out. | Grease may need a longer break-in (a few miles). If still slow after that, the bearing may be pitted and need replacement. |
| Squeaking or rattling persists | The noise may not be from the bearing. | Check for wheel nuts that are too tight, or dry pivot cups in the trucks. Our guides on squeaky bearings and rattling bearings cover other culprits. |
A bearing that feels rough even after cleaning and lubrication is likely damaged. The super-finished races are pitted. No amount of lubrication will fix that.
The Quick Refresh (Lubricating Without Full Removal)
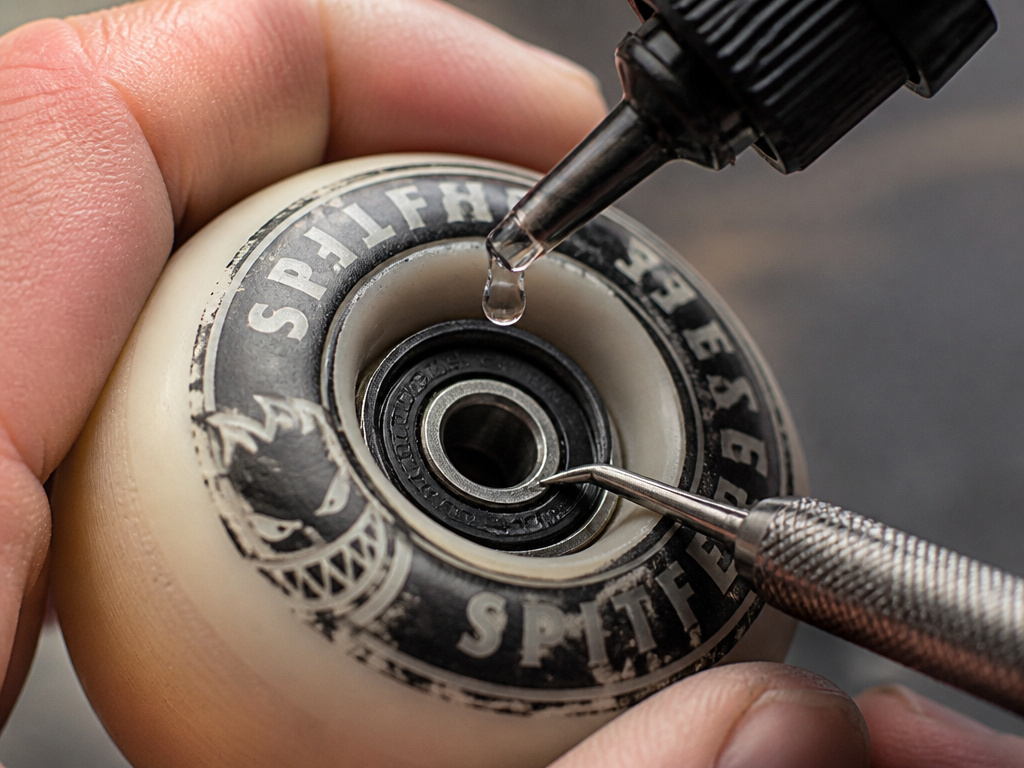
Sometimes you just need a quick boost between full cleans. You can add a drop of oil without taking the bearings out.
Lift the edge of the rubber shield with a pin. Apply one single drop of oil into the gap. Spin the wheel vigorously to distribute it. This is a temporary measure—it doesn’t replace cleaning—but it can quiet a dry bearing and add a little life.
I use this if I’ve been caught in a light drizzle. One drop per bearing after drying the wheels off helps displace moisture. It’s a stopgap, not a solution.
Testing and Break-In: The Finger Spin Myth
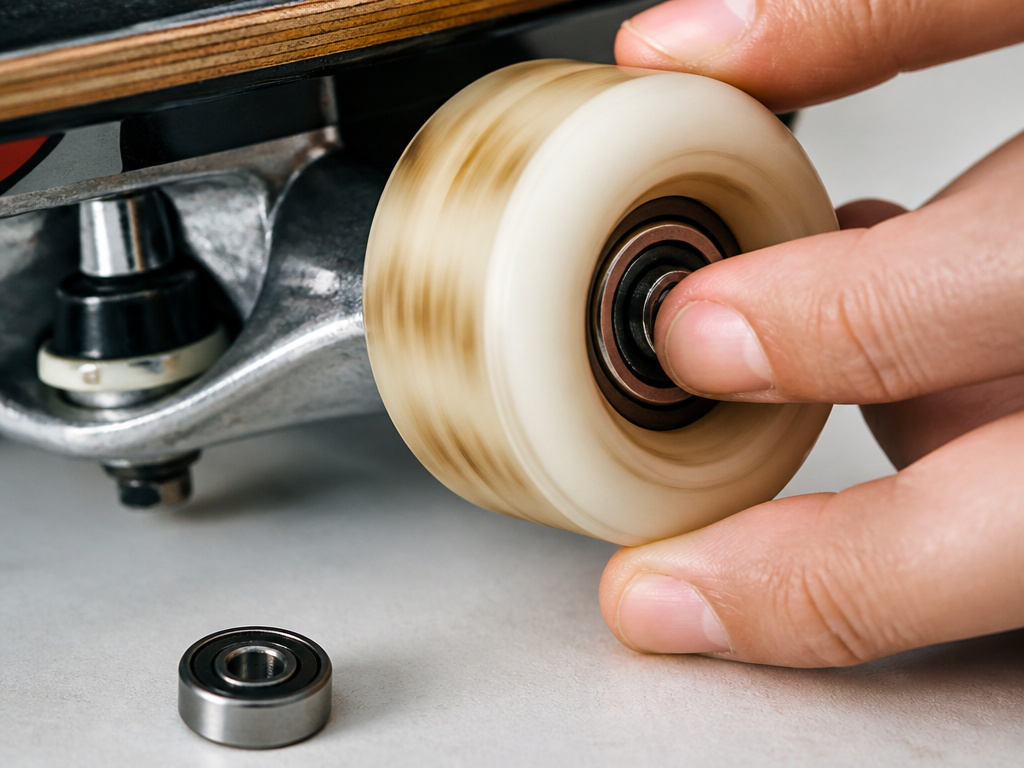
You’ll see people flick a bearing and listen. The SMB Bearings guide calls this a “terrible way to test.” The Skate FAQ agrees, saying a no-load spin test doesn’t reflect rolling resistance under your weight.
A clean, dry bearing with no lubricant will spin the longest in a finger test. That doesn’t mean it’s good for skating—it will wear out fastest.
SMB Bearings states that spinning a bearing with your finger is a terrible way to test because it does not replicate the conditions under load.
The real test is after reinstallation. Give the wheel a solid spin. It should spin freely but come to a smooth stop, not jerk to a halt. Then, ride it. After about an hour of skating, the lubricant will fully distribute. Bones Bearings calls this the break-in period. Your board will feel fastest after this, not immediately after lubrication. If you’re preparing for a session where every bit of speed counts, break in your bearings ahead of time.
How to Dry Bearings After Cleaning
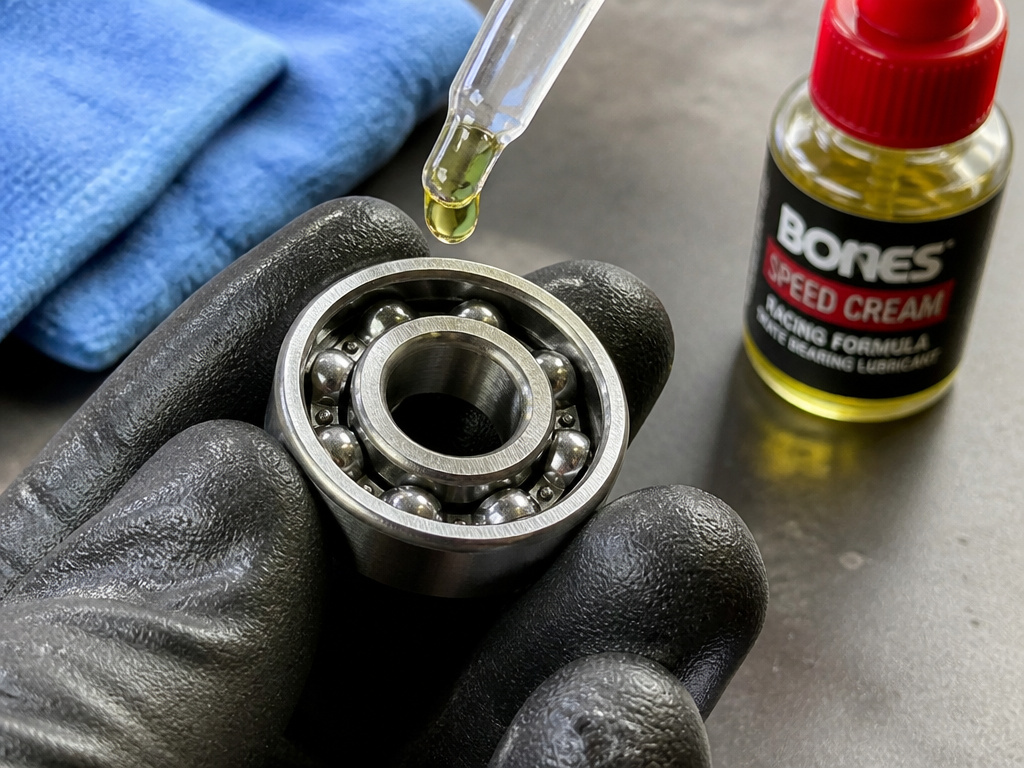
If you use a water-based cleaner like a citrus solution, you must dry your bearings immediately after rinsing. Any lingering moisture will cause the steel parts inside to rust. Once the bearings are completely dry, you need to re-coat the internal components with your chosen lubricant right away. This fresh layer of oil or grease protects the metal surfaces. After lubrication, remember that bearings perform best after a break-in period of use, which can be about an hour of skating or a few miles of riding to distribute the lubricant fully.
Safety Tips for Cleaning Bearings
When cleaning bearings with solvents or chemical cleaners, always work in a safe, well-ventilated area. The fumes from these products can be harmful if inhaled in an enclosed space. You should also wear appropriate rubber gloves to protect your skin from direct contact with the cleaners. This keeps harsh chemicals off your hands and prevents any contaminants from your skin from getting into the bearing. Always clean bearings thoroughly before adding new lubricant, as adding oil or grease to a dirty bearing will only flush the dirt further inside.
Frequently Asked Questions
What can I use to lubricate skateboard bearings?
Light machine oil like Bones Speed Cream is the standard. Alternatives include sewing machine oil or 3-in-1 oil. High-speed, low-torgrease (like Klueber) is also an option, as recommended by SMB Bearings. Never use WD-40, motor oil, or cooking oil.
Should I put WD-40 on my skateboard bearings?
No. The Concrete Waves handbook and Skate FAQ are clear: WD-40 is a solvent and water displacer, not a lubricant. It will dry out the bearing, leave a sticky residue that attracts dirt, and can lead to premature failure.
How often should I lubricate my bearings?
There’s no fixed schedule. Lubricate when bearings sound gritty, seem slow, or after they’ve gotten wet. Lubricate when bearings sound gritty, seem slow, or after they’ve gotten wet. More frequent skating or harsh conditions demand more frequent care.
Is it okay to use grease instead of oil?
Yes, it’s a valid choice with different trade-offs. Grease lasts longer and seals better against dirt and water but can feel slightly slower initially. If you choose grease, use a small amount of a high-speed formulation designed for bearings.
Why do my bearings feel slower after lubricating them?
If you used grease, it needs a break-in period of a few miles to expel excess from the ball path. If you used oil, you may have applied too much, creating drag. Spin the wheels aggressively to distribute the lubricant evenly. If the problem persists after a short ride, revisit the cleaning step.
Before You Go
Lubricating bearings isn’t about making them spin forever in your hand. It’s about reducing friction under load so you roll faster and farther. The one rule that overrides all others: clean first, lube second. Adding fresh lubricant to grit is how you make grinding paste.
For your next session, pick one wheel that feels slow. Clean and lube just that one bearing set. Ride it back-to-back against the others. You’ll feel the difference immediately—that’s the proof the process works. Then you can do the rest.
