
How to Grind a Skateboard Ledge: The First Steps That Work
This post contains affiliate links. As an Amazon Associate, we earn from qualifying purchases.
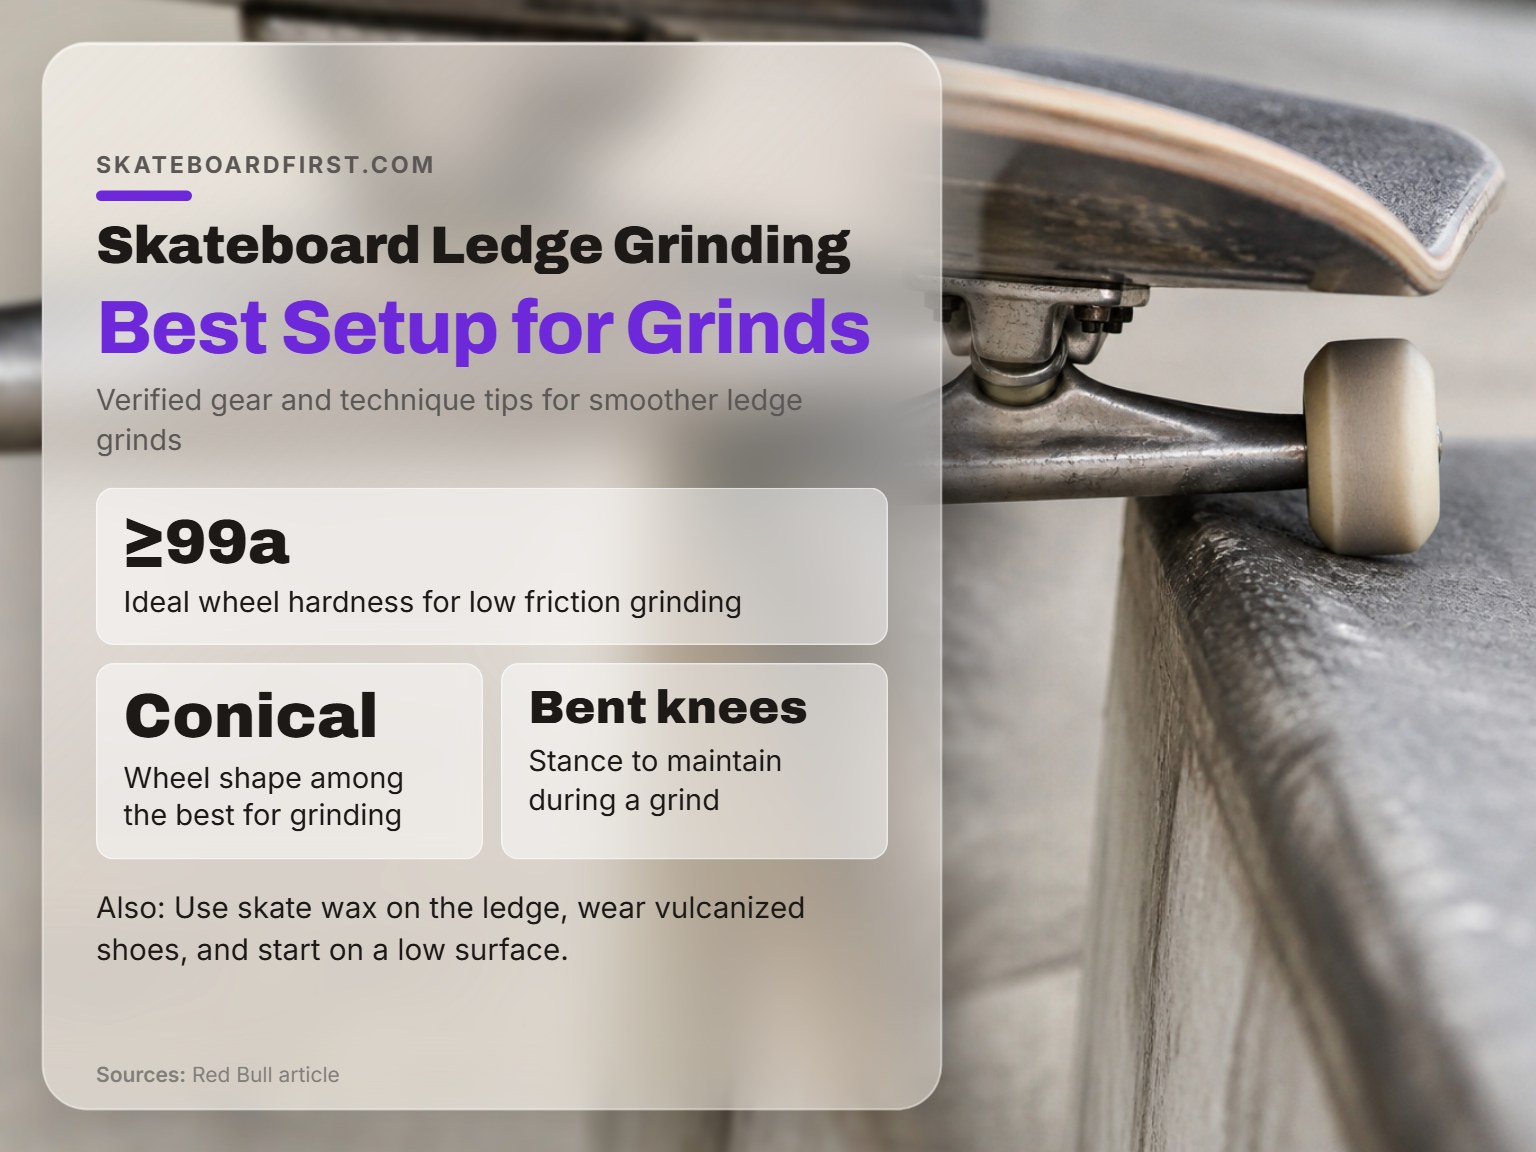
To grind a skateboard ledge, you need three things dialed in: a ledge prepped with wax, a board set up with hard wheels (99a or harder) and lighter trucks, and the ability to ollie onto the ledge and balance with your weight forward. Start on a low, waxed curb, approach at a slight angle, and focus on locking both trucks evenly onto the edge.
The “locking evenly” part is where most attempts fail. Your trucks need to hit the edge at the same time and your weight needs to stay centered over them, lean back and you slip off the back, lean too far forward and the nose digs in. It’s a balance point you find with your knees, not your upper body. This is a key principle when learning how to grind a skateboard ledge.
What follows is a breakdown of the gear that actually matters, how to make a rough ledge grindable, and the step-by-step sequence for how to grind a skateboard ledge with a basic 50-50. We’ll also look at where skaters disagree on approach angles and trick order, so you can test what works for your style.
Key Takeaways
- Use hard wheels (99a or harder) and lighter, forged trucks for lower friction and easier slides.
- Wax the ledge generously, a dry, sticky edge is the most common reason beginners stop dead mid-grind.
- Start by practicing ollies onto a low curb and balancing with both trucks on top before attempting a moving grind.
- Approach the ledge at a slight angle (not parallel) according to some skaters, while others recommend a parallel approach; test what works for you.
- Your first real grind should be a 50-50; it’s the foundation every other grind variation builds on.
The Gear That Actually Helps (and What Doesn’t)
You can grind on any setup, but some gear makes the learning curve noticeably shallower. The goal is to reduce friction and increase stability.
That blockquote from Red Bull’s guide nails the specs. A wheel at 99a durometer slides where a soft 78a wheel would stick and chatter. Conical shapes offer more surface area for stability without adding much weight. Lighter trucks mean less mass to haul onto the ledge, and forged construction keeps them strong despite the weight reduction.
For shoes, vulcanized soles are the standard recommendation because they’re slim and offer direct board feel. Thick, cushioned cupsoles can mute the feedback you need when adjusting your foot position mid-slide.
What about grind plates? They’re not necessary to start. They protect your truck hangers from cosmetic wear, but that wear doesn’t affect performance for a long, long time. Save the upgrade for when you’re grinding daily. Wider trucks can offer a more stable platform, but standard width is fine, changing your truck size changes how your board flips and turns, so don’t do it just for grinding.
The one thing you must not skip: skate wax. A dry, sticky edge will stop your trucks dead. A small block of dedicated skate wax is cheap and lasts forever.
| Gear | Ideal Spec for Grinding | Why It Matters |
|---|---|---|
| Wheels | Hardness ≥99a, Conical shape | Minimizes friction, provides stability for the slide. |
| Trucks | Lightweight / Forged construction | Easier to lift onto the ledge, strong enough for impact. |
| Shoes | Vulcanized sole | Better board feel for precise foot adjustments. |
| Wax | Dedicated skate wax | Creates the slick surface needed for the trucks to slide. |
| Protection | Helmet, knee pads (optional) | Falling on concrete is part of learning; gear lets you get back up faster. |
Prepping Your Ledge: The Rub Brick Method
Not every concrete ledge is ready to skate. A “crusty” or rough surface will eat your speed and spit you off, no matter how much wax you apply. The Tactics guide details a full restoration process for these spots.
First, scout a ledge away from businesses or high-traffic areas. You’ll be making noise and dust. The three parts you need to smooth are the edge (where your trucks grind), the top (for nose or tail slides), and the side (where your wheels might touch).
The tool for this is a rub brick, a coarse, hand-held abrasive block. You’ll scrape it along the surface, which is labor-intensive and creates concrete dust. Wear a mask. Sweep the dust away with a broom or an old shirt as you work.
Once the ledge is smooth to the touch, you seal it. A clear spray-on lacquer over the entire smoothed area locks out moisture and prevents the concrete from reverting to a dusty, grabby surface. Let it dry completely.
Now you wax. Don’t skimp. A ledge that’s never been skated needs a heavy initial coat. Rub the wax generously along the edge, top, and side. Test it by pushing your board along the ledge with your hands. If it doesn’t slide smoothly, add more wax. This whole process turns an unskateable spot into a buttery grind haven.
The 50-50 Grind: Step-by-Step
The 50-50 grind, where both trucks slide evenly on the ledge, is the universal starting point. Every other grind, the 5-0, the nosegrind, the feeble, builds on this balance.
Before you try this moving, do this stationary drill. Find a low painted curb or a very low ledge. Practice ollieing straight up and landing with both trucks planted on top, your wheels hanging off on either side. Hold that position. The feeling of being balanced on that narrow edge is the core of the grind.
When that feels stable, add a tiny bit of speed so your landing carries you into a slight slide. You’re not trying for length yet; you’re connecting the balance point with forward motion.
Now for the real attempt on how to grind a skateboard ledge properly.
- Approach with a slight angle. Don’t come in parallel to the ledge. A slight angle makes it easier to get your back truck up and locked. Too much angle and you’ll slide off sideways; too little and you might not get fully on.
- Ollie onto the ledge. You need enough pop to clear the edge and land with your trucks squarely on it. A weak, sliding-on attempt won’t lock in.
- Land with knees bent, weight forward. Land in a low, athletic stance. Your weight should feel centered over your trucks, maybe slightly forward, though some skaters suggest a 40% front foot, 60% back foot distribution. Leaning back is the most common cause of slipping off the back.
- Lock and slide. Focus on keeping the trucks evenly on the edge. Look ahead, not down at your feet.
- Pop off. As you near the end, give a small ollie pop to hop cleanly off the ledge and land rolling away.
Common mistake: Leaning back as you lock in. Your instinct will be to pull away from the obstacle. Fight it. Commit your weight over the front truck, and your board will slide. Lean back, and you’ll stall and fall backwards every time.
Where do skaters disagree? Reddit threads show debate on the ideal approach angle. Some say parallel, others insist on a slight angle. The “slight angle” camp has more traction because it helps with the back truck. Some skaters recommend starting at a slight angle and adjusting, while others prefer a parallel approach. There’s disagreement on weight distribution: some say 40% front foot, 60% back, while the Red Bull guide implies an even 50-50 split. In practice, you’ll need to find the balance point that works for you.
Ledge vs. Rail: Where to Start

Should your first grind be on a ledge or a flatbar rail? The community is split, and your local spots might decide for you.
Ledges are more forgiving. They have a wide, flat top for your trucks to land on. If you come in a little crooked, you can sometimes correct. The consequence of bailing is often just stepping off onto the ledge. A low concrete curb or a DIY skate ledge is the perfect training ground.
Rails are less forgiving. They’re narrow and round. Your margin for error is tiny. Landing off-center means your wheels hit the rail and you pitch off. However, a low, sturdy flatbar rail can be easier for certain slides like boardslides, as the rounded shape is designed to be slid on.
Most instructors and forum veterans advise getting comfortable on ledges first. The skills transfer directly to rails, but the wider target and easier bail make the learning process less punishing. Once your 50-50s on a ledge are consistent, a low flatbar rail is a logical and exciting next step.
Trick Progression: What to Learn After the 50-50
Once you have the 50-50 on lock, the world of ledge tricks opens up. But what’s the next easiest trick? Ask three skaters, and you’ll get three different lists.
Here’s a synthesis of the most common progressions suggested on r/skateboarding:
| Common Progression Paths | Key Takeaway |
|---|---|
| 50-50 > Backside Noseslide > Frontside 5-0 > Crooked | Focuses on slides before other grinds. |
| 50-50 > Frontside 5-0 > Backside 50-50 > Noseslide | Introduces frontside/backside variety early. |
| 50-50 > Boardslide > 5-0 > Nosegrind | A more traditional grind-focused progression. |
The backside noseslide frequently appears as an early trick because you don’t need a high ollie, you just need to get the tail or nose onto the ledge and pivot. Frontside 5-0s (balancing on just your back truck) are often the first “one truck” grind people learn after the 50-50.
The best approach is to pick one from the “common next step” column and drill it. Trying to learn three tricks at once on the same day leads to frustration. I used to grind on one trick for extended periods until I landed it. By the end my legs were shaky and my form was sloppy. Now I work in short rounds of several serious attempts and then take a break or switch to something else. The clarity you get from a fresh start is worth more than repeated sloppy tries.
Materials needed (wood, steel coping, hardware)

You’ll need a solid piece of wood for the main structure, a length of steel angle iron for the coping, and the necessary hardware to assemble it. The angle iron acts as the smooth, durable edge your trucks will grind against. Make sure all your fasteners are strong enough to handle repeated impacts. While the fact sheet doesn’t list specific lumber dimensions or hardware sizes, the core idea is straightforward: a sturdy base, a metal edge to slide on, and the bolts or screws to hold it all together securely.
Step-by-step construction process

Begin by cutting your wooden structure to the desired length and shape. Secure the frame together firmly, ensuring it’s stable and won’t wobble under your weight. The next critical step is attaching the steel coping, which is covered in its own section. Once the main build is complete, you can add finishing touches like sanding rough edges or applying a sealant to protect the wood from the elements. The process is about creating a solid, reliable platform that mimics the feel of a real-world ledge.
Coping (angle iron) installation and placement
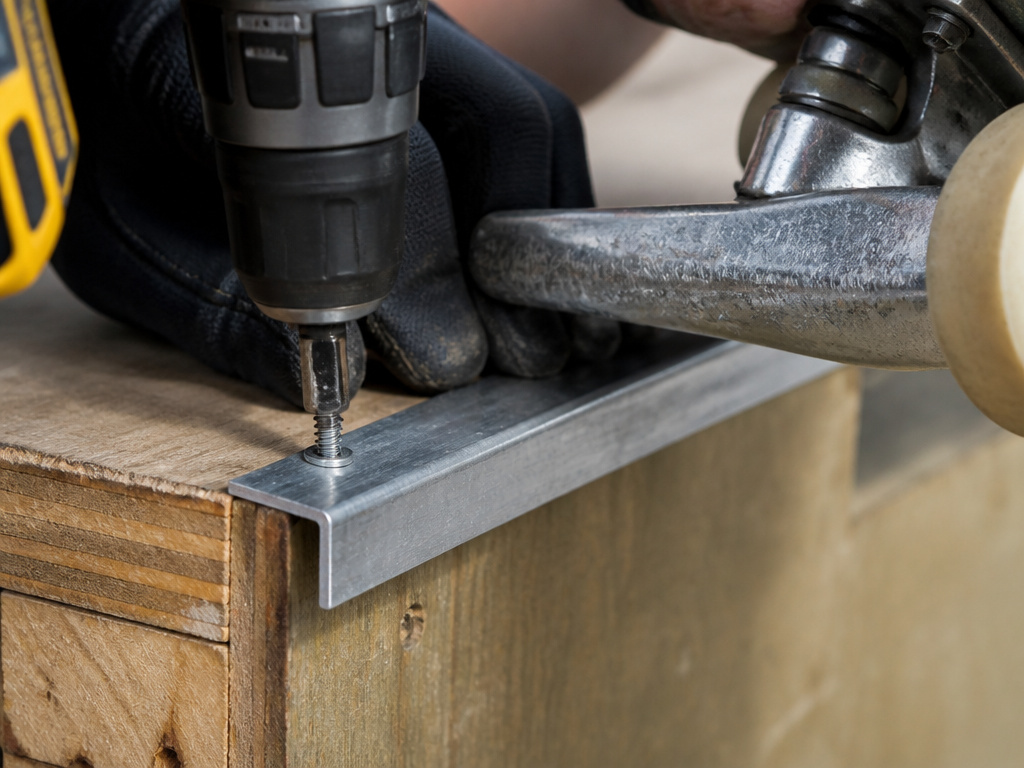
Installing the angle iron coping is the most important part of the build. Position it so the metal edge protrudes slightly from the wooden structure, creating a clean lip for your trucks to catch and grind. Secure it from underneath or through the side with strong bolts or lag screws, making sure it’s perfectly straight and flush along the entire length. A wavy or uneven coping will make grinding difficult. The goal is a smooth, continuous metal edge that’s firmly anchored to withstand the force of landing tricks.
Frequently Asked Questions
How do I make a concrete ledge grindable?
For a rough concrete ledge, you need to smooth it first. Use a rub brick on the edge, top, and side while wearing a mask. Sweep away the dust, then seal the smoothed area with a clear spray-on lacquer. Once the lacquer dries, apply skate wax generously. Test the slide by pushing your board along it with your hands.
What is the hardest grind to do on a skateboard?
On ledges, tricks like backside noseblunts or highly technical variations like a sugarcane grind are considered among the most difficult. For beginners, the perceived difficulty often comes from the commitment and balance required for any grind, not the trick’s technical ranking.
Is 27 too late to start skateboarding?
No. Starting at 27 means you’ll likely be more cautious, which can actually be a safety benefit. Your learning focus will be different, mastering pushing, turning, and stopping is more important than trying to keep up with teenagers. Wear protective gear, set realistic goals, and enjoy the process. Skateboarding is about personal progression, not age.
Do I need special trucks to grind?
No. Standard trucks work perfectly fine for learning. Some skaters later add grind plates to protect the truck hangers from cosmetic wear, but they are not necessary to start. Lighter, forged trucks can make getting onto the ledge easier, but they are an upgrade, not a requirement.
Why do I keep stopping dead on the ledge?
Two main reasons: the ledge isn’t waxed enough, or you’re leaning back. A dry, sticky concrete surface creates huge friction. Apply more wax. If the ledge is slick and you’re still stopping, you’re probably shifting your weight backward as you land. Commit your weight forward over your front truck.
Before You Go
Grinding a ledge boils down to a simple trade: you trade the fear of the obstacle for the feel of the slide. The exchange happens in your knees, not your head.
Start with the lowest ledge you can find. Wax it until your board slides with a gentle push. Set up your board with hard wheels, and then just work on ollieing onto it and standing there. The jump from that stationary balance to a moving 50-50 is smaller than it looks from the sidewalk.
One rule most guides skip: if you haven’t landed a clean 50-50 on a low curb after several tries, stop. Go back to ollieing onto it and holding the balance. The trick isn’t about muscling through; it’s about finding that lock point so consistently that the muscle memory takes over. Everything above assumes you can ollie with control, if you can’t, that’s your real first step. Grinds are a milestone, not a starting line.
