
How to Powerslide on a Skateboard: Step-by-Step Breakdown
This post contains affiliate links. As an Amazon Associate, we earn from qualifying purchases.
To powerslide on a skateboard, you need speed, a low stance, and a 90-degree board rotation where all four wheels slide sideways. Your back foot is the control foot, pushing the board into the slide. Harder wheels and smooth surfaces make sliding easier, but the trade-off is flat spots that wear down your wheels.
The 90-degree rotation is the whole game. It’s not a trick where the board lifts off the ground; it’s a controlled loss of traction. That means your setup and your commitment decide whether you slide or just stop abruptly. This is the core of how to powerslide on a skateboard.
What follows: the exact foot placement debate, the three things that make or break your slide (speed, wheels, surface), a step-by-step breakdown for frontside and backside, and how to bail safely when it goes wrong, all central to learning how to powerslide on a skateboard. By the end, you’ll know why your first attempts probably stick instead of slide, and the one adjustment that fixes it.
Key Takeaways
- A true powerslide requires a 90-degree board rotation with all wheels sliding — anything less is a speed check.
- Your back foot controls the slide by pushing the tail sideways; your front foot anchors your weight over the bolts.
- Sources agree that harder wheels slide easier, but disagree on specific hardness: Surfertoday states the general rule, while anecdotal advice cites Spitfire Formula Four 101 duro wheels as sliding easier than 99 duro.
- Frontside slides are easier for most beginners because you can see where you’re going as you rotate.
- Always wear slide gloves and a helmet when practicing — you will fall, and pavement wins every time.
The 90-Degree Rotation That Defines a Powerslide
A powerslide isn’t just any slide. It’s a specific 90-degree rotation of the skateboard while keeping all four wheels in contact with the ground. That definition comes straight from the Surfertoday tutorial, and it’s the line between a controlled braking maneuver and an accidental skid.
If you only get a 45-degree turn or the board chatters to a stop, you’ve done a speed check. That’s a useful skill for scrubbing a little speed, but it’s not the full, board-locked slide that lets you stop from a hill bomb. The full 90 degrees is what separates a beginner move from a reliable tool.
The powerslide results in a 90-degree rotation of the skateboard while maintaining all wheels in contact with the ground. This is the technical definition that distinguishes it from other slides and pivots.
The sensation is unique. When it’s right, you’ll hear a consistent, gritty hiss from all four wheels at once, not a chattering brrrp-brrrp. Your board will feel locked in a sideways drift, and you’ll be leaning back over your rear truck to keep from pitching forward. Get it wrong, and the board either stops dead or spins out from under you. That 90-degree target is your benchmark.
Foot Placement and Body Positioning: Where Sources Disagree
Here’s the first real debate. The Surfertoday guide says to put your front foot near the front truck. Multiple Reddit threads from learners insist your front foot needs to be on the bolts, at least at first. Who’s right? Both, for different reasons.
The “on the bolts” position gives you maximum control and stability, which is why it’s the beginner recommendation. Your weight is centered over the deck, making it harder to slip off. The “near the front truck” position, sometimes called the pocket, gives you more power to whip the board around, which is useful for longer, stylized slides. Start on the bolts. Move to the pocket only after you’re comfortable with the motion.
Your back foot is the control foot. It stays over or just behind the rear truck, and it’s the foot that actively pushes the tail out to initiate the slide. If you’re regular-footed (left foot forward), a frontside slide means pushing your right foot to the right. That’s the “power” in powerslide.
Common mistake: Keeping your weight centered or on your back foot. This prevents the board from breaking traction. Most of your weight must be on your front foot when you initiate.
Body positioning follows from your feet. Bend your knees. Seriously, bend them more than you think you need to. A low center of gravity keeps you stable when the wheels lose grip. As you carve into the slide, extend your legs to push the board out, then bend them again to absorb the slide and regain control. That leg extension is the “push both of your feet and the board forward” action the Surfertoday source describes. Reddit users describe it as using your leg power to really push into the board.
Speed, Wheels, and Surface: The Sliding Trifecta
You can have perfect form, but if any one of these three factors is off when learning how to powerslide on a skateboard, you won’t slide. They work together.
Speed is essential. The Reddit advice is blunt: the faster you’re going, the longer you’ll slide. Too slow, and your wheels will grab the pavement and stop you dead. A solid, confident push that generates enough momentum to break traction is a good starting speed. If you’re scared of the speed, you’re not ready to commit to the slide.
Wheel hardness decides how much speed you need. The Surfertoday source states a clear rule: the harder your wheels are, the easier they’ll slide because they have less traction. A Reddit thread backs this up with a specific comparison: Spitfire Formula Four 101 duro wheels slide easier than 99 duro. Harder wheels (higher duro number) break loose with less force. Softer wheels grip more, which is great for park skating but works against you when you want to slide.
| Wheel Hardness (Duro) | Best For | Slide Ease | Trade-off |
|---|---|---|---|
| 99A and below (Softer) | Park skating, rough surfaces | Harder – needs more speed/force | Grippy, provides more traction |
| 101A and above (Harder) | Sliding, smooth concrete | Easier – breaks loose sooner | Less traction, slides more readily |
Surface is your third variable. Smoother surfaces are easier for powerslides. Fresh asphalt, polished concrete, or even a slick tennis court offer less friction. Rough pavement or painted concrete with sand mixed in will grab your wheels. One Reddit user noted that asphalt is usually slicker, especially fresh blacktop, while polished concrete provides a controllable slide with typical 99 duro wheels. If you’re struggling, find smoother ground.
Frontside vs. Backside: Which Should You Learn First?
Frontside and backside refer to which side of your body faces the direction of travel during the slide. For a regular-footed rider, a frontside powerslide has your chest facing forward as the board slides. A backside powerslide has your back to the direction of travel.
The consensus from the Reddit community is clear: frontside powerslides are easier than backside. The reason is visibility and biomechanics. In a frontside slide, you can see where you’re going, and the motion feels like a natural, seated rotation. For a backside slide, you’re rotating blind, and the motion requires more of a squat-and-push that can feel less stable.
Where this goes sideways: Trying a backside slide first because it looks cooler. You’ll likely spin out or fall backwards because you can’t see your exit. Start frontside to build confidence and understand the mechanics.
The setup differs slightly. For a frontside slide, you’ll carve heelside (leaning back) and push your back foot out. For a backside slide, you carve toeside (leaning forward) and push the tail out behind you. One Reddit tip for frontside is to put more weight on your nose and almost do a kickturn/pivot, but keep your back wheels on the ground. That “almost” is the key—it’s the initiation of rotation without leaving the ground.
The Step-by-Step Breakdown
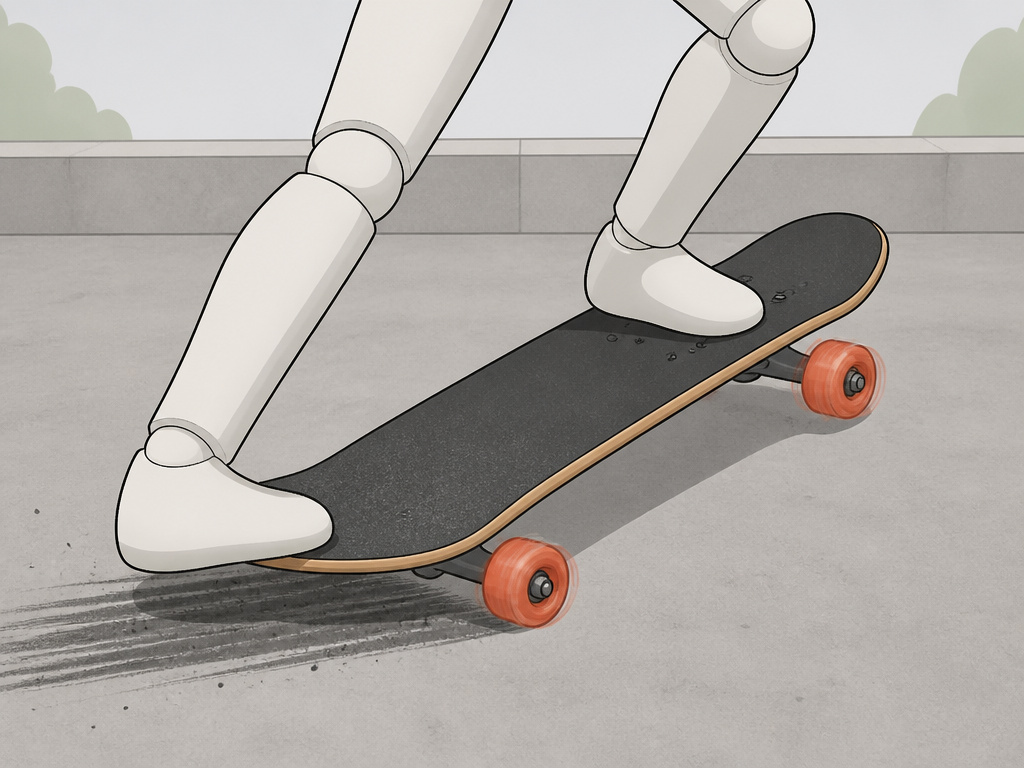
We can stitch the theory into a sequence you can practice. This is for a frontside powerslide, the recommended starting point.
- Get to a confident speed. Find a smooth, open stretch of pavement or polished concrete. Push until you’re going noticeably faster than a cruising pace.
- Set your feet. Front foot on the front bolts. Back foot on or just behind the rear bolts. Bend your knees deeply.
- Initiate a heelside carve. Start turning your board to the left (if regular-footed) by leaning back onto your heels. Don’t slide yet; just set the angle.
- Shift weight forward and push. As you carve, shift most of your weight onto your front foot. Now, forcefully push your back foot out to the right, like you’re kicking the tail sideways. This is the “push both feet forward” action.
- Lean back and extend. As the board starts to slide sideways, lean your upper body back over your rear truck. Extend your legs slightly to maintain the push. Your shoulders should stay parallel to the board.
- Hold and recover. Keep the slide going for as long as you want to scrub speed. To end it, stop pushing with your back foot and let the board straighten out. Shift your weight back to center and bend your knees to absorb the return to rolling.
What if the board doesn’t slide? You need more speed, a harder push with your back foot, or harder wheels. The board will tell you what’s missing. A sudden stop means not enough speed or commitment. A wobbly, uncontrolled spin means you put too much weight on your back foot or didn’t lean back enough.
How to Bail Safely (And Why You Need Gear)
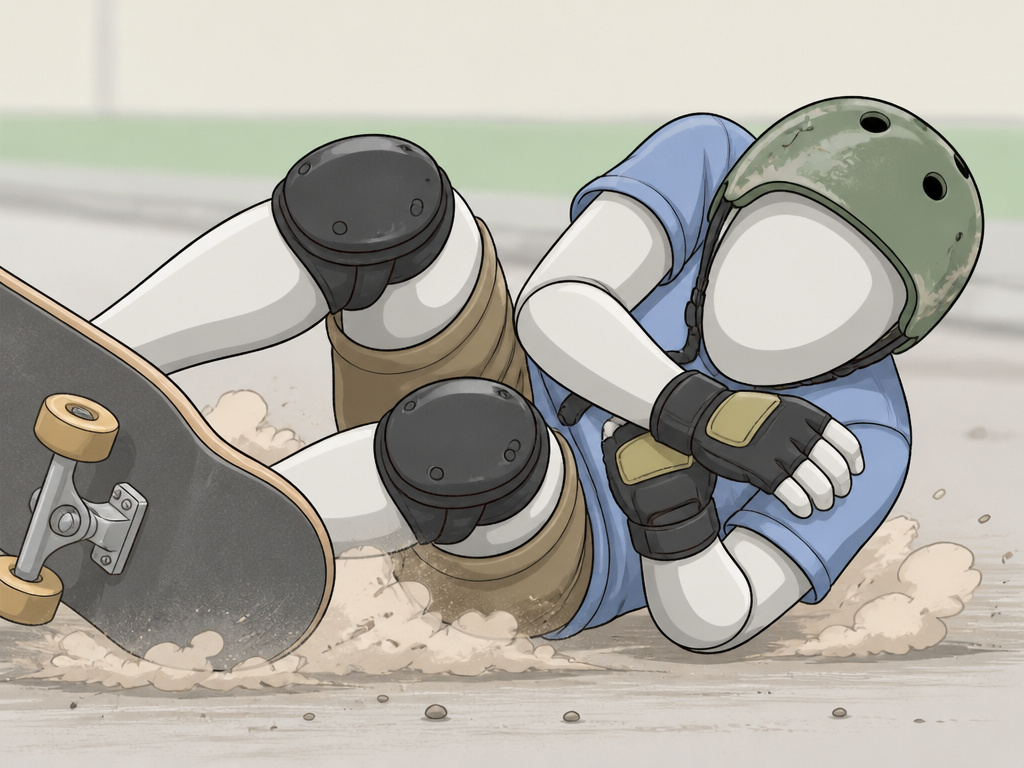
You will fall learning this. It’s a guarantee. The goal is to fall correctly. The most common fail is the high-side: the board suddenly regains traction and flings you forward over the top of it.
When you feel the slide start to hook up and buck you, don’t fight it. Try to run it out. If that’s not possible, aim to roll. Tuck your chin, try to land on the meaty parts of your shoulder and back, and roll through the impact. Never stick an arm out straight to break your fall—that’s a wrist or collarbone injury waiting to happen.
This is why the Reddit advice to bring slide gloves, a helmet, and pads is not optional for learning. Slide gloves let you put a hand down if you need to without shredding your palms. A helmet protects you from the one bad fall. Knee pads let you practice on harder surfaces with less fear. Looking like a beginner is temporary. A head injury is permanent.
Drills to Build Up to a Full Powerslide
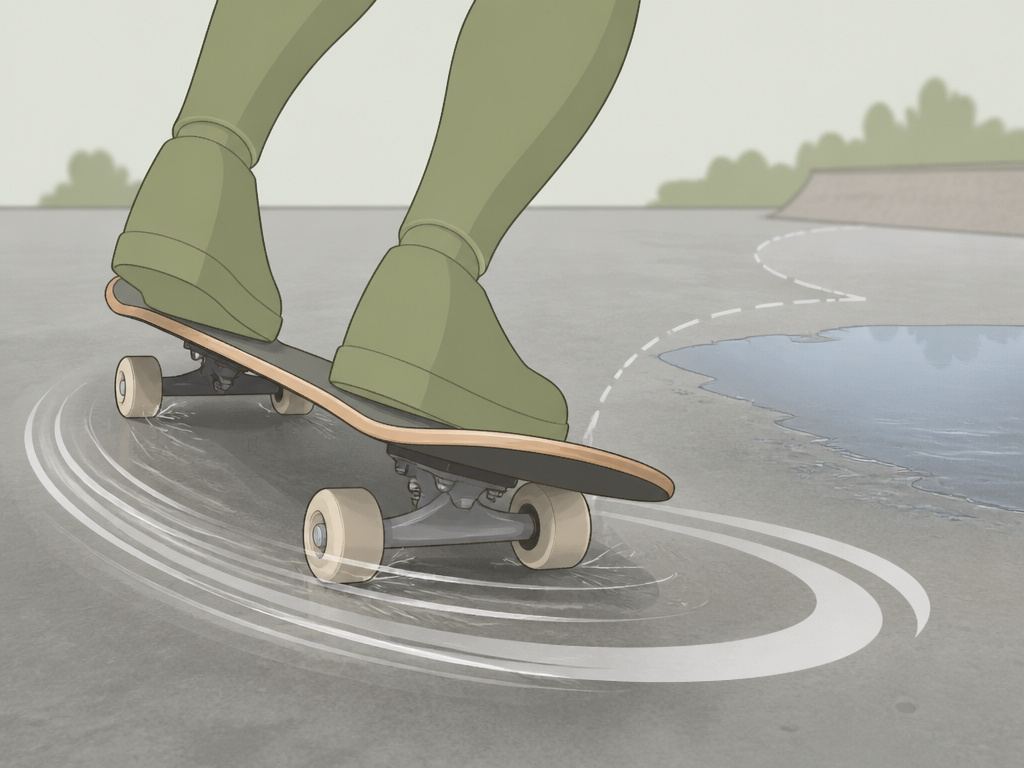
Jumping straight into a full-speed powerslide is a recipe for a hard fall. Break it down.
Drill 1: The Revert. On flat ground, practice spinning the board 180 degrees while keeping the wheels on the ground. This teaches you the foot motion and board control without the speed. It’s the first tip in the Reddit threads for a reason.
Drill 2: The Speed Check. At a moderate speed, try to get the board to slide just a few degrees. Don’t aim for 90 degrees. Aim for a quick scritch sound and a tiny speed reduction. This builds the muscle memory for initiating the slide without the commitment of a full lock-up.
Drill 3: Wet Surface Practice. One seasoned Reddit user recommended practicing in the rain on a beater board. The reduced friction helps you feel the slide mechanics at lower speeds. It’s a brilliant way to demystify the motion before taking it to dry pavement.
Common Mistakes and How to Fix Them
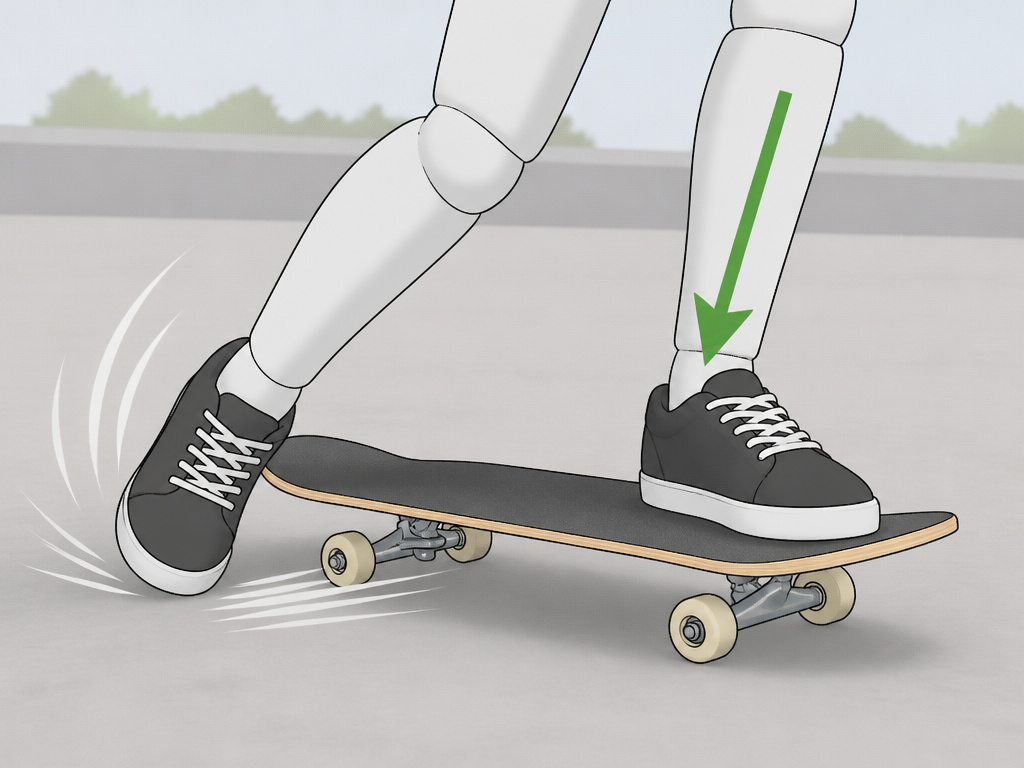
- The board stops dead. You didn’t have enough speed or you didn’t commit to the push. Fix: Go faster and really throw your back foot out. Think of it as a sharp, decisive shove.
- You spin out and fall backwards. You put too much weight on your back foot during initiation. Fix: Consciously keep your weight over your front foot. Your back foot pushes, but it shouldn’t hold your weight.
- The slide is short and chattery. You’re not leaning back enough, or your wheels are too soft for the surface. Fix: Actively lean your upper body behind the board. If that doesn’t work, try harder wheels or a smoother spot.
- You can’t exit the slide smoothly. You’re staying in the leaned-back position too long. Fix: As soon as you’ve scrubbed the desired speed, stop pushing with your back foot and let the board’s natural forward momentum straighten it out. Shift your weight forward again.
The Downside: Flat Spots and Wheel Wear
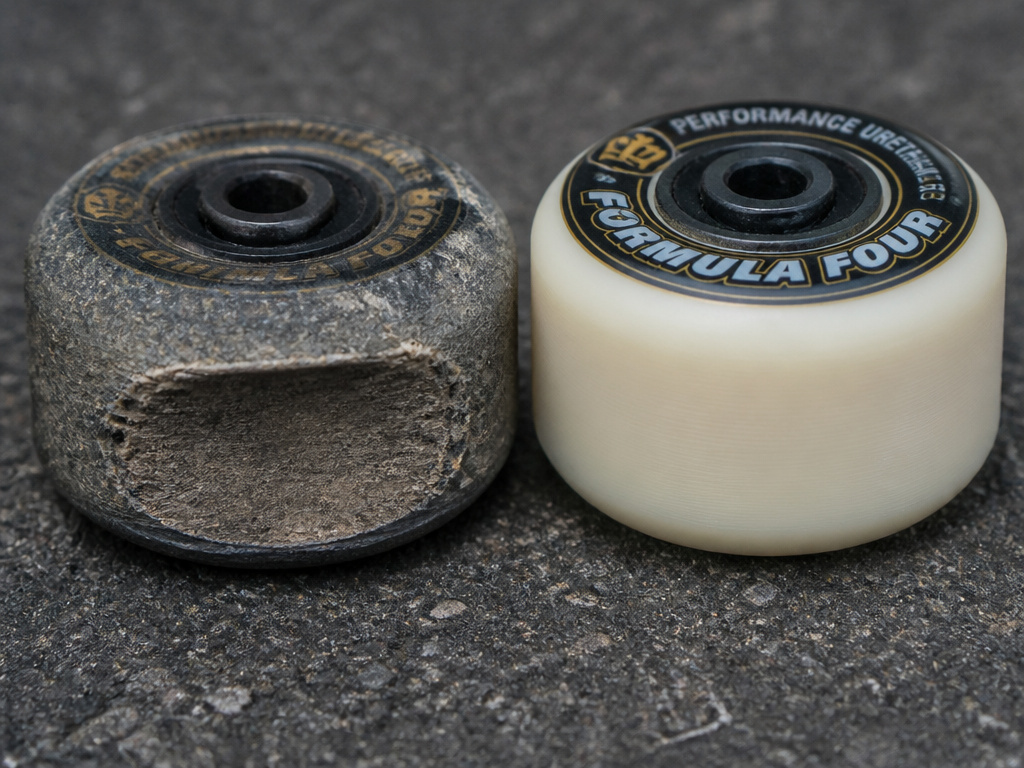
The Surfertoday source doesn’t sugarcoat it: the downside of the powerslide is flat spots that will slowly appear on your wheels. Every slide grinds down the round profile of your wheel where it contacts the ground. Over time, they become smaller and develop a distinct flat plane.
You’ll feel it before you see it. A wheel with a flat spot makes a rhythmic thump-thump-thump sound with each revolution. It kills your smooth roll and can make your board feel sluggish. It’s the trade-off for having a reliable braking tool. If you slide a lot, expect to replace your wheels more often. It’s just part of the cost of doing business. Some skaters dedicate a set of harder wheels specifically for sliding to preserve their good park wheels.
Practicing at low speed first
Start slow. Before you try a full powerslide at high speed, practice the motion at a low, manageable pace. This helps you focus on the mechanics without the fear of a high-speed fall. Begin by learning how to revert on flat ground, which builds the balance and control needed for a slide. A short slide at low speed is called a ‘speed check’ and is a key stepping stone. Focus on bending your knees as you carve and then extending your legs to initiate the rotation. The goal is to get comfortable with the feeling of the board sliding sideways while all wheels stay on the ground.
Risk of falling forward if not leaning back
A common mistake when learning the powerslide is not leaning back enough. If your weight is too far forward, you risk pitching over the nose of the board and falling. The key is to commit your weight to the slide by leaning back, using your back foot as the control foot to push the board sideways. For a frontside powerslide, put more weight on your nose to start the pivot, but keep your back wheels grounded and your body centered over the board. This backward lean counteracts the forward momentum and keeps you stable as the board rotates.
Frequently Asked Questions
Do you need hard wheels to powerslide?
You don’t need them, but they make it exponentially easier. Harder wheels (101 duro and up) have less traction, so they break into a slide with less speed and force. Softer wheels (like a 99 duro) can slide, but they require more commitment and speed, making the learning curve steeper.
What is a powerslide vs drift?
In skateboarding, they are often the same thing. “Powerslide” is the specific term for the 90-degree, all-wheels-down slide used for braking. “Drift” is a more general term sometimes used in longboarding for similar sliding techniques, but it can imply a longer, more drawn-out slide. For a street skateboard, you’re learning a powerslide.
How do you perform a power slide on a longboard?
The principles are the same—speed, weight distribution, and breaking traction—but the execution differs due to the longer wheelbase, lower ride, and often softer wheels. Longboard slides often involve a “stand-up” technique with a more dramatic pre-carve and a different hand/body position. Our article on the longboard slide covers those specifics.
Is a 180 powerslide different?
Yes. A regular powerslide rotates the board 90 degrees relative to your direction of travel, then you straighten out. A 180 powerslide continues the rotation a full 180 degrees, so you end up riding away in the opposite direction (fakie). It’s a more advanced trick that requires greater board control and commitment.
Before You Go
The one thing that stops more learners than anything else is fear of the slide itself. The board is supposed to lose grip. That’s the point. Trust that if you’ve practiced your basic skateboard turns and you know how to stop a skateboard by other means, you have the fundamentals to control this.
Start small. Don’t bomb a hill trying to powerslide for the first time. Find a smooth, flat lot and practice the revert. Then add a little speed for a speed check. Get a feel for the way your new skateboard wheels behave when they scuff. The full, board-locking slide will come when your body believes it’s just a bigger version of what you’ve already done. And for your first real attempts, gear up. The confidence that comes from wearing pads is worth more than looking cool.
