
How to Stop on a Skateboard: Step-by-Step
This post contains affiliate links. As an Amazon Associate, we earn from qualifying purchases.
To stop on a skateboard, you have four core methods, each for a different speed and skill level: the foot drag (for controlled slowing on flat ground), the run-out (the safest emergency stop for beginners), the tail scrape (for quick, low-speed stops), and the power slide (for advanced riders at higher speeds). Official advice differs on the first stop to learn. The Roces manual instructs simply to stop or slow down by placing the foot on the ground. However, many professional instructors prioritize the run-out (stepping off into a run) as the primary and safest emergency stop for beginners.
That gap between dragging a foot and stepping off cleanly in the how to stop on a skateboard process is where most beginners get hurt. They try to force a drag at speed, their foot catches, and they pitch forward. The run-out is the real safety net, it’s how you avoid that face-first meeting with the pavement.
What follows: the exact steps for each method, the speed ranges where they work, the gear that actually matters, and the one practice rule that prevents most wipeouts.
Key Takeaways
- The run-out (stepping off) is the safest emergency stop for any beginner; it’s the primary technique professional instructors teach to avoid catching a foot and falling.
- For the foot drag, keep all your weight on the front foot, if your braking foot feels heavy, you’re about to skip and fall.
- Tail scrapes destroy your board’s tail quickly; use them sparingly and only for very slow, controlled stops.
- Speed dictates your stop. The foot drag is for controlled slowing at lower speeds, while the run-out is recommended for higher speeds or when uncertain. The power slide should only be attempted after mastering the other techniques on flat ground.
- Always practice new stops at a walking pace in a flat, open area; hills change everything and require mastered skills.
The Gear That Lets You Practice Safely
Before your foot touches the ground, your gear needs to be sorted. This isn’t about looking pro; it’s about having a board that responds predictably and pads that let you walk away from a mistake.
The official advice splits on specifics. The U.S. Consumer Product Safety Commission (CPSC) says to wear protective gear when riding, especially a helmet and notes wrist guards are especially important. The Roces manual advises to wear protective equipment: hand/wrist, knee and elbow protections and helmet.
Before you start: A loose helmet comes off on impact. The CPSC states a helmet should fit snugly with the chin strap fastened and sit level on your head, not tilted back. The CPSC states that wrist guards are especially important.
Your board matters just as much when you compare a how to stop on a skateboard. The Roces manual, which references the EN13613:2009 safety standard, tells you to check the skateboard steering mechanism and turn the wheels to make sure they rotate freely. A sticky wheel or a wobbly truck won’t let you control your speed reliably, which means your stop will be a guess. Check your gear every session.
The Foot Drag (Foot Brake). Step-by-Step
This is the first stopping method you’ll read about in any manual. The Roces manual puts it plainly: “To stop or slow down, place the foot on the ground.” It’s for controlled slowing on flat, smooth pavement when you’re going at a jogging pace or slower.
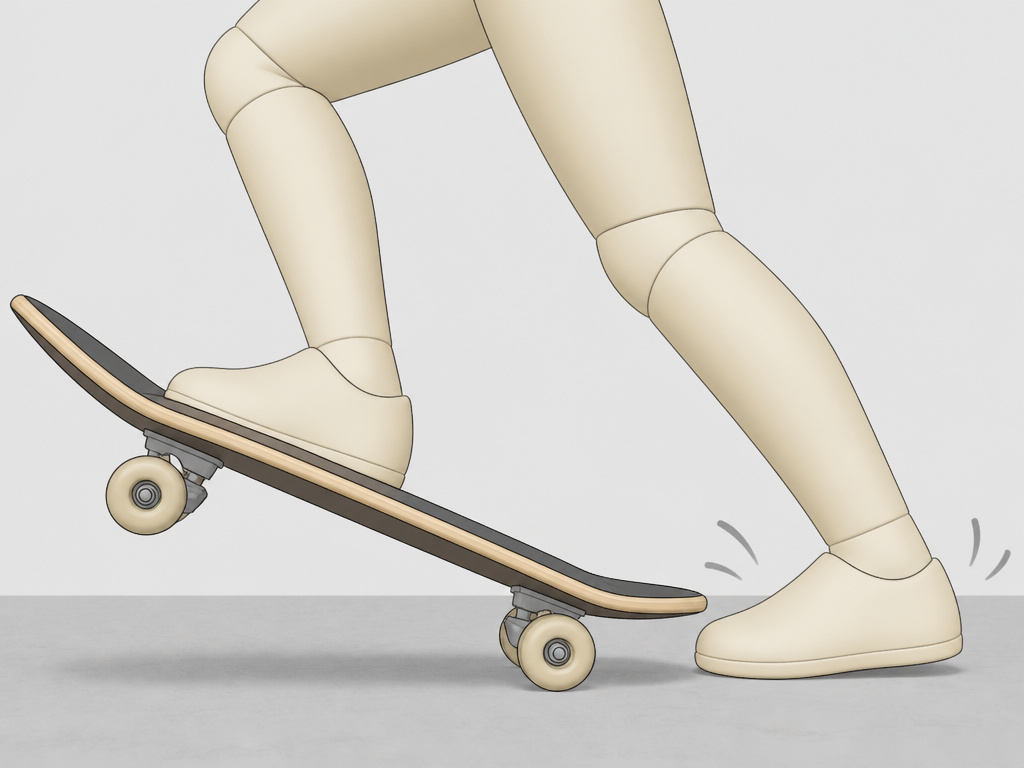
The trick everyone misses is weight distribution. If you shift your weight onto your braking foot, it will catch and you’ll pitch forward. Your braking foot should barely kiss the pavement. All your weight stays on your front foot, planted over the front trucks. You’re doing a one-legged squat on the board while the other foot lightly drags.
Follow these steps:
- Set your front foot straight. Pivot your front foot from the pushing position to point straight ahead, parallel to the board’s length. Your toes should be just behind the front bolts.
- Look ahead, not down. Pick a spot in front of you and focus on it. Looking down throws your balance over the front wheels.
- Lower your back foot gradually. Bend your front knee and slowly lower your back foot. Let the sole of your shoe brush the ground. You should feel a gentle drag, not a hard scrape.
- Increase pressure to slow. To stop, gradually press your back foot down while keeping your chest up and weight forward. To slow without stopping, just maintain light contact.
- Bring your foot back on. Once stopped, lift your back foot and place it on the tail to step off.
What happens if you do it wrong: Put too much weight on your dragging foot and it will catch. The board stops instantly, but your body keeps moving. You’ll pitch forward onto your hands and knees. This is the most common foot-brake injury, and it’s why wrist guards are on every official gear list.
The Run-Out (Stepping Off). Your Emergency Stop
When professional instructors with 20 years of teaching skateboarding make a video titled “HOW TO STOP ON A SKATEBOARD,” they don’t lead with the foot drag. They start with the run-out. This method is the real foundational safe stop. It works at almost any speed and is the safest way to abort when things feel wrong.
You don’t drag a foot. You step off the moving board entirely and transition into a run. The goal is to match your body’s momentum to the board’s speed, then let friction slow you down. It feels counterintuitive at first because you’re leaving the board. But a runaway board is cheaper than a broken wrist.
| Scenario | Best Stop Method | Why It’s Safer |
|---|---|---|
| Sudden obstacle ahead | Run-Out | Removes you from the board instantly; no risk of foot catching. |
| Speed feels too high | Run-Out | Lets you control deceleration with your legs, not a single point of contact. |
| Smooth, flat ground & low speed | Foot Drag | Allows for controlled, gradual slowing without leaving the board. |
| Wet or debris-covered pavement | Run-Out | Dragging a foot on slick ground can cause an immediate, uncontrolled slide. |
The steps are simple, but they require commitment. Hesitate and you’ll trip over your own board.
- Decide and commit. The moment you know you need to stop, pick a spot to run toward. Don’t second-guess.
- Step off with your back foot. In your rolling stance, simply step your back foot off the board and onto the ground, directly beside it.
- Immediately follow with your front foot. As your back foot hits, step your front foot off next to it. You are now running alongside your board.
- Run it out. Take a few strides to slow down. You can grab your board as it slows or let it roll away safely.
This is the technique you must practice until it’s automatic. It’s your panic button.
The Tail Scrape. Slow-Speed Only
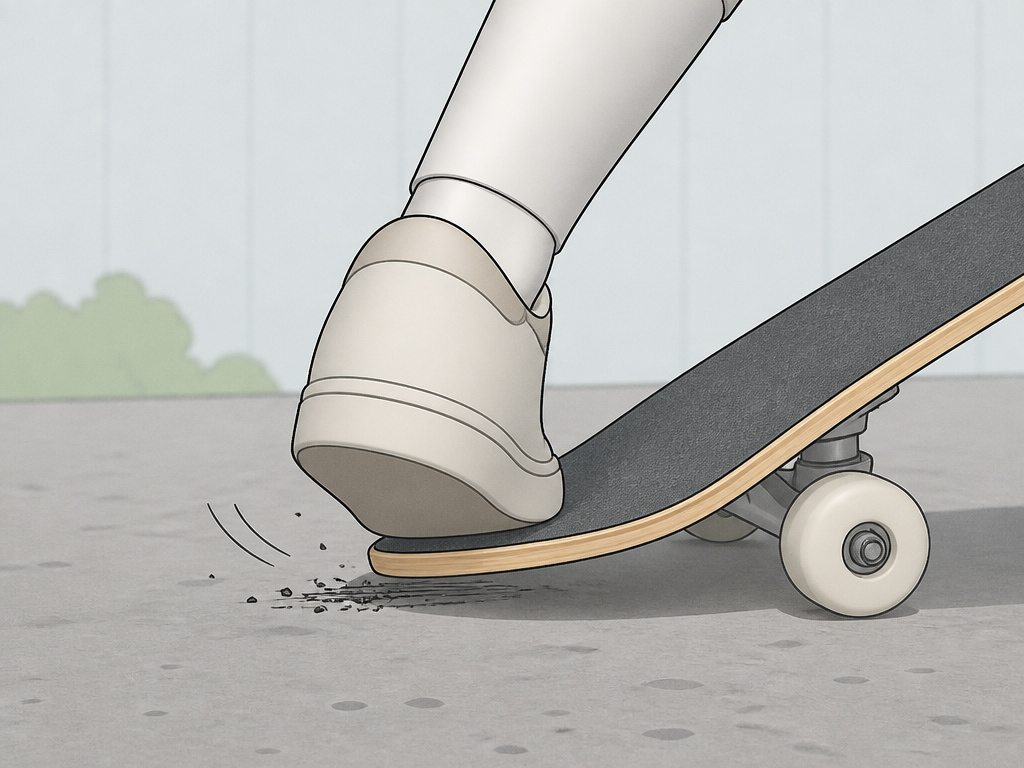
You’ve seen it in old videos: a rider steps on the tail, tipping the board up until the tail plastic grinds on the pavement, bringing them to a halt. The Roces manual doesn’t mention it. Professional instruction warns against it. Here’s why.
A tail scrape is a party trick, not a practical stop. It works only at walking speed. Go any faster and the sudden deceleration will either eject you forward or, more likely, chip a chunk out of your tail. Modern skateboard tails aren’t built for grinding on asphalt. Do it repeatedly and you’ll sand your tail down to the bolts quickly.
If you must use it for a very slow, controlled stop in a tight space, here’s the less-damaging method.
- Shift your back foot. Place the ball of your back foot directly on the very edge of the tail.
- Apply gentle pressure. Press down slowly, letting the tail tip down to meet the ground. Don’t stomp.
- Use it to kill momentum. The moment you feel the tail touch, ease up. It’s a brake tap, not a handbrake pull.
Skip this if: You care about your board’s longevity, or you’re going faster than a slow crawl. The risk-to-reward ratio is bad. A tail scrape is a last resort for when you’re barely moving and need to stop precisely.
Advanced Stop: The Power Slide
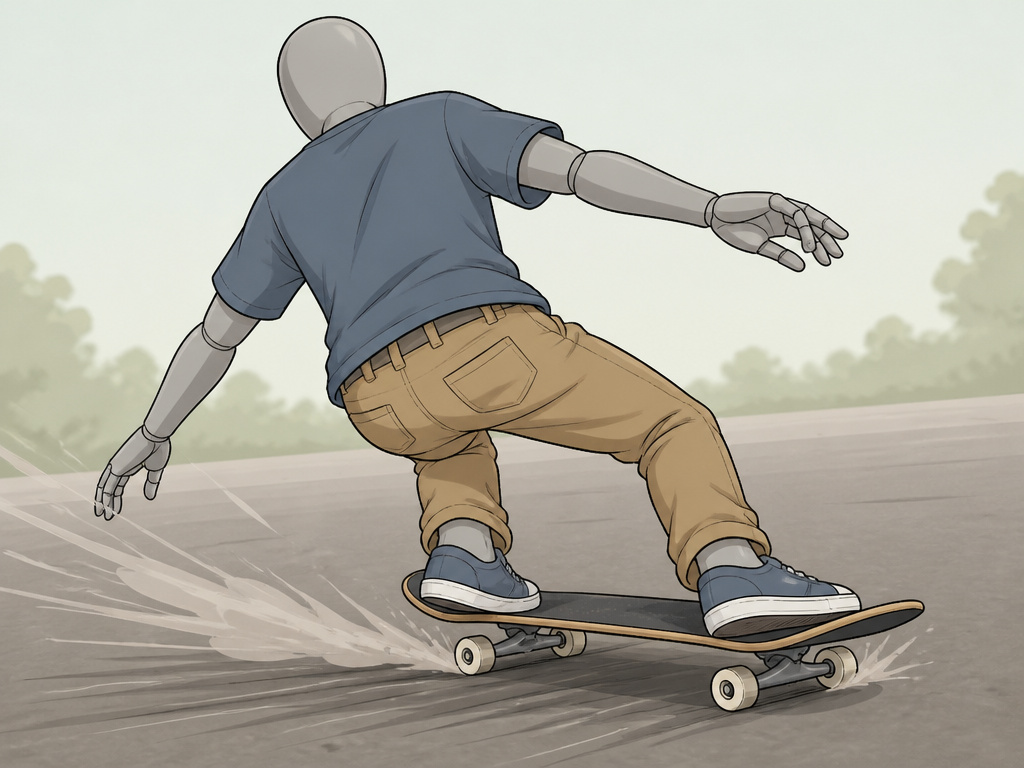
The power slide is the domain of experienced riders. It’s how you shed speed quickly while maintaining control, and it’s the gateway to more advanced powersliding and freeride moves. You won’t find it in a beginner manual. It requires a comfortable, stable stance, good speed, and smooth, dry pavement.
The mechanics are about breaking traction intentionally. You kick the board out sideways so all four wheels slide across the ground, using friction to slow down. It’s also a great way to low-side and slide out if your weight is wrong.
Where this goes sideways: Attempting a power slide on wet ground or with worn, hard wheels. The board can slide unpredictably or hook up suddenly, throwing you onto your hip or shoulder. Practice in a clean, dry parking lot.
You must be solid with your foot braking and run-out before trying this. Mastering these skills in order is essential. Start by practicing at a moderate speed on a smooth, dry surface, wearing all your pads. The goal isn’t to stop completely at first, but to feel the board break traction and slide.
How to Choose Your Stop (Speed Is Everything)
Your speed and the terrain decide the stop. This isn’t a matter of preference; it’s physics. A foot drag at high speed will catch. A run-out on a steep hill is a sprint you might not win.
| Your Speed | Best Method | Key Warning |
|---|---|---|
| Stopped to Slow Crawl | Step off normally | Just put a foot down. No technique needed. |
| Walking to Jogging Pace (0–5 mph) | Foot Drag | Keep weight on front foot. Practice on flat ground first. |
| Jogging to Running Pace (5–10+ mph) | Run-Out | The only safe beginner option. Commit to the step-off. |
| Higher Speeds (Downhill) | Advanced: Power Slide or Controlled Run-Out | Requires pre-learned skill. Beginners should avoid hills until foot drag and run-out are automatic. |
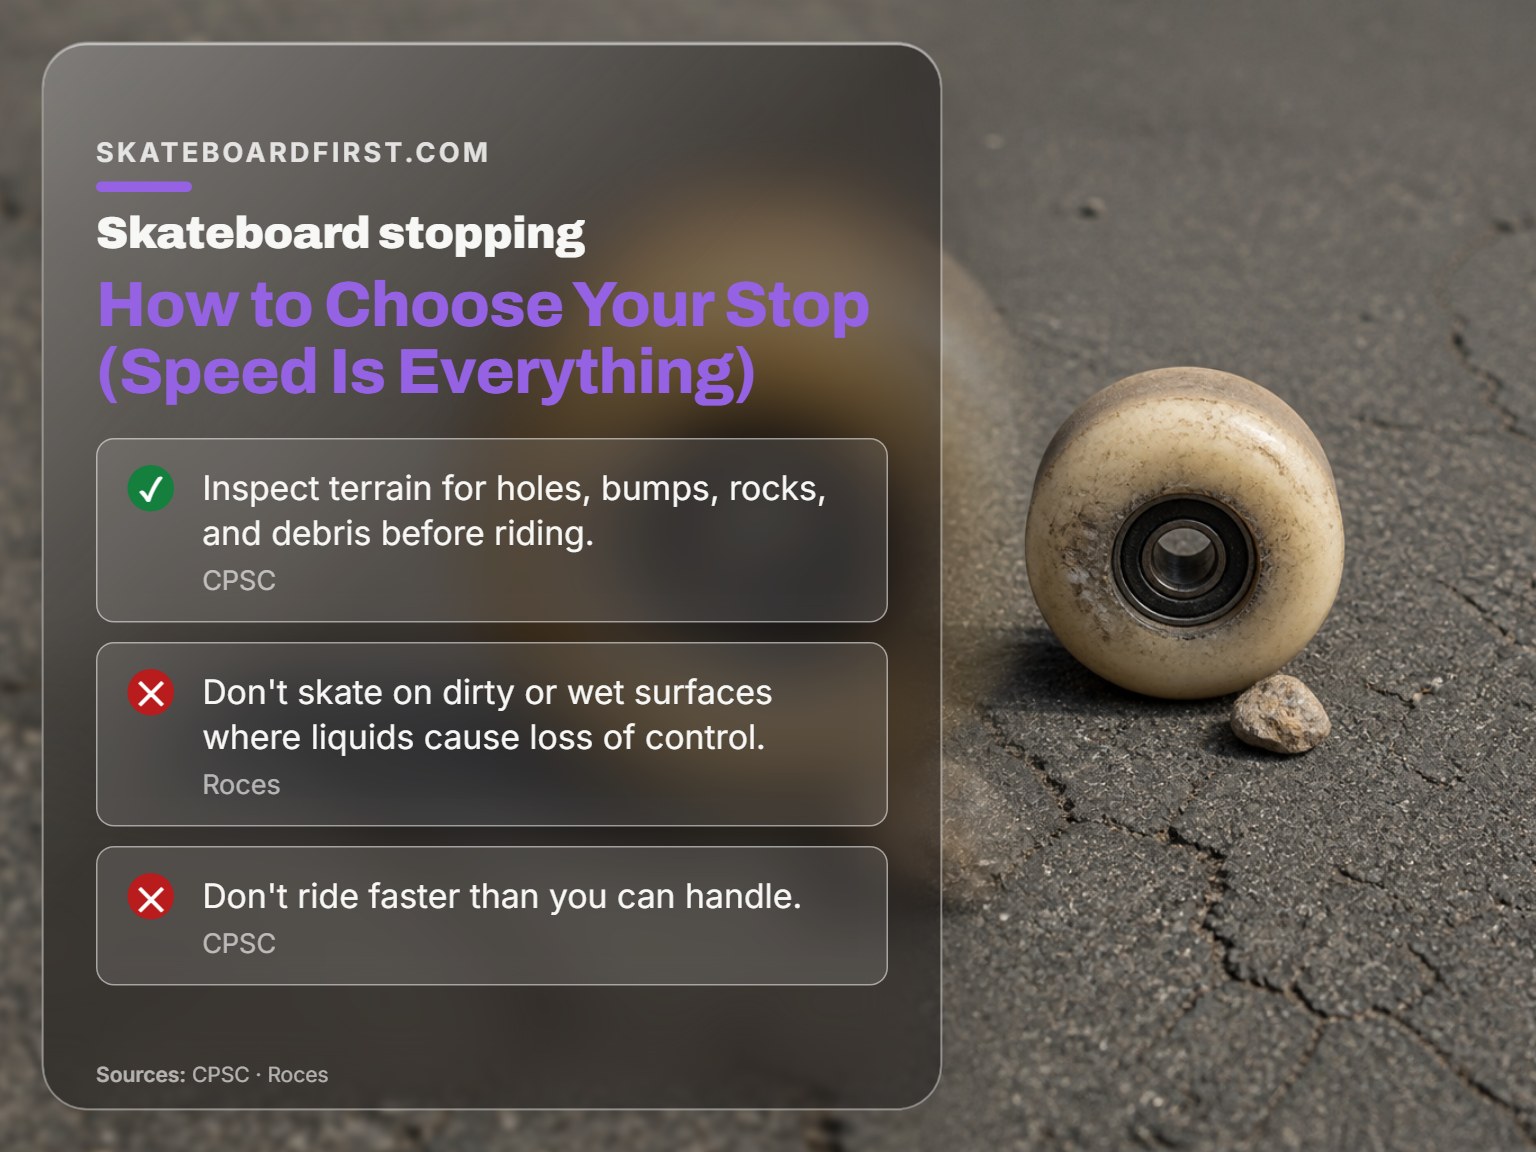
The CPSC warns to inspect your riding terrain for holes, bumps, rocks, and debris before you ride. Your stopping method is useless if you hit a pebble mid-drag. If the ground is wet, gritty, or cracked, your only safe option is the run-out. The Roces manual is explicit: don’t skate on dirty or wet surfaces, where water, oil or other liquids can make you lose control.
For downhill skating, the calculus changes completely. If you haven’t mastered speed control via carving and the run-out on flat ground, you have no business on a hill. The CPSC Skateboarding Safety Fact Sheet and every professional instructor will tell you that. Hills magnify every mistake.
Troubleshooting: Why Can’t I Stop?
If you’re struggling, it’s almost always one of three things.
Problem 1: My foot catches and I stumble.
Solution: You’re putting weight on your braking foot. Drill the one-legged squat on your stationary board. Feel all your weight in your front leg. Then practice rolling at a snail’s pace and just touching your back shoe to the ground without pressing.
Problem 2: I’m afraid to step off (run-out).
Solution: Practice on grass or very smooth, flat pavement while barely moving. Step off, land on both feet, and stand still. Repeat this multiple times. Then do it while rolling slowly. The fear comes from the unknown; make the motion boringly familiar.
Problem 3: I can’t control my speed going into the stop.
Solution: You’re going too fast for your skill level. The CPSC advises don’t ride faster than you can handle. If you can’t comfortably foot brake at a slow speed, you have no way to modulate your speed at a high one. Go back to a flat parking lot and practice slowing down from a gentle push. Slowing down safely is a prerequisite to stopping.
Sometimes the board itself is the issue. A warped deck, seized bearings, or loose trucks make controlling speed feel like wrestling a shopping cart. Do the pre-ride check from the manual: turn the wheels and check the nuts that secure the wheels.
Beginner vs. Advanced techniques
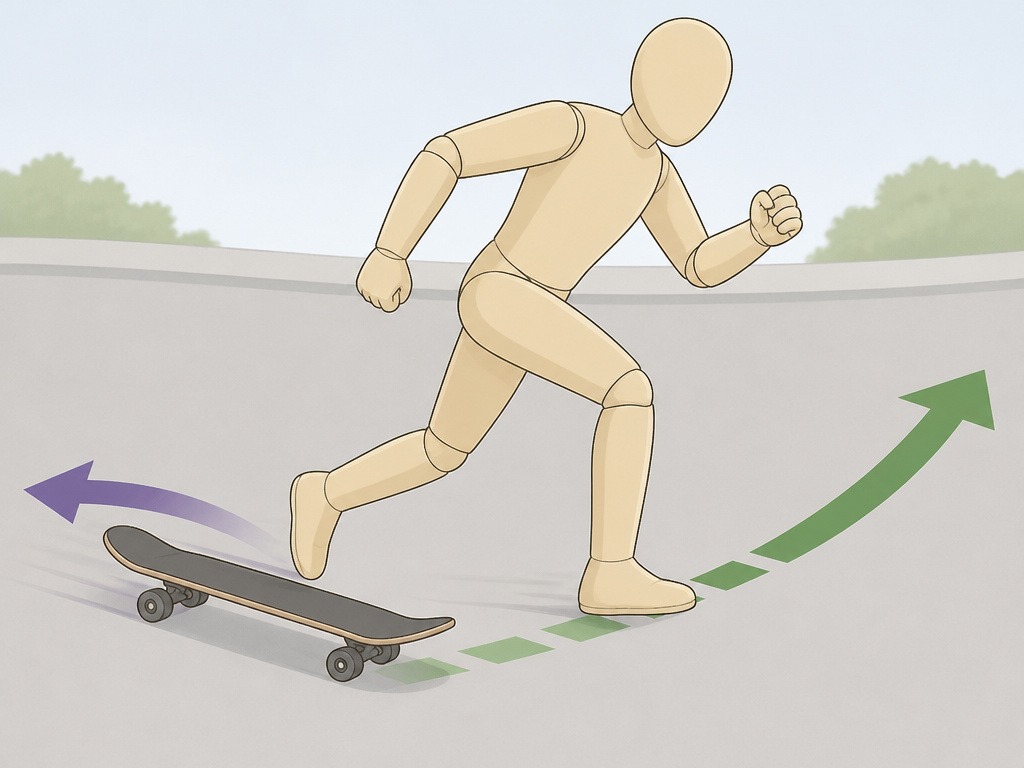
Official advice differs on the first stop to learn. The Roces manual instructs simply: ‘To stop or slow down, place the foot on the ground.’ However, the Skatepark Lessons instructor prioritizes the run-out (stepping off into a run) as the primary and safest emergency stop for beginners. This means stepping off the board into a run to avoid a sudden fall. It’s considered the safest emergency stop when you feel out of control. The foot drag is a controlled slowing technique, but mastering the run-out builds confidence and prevents panic. Always start in a flat, open area to practice these basics without obstacles.
Weight distribution and balance
Your stance dictates your control when stopping. For any technique, keep your weight centered and slightly forward over your front foot. Leaning back can cause the board to shoot out. Crouching lowers your center of gravity, which improves stability, especially at higher speeds where wobble can occur. If you need to drag a foot to slow down, shift your weight onto the foot remaining on the board. This keeps the board stable and prevents the tail from lifting. Practice finding this balanced, crouched position while rolling slowly before attempting to stop.
Using foot placement to turn and slow (carving)
Carving is a fundamental way to control speed without a hard stop. By making wide, smooth turns back and forth across your path, you naturally scrub off momentum. It relies on subtle foot pressure and shoulder movement to steer the board. Keep your knees bent and your weight distributed evenly as you lean into each turn. This technique is useful on gentle slopes and prepares you for more advanced board control. Always inspect your riding terrain first for holes, rocks, or debris, as carving requires a smooth, clean surface to be safe and effective.
Frequently Asked Questions
What is the safest way to stop for a complete beginner?
The run-out (stepping off into a run) is the safest. It removes you from the board completely, eliminating the risk of your foot catching and throwing you forward. Professional instructors prioritize this as the first stopping technique to learn. It works at almost any speed and on almost any surface.
Is foot braking bad for your shoes?
Yes, it wears through the sole quickly, especially if you drag the same spot every time. Yes, it wears through the sole quickly, especially if you drag the same spot every time. Consider it a necessary expense for safe riding.
How do you stop on a skateboard going downhill?
This is an advanced scenario. If you’re a beginner, the only safe answer is to avoid hills until you’ve mastered speed control and the run-out on flat ground. For experienced riders, stopping downhill involves a combination of carving to scrub speed, followed by a controlled power slide or a planned, strategic run-out onto a safe runoff area. There is no safe, simple “brake” for a beginner on a steep hill.
Can you use the tail to stop like in the movies?
You can, but it’s inefficient and damaging. A tail scrape works only at very slow speeds and grinds down the tail of your board rapidly. It’s not a practical, everyday stopping method. It’s better used as a trick or for very precise, slow positioning.
What should I do if I lose control and can’t stop?
This is when you bail. Bailing safely means abandoning the board to avoid a worse fall. Aim to fall safely by tucking and rolling, protecting your head and wrists. If you have a moment, try to step into a run-out. If not, jump clear of the board and try to land on your padded parts (knees and elbows in gear) and roll. Learning how to fall is as important as learning how to stop.
Before You Go
One rule most guides skip: if you can’t foot brake comfortably to a complete stop on flat ground from a gentle push, you are not ready for any hill, no matter how mild. That’s the threshold. Everything about skateboarding downhill safely, carving, sliding, controlling wobble, builds on that fundamental ability to control deceleration.
Your next session, spend time just pushing, foot braking to a slow roll, and then run-out stopping. Don’t move on to anything else. That single drill builds the muscle memory for every emergency you’ll ever have on a board. The fancy stops come later. Start with the basics.
