
How to Remove Scratches From a Skateboard Deck
This post contains affiliate links. As an Amazon Associate, we earn from qualifying purchases.
To remove scratches from a skateboard deck, match the repair to the scratch depth. For light surface marks, a light sanding with 600-grit paper followed by a polish works. For deep scratches or chips exposing wood, you need to fill with a wood filler or a PVA glue and maple sawdust mix, sand smooth from 400-grit to 600-grit, and seal with a clear protective coat. The goal, preserving artwork for display or restoring strength for riding, dictates your materials.
That distinction between display and riding decks changes everything. A wall-hanger needs its graphic intact and a clear coat to stop UV fade. A deck you’re going to kickflip needs structural integrity first, looks second. Mix up the goals and you either wreck collectible value or snap your board at the worst moment. This is why learning how to remove scratches from a skateboard deck is a skill for display boards, not your main rider.
What follows: a tool list that costs under thirty bucks, the exact sanding sequence that keeps artwork crisp, and the one filler recipe that actually matches Canadian maple when you compare a how to remove scratches from a skateboard deck. We’ll also cover when a ten-minute buff is enough and when you should just buy a new deck.
Key Takeaways
- Start with the finest grit possible to avoid removing artwork; for deep wood repair, begin with 400-grit sandpaper and progress to 600-grit.
- Let wood filler cure for 24-48 hours before sanding; rushing this step causes the filler to shrink and crack, leaving a visible divot.
- Use a clear, UV-resistant polyurethane as a final sealant for display decks; it protects against sunlight and minor scuffs without yellowing.
- Skip harsh solvents for cleaning raw wood during repair; a quick-evaporating liquid like isopropyl alcohol on a cotton rag lifts dirt without raising the grain.
- Replace the deck if more than 10% of the graphic is lost or if structural cracks compromise pop; professional restoration often costs more than a new board.
The First Question: Ride It or Hang It?
You need to decide what this deck is for before you touch sandpaper. A riding deck and a wall-art deck fail in different ways, and the fix for one can ruin the other.
If you’re fixing a deck you plan to skate, the how to remove scratches from a skateboard deck question is about structural integrity first. A deep scratch, especially on the tail or nose, is a stress riser. It can turn into a crack after a hard landing. Your repair here is about strength, filling the gap with a bonding agent like epoxy or a specific wood glue that sets hard. The finish can be rough; grip tape covers it.
A deck destined for your wall is a different project. Here, the goal is visual perfection and long-term preservation. The Concrete Waves Handbook notes the average 7-ply maple deck is about 1/2″ thick, but the top veneer holding the graphic is paper-thin. Sand too aggressively and you burn right through the artwork. Your enemy isn’t impact, it’s sunlight and moisture. The repair focuses on flawless color matching and a protective, UV-blocking topcoat.
Common mistake: Using the same epoxy for a deep chip on a riding deck and a display deck. The riding deck needs maximum bond strength, often with a thick, rigid filler. The display deck needs a filler that sands to a featheredge and accepts touch-up paint, like a custom mix of PVA glue and fine maple sawdust.
Tools and Materials You’ll Actually Need
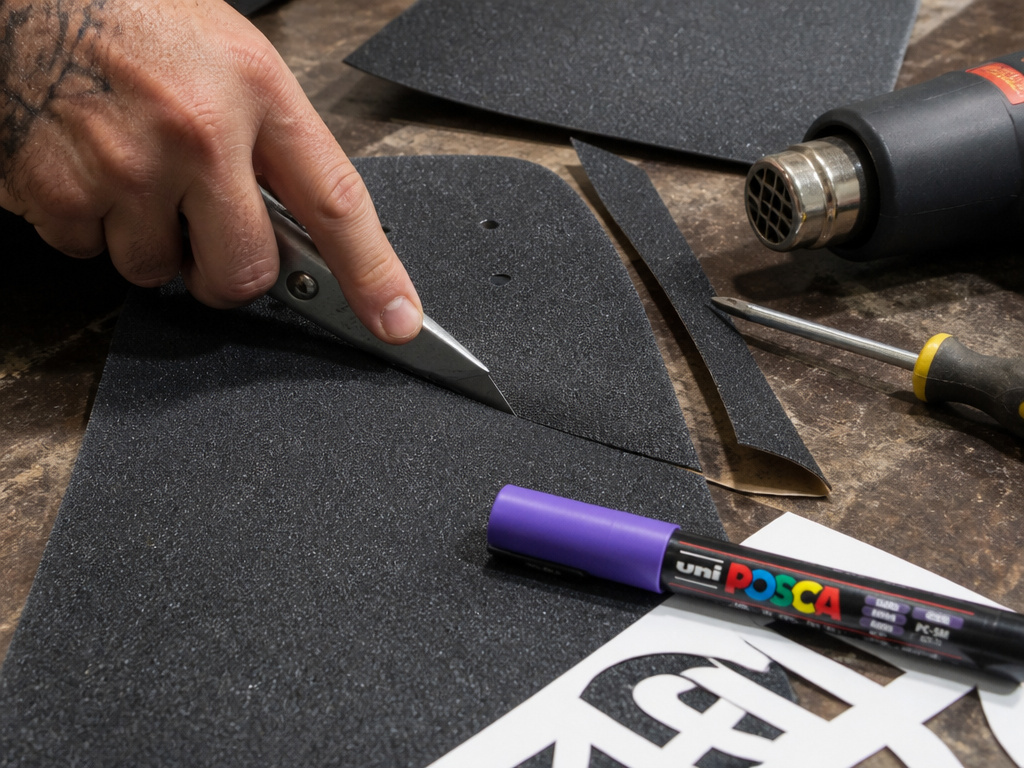
You can spend a fortune on specialty tools, but you don’t need to. This list gets the job done without the clutter.
- Sandpaper: Get a multi-pack with grits from 400 to 600. The DeckArts.com guide specifies this progression for deep scratch repair on Canadian maple. Lower grits can be too aggressive and risk damaging the artwork.
- Filling Compound: For small chips on a riding deck, wood filler works. For display decks or deeper scratches where color-matching matters, the custom filler is better: PVA glue (like Elmer’s Carpenter’s Glue) mixed with fine sawdust, preferably maple.
- Cleaning Agent: For wiping down the raw wood after sanding, use a quick-evaporating liquid like isopropyl alcohol (91%) on a cotton rag. It lifts dust and grease without soaking the wood. Wear gloves and keep it from your eyes.
- Brushes and Applicators: Brushes and applicators for applying glue, filler, and clear coat.
- Clamps and Cardboard: If you’re-gluing a delaminated chip, you’ll need light clamping pressure. Use a protective material between the clamp jaws and the deck to prevent damage.
- Protective Topcoat: For display decks, a museum-grade UV-resistant polyurethane is the final step.
The Sanding Sequence That Doesn’t Ruin Artwork
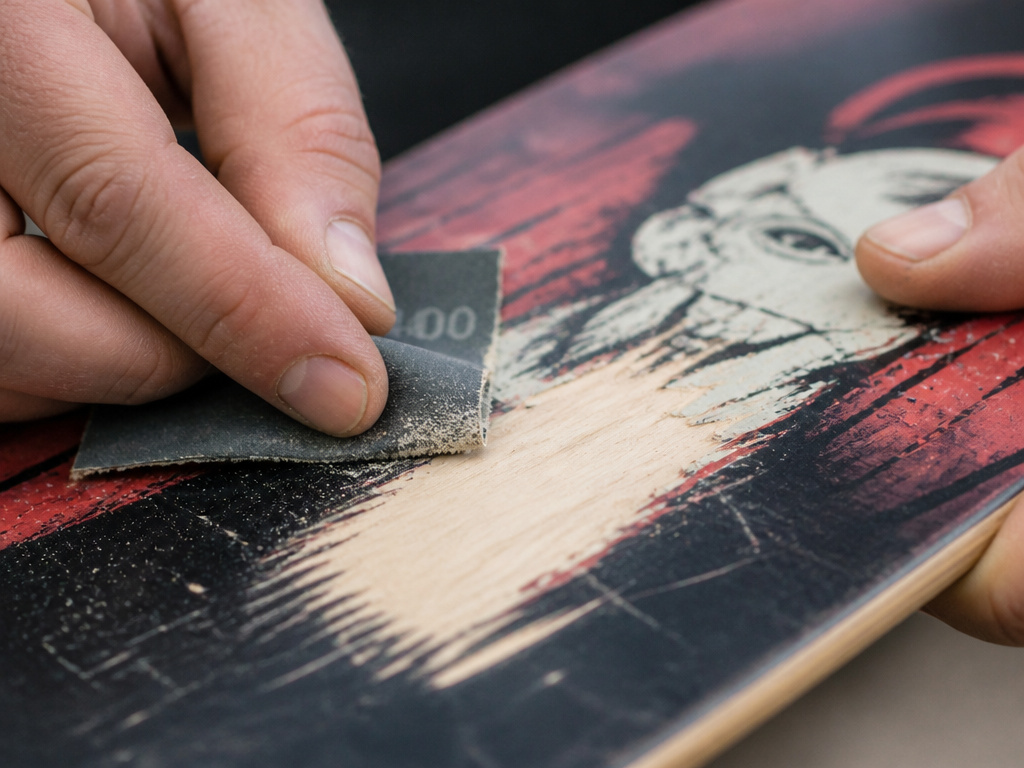
Sanding is where most DIY repairs go wrong. The goal is to smooth the defect, not create a new one. The sequence is essential.
Start by cleaning the scratched area to remove grit, following our guide on cleaning your deck. For a light surface scratch that hasn’t hit wood, Use a small piece of 600-grit sandpaper. Sand with the grain of the wood, using light, even pressure. You’re not trying to remove the scratch entirely, just feather its edges so it catches less light. Stop the moment the graphic around the scratch starts to look fuzzy.
For a deep scratch that exposes the pale maple underneath, you start with 400-grit. Sand just enough to clean up any torn wood fibers and create a slight bevel at the edges of the gouge. This gives the filler something to grip. Then, switch to 600-grit to smooth the transition zone. The entire sanding process for a single deep scratch should take roughly 5 to 10 minutes depending on the amount of filler. If it’s taking longer, you’re probably removing too much material.
A properly sanded repair area should feel perfectly smooth to your fingertip, with no detectable edge between the original deck and the filled scratch. If you feel a lip, you haven’t feathered enough.
Filling Deep Scratches and Chips
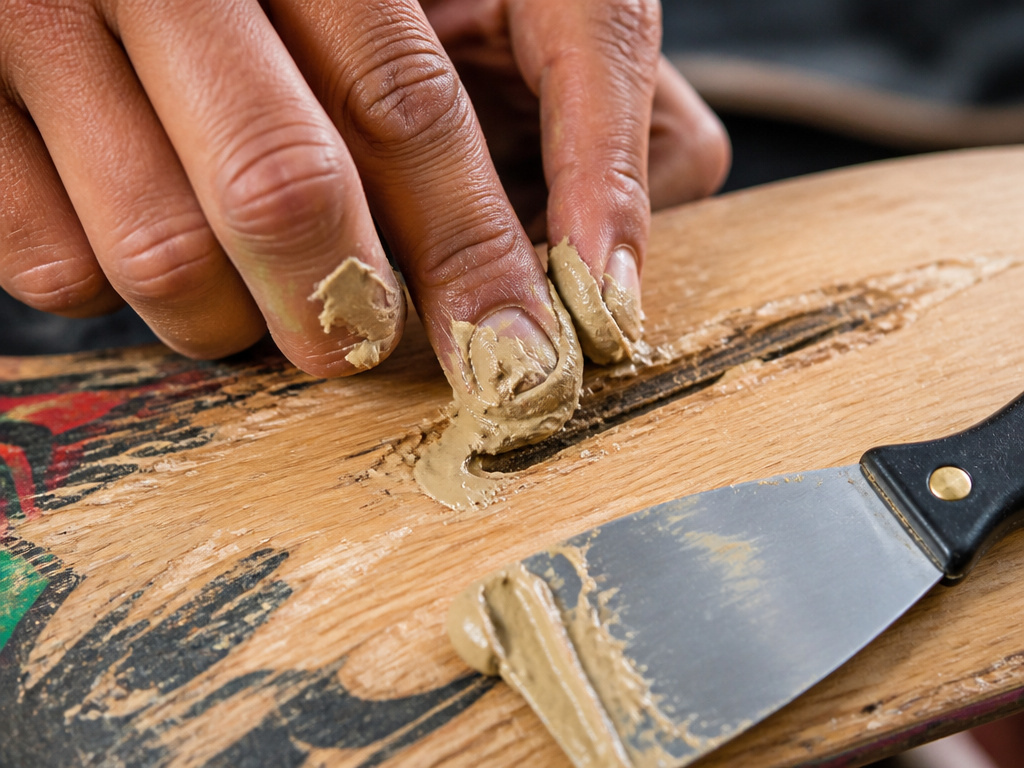
This is the point of no return. Your choice of filler decides whether the repair is invisible or a glaring patch.
For a riding deck with a chip, a standard wood filler is fine (see our guide on deck chip repair for more details). Press it firmly into the cavity, overfilling slightly. Follow the manufacturer’s cure time, often 24 to 48 hours. Don’t rush. Sanding filler that’s still soft inside can create a gummy mess.
For a display deck or a scratch where you plan to touch up the graphic, make a custom filler. Mix PVA glue with fine sawdust (maple is ideal) until it forms a thick paste. Apply it, overfilling slightly. Let it cure fully.
| Filler Type | Best For | Cure Time | Key Advantage |
|---|---|---|---|
| Standard Wood Filler | Riding decks, structural chips | 24-48 hours | High strength, easy sanding when fully cured |
| PVA Glue & Sawdust Mix | Display decks, color-sensitive repairs | 24-48 hours | Blends with maple, accepts stain/paint seamlessly |
| Epoxy Resin | Severe delamination, high-stress areas | Varies by product | Maximum structural bond, waterproof |
After the filler has cured, sand it flush with the surrounding deck using your 600-grit paper. The goal is a perfectly flat surface.
Cleaning and Prepping for the Finish
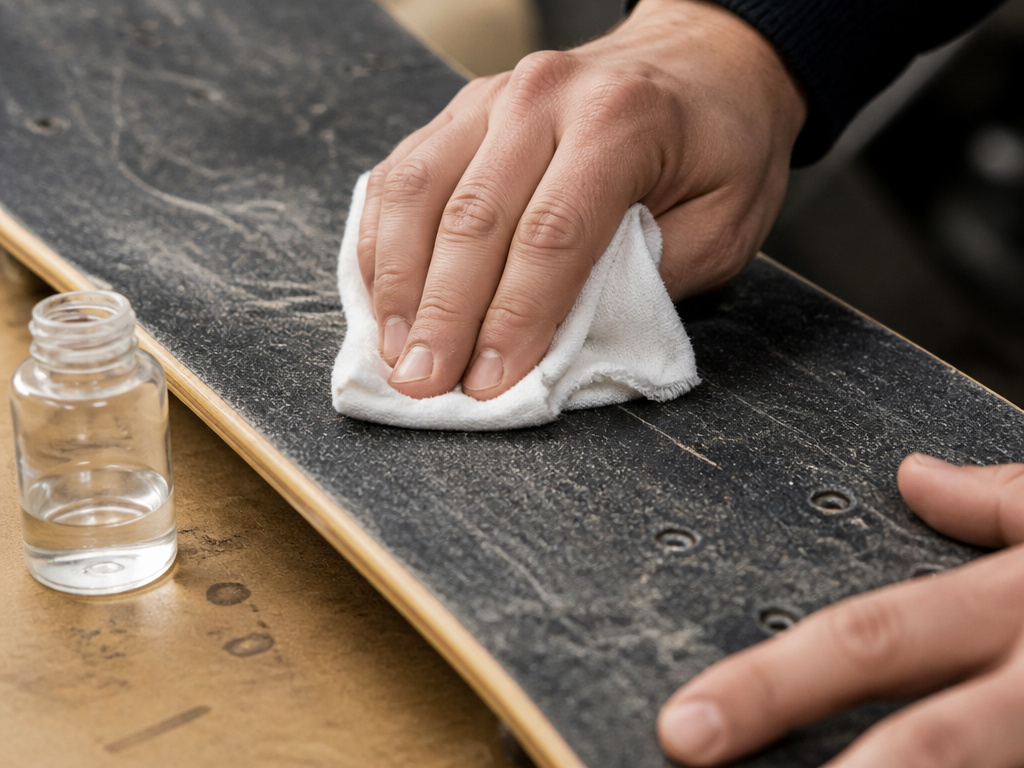
Before any clear coat or paint touches the repair, the deck must be immaculate. Sanding dust must be removed before applying a finish.
Take a clean, lint-free cotton rag and dampen a corner with your quick-evaporating liquid. Wipe the entire repair area and about an inch beyond. The quick-evaporating liquid will leave a clean, dry surface.
If you’re working on a carbon deck, like an Evolve Skateboard, the process shifts. The manufacturer advises wiping the carbon with a slightly damp rag only. For small scratches, they recommend car polishes like Meguiar’s ScratchX. Harsh chemicals or solvents can damage the composite’s coating.
Applying a Protective Clear Coat
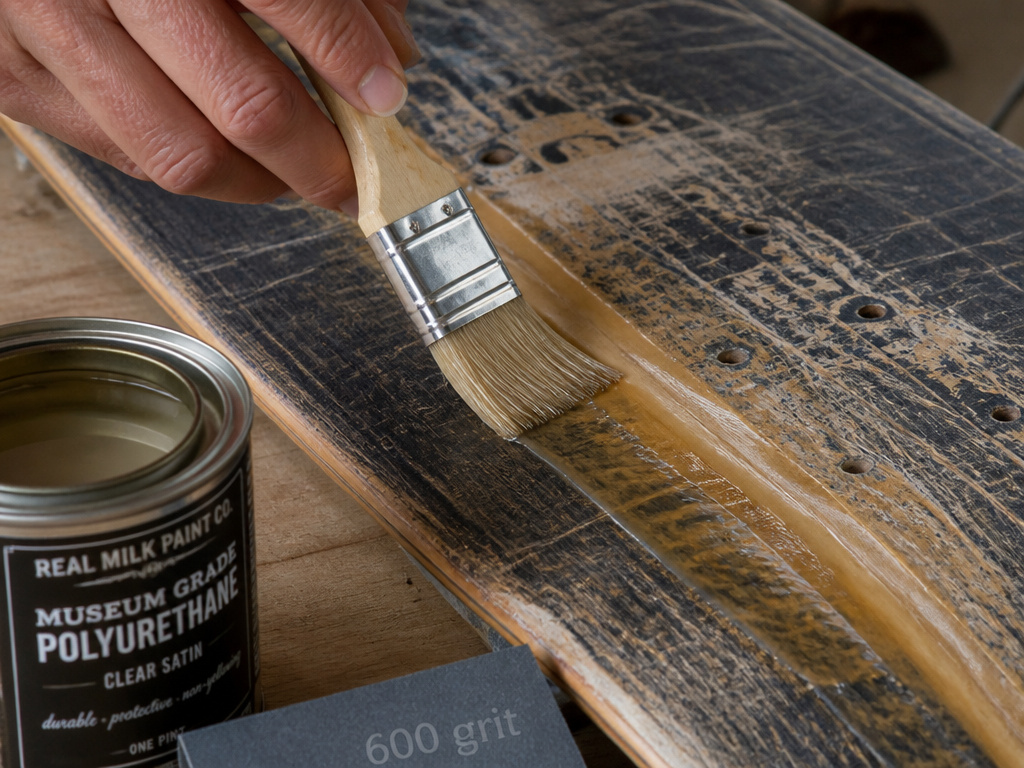
The final step seals your work and determines its longevity. For a riding deck, this is often just the grip tape. Once you apply new grip, the repair is hidden and protected.
For a display deck, the clear coat is critical. It protects the artwork from UV rays, dust, and minor handling scratches. Use a museum-grade UV-resistant polyurethane. Apply it in a dust-free environment with a soft, high-quality brush. Use long, smooth strokes, and always follow the wood grain. Apply two thin coats, sanding lightly with 600-grit between coats if the first coat raises any grain.
Let the final coat cure fully before handling the deck.
When to Call a Pro (or Just Buy a New Deck)
Not every deck is worth saving. Be honest with yourself about the time and cost.
Consider professional restoration if you have a high-value vintage piece or extensive artwork loss covering more than 10% of the design. Professionals have specialized tools for restoration. This is for art, not skate-able boards.
For a riding deck, replace it if you find structural cracks or delamination (layers separating). A deck that has lost its pop may not perform as well, and a repair may not restore its original flex.
Sometimes, the deepest “scratch” is actually razor tail, the worn-down tail from constant dragging. Filling that massive wear area with glue and reshaping it is a major project. For most skaters, once the pop is gone, it’s more economical and fun to just get a new deck.
How to Touch Up Scratches on Skateboard Graphics
For a deep scratch on a maple deck you plan to display as art, start by sanding the area smooth. After filling the scratch, you can attempt to restore the graphic. If the artwork loss is minor, carefully color-match the area with paints, a technique covered in our guide on deck painting. Apply a clear, protective coating designed for art conservation over the finished repair to shield it from light. If the damage covers a significant portion of the original graphic, professional restoration may be the only way to fully recover the artwork. For a deck you intend to keep skating, a perfect graphic match is less critical than a strong, flush repair.
Frequently Asked Questions
What’s the difference between repairing wall art decks and riding decks?
The goal dictates the method. Wall art repairs prioritize a flawless visual finish and use materials like color-matched fillers and UV-blocking clear coats. Riding deck repairs prioritize structural strength, using strong bonding agents like epoxy, and the finish is almost always covered by grip tape.
Can I fix scratches under my grip tape?
Yes, but it’s a commitment. You must remove the old grip tape. Sources disagree on the best method: Evolve Skateboards recommends a paint-thinner type product, while the Concrete Waves Handbook suggests heating it with a hair dryer, heat gun, or the sun. Once the tape is off, treat any deck scratches as a raw wood repair. After fixing and sealing, apply fresh grip tape using our guide on grip tape application.
What do I use to clean the deck before repairing?
For raw wood, use a quick-evaporating liquid (like isopropyl alcohol) on a cotton rag. It dissolves grease and dust without warping the wood. For a carbon deck, use only a slightly damp rag. Never use harsh household cleaners or excessive water.
Does olive oil remove scratches from wood?
No. Olive oil temporarily darkens the wood, making shallow scratches less visible, but it does not repair them. It also leaves a residue that attracts dust and can go rancid, damaging the deck and making future repairs difficult.
How long does a repaired skateboard deck last?
Properly repaired deep scratch on a riding deck can last the remaining life of the deck if the bond is strong. A display deck repair, protected by a UV-resistant coat, can last for years. However, a repair does not restore a deck’s lost “pop” or flex; it only fixes the localized damage.
Before You Go
Here is the thing about deck scratches: they prove you’re using your board. The goal isn’t a museum-perfect finish on a deck you kickflip down stairs. It’s about knowing when a ten-minute buff brings back the shine and when a deep chip means it’s time to retire an old friend to the wall, or the trash.
If your deck is for display, invest in the UV-resistant polyurethane. If it’s for riding, prioritize a strong filler and don’t sweat the looks. And if you’re staring at a scratched deck right now, start with the simplest step: clean it. Half the time, a wipe-down with quick evaporating liquid makes those surface marks almost disappear. Try that before you ever pick up sandpaper.
