
How to Ride a Cruiser Skateboard: Step-by-Step
This post contains affiliate links. As an Amazon Associate, we earn from qualifying purchases.
To ride a cruiser skateboard, you match your stance, push smoothly, turn by leaning, and stop safely, all on a board built for comfortable, stable rolling over pavement. Your first sessions should focus on these four fundamentals on flat, smooth ground before adding speed or distance.
That sequence, stance, push, turn, stop, is the mechanical loop every ride depends on. Get one piece wrong and the others fall apart. Learning how to ride a cruiser skateboard means a cruiser’s wider deck and softer wheels forgive small errors, but they can’t save a bad habit.
What follows: the pre-ride checks manufacturers list but riders skip, the two braking techniques brands disagree on, and how to adjust your trucks so the board feels stable instead of terrifying when you compare a how to ride a cruiser skateboard guide. By the end, you’ll have a repeatable practice routine for your first week.
Key Takeaways
- Spend your first sessions only pushing, turning, and stopping before trying any tricks, balance is a skill, not a gift.
- Adjust your truck kingpin for stability first; a wobbly board from overly loose trucks is the top reason new riders bail.
- Practice the foot-brake stop from day one; dragging your pushing foot lightly is the safest way to slow down at low speeds.
- Charge electric cruiser batteries indoors and above 32°F (0°C); letting them sit dead, per the RazorX manual, can permanently kill the battery.
- Choose soft durometer wheels for cruising; their grip and vibration absorption make rough pavement feel manageable.
Stance and Balance
Your feet decide everything before you move an inch. Stand on the board on a flat, grassy patch or carpet. Place your front foot just behind the front truck bolts, angled slightly forward. Your back foot goes near the tail, perpendicular to the board. This is your “ready” stance.
Now, forget looking cool. Bend your knees. A little more. That knee bend is your suspension, it absorbs bumps and lets you shift weight without throwing your upper body around. Most beginners stand bolt upright, which transfers every pebble directly to their spine and makes balancing a fight. A relaxed, athletic crouch turns balance from a conscious effort into something your legs do automatically.
A proper riding stance keeps your center of gravity low and over the board. Knees bent, back straight, eyes looking ahead, not down at your feet. This posture is stable enough for your first pushes and turns.
I learned this the hard way after a month of wobbly, exhausting rides. I was so focused on not falling that I locked my knees and stared at the grip tape. The board felt twitchy and unpredictable. The day I consciously bent my knees and looked at the horizon, the wobbles cut in half. Your body knows how to balance; you just have to get out of its way.
The 7-Step Pre-Ride Checklist
Cruising is low-stakes until a mechanical failure sends you flying. These seven checks take two minutes and prevent the most common failures new riders don’t see coming.
| Check | What to Look For | Why It Matters |
|---|---|---|
| 1. Truck Tightness | No side-to-side wobble when you tilt the board with your hands. | Prevents speed wobbles and maintains predictable turning. |
| 2. Wheel Spin | All four wheels spin freely for a few seconds when flicked; no grinding sounds. | Ensures smooth rolling and confirms bearings aren’t seized. |
| 3. Wheel Condition | No flat spots or deep cracks. | Worn wheels vibrate badly and can chunk apart mid-roll. |
| 4. Deck Integrity | No visible cracks or delamination along the edges or kicks. | A cracked deck can snap under weight, especially near the trucks. |
| 5. Hardware | All bolts securing trucks and wheels are snug, not stripped. | Loose hardware leads to parts detaching while riding. |
| 6. Grip Tape | Grit is intact, not peeling or slick in high-wear areas. | Slipping off the board is a common fall cause. |
| 7. Battery (Electric) | Power switch is OFF when not riding, and the battery is charged above 32°F (0°C). | The RazorX manual warns that leaving power on can ruin the battery. |
The kingpin check is where most riders mess up in the how to ride a cruiser skateboard process. The Decathlon support guide says tightening it makes the board more rigid, while loosening it increases maneuverability. Loosen it too much, though, and you get wheel bite, the wheel touches the deck during a turn and locks up instantly. That’s a guaranteed crash. Start with trucks tight enough that the board doesn’t turn when you lean gently. Loosen them a quarter-turn at a time during your first few sessions as you get comfortable. Control beats flair every time for a beginner.
Pushing and Getting Moving
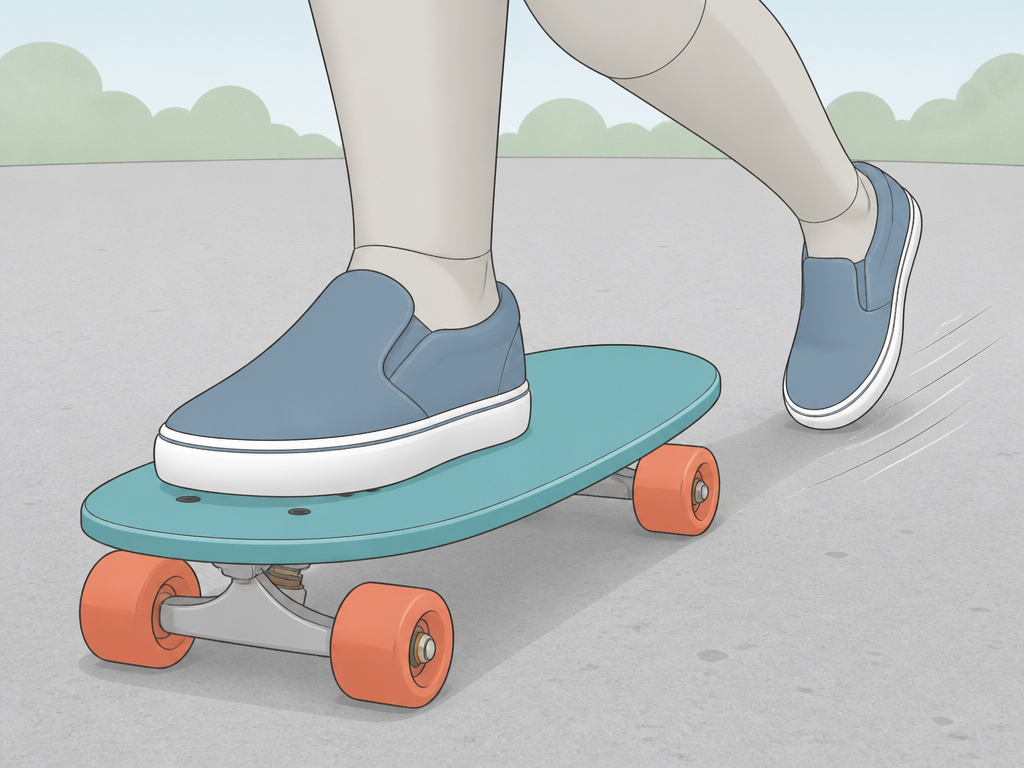
Place your board on smooth, flat pavement, an empty parking lot or a quiet cul-de-sac is perfect. Step on with your front foot in the ready stance. Look ahead, not down. Now, push off the ground with your back foot.
Here’s the part people overthink: you aren’t kicking a soccer ball. You’re making gentle, controlled contact with the ball of your foot, then pushing the ground behind you. Two or three short, soft pushes will get you rolling. Once you’re moving, place your back foot on the board near the tail, turning it to match your front foot’s angle.
Manufacturers disagree on the ideal foot placement for that initial push. The Yvolution Neon Cruzer manual says to place your front foot “behind the point where the front wheel is.” The Sportplus SP-SB-301 manual says to place it “in par with the front wheels.” The difference is about two inches. Try both. The Yvolution position gives you more power for a strong push, while the Sportplus position feels more balanced for quick, short pushes. Pick the one that feels more stable to you, there’s no universal rule.
Common mistake: Pushing with your whole leg stiff. Your ankle should do most of the work, with your knee slightly bent. A stiff leg throws your upper body off balance, making the board veer.
Practice pushing to a crawl, then coasting for ten feet. Then stop, step off, and repeat. Your goal isn’t speed or distance; it’s making the motion automatic. Do this for twenty minutes. Your pushing leg will burn. That’s fine, it means you’re using the right muscles.
Turning and Carving
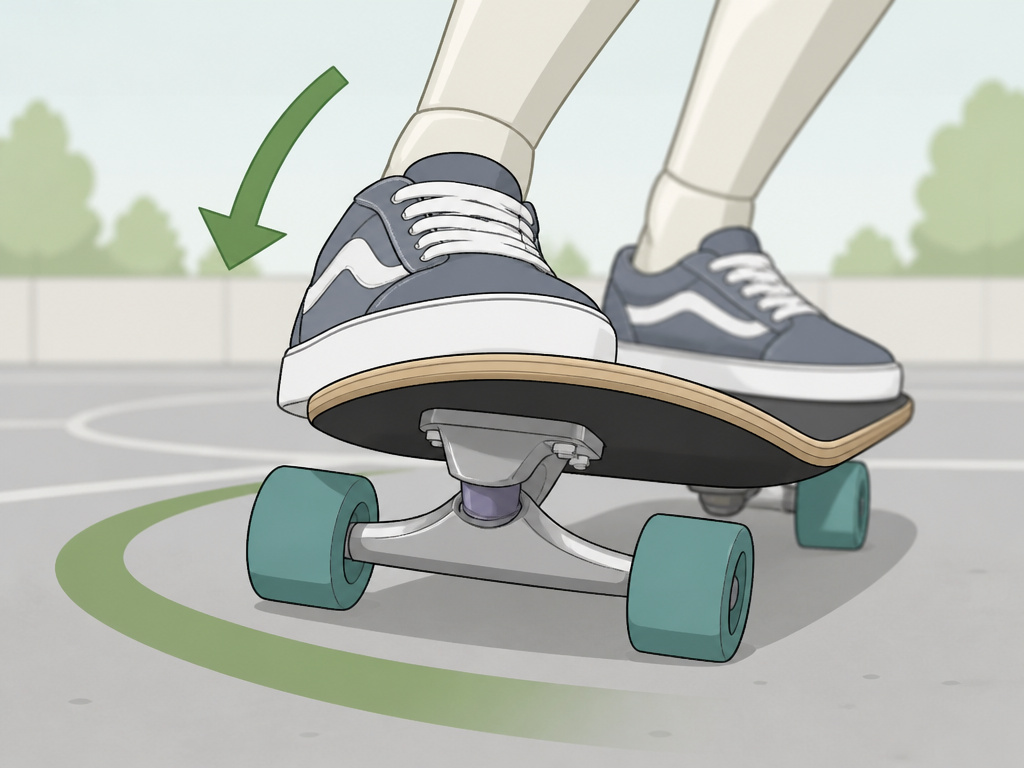
Your cruiser turns when you lean. To go left, shift your weight onto your left heel. To go right, shift onto your right heel. The trucks pivot, and the board arcs. It’s that simple, and that difficult.
Start with gentle, wide turns in your practice lot. Don’t try to steer with your upper body or kick the tail, that’s for trick boards. Just lean. You’ll feel the board respond. This is carving, the smooth, flowing motion that makes cruising fun. It’s also your first line of defense against obstacles; a slight lean can avoid a crack or a pebble.
If your board won’t turn, your trucks are too tight. Refer back to the Decathlon guide: tightening the kingpin makes the board more rigid. Loosen each kingpin a quarter-turn, then test again. If the board turns too easily and feels wobbly, tighten them a quarter-turn. This is the single most important adjustment for a beginner. A stable board builds confidence; a twitchy one builds fear.
For more on linking turns together for momentum, our guide on how to carve on a skateboard breaks down the weight shifts.
Braking and Stopping Safely
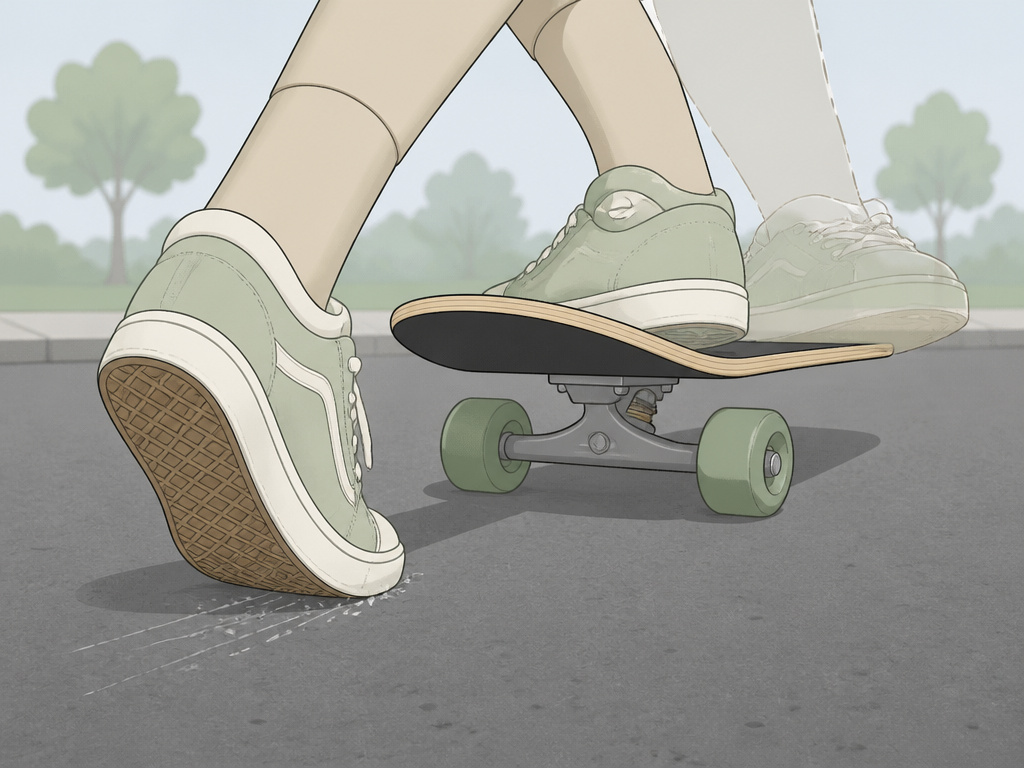
Knowing how to stop is more important than knowing how to go fast. You have two main options at low speed: the foot-brake and the heel-drag.
The foot-brake is the default. As you coast, take your back foot off the board and let the sole of your shoe drag lightly on the ground. Increase pressure to slow down. It sounds easy, but beginners often slam their foot down, which jolts their weight forward and can cause a fall. Practice dragging your foot at a crawl first.
Manufacturers disagree here, too. The Yvolution manual teaches a “toe drag” method, where you keep your heel on the board and drag only the toe. The Sportplus manual says to place your whole foot next to the board and touch down the full foot. Beginners should try both to see which feels more stable. The toe-drag is useful if you need to brake but want to keep your foot mostly on the board. Learn the full-foot brake first.
The second method, for slightly more speed, is the heel-drag. Shift your back foot to the tail and press your heel down off the side of the board, using the grip tape for support. This is less stable but can scrub speed faster once you’re comfortable.
Where this goes sideways: Relying on jumping off or running out as your primary stop. That works until you’re going faster than you can run, or you need to stop in a tight space. Drill your foot-brake until it’s muscle memory.
Navigating Common Obstacles
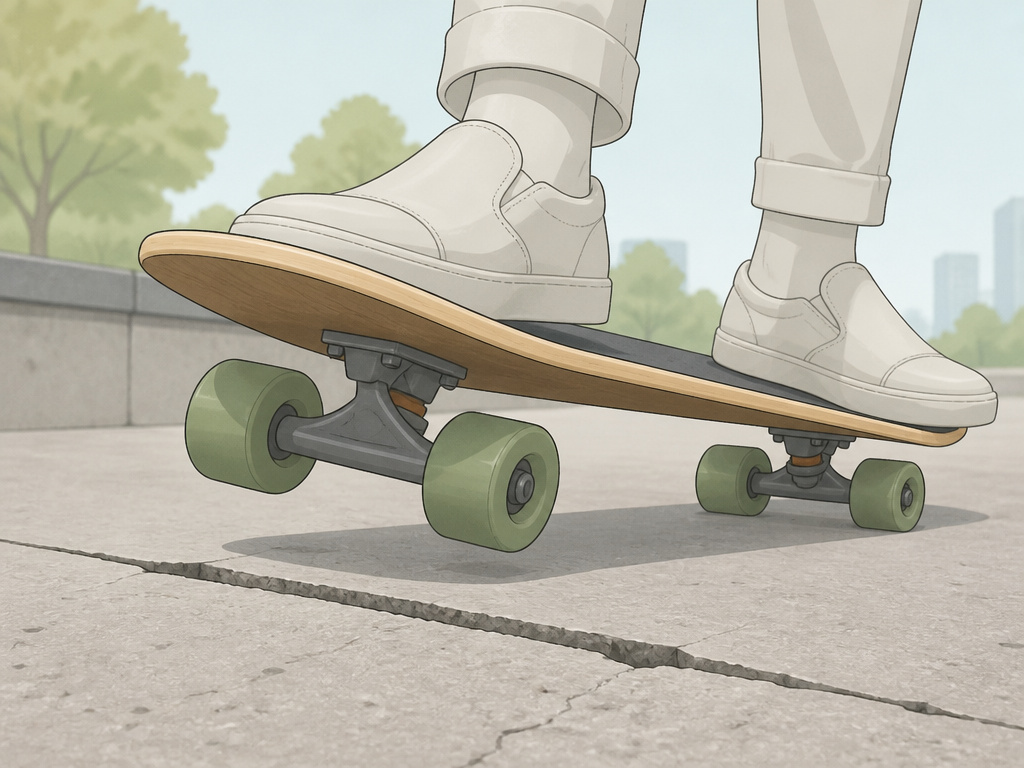
City cruising means dealing with cracks, seams, and gentle slopes. Your cruiser’s soft wheels handle small stuff, but you need technique for the rest.
For a pavement crack parallel to your path, you can usually roll right over it. Lift your front wheels slightly by shifting weight to your back foot just before the crack, then shift weight forward as you clear it. This “manual” motion is subtle, you’re not popping an ollie, just lightening the front.
For a shallow uphill, maintain your speed with a few extra pushes before the incline. Once on the slope, keep your weight centered and maintain a steady, slightly forward lean. Don’t panic and lean too far forward, or the board might stall.
Downhills are a hard no for beginners. Even a gentle slope can quickly accelerate a cruiser beyond your stopping ability. Walk your board down any hill until you’ve mastered controlled braking from higher speeds.
When you’re ready to use your board for practical travel, our article on skateboard commuting covers route planning and carrying your gear.
Electric Cruiser Specifics
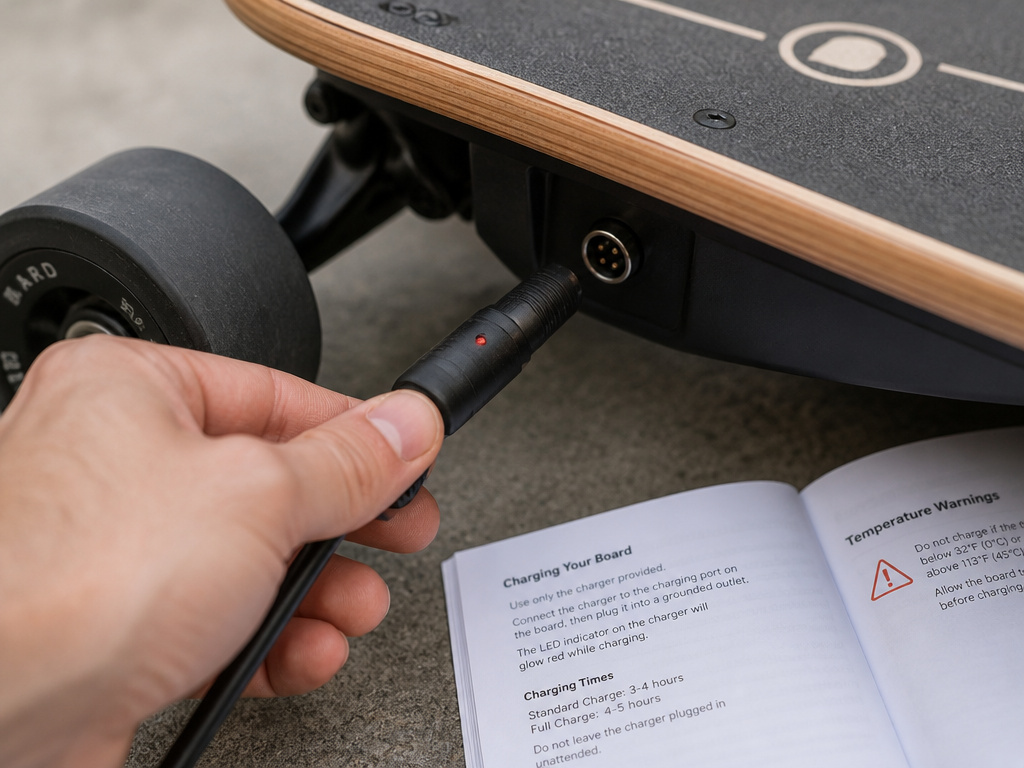
Riding a powered board like the RazorX Cruiser changes a few fundamentals. The motor only engages when the board is moving at least 3 mph (5 km/h). You still need to push-start it manually to get going.
The battery is the critical difference. The manual is strict: the initial charge takes 8 hours. A full recharge can take up to 6 hours. Never charge the battery at or below 32°F (0°C). More importantly, the manual warns that “failure to recharge the battery periodically may result in a battery that will not accept a charge.” Letting it sit dead for months can brick it. If you store it, give it a top-up charge every few weeks.
Run time is up to 40 minutes of continuous use. That’s in ideal conditions, rider weight, incline, and temperature all cut into that. Plan shorter routes at first. The top speed is approximately 10 mph (16 km/h), which feels much faster on a board than it sounds. Respect the power switch, too. Leaving it on when not in use can lead to a battery that “will no longer hold a charge.”
Practice Plan for Your First Week
Don’t just ride aimlessly. Structure builds skill faster. Here’s a simple plan.
- Day 1-2: Stance and pushing. On grass or carpet, find your stance. On smooth pavement, practice pushing to a coast and stepping off. Do this for 20 minutes. Goal: 10 controlled pushes in a row without wobbling.
- Day 3-4: Turning and foot-braking. In your lot, practice wide, gentle turns. Then, from a slow coast, practice the full-foot brake. Goal: Come to a complete stop using only the foot-brake three times.
- Day 5-6: Linking it together. Push, coast in a straight line, execute a gentle turn, then foot-brake to a stop. Repeat. Goal: Complete the sequence (push-turn-stop) five times without putting a foot down during the coast.
- Day 7: Review and adjust. Go through the pre-ride checklist. Adjust your truck tightness if the board feels too loose or stiff. Re-practice your weakest skill from the week.
This isn’t about marathon sessions. Twenty focused minutes beats an hour of distracted cruising. If you’re looking for the right board to start this plan on, our roundup of top beginner cruiser skateboards compares top picks.
Frequently Asked Questions
How long does it take to learn to ride a cruiser skateboard?
Most beginners can achieve basic control, pushing, turning, and stopping, within focused practice over multiple sessions. Feeling truly comfortable cruising on varied pavement takes longer, often a month or more of regular riding. Your progress depends more on consistent, short practice sessions than on natural talent.
What is the best way to stop for a complete beginner?
The full-foot brake is the safest and most reliable method. At a slow coast, place your pushing foot flat on the ground next to the board and drag the sole to create friction. Start with very light pressure to avoid jolting forward. Practice this at walking speed before trying it at higher speeds.
Can I ride a cruiser skateboard in the rain?
No. Riding on wet surfaces is dangerous and damages your board. Water ruins the wooden deck’s integrity, rusts bearings and hardware, and severely reduces grip tape traction. The RazorX electric cruiser manual explicitly says not to ride in puddles or water. Wet pavement also hides hazards and makes braking unpredictable.
How tight should my cruiser skateboard trucks be?
Start tighter than you think. The board should not turn easily when you stand on it and lean gently. As you gain confidence in pushing and braking over your first few sessions, loosen each kingpin a quarter-turn at a time. Stop loosening when you get the amount of turn you want without feeling unstable or experiencing wheel bite. The Decathlon guide warns that excessive looseness causes wheel bite.
What size wheels are best for cruising on rough pavement?
For navigating typical city streets, soft, larger-diameter wheels are ideal. Softer wheels absorb vibration from rough pavement, making the ride smoother and quieter. Larger wheels roll over small cracks and pebbles more easily than smaller, harder wheels designed for skate parks. For a detailed breakdown, see our guide on choosing skateboard wheels for cruising.
Before You Go
Your first goal isn’t to ride a mile or learn a trick. It’s to complete the push-turn-stop loop once, cleanly. Then do it ten times. Then a hundred. Mastery in skating, as in anything, is the aggregate of simple motions repeated until they’re automatic.
One rule most guides skip: if you feel wobbly, tighten your trucks. The quest for loose, carvy trucks has sent more beginners tumbling than any other setup myth. Stability first, maneuverability second. Everything above assumes you’ve chosen a board, if you’re still looking, our guide on choosing a cruiser skateboard walks through the specs that matter.
Now, find your smooth patch of ground and take that first push. The board will roll. You might wobble. That’s the point. Your next session will be steadier.
