
Skate Photography Tips: Shutter Speed and Framing Guide
This post contains affiliate links. As an Amazon Associate, we earn from qualifying purchases.
Skate photography tips start with matching the right shutter speed to the trick’s speed. The baseline is 1/500 of a second to freeze basic action, but crisp shots of fast rotations demand 1/2000. The real difference between a usable shot and a great one, however, is nailing the timing of the trick’s peak moment and understanding how light loss from specialty lenses like the SKATER® Scope affects your final exposure.
That last part trips up a lot of new shooters. You get the settings right, the timing perfect, but the shot still looks flat or dark. Often, it’s because you didn’t account for the light loss a tool like that scope eats. Your camera’s meter lies when you add glass between it and the subject.
This guide walks through the eight core settings and techniques that form the core of skate photography tips, separating clear, compelling skate photos from blurry snapshots. This guide explains the shutter speed debate, when to use flash, how to frame for impact, and the one piece of gear that defines the look.
Key Takeaways
- Start with a shutter speed of 1/500s as your absolute minimum, but aim for 1/2000s to truly freeze fast rotations like kickflips.
- Account for light loss with add-on lenses; the SKATER® Scope, for example, has a calculated stop of T4 1/3 and a final T-stop of T5.6.
- Frame from head to wheels and always include the roll-away after the trick to prove the make.
- Flash isn’t just for night; it can fill harsh daytime shadows, but communicate with the skater first to avoid startling them.
- Your angle dictates the story, low and close with a wide lens feels fast and immersive, while a longer lens from farther back shows off the scale of the spot.
The 1/500 vs. 1/2000 Shutter Speed Debate
You’ll see three numbers thrown around for freezing skateboarding: 1/500, 1/1000, and 1/2000. They’re all right, but for different jobs. The trick is knowing which job you have.
The OER Commons skateboard photography lesson prescribes a shutter speed of 1/1000 or faster. Professional photographer Atiba Jefferson calls 1/500s the “bare minimum,” but states his personal “sweet spot” for crisp action is 1/2000s. Meanwhile, a photographer featured by Fujifilm describes using shutter speeds as slow as 1/10 or 1/20 of a second with flash.
Use 1/500s as your safety net. This speed will freeze a skater pushing or a basic ollie on flat ground. It’s the floor. If your light is fading and you can’t get a faster shutter without cranking the ISO to noisy levels, 1/500s might save the session. It’s also a common flash sync speed, which matters if you’re adding light.
Crank to 1/2000s for the money shot. When the board starts spinning, kickflips, 360 flips, hardflips, the angular velocity is insane. A board can rotate very quickly. At 1/1000s, there can still be visible motion blur. That shows up as a faint blur on the grip tape or wheels. 1/2000s cuts that motion in half, giving you that razor-sharp, frozen-in-air detail that magazine covers are made of. This is where investing in quality camera gear pays off; a camera that can shoot clean images at high ISO lets you use these faster speeds in lower light.
The physical sensation is a short, sharp click from the shutter, not a drawn-out swish. If you’re shooting in continuous mode, the burst will sound tight and rapid. That’s your cue that you’re in the right ballpark.
When and How to Break the Speed Rule with Flash
Everything above assumes you’re freezing motion with shutter speed alone. Flash changes the game. Flash allows you to create motion blur for artistic effect while keeping the subject sharp.
A photographer featured by Fujifilm described using shutter speeds as slow as 1/10 or 1/20 of a second with flash to capture a sense of speed, a technique known as slow-sync flash. The brief flash burst freezes the skater crisply, but the long shutter allows the ambient light to paint streaks of motion in the background and on the moving limbs. The result feels fast and dynamic in a way a perfectly frozen 1/2000s shot sometimes doesn’t.
Where this goes sideways: Firing a flash without warning. A bright burst in a skater’s peripheral vision mid-trick can cause a bail. Always get a clear “ready?” and a nod before you shoot.
This technique is for controlled, collaborative sessions, not candid or competition shooting. It also requires an off-camera flash you can trigger remotely. For night photography, this method can blend artificial and ambient light. According to a Fujifilm article, skaters had ‘hardly ever seen’ off-camera flash images, suggesting a community norm of available-light photography for some, so using flash well can make your work stand out. The key is making the skater a collaborator, not just a subject.
Framing: Head to Wheels and the Roll Away
Your camera settings can be perfect, but the most fundamental skate photography tips remind us that if you cut off the skater’s feet or the board is out of frame, the photo is useless. The rules here are simple and brutal.
The Skate Labs filming guide states it plainly: “Keep the full body and the whole board in frame, from the top of the head to the wheels.” If you chop off the feet, the viewer can’t see foot placement. If the board is half out, you’ve lost the trick.
Start recording a few seconds before the setup and keep going until they roll away. The roll away proves the make.
That last line is editorial gold. A skater in the air is impressive, but a skater rolling away cleanly is a completed trick. It’s the difference between “attempt” and “achievement.” Always capture that second or two of ride-out. It gives your shot a narrative conclusion.
| Common Mistake | Why It Fails | The Fix |
|---|---|---|
| Cutting off feet | Hides foot placement, the most technical part of the trick. | Zoom out or step back. Ensure the entire skater, head to toe, is in your viewfinder. |
| No lead room | Skater looks crammed into the frame, with nowhere to “go.” | Frame the skater so they have space in the direction they are moving. |
| Stopping at the peak | Photo lacks a sense of completion; was it landed? | Keep shooting for 1-2 seconds after the trick appears done. Capture the roll-away. |
Your position is everything. Get low. A shot from waist height looks like a spectator’s view. A shot from knee height or lower puts the viewer in the action. Your shins will complain, but the photos won’t.
Lens Choice: From Fisheye to Telephoto
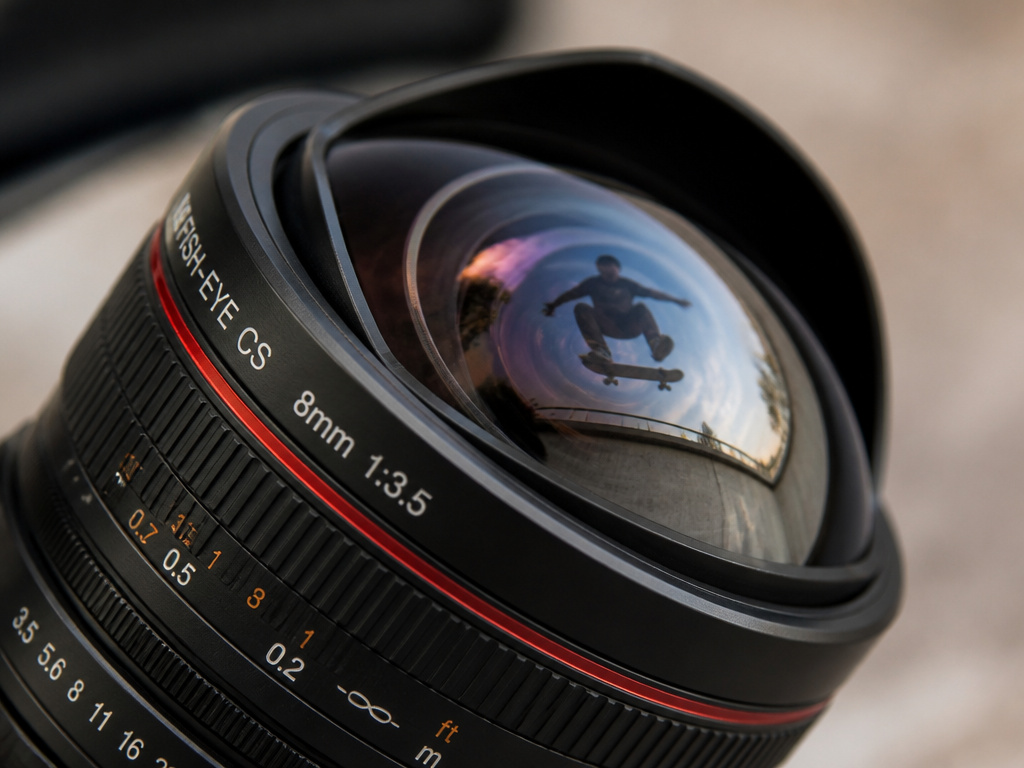
Your lens decides how the world of the trick looks. The classic skate look comes from extreme wide-angles.
The fisheye is iconic. As the Streetwar fisheye lens guide notes, Century Optics is the exclusive producer of the ultra-fisheye lenses that define the look. A fisheye exaggerates depth, making close objects feel huge and pushing the background away. It’s why filmerboards get so close, the distortion makes the trick feel massive and fast. For filming skateboarding, this perspective is almost a language of its own.
But don’t sleep on longer lenses. A longer telephoto lens from a distance can compress the scene, making a spot look more imposing. It’s perfect for showcasing the scale of a spot. A standard prime lens can give you a natural perspective. It forces you to “zoom with your feet,” which means you’re moving and engaging with the session, not just standing in one spot.
If you’re adding a specialty tool like the SKATER® Scope to get unique angles, remember the math. Its operating manual specifies a calculated stop of T4 1/3 and a final T-stop of T5.6. If your lens is set to T4, the scope drops that to an effective T5.6. You must open your lens aperture to compensate, or your photos will be underexposed.
The Non-Negotiable: Safety and Etiquette

You are a guest in the skaters’ space. Your camera doesn’t grant you priority.
- Watch first, shoot second. Spend ten minutes observing the flow of the park. See where skaters set up, where they rest, and the lines they take. Then, position yourself somewhere that doesn’t block a run-up or a landing zone.
- Communicate clearly. Before a skater attempts a trick for you, have a quick chat. “Hey, mind if I shoot you trying this? I’ll be over here. I’ll yell ‘shooting!’ right before I take the photo.” This sets expectations and prevents surprises.
- Never stand directly in a blind spot. The area immediately behind a skater preparing for a rail slide is a no-go zone. Position yourself at a 45-degree angle to their path.
- Protect your gear and yourself. Concrete is unforgiving. Use a wrist strap. Wear shoes you can move quickly in. A dropped camera or a photographer taking a tumble ends the session for everyone.
This isn’t just being polite; it’s how you get invited back. Skaters remember who respects the session.
Building a Starter Kit on a Budget

You don’t need a $5,000 setup. You need a camera that can control shutter speed, a lens that lets you get close, and reliability.
- The Camera Body: Choose a used DSLR or mirrorless camera with “Manual” mode. Choose a used DSLR or mirrorless camera with “Manual” mode that can be found for reasonable prices. Their kit lenses are a start.
- The Lens Upgrade: The first purchase should be a fast prime lens that lets in lots of light. These are cheap, let in lots of light for faster shutter speeds, and force you to move to compose the shot.
- The Flash (Optional): A simple off-camera flash is a low-cost way to start experimenting. It’s the single biggest leap in quality you can make for indoor or shaded outdoor shots.
- The Bag: A small, padded backpack. You’ll be moving, squatting, and possibly bailing. You need your hands free and your gear secure.
This kit gets you 90% of the way there. The last 10% is practice, not gear.
Editing for Impact, Not Overprocessing
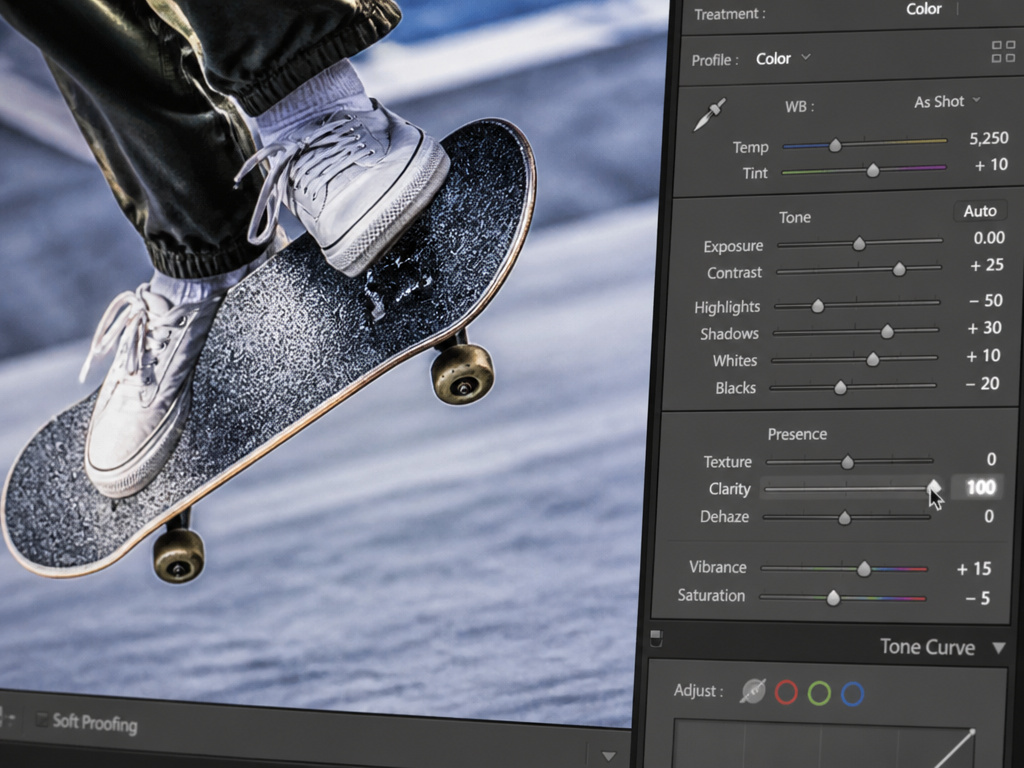
Skate photography has a raw, authentic aesthetic. Your goal in editing is to enhance what’s there, not to create something new.
Common mistake: Cranking the “Clarity” and “Sharpening” sliders to 100. This makes grip tape look like jagged rocks and skin texture look plastic. It screams “amateur edit.”
Stick to basic adjustments:
- Exposure & Contrast: Get the exposure right. Lift the shadows just enough to see detail in dark clothing, but keep the contrast to make the subject pop.
- Color: Slightly boost vibrancy, but don’t go crazy. Keep colors looking natural.
- Crop: Use the crop to tighten the composition, but remember the “head to wheels” rule. Don’t crop so tight that you lose the context of the spot.
The best skate video editing follows a similar principle: it serves the action, not the other way around. Your stills should feel dynamic and focused on the moment.
What Gear Do I Need for Skate Photography?

Your camera needs to handle fast action. Find a camera that allows you to manually set a very fast shutter speed. For lenses, an ultra-wide perspective is a classic look in skate media, and Century Optics is known for producing ultra-fisheye lenses essential for that look. If you’re considering a specialized filming adapter for a certain aesthetic, note that it will affect your lens’s light-gathering ability, changing the final aperture. For flash, using an off-camera unit can create a dramatic look. According to a Fujifilm article, skaters had ‘hardly ever seen’ such images, suggesting it can stand out, while other sources refer to flash usage as ‘typical’. The gear matters, but knowing how to use it to freeze motion and frame the full sequence matters more.
Frequently Asked Questions
What is the most important camera setting for skate photography?
Shutter speed. It controls motion blur. Start at 1/500s as a baseline, but be prepared to use 1/2000s or faster to freeze rapid board rotations cleanly. Aperture and ISO support that primary goal.
Do I need a fisheye lens?
No, but it defines the classic, immersive skate look. A standard wide-angle lens (like a 16-35mm) is a more versatile and affordable starting point. You can achieve great results with a 50mm lens by learning to position yourself well.
How do I get sharp photos when the skater is moving so fast?
Pre-focus on the spot where the trick will happen (like the edge of a ledge), set your camera to a high-speed continuous shooting mode, and start shooting just before the peak action. This “spray and pray” method, combined with good timing, increases your odds of getting the perfect frame.
Is flash necessary for daytime skate photography?
Not necessary, but powerful. A flash can fill in harsh shadows under the brim of a hat or under the board, adding detail and dimension that bright sun can wash out. It requires more gear and coordination but can improve your daytime shots.
How do I avoid getting in the skater’s way?
Communication and awareness. Always ask if it’s okay to shoot. Position yourself well outside their intended path. Watch for other skaters using the park, and be ready to move quickly. Your safety and theirs is more important than any photo.
Before You Go
One rule cuts through all the technical advice: shoot the skater, not the trick. The best skate photos have emotion, concentration, effort, relief, joy. A perfectly sharp, technically flawless shot of a trick no one cares about is just a catalog image. A slightly softer shot of a skater laughing as they roll away from a hard-earned make has weight.
Your first hundred shots will be blurry, poorly framed, or badly lit. That’s fine. The key is to analyze your footage and your stills afterward. Why was this one blurry? Was my shutter too slow? Why did I miss the moment? Was I reacting instead of anticipating? That review is where you actually learn.
Grab your camera, go to a local spot, and start with the one thing you can control today: shoot at 1/500s or faster, and keep the whole skater in the frame. Nail that, and everything else is a matter of turning the right dials.
