
How to Photograph Skateboarding at Night: Step-by-Step
This post contains affiliate links. As an Amazon Associate, we earn from qualifying purchases.
Photographing skateboarding at night requires matching three things: a camera that handles high ISO, a fast lens (f/2.8 or wider), and off-camera flash or strobes to freeze the action. In one common technique, your main light comes from the flash, not the ambient streetlights, which keeps the skater sharp while the background falls dark.
That flash-as-main-light rule is where most night shots fail. You can’t rely on the camera’s sensor to gather enough light from a dimly lit park; it’ll push the ISO into noisy territory and still force a slow shutter that blurs every movement. The flash burst, lasting maybe 1/1000th of a second or less, is what actually freezes the trick. This is the core principle of how to photograph skateboarding at night.
What follows: the specific camera settings used in published night shoots, the two competing lighting techniques photographers argue over, the essential gear list, and a guide on how to photograph skateboarding at night when you can barely see each other.
Key Takeaways
- Your flash or strobe is the main light source at night in one common technique; Sam Muller, for example, underexposes the ambient background by two stops to make the skater pop.
- Sources disagree on shutter speed: for freezing action with flash, photographers like James Walker use speeds like 1/160th, while others like Rob Meronek use long exposures like 3 seconds for a different effect.
- Open your aperture to f/2.8 or wider and don’t be afraid to push ISO to 1600 or 2500 to get a proper exposure.
- Off-camera flash placement is critical: start with two lights at 45-degree angles to the skater, placed low on the ground.
- Coordinate with a test flash and cell phones when shooting from a distance; skaters need a clear “go” signal.
The Gear You’ll Need (Flash or Strobe)
You can’t cheat this with a phone’s flashlight. The Skate Labs field guide is blunt: a phone flashlight won’t light much at night, and phones get grainy in the dark. You need dedicated, powerful light you can control.
The core of your kit is a camera that performs decently at high ISO (1600-3200), a lens that gathers a lot of light quickly, and a way to trigger lights away from your camera. Here’s what real photographers have on the ground.
| Gear Type | Specific Examples Used | Why It Matters for Night |
|---|---|---|
| Camera Body | Canon EOS 5D Mark II, Nikon D3 | Handles high ISO (1600-2500) with acceptable noise for action freezing. |
| Lens | 15mm prime, 24-85mm f/2.8-4 zoom | Fast aperture (f/2.8 or wider) lets in maximum available light. |
| Flash/Strobe | Canon speedlights, Lumedyne 400ws P4XX, Quantum QFlash T5dR | Portable, powerful, with short flash durations to freeze motion. |
| Trigger System | PocketWizard transmitters/receivers | Reliable wireless sync for off-camera placement, sometimes over long distances. |
James Walker lit a whole skatepark scene with just two Canon speedlights. Sam Muller, shooting for PopPhoto, credits his Lumedyne and Quantum lights for being “portable and powerful, with short flash durations.” That last part is the key. A speedlight’s burst is extremely short, which is how you freeze a board mid-flip without any blur.
Common mistake: Relying on continuous light from street lamps or LED panels. These lights require slow shutter speeds, which will blur your skater. The flash burst is what freezes the action.
You’ll also need a way to get that light off your camera. A simple wireless trigger like a Godox XPro or a PocketWizard does the job. For more advanced skate photography, some setups, like the one documented in Layers Magazine, use Elinchrom Rangers with PocketWizards for triggering flashes from a quarter-mile away.
I’ve learned this the hard way. I once tried to use a bright LED video light for a night shoot. The skater was a blurry ghost in every frame. The light was constant, so my shutter speed had to be slow enough to expose him. It was a mess. The shot only worked when I turned off the LED and used a cheap speedlight fired from the side.
Camera Settings: The Numbers From Real Shoots
Forget preset modes. You’re shooting in manual. The goal is to expose for your flash as the main light, letting the night scene go dark. The numbers below aren’t theory; they’re the settings pulled from published night skate photos.
First, set your shutter speed to your camera’s flash sync speed or slower; common speeds used are between 1/80th and 1/250th. This ensures the entire sensor is exposed when the flash fires. James Walker shot at 1/160th. Sam Muller used 1/80th. Both work because the flash, not the shutter, freezes the action.
Next, open your aperture as wide as your lens allows, f/2.8, f/4. This allows the flash’s light to reach the sensor with the greatest effect. Then, set your ISO. Start at 1600. Walker used ISO 1600; Muller used ISO 200 because his powerful strobes did all the work.
Here is a direct comparison of settings from different photographers, showing there’s more than one way to get the shot.
| Photographer / Source | Shutter Speed | Aperture | ISO | Lighting Setup |
|---|---|---|---|---|
| James Walker | 1/160th | f/2.8 | 1600 | Two Canon speedlights at 45-degree angles. |
| Sam Muller | 1/80th | f/6.3 | 200 | Lumedyne strobes as main light, ambient underexposed. |
| Rob Meronek | 3 seconds | f/6.3 | 250 | Long exposure with a single remote flash burst. |
Notice the massive disagreement on shutter speed? Meronek’s 3-second exposure is a completely different technique, which we’ll unpack next. For your standard action-freezing shot, start in the 1/80th to 1/160th range.
The why-layer here is simple: a flash burst is incredibly short. Your shutter speed just needs to be fast enough to darken the background and prevent ambient light trails from forming. The flash does the freeze.
The Two Main Lighting Techniques
Photographers don’t agree on one “right” way to light a night skate shot. The debate boils down to two camps: flash-as-main-light, and long-exposure-with-flash. Your choice changes the entire feel of the photo.
Technique 1: Flash as Main Light (The Freeze)
This is the standard. You set your exposure so the ambient city light is dark, often underexposed by one or two stops. Then, you place your flash or strobe to fully illuminate the skater. The result is a crisp, sharp subject isolated against a moody, dark background.
Sam Muller’s method is the textbook example. He used his strobes as the main light, underexposing the ambient background by two stops. The skater is perfectly lit, and the motion is frozen solid by the short flash duration.
How to set it up:
- Place your lights first. Start with two flashes on stands or on the ground, about 45 degrees to either side of where the skater will be.
- Set your camera to manual mode. Dial in a shutter speed like 1/160th, an aperture like f/2.8, and ISO 1600.
- Take a test shot without the skater and without the flash. The scene should look nearly black.
- Turn your flashes on and take another test. Adjust their power until the ground and the spot are well-lit.
- Bring in the skater and shoot.
The skater gets one bright, clean pop of light. There’s no motion blur. This technique is central to how to photograph skateboarding at night and is why professional skateboarding cameras need a reliable flash sync port.
Technique 2: Long Exposure with a Flash Pop (The Streak)
This is the creative, high-risk alternative. You use a very slow shutter speed, like Rob Meronek’s 3 seconds, to let the ambient light create streaks or glow. Then, you fire a flash at some point during the exposure to freeze the skater sharply.
The result can be magical: a sharp skater superimposed over light trails from traffic or blurred city lights. It can also be a mess if the timing is off.
How to set it up:
- Mount your camera on a tripod. This step is required.
- Set your exposure for the ambient light. For a city street, this might be a long exposure like 3 seconds at f/6.3, ISO 250. The scene without the skater should look correctly exposed.
- Place a remote flash where it will light the skater. Trigger it manually or with a radio trigger.
- The skater starts their trick in the dark. You open the shutter for the long exposure.
- At the peak of the trick, you fire the flash. Then you close the shutter.
The timing is everything. You’re layering a frozen moment over a flowing, time-blurred background. This method is less about lighting your skater with multiple sources and more about a single, well-timed burst.
Composition and Working with the Skater
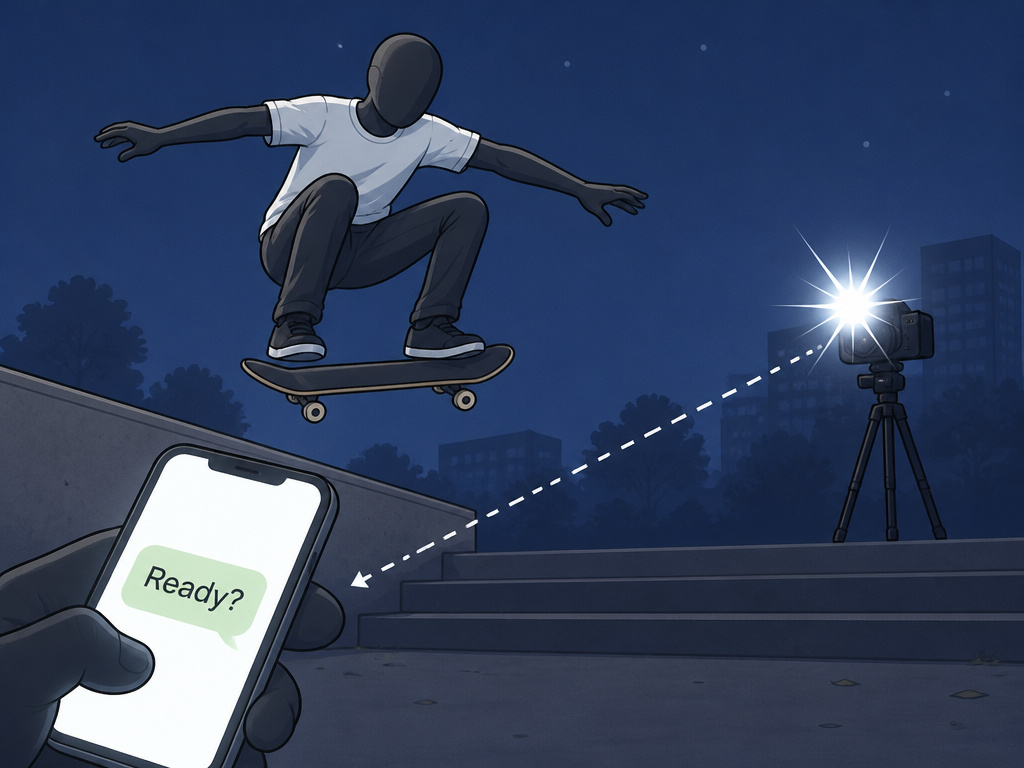
A perfectly exposed, frozen trick is worthless if the framing is off. Skate photography has its own compositional rules, and at night, you’re collaborating with someone who can’t see you clearly.
The STREETWAR skateboard photography guide lays out the basics that still apply after dark. Use the Rule of Thirds, don’t center the skater. Give more leadroom (space in front) than space behind so the image feels like it’s moving forward. Most importantly, the skater and board must be in focus.
Where this goes sideways: Shooting a skater in all-black clothing against a dark background. One guide explicitly warns against this for a nightshooting. Ensure they wear something that contrasts with the spot.
Communication is your biggest hurdle. You can’t yell settings over the sound of wheels on concrete. Rob Meronek and his team used cell phones for coordination and a test flash as a “ready” signal from a distance. Establish a simple system: a wave of a phone light means “get ready,” and the flash firing means “go now.”
Reddit photographers who don’t skate emphasize this: you need to understand the trick’s “moment.” For an ollie, it’s the peak. You have to frame the shot to show where they started, what they’re clearing, and where they’ll land. Context is everything. If you’re new to skate filming, this is the skill that takes the most time to learn.
Post-Processing Night Shots
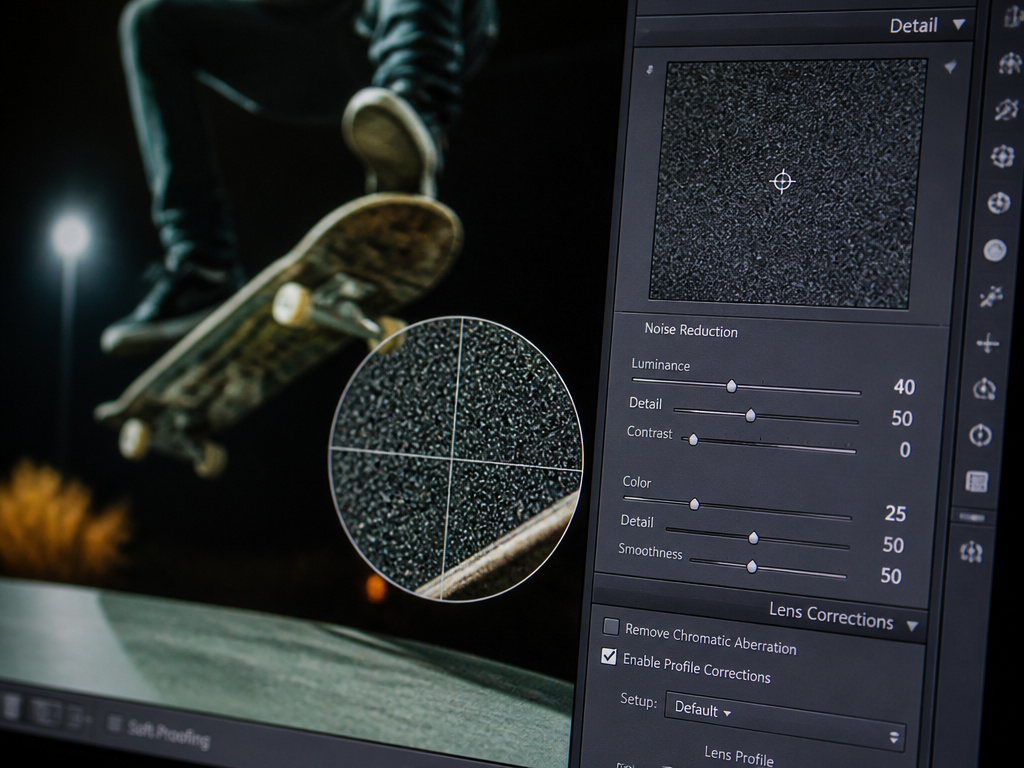
You will have noise. Your white balance will be weird from mixed light sources. Your shadows might be blocked. This is where you save the shot.
First, tackle noise. Use your editing software’s noise reduction (like Lightroom’s Detail panel) judiciously. Overdo it and your skater will look like a wax figure. Aim to reduce color noise more than luminance noise to keep texture in the grip tape and clothing.
Second, adjust white balance. Pick a neutral gray area on the concrete or the skateboard’s underside to correct the strange green or orange cast from streetlights. Then, use the tone curve to deepen your blacks and make the skater pop. The goal is to reinforce that the flash was the main light, darks should be dark, highlights should be crisp.
Finally, crop for impact. Revisit the Rule of Thirds. Does the skater have enough leadroom? Is there a distracting street sign in the background you can clone out? Night shots often benefit from a tighter crop, focusing attention on the lit subject.
What lighting equipment is best for night skateboarding?
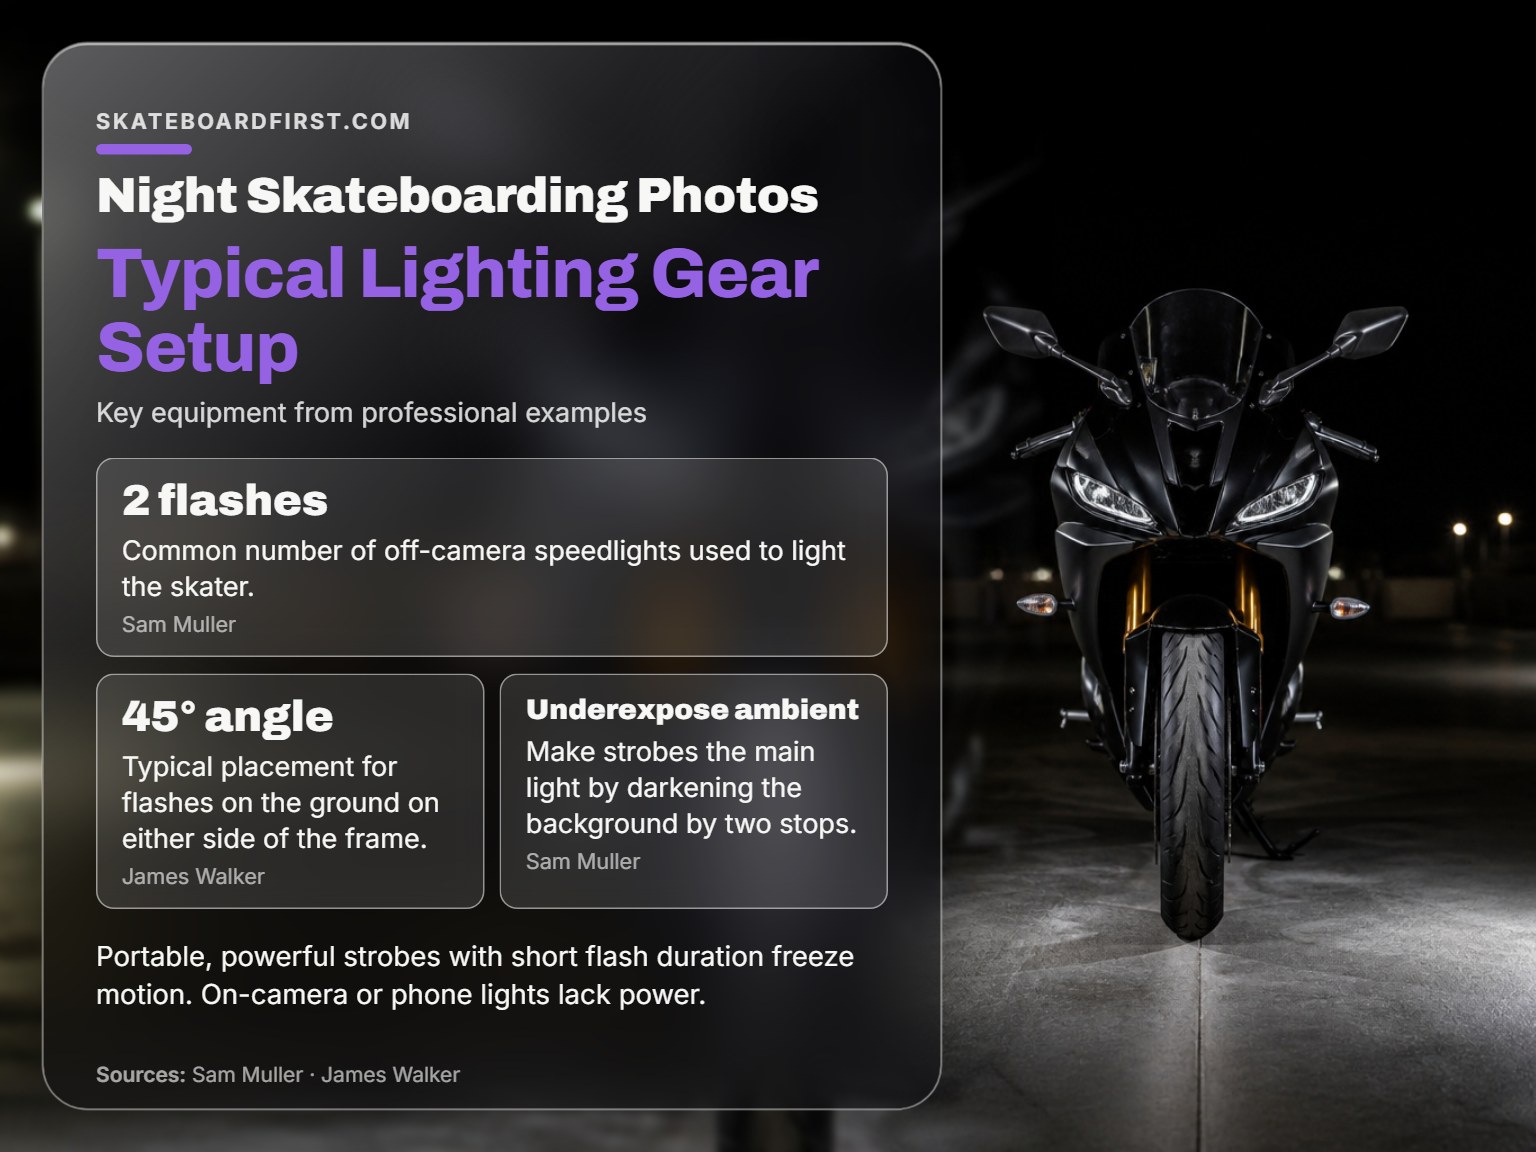
The core tool is a powerful, portable flash system. Photographers use dedicated strobes or speedlights placed off-camera to freeze the action. One common setup involves positioning two flashes on the ground at about a 45-degree angle on either side of the frame. The goal is to make these strobes the main light, often by underexposing the dark ambient background. This approach isolates the skater with a crisp, sharp flash that stops motion. For coordination over distance, cell phones can be used for signaling, and long-range radio triggers are essential. On-camera or phone-mounted lights typically lack the necessary power and control for lighting a moving skater effectively.
Frequently Asked Questions
What is the best shutter speed for skate photography at night?
For freezing action with flash, use your camera’s flash sync speed, typically between 1/160th and 1/250th. For creative light trails, use a long exposure of 2-5 seconds from a tripod and fire the flash during the shot.
Can I use my phone to photograph skateboarding at night?
You can, but with severe limits. Phone flashlights are too weak to light a scene. Your best bet is to find a spot under very strong streetlights and have a friend hold a bright, off-camera light to the side. Expect grainy, blurry results compared to a dedicated camera and flash.
How many flashes do I need?
You can start with one. Many iconic shots use a single, well-placed off-camera flash. Two flashes, placed at 45-degree angles to the skater, give more even, three-dimensional lighting and are a great next step.
How do I focus in the dark?
Use your flash’s AF-assist beam if it has one, or pre-focus manually on the spot where the skater will perform the trick. Using a narrower aperture like f/5.6 or f/8 gives you more depth of field forgiveness if the focus isn’t perfect.
Is it safe to use bright flashes around skaters?
Yes, but with etiquette. Always warn the skater before test firing full-power flashes. Never fire a flash directly into their eyes as they approach a spot. Place your lights to the side and use radio triggers so no one trips over cables. Good communication is key for safe skateboarding at night.
Before You Go
Night shooting is a puzzle with moving parts. Lock in your gear, memorize a starting point for your settings (1/125th, f/2.8, ISO 1600), and practice placing lights before you ever bring a skater out.
The one rule that flips in the dark: the sun is no longer your main light. Your flash is. Any attempt to make the ambient city lights bright enough will force a slow shutter and blur your subject. Commit to the dark background.
