
How to Build a Skateboard Grind Rail: Step-by-Step Plans
This post contains affiliate links. As an Amazon Associate, we earn from qualifying purchases.
To build a skateboard grind rail, you need to pick a construction method, welded steel, bolted wood, or screwed PVC, and follow the exact material specs for your chosen design. A 6-foot rail made from 2 3/8″ outside diameter steel pipe with 1/4″ wall thickness is the standard for a durable welded option, while a wooden rail built from 2x4s and a 2×6 offers a no-weld alternative.
That choice between welding, bolting, or screwing isn’t just about tools. It decides the rail’s lifespan, portability, and how much weather it can handle. A welded steel rail left outside without primer rusts through in a season. A wooden rail built from untreated pine splits after a few rainstorms. The right build matches your skill, budget, and where the rail will live, which is a key consideration in any guide on how to build a skateboard grind rail.
What follows is a breakdown of the three proven plans for how to build a skateboard grind rail. You’ll get the exact measurements for steel, wood, and PVC rails, the tools each one needs, and the one mistake that makes a wobbly, dangerous rail every time.
Key Takeaways
- For a welded steel rail, the pipe must be 2 3/8″ outside diameter with a 1/4″ (Schedule 80) wall thickness, anything thinner dents on impact.
- A wooden rail needs pressure-treated lumber or sealant if it will ever get wet; untreated pine warps within a month outdoors.
- The rail’s stability hinges on the foot length: leg height plus 3 inches; shorter feet make the rail tippy.
- Drill pilot holes before driving screws into wood to prevent splits, and grind a semi-circle notch in round rail legs for a better weld.
- Always start with a rail under 12 inches tall; a lower rail is safer for learning and easier to build with less material.
The Welded Steel Rail: Round vs. Square
A welded rail is the park standard for a reason. It doesn’t flex, it slides predictively, and it lasts for years if you protect the steel. The build comes down to picking round or square tubing and cutting the legs to the right length.
You need a 2 3/8″ outside diameter steel pipe with a 1/4″ wall thickness (often called Schedule 80) for the round rail. For a square rail, you need 2″ x 2″ square steel tubing with a wall between 1/8″ and 3/16″. That thickness matters. Thinner tubing crumples the first time a board slams into it sideways.
The 2 3/8″ OD, Schedule 80 pipe is the industry benchmark for grind rails. Its wall thickness withstands repeated impact from skateboard trucks without deforming, providing a consistent slide surface.
The legs get welded to feet made from plate steel. The foot length rule is simple when you learn how to build a skateboard grind rail: make the foot as long as the rail is tall, plus about 3 inches. A rail that is 12 inches tall needs feet that are 15 inches long. This extra length is your stability insurance. Weld the leg to the center of the foot so the weight is balanced.
Where you weld the leg to the rail is the trickier part. Sources disagree on the exact measurement. DIYskate.com says to place the leg a distance from the rail’s end equal to the rail’s height. For a 1-foot tall rail, that’s 12 inches in. Roberts.com.ph says to mark a point 9 inches from the end for a square rail. Both DIYskate.com and Roberts.com.ph specify placing the legs 6 inches from the end for a 6-foot round rail.
My take? Start with 6 inches in from each end for a 6-foot rail. That centers the legs under the riding section and leaves enough rail hanging over for approaches. Test the stance before you weld, stand on the rail. If it rocks, adjust the leg position.
Cut list for a 6-foot long, 1-foot tall round rail:
- Rail: 72 inches of 2 3/8″ OD, Schedule 80 steel pipe.
- Legs: Two pieces at 9 5/8″ long (or 10 1/2″ if you plan to notch them).
- Feet: Two pieces of plate steel cut to the required length (rail height + 3 inches).
Cut list for a 6-foot long, 9-inch tall square rail:
- Rail: 72 inches of 2″ x 2″ square steel tubing (1/8″ to 3/16″ wall).
- Legs: Two pieces at 6 3/4″ long.
- Feet: Two pieces of plate steel cut to the required length (rail height + 3 inches).
Weld the legs to the center of the feet first. Make sure they’re perfectly upright. Then, position the legs under the rail at your chosen mark (6 inches or 9 inches in), check for level in all directions, and tack-weld them in place. Double-check everything before running your final beads.
Common mistake: Welding a round rail without notching the legs. A flat-to-round joint is weak. Grind a semi-circle into the top of each leg so it cradles the pipe, the weld penetrates deeper and the joint won’t snap under stress.
If you don’t own a welder, a local metal shop or fabricator can do this for you. Bring them the cut materials and a diagram. It’s often cheaper than buying a pre-made rail.
The No-Weld Wooden Rail
Not everyone has a welder or a friend who welds. A wooden rail built from standard lumber is the most accessible DIY option. It’s also the quietest rail to skate, which is nice for backyard sessions. The trade-off is durability, especially against the elements.
The core structure is a sandwich. You need two 2x4s for the sides and a 2×6 for the top grinding surface. Cut all three pieces to your desired rail length. A 2×6 provides the grinding surface.
Assembly is all about screws and pilot holes.
- Lay the two 2x4s parallel on their wide faces.
- Place the 2×6 on top, centered.
- At each end, drill a 3/8″ hole through the 2×6, 2 inches in from the end. This is your top guide hole.
- Directly below that, on the inside face of the 2×4, drill a 3/16″ pilot hole. This stops the wood from splitting.
- Drive a 1 5/8″ screw down through the 2×6 and into the 2×4. The screw threads into the pilot hole and pulls the wood tight.
For every 4 feet of rail length, add another screw in the middle. A 4-foot rail needs three screws (two ends, one in the middle).
The legs are just more 2x4s cut to your chosen height. Attach them vertically to the outside of the base 2x4s using exterior-grade screws. For more stability, add a third horizontal 2×4 between the legs at ground level, creating a rectangular base frame.
Where this goes sideways: Using untreated wood outdoors. Rain soaks into the end grain of pine 2x4s, they swell, then they dry and crack. After a few cycles, the rail gets wobbly and the screws pull loose.
If there’s any chance of rain, use pressure-treated lumber for everything. If you’re using standard pine, coat every surface, especially the cut ends, with a water-sealant paint or stain before assembly. Even then, store it under cover or in a garage. A wooden rail left on a wet lawn will be a crumbling mess by the end of the season.
The PVC Pipe Rail (Halfpipe Plans)
The “HalfpipePlans.q” PDF from Rickdahlen.com offers a third path: a 1.5″ ID plastic PVC pipe mounted on a 4×6 wooden beam. This is a fantastic beginner or kid-friendly option. PVC is slippery, cheap, and harmless to fall on. It’s also the lightest and least permanent design.
You need a 10-foot-long 4×6 beam. And a 10-foot length of 1.5-inch interior diameter PVC pipe. Cut the PVC to match the beam length.
The construction is clever. You cut a groove down the center of the beam’s wide face, just deep enough to cradle half the PVC pipe. Bevel the edges of the groove so the pipe sits flush. Don’t cut the groove too deep, you need solid wood below for the screws to bite into.
Easy to miss: Following the Rickdahlen.com plan, you drill holes from the top straight through the bottom, then redrill just the top hole to countersink the screw head.
Here’s the sequence:
- Lay the PVC pipe in the groove.
- Clamp it in place.
- Drill holes straight through the bottom of the beam and up into the PVC pipe. Use an appropriately sized drill bit.
- Enlarge only the top part of each hole in the PVC with a bigger bit. This creates a countersink for the screw head and allows your screwdriver to fit.
- Drive 1.5″ panhead screws up through the beam and into the PVC.
The rail is now fixed to the beam. The beam itself becomes the heavy, stable base. You can leave it as is, or add short wooden legs to the bottom of the beam for extra height. This design requires zero welding, and if the PVC gets chewed up, you just unscrew it and slide on a new piece.
Design Choices: Height, Length, and Slope

The standard specs work, but you can tweak them. Your rail doesn’t have to be 6 feet long and 12 inches tall. Shorter and lower is better for learning.
Height: For your first rail, stay between 6 and 10 inches tall. This feels low, but that’s the point. It’s less intimidating to jump onto, and if you slip, the fall is shorter. You can always build a taller one later.
Length: A 4-foot rail is enough to practice locking in a grind and riding it out. It’s also cheaper on materials and easier to move around. Longer rails (8 feet or more) are for building speed and linking tricks, but they require a perfect approach.
Slope: DIYskate.com mentions a creative option: make one leg longer than the other for a slanted rail. This creates a downhill grind, which is easier to lock into because gravity helps you stick to the rail. It’s also a unique challenge. Just make sure the feet are long enough on both sides to prevent tipping.
Portability vs. Permanent: A lightweight PVC or wooden rail is easy to store. A welded steel rail is a two-person lift. If you want it to stay put, consider driving long spikes or lag screws through the feet into the ground (for grass) or using sandbags on the feet (for pavement).
Tools and Safety

You can’t build a rail with just a screwdriver. The tool list scales with your ambition.
For a wooden or PVC rail:
- Circular saw or handsaw
- Power drill with bits (3/16″, 3/8″, and a countersink bit)
- Screwdriver bits
- Tape measure
- Speed square (for marking straight lines)
- Clamps
For a welded steel rail, add:
- Angle grinder with cut-off and grinding discs
- Welder (MIG is easiest for beginners)
- Welding helmet, gloves, and jacket
- Metal file
- C-clamps or magnetic welding clamps
Before you start: Wear safety glasses when cutting or grinding metal. Wear a respirator when welding or painting. Welding produces intense UV light, protect your skin and never look at the arc without a proper helmet. Work in a well-ventilated area, clear of flammable materials.
Squaring your cuts and drilling pilot holes are the two habits that separate a clean build from a frustrating one. Measure twice, cut once. It’s a cliché because it’s true.
Maintenance and Weatherproofing
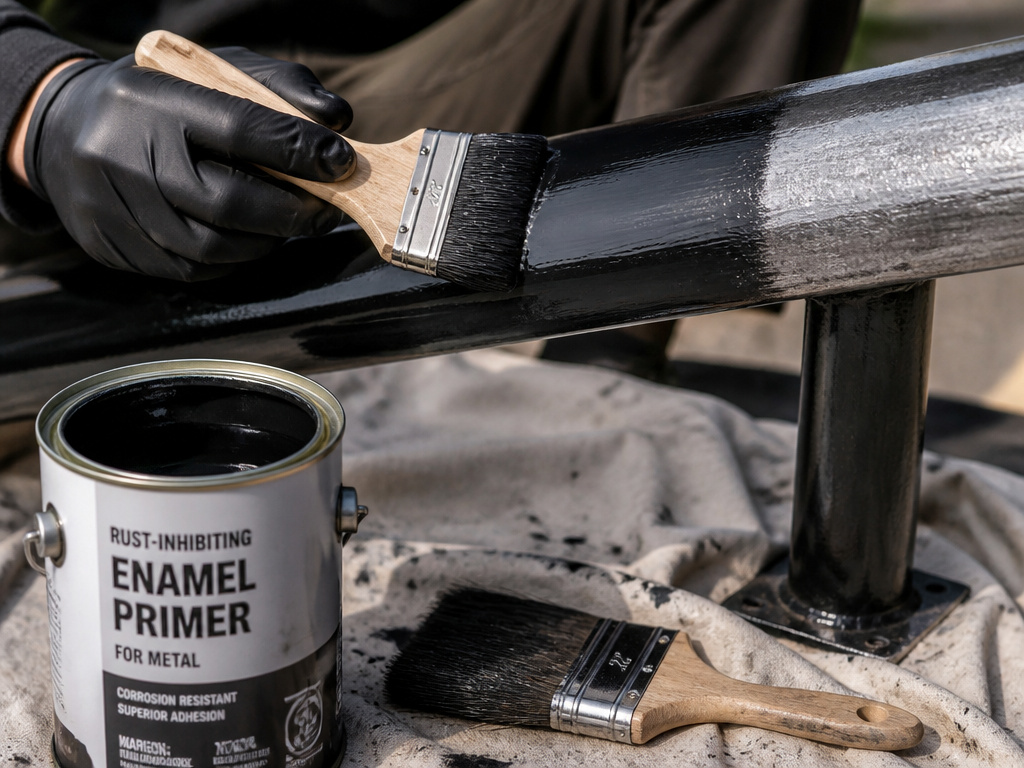
A rail isn’t a “build it and forget it” project. Weather eats wood and rusts steel.
Steel rails need paint. After welding, clean the entire rail with a wire brush to remove slag and mill scale. Apply a rust-inhibiting metal primer immediately. Follow with a tough enamel paint. The Redbull.com guide stresses this: trapped water inside a welded joint will rust it from the inside out. Seal any holes or gaps.
Wooden rails need sealant. Even pressure-treated wood benefits from a fresh coat of outdoor sealant every year. Check the screws annually for looseness. Tighten any that have backed out.
PVC rails need inspection. The plastic can become brittle in freezing temperatures. Check for cracks, especially around the screw holes, before each session.
Store your rail indoors if possible. A garage, shed, or under a sturdy tarp extends its life by years. The DIYskate.com source puts it bluntly: “Personally I wouldn’t leave either (wood or steel rail) outside.”
How much does it cost to build a grind rail vs buying one

Building your own rail is almost always cheaper than buying a pre-made one, especially for a metal design. The main costs are for materials like steel tubing or pressure-treated lumber and basic supplies like primer to prevent rust. You also need access to tools, most critically a welder for a metal rail, which can be rented or borrowed. A purchased rail includes the cost of manufacturing, shipping, and retail markup, which can be significant. While a DIY project requires your time and effort, the savings are substantial, and you get a custom-built piece of equipment tailored to your preferred height and length.
Frequently Asked Questions
What is the best material for a DIY grind rail?
It depends on your tools and goals. Welded steel is the most durable and performs like a park rail. Wood is the easiest for beginners to build with basic tools. PVC is the safest and cheapest for kids or first-timers. For a proper long-term street rail, 2 3/8″ OD steel pipe is the benchmark material.
How tall should a beginner grind rail be?
Start between 6 and 10 inches tall. This low height allows you to focus on the jumping and locking-in motion without a scary fall. Once you’re comfortable with 50-50 grinds and boardslides on a low rail, you can step up to a standard 12-inch or taller rail.
Can you build a grind rail without welding?
Yes. The wooden rail design using 2x4s, a 2×6, and screws requires no welding. The PVC pipe rail screwed to a wooden beam is another no-weld option. These are great for learning and are covered in our guide building a skate ledge, which uses similar construction principles.
How do you make a grind rail not wobble?
Wobble comes from unstable feet or uneven legs. Ensure the feet are at least 3 inches longer than the rail is tall. Check that both legs are exactly the same length before attaching them. On a wooden rail, make sure the base frame is square and all screws are tight. Adding a cross-brace between the legs at ground level also kills wobble.
How do you wax a grind rail?
Apply a specialized skate wax or a paraffin candle to the top surface of the rail. Rub it in a back-and-forth motion along the entire length. You don’t need a thick layer, a smooth, even coat reduces friction. For more detail, our complete skate wax guide covers how much to use and where to apply it for the best slide.
What’s the first grind trick to learn?
The 50-50 grind is the foundation. Your back truck rolls onto the rail first, followed immediately by your front truck, so both trucks are grinding evenly. It’s the most stable and teaches you balance. We have a full tutorial on how to do a 50-50 grind that breaks down the approach, pop, and lock-in.
The Bottom Line
Building a grind rail is a weekend project that pays off in trick progression. The choice is simple: if you have a welder, build the steel pipe rail. If you have a drill and saw, build the wooden rail. If you want something for a kid or a first attempt, build the PVC rail.
One rule most guides skip: if you build a steel rail, prime and paint it the same day you finish welding. Morning dew on bare steel starts the rust process before you even skate it. Everything above assumes you want a rail that lasts, a rusty, wobbly rail is more dangerous than no rail at all.
Start with a short, low rail. That’s the sweet spot for learning grind tricks without overcommitting on materials or space. Once you’ve got the feel, you can scale up to a longer, park-style rail for your home skatepark ambitions.
