
How to Fall on a Mini Ramp: A Step-by-Step Safety Guide
This post contains affiliate links. As an Amazon Associate, we earn from qualifying purchases.
To fall safely on a mini ramp, you must redirect your momentum into a controlled roll, tuck your limbs, and protect your head. The goal is to slide or roll out of the fall along the ramp’s curve, not to stop dead or catch yourself with stiff arms. Practice this on flat ground and gentle banks before attempting it on transition.
Most people think falling means you failed. On a mini ramp, it means you’re learning. The real failure isn’t the fall itself, it’s landing in a way that breaks a wrist or slams your head. Knowing how to fall on a mini ramp is therefore crucial.
What follows is the specific sequence for how to fall on a mini ramp, the gear that actually works, and the one drill that makes the response automatic before you ever try a trick. This isn’t about avoiding falls. It’s about making them a skill you own.
Key Takeaways
- Practice the tuck-and-roll on flat ground first. Stiffening up guarantees injury.
- Wrist guards are recommended to prevent a common beginner injury. Pads are useless if you don’t wear them.
- Redirect momentum along the ramp’s curve. Fighting the fall multiplies the force.
- Check your ramp’s weight capacity and surface conditions. A wet or overloaded ramp changes the fall dynamics completely.
- Bailing early is a skill. Knowing when to step off the board beats trying to salvage a lost trick.
Why Mini Ramp Falls Are Different
Falling on flat concrete is a sudden, jarring stop, unlike the physics of how to fall on a mini ramp. Falling on a mini ramp is a physics problem with a curved solution. The ramp’s transition wants to convert your downward momentum into a sliding, rolling motion along its surface. Your job is to let it.
When you drop in and lose balance, your instinct is to throw your arms back or stick a leg out to catch yourself. That’s how you get spiral fractures. On a ramp, you have a split second to redirect that energy. You go with the curve, not against it.
The U.S. CPSC recall of certain half-fold trampolines highlights a related hazard. The folding frame itself became a striking hazard. On a mini ramp, the “striking hazard” is often your own board or the rigid coping if you don’t manage the fall. The principle is the same: the equipment’s shape dictates the specific risk.
The Non-Negotiable Gear List
You can learn to fall perfectly and still get hurt if you’re not wearing the right stuff. This isn’t a fashion show. It’s impact engineering.
Helmet: Essential. A CPSC-certified skate helmet is the bare minimum. It must fit snugly without wobbling. A loose helmet twists on impact and does nothing.
Wrist Guards: These are the most underrated piece of kit. When you slip out on a ramp, your hands shoot out to catch you. Wrist guards disperse that impact across a hard splint instead of letting your wrist hyperextend. I learned this after a single hard fall onto my palms. The soreness lasted a week. Now my wrist guards go on before the helmet.
Knee and Elbow Pads: Choose pads with a hard plastic cap and a soft inner sleeve. They need to stay in place when you slide. Cheap pads that shift on impact are worse than nothing, they give false confidence.
Common mistake: Buying pads but not wearing them because they feel bulky. The one session you skip them is the session you need them. A bruised ego heals faster than a broken scaphoid.
A Quick Note on Ramp Safety
If you’re skating a portable ramp like the Discount Ramps Mini EZ-Link set, the manufacturer’s rules aren’t suggestions. They are the conditions under which the ramp is designed to be safe.
- Maximum weight capacity is 600 lbs, inclusive of user and equipment. Exceed it, and the structure can fail mid-session.
- Never use it in rain or when damp. The surface friction disappears, turning a slide into a slam.
- Always use it on a flat, level base. A wobbly ramp changes the fall trajectory unpredictably.
This isn’t scare talk. It’s the engineering data from the manual. Ignoring it turns a controlled practice environment into a hazard.
The 4-Step Falling Drill
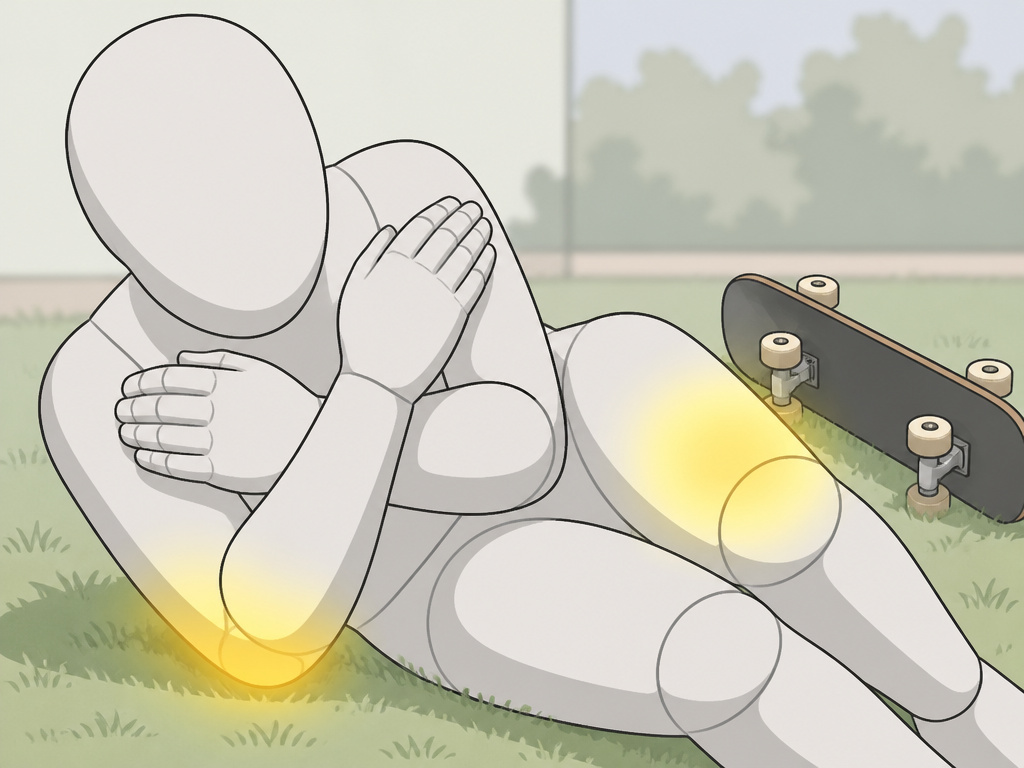
This is the practice sequence. Do it on flat ground, then on grass, then on a very mellow bank. Only move to a mini ramp when the motions feel automatic.
1. The Tuck Position (Static)
Stand with your knees bent. Cross your arms over your chest, tucking your chin down. Practice dropping to your side (not onto your back) onto a soft surface like grass or a mattress. The goal is to feel the impact on the meaty part of your shoulder and thigh, not your spine or elbow.
2. The Roll (Adding Motion)
From the tuck position, add a gentle push. Let your body roll from your shoulder across your back to your opposite hip. Don’t try to stop. The roll dissipates energy. Practice both sides.
3. The Board Bail (Dynamic)
With your board on grass, practice stepping off the board and immediately going into the tuck-and-roll. The “step-off” is a crucial mini ramp skill for when a trick is already lost. Get away from the board, it becomes a projectile.
4. The Pump-and-Bail (Ramp Specific)
On a very small, mellow ramp or bank, pump back and forth without attempting tricks. Focus on balance. Then, intentionally step off at the bottom and execute your roll. This links the falling skill to the actual feeling of the ramp’s motion.
| Drill Stage | Where to Practice | Key Sensation | Risk If Skipped |
|---|---|---|---|
| Tuck Position | Flat ground, grass | Impact on shoulder/thigh, not bone | Direct impact on elbow or tailbone |
| The Roll | Grass, gym mat | Momentum carrying across your back | Energy has nowhere to go, causing whiplash |
| Board Bail | Grass, flat pavement | Separation from the board | Board flips into your shins or ankles |
| Pump-and-Bail | Mellow bank, small ramp | Timing the bail with the ramp’s curve | Bailing mid-transition, leading to a awkward, high-drop fall |
Reading the Fall: Before You Hit the Ground
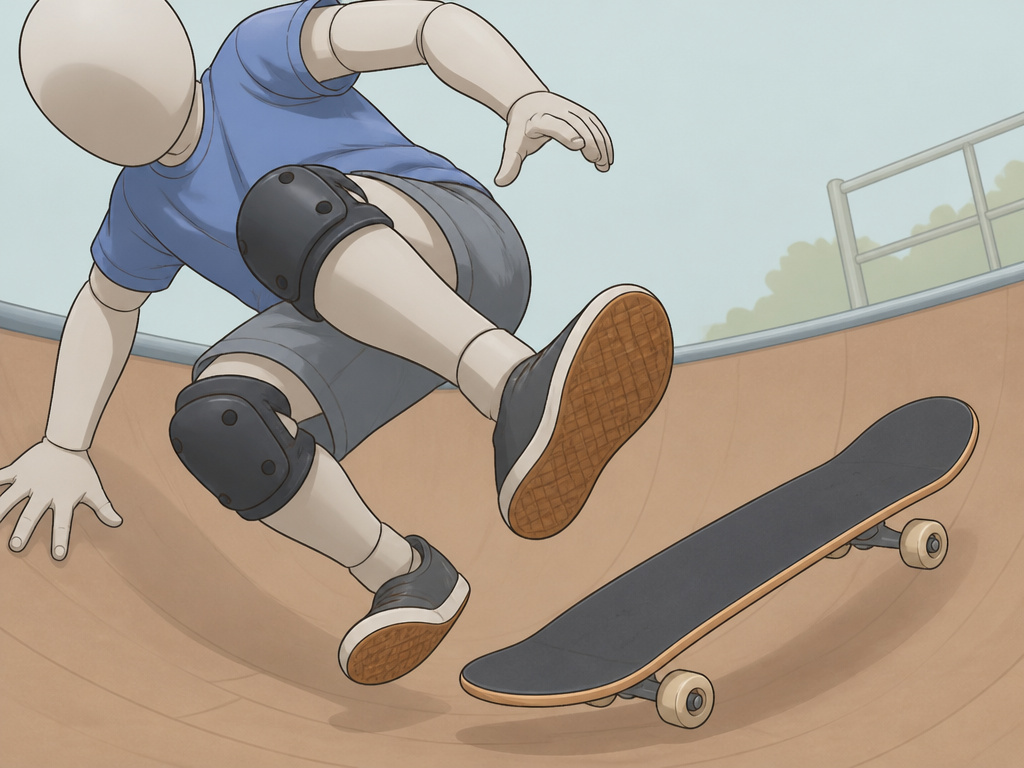
Falling isn’t a surprise if you’re paying attention. Your body gives you warnings. Learning to bail safely means recognizing these signals a half-second earlier.
The Board Gets Away From You: If your feet lose contact or the board shoots out, your trick is over. Don’t chase it. Commit to the bail and step off into your practiced roll.
You’re Off-Balance in the Air: On a mini ramp, this often happens at the coping. If you feel your weight tipping too far forward or back as you leave the ramp, it’s a bail. Trying to force the landing almost always ends with a higher, harder impact.
The Sound Changes: A good, solid roll onto your pads has a whump-thud-slide sound. A bad fall has a sharp crack or a dead thump. Your ears will tell you the difference after a few sessions.
I used to think every fall was a failure. After watching better skaters, I realized they fell constantly, they just knew how to hit the ground. Treating falls as a normal skill changed my whole progression. It made me willing to try the next trick.
Integrating Falls Into Your Progression

You don’t practice falling instead of skating. You practice it as part of your ramp session.
Warm-Up Falls: Do five practice bails on flat ground as part of your warm-up. It resets your muscle memory to the safe pattern.
The “Three Try” Rule: When learning a new trick on the mini ramp, give yourself three committed attempts. If you don’t land one cleanly by the third try, stop. Revert to pumping and carving for the rest of the session. This prevents frustration-falls where your technique breaks down.
Session-Ender Falls: If you take a hard fall, your session is over. Your adrenaline will lie to you and say you’re fine. Your coordination won’t be. Pack it up, hydrate, and live to skate tomorrow. This is the hardest discipline to learn.
How This Connects to Other Skills
Learning to fall isn’t an isolated skill. It’s the foundation that makes other ramp skills possible. You can’t commit to a drop-in if you’re terrified of the consequence. Understanding transition skating is about managing momentum, and falling is the ultimate momentum management. Even building your own ramp requires respecting the safety specs we covered earlier, knowing how to fall on a DIY mini ramp you trust is far easier than on one you doubt.
Frequently Asked Questions
How do I overcome the fear of falling on a mini ramp?
You don’t overcome it by avoiding falls. You overcome it by practicing them. Start with the drills on grass until the tuck-and-roll is automatic. Then practice bailing on a bank. The fear comes from the unknown. Make the fall a known, controlled action, and the fear loses its power. Our guide on overcoming the fear of falling digs deeper into this mindset shift.
Should I try to run out of a fall on a ramp?
Almost never. Running out requires you to catch your balance on a declining, curved surface while moving. Your feet will likely slip out from under you, leading to a worse, backward fall. It’s safer to commit to the controlled roll and let your pads do their job.
What’s the most common injury from mini ramp falls?
Wrist sprains or fractures are the most common. This happens when skaters instinctively reach out with stiff arms to catch themselves. This is exactly why wrist guards are critical, they turn a potential break into a slide.
I wear all my pads but still get hurt. What am I doing wrong?
You’re likely stiffening up. Pads are tools, not forcefields. If you lock your joints and brace for impact, you’re turning your body into a rigid structure that transfers all the energy to one point. The pads can’t help if you don’t allow yourself to slide or roll. Revisit the rolling drill. You must stay loose.
How is falling on a mini ramp different from falling on a quarter pipe?
The principles are the same, but the scale changes. A mini ramp often has a tighter transition and less vertical space than a large quarter pipe. This means falls happen quicker and with less time to react. The need for a pre-programmed, automatic response is even higher on a mini ramp.
Before You Go
The single best thing you can do for your mini ramp skating isn’t a new trick. It’s spending twenty minutes tomorrow on the grass, practicing your bail and roll until you don’t have to think about it. Then find a mellow bank and do it five more times.
That muscle memory is what separates a shaken-up session from a trip to the clinic. Everything else, the drop-ins, the rock-to-fakies, the stalls, builds on that foundation. You can’t build anything stable on the fear of a sudden stop.
Go push around, find a gentle slope, and step off your board on purpose. That’s your first real trick.
