
How to Freeride on a Longboard: Step-by-Step Guide
This post contains affiliate links. As an Amazon Associate, we earn from qualifying purchases.
To freeride on a longboard, you need a stable board, full protective gear, and a progression that starts with mastering speed control through foot braking and carving before attempting any slides. Most beginner injuries happen in the first 10 minutes, so supervision and a closed practice area are essential.
The gap between knowing you need to slide and actually sliding is where most guides stop. They tell you to “get comfortable at speed” or “learn the Coleman,” but they don’t map the months in between. A key part of that journey is learning how to freeride on a longboard. That map is what separates a controlled first slide from a panicked bail into the curb.
What follows is the progression I wish I’d had when learning how to freeride on a longboard: the four concrete stages that take you from pushing on flat ground to linking your first slides, the gear specs that actually matter, and the one maintenance mistake that burns out a beginner’s motivation faster than a steep hill.
Key Takeaways
- Start with a closed, flat area and spend your first sessions only pushing, turning, and foot braking. The InSportline source notes most beginner injuries occur in the first 10 minutes of riding, rushing past fundamentals is how you get hurt.
- For a beginner, a drop deck is best for stability, while a drop-through is good for intermediate freeriders. Most freeride boards are between 38″ and 42″ long. A symmetrical shape and stiff platform make learning switch stance and slides easier down the line.
- Wear slide gloves when practicing slides, not just a helmet. The gloves change your weight distribution and protect your hands when you instinctively reach for the pavement.
- Master compact speed checks before any hands-down slides. Sources disagree on whether the Coleman or speed check comes first: Polyboards advocates the Coleman slide as the first and safest, while the Longboard Bible lists speed checks as a core skill before hands-down slides.
The Non-Negotiables: Gear and Mindset
Before you look for a hill, you need to check your helmet, slide gloves, and knee and elbow pads. A skateboard helmet is the bare minimum. The U.S. Consumer Product Safety Commission recommends protective gear, and every source in our research emphasizes its importance. Slide gloves are the next piece. You can’t practice a hands-down slide without them, and they also save your palms during any fall. Knee and elbow pads round out the set, as your first slides will be awkward.
Before you start: A helmet must fit snugly without wobbling. Gloves need durable puck material on the palms. Test your foot brake on flat ground until stopping feels automatic; a failed slide attempt often ends with a frantic foot drag.
The right mindset is just as critical. Freeride focuses on controlled, incremental progress rather than immediately tackling the biggest hill. The Longboard Bible source is clear: a beginner should not begin freeride descents immediately. First build pushing, turning, and braking skills on flat ground. Find a closed, flat practice area away from traffic and pedestrians. This is your lab.
Choosing (and Setting Up) Your First Freeride Board
You can freeride on almost any longboard, but some boards are teachers and others are obstacles. For a beginner, stability and predictability are everything.
Most freeride boards are between 38″ and 42″ in length (RidingBoards source). A wheelbase between 24″ and 29″ gives a stable ride. Width typically falls between 8.5″ and 10″. These dimensions aren’t random; they provide a platform you can trust as you learn to shift your weight radically.
| Deck Type | Best For | Why It Works for Beginners |
|---|---|---|
| Drop Deck | Absolute beginners | Lowest ride height for stability, easier to push into slides. |
| Drop-Through | Intermediate beginners | Still low, but lighter and more responsive than a drop deck. |
| Topmount | Experienced riders | Higher center of gravity offers more leverage but less stability. |
The RidingBoards source states drop decks are best for beginners. The RidingBoards source states drop-through decks are good for intermediate freeriders. Both should have little to no flex, a stiff platform feels predictable when you’re sliding.
Truck tightness is your most important adjustment. The Longboard Bible warns against making trucks excessively loose to force easier turning. Instability and wheelbite are not useful. You can always loosen them gradually as you get more comfortable.
You don’t need the top-tier model, but you do need a board built for the job.
The 4-Step Beginner Progression Path
This is the sequence most online tutorials on how to freeride on a longboard skip. They assume you’re already “comfortable at speed.” Here’s what that actually breaks down into.
Step 1: Flat Ground Dominion
Your first goal is achieving total control on flat ground, not on a hill. Push, turn, and stop without thinking. Practice foot braking until you can slow to a complete halt smoothly from a gentle push. The goal is muscle memory. When a slide goes wrong, your body will revert to its most ingrained skill. Make that skill a reliable foot brake.
Step 2: Carving for Control
Find a very mellow, smooth incline, think a parking garage ramp or a slight hill in a park. Don’t try to go straight down. Practice linking wide, controlled S-shaped carves across the entire path. This teaches you to control speed by lengthening your path, and it gets you used to leaning hard onto your edges. If you can’t carve confidently, you can’t slide.
Step 3: The Pre-Slide: Speed Checks
Before any dramatic hands-down action, you need to feel the wheels break traction. Don’t try to hold the slide; just let the board shimmy sideways briefly before gripping again. This is a speed check. It’s the foundation.
Common mistake: Trying to kick the board out with just your foot while keeping your body upright. The board won’t slide, or it will shoot out from under you. Your shoulders and hips have to commit and lean back over your rear truck.
Step 4: Linking It All Together
Carve to build a little speed, set up your carve, and as you come across the hill, initiate a speed check to scrub off speed. Then carve the other way. Your goal is to link carving and micro-slides to control descent without ever feeling out of control. This is the core of freeriding.
Your First Slide: Speed Checks vs. Coleman
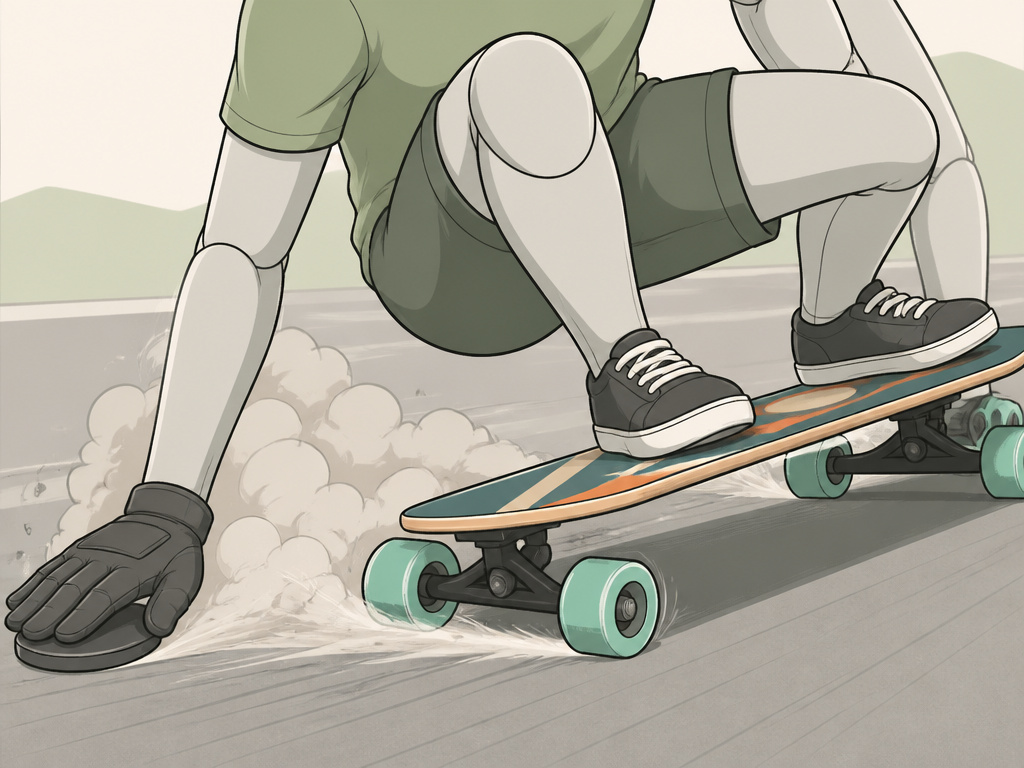
Here’s where sources offer different paths. Polyboards advocates the Coleman slide as the first and safest slide to stop at any speed. The Longboard Bible, however, lists speed checks as a core skill before hands-down slides like the Coleman.
| First Slide Approach | Proponents | Progression | Best For |
|---|---|---|---|
| Speed Checks First | Longboard Bible | Carving → Speed Checks → Stand-Up Slides → Hands-Down Slides | Riders who want to build feel for wheel release gradually. |
| Coleman First | Polyboards | Strong Foot Braking → Coleman Slide → Other Slides | Riders focused on a reliable, full-stop slide from the start. |
A speed check lets you test your control.
Whichever path you choose, the setup is the same. For a stand-up speed check, you’re essentially doing a powerful, extended carve where you push the board out. For a Coleman slide, you drop your rear hand to the pavement inside your rear knee, kick the board out with your front foot, and look over your leading shoulder.
Your longboard slides will feel terrible at first. The board will chatter, not slide. You’ll bail halfway through. That’s the process. Each attempt teaches your body the feel of the edge.
The Switch Stance Secret
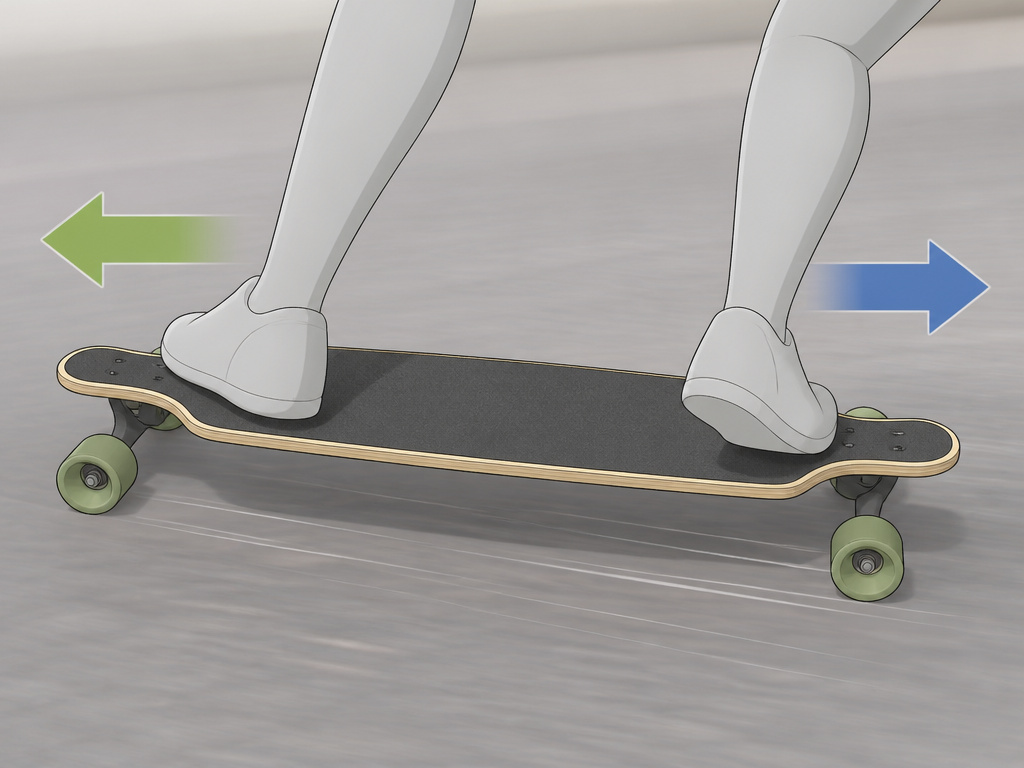
Here’s a non-commodity insight from the RidingBoards source that most beginners miss: being comfortable in switch stance is crucial for more advanced slides and 180s. Freeride requires controlling the board in both directions, not just sliding one way.
This is why a symmetrical deck is recommended. It feels the same whether you’re riding regular or goofy. Start incorporating switch pushing into your flat-ground practice early. It will feel profoundly awkward. That’s the point. The earlier you start, the less of a barrier it becomes later when you want to link two slides together.
Practice Drills: From Parking Lot to Hill
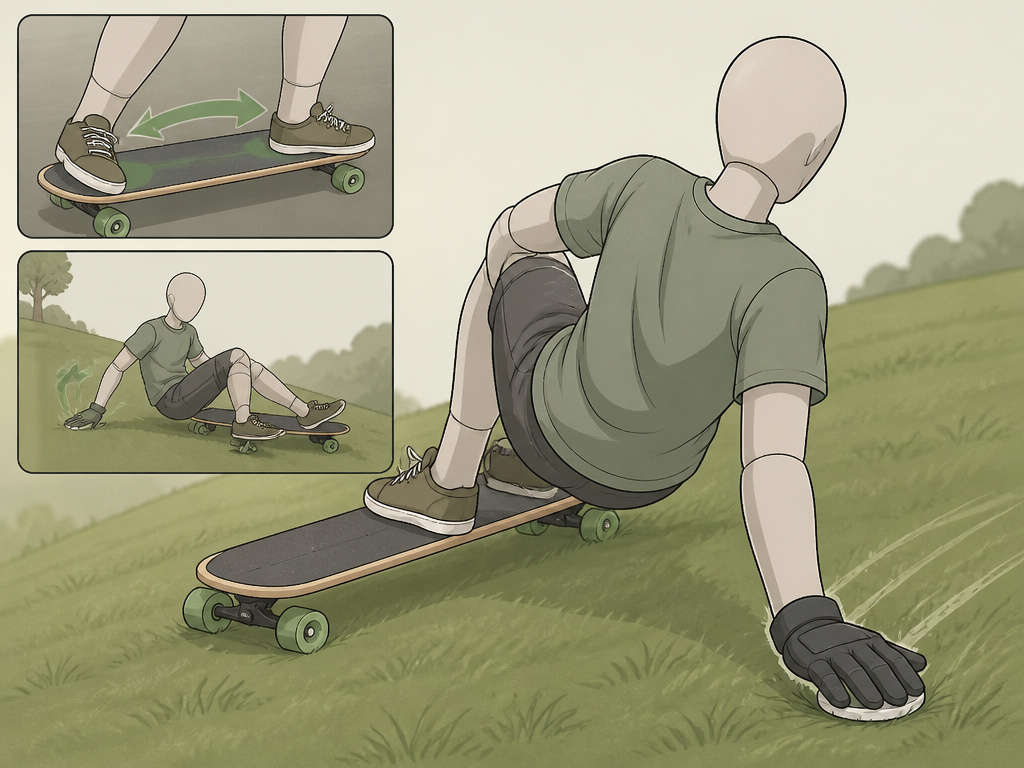
Theory is useless without drills. Here are three to take from the page to the pavement.
- The Flat-Ground Shuffle: In your empty lot, push to a slow roll, then practice shifting your weight from heels to toes aggressively. Feel the trucks lean. Get used to the board moving under you without going downhill.
- The Coleman Dry-Run: With your board on grass or carpet, strap on your slide gloves and get into the Coleman position. Practice dropping your hand, kicking your foot out, and rotating your shoulders. No speed, just form.
- The Uphill Slide: Find a hill so slight you can almost walk up it. Push down it, and try to initiate a small speed check. The low speed means if you mess up, you just step off. It removes the fear factor.
Maintenance and Common Pitfalls
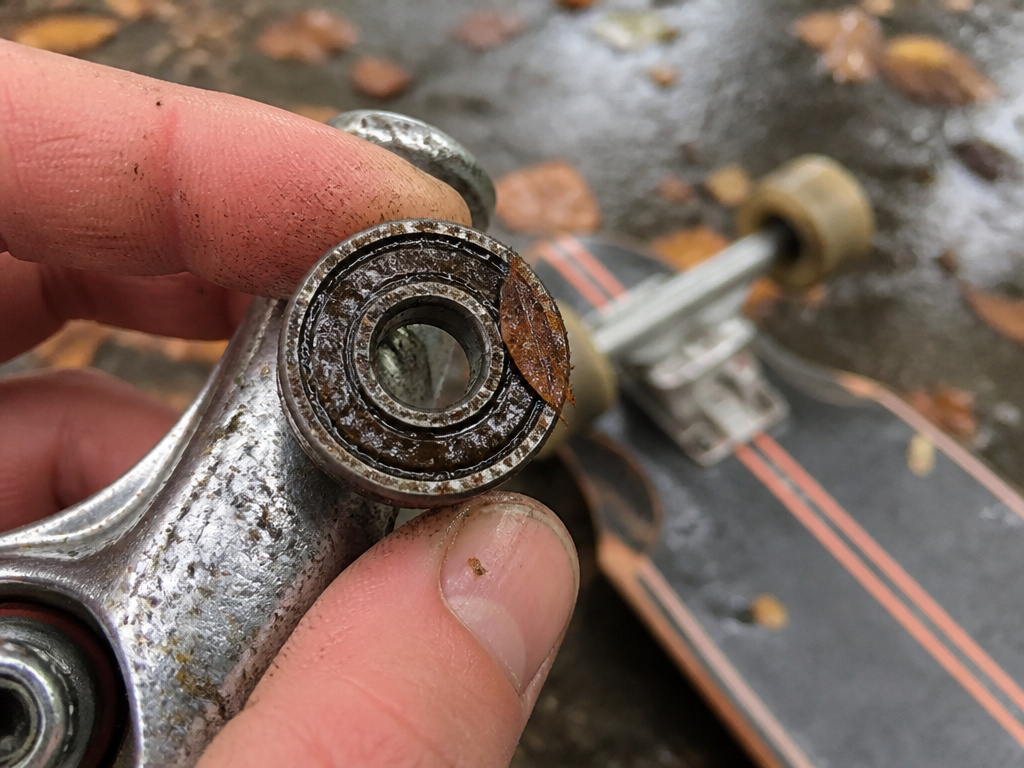
Longboard maintenance is simple, but one mistake is costly. The InSportline manual is explicit: do not lubricate bearings. Modern sealed bearings are not meant to be oiled. Adding oil attracts grit and grime, which turns into a grinding paste that destroys the bearing. If they get wet, dry them off. If they get slow and gritty, replace them.
Where this goes sideways: Riding over wet leaves, mud, or sand. The InSportline manual says to avoid these. Water and debris get into your bearings and truck pivots, causing rust and seizing. A board that rode smoothly on Monday can feel like a shopping cart by Friday.
Always check your hardware before a session. A loose kingpin or truck mount can lead to catastrophic failure at speed. Make sure your wheels spin freely without side-to-side wobble.
How to set up trucks for freeride
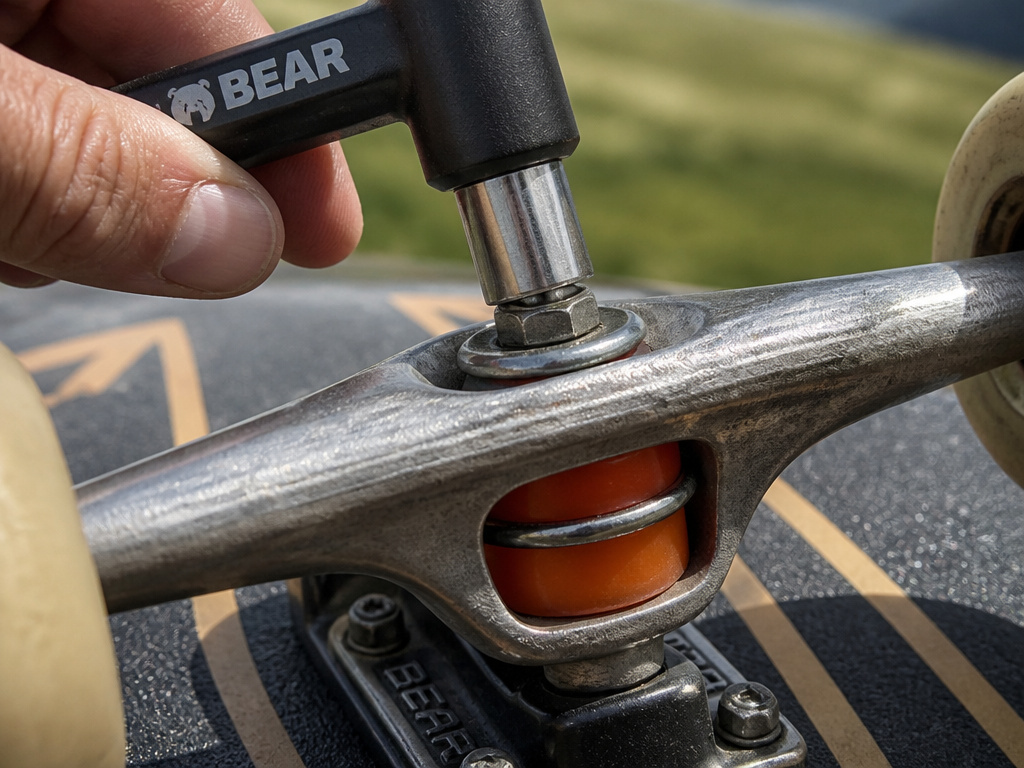
Your truck tightness and bushing choice dictate how your board feels during slides. A stiff, stable setup helps control speed, while a looser one makes initiating slides easier. Avoid making your trucks excessively loose just to force easier turning, as this can lead to unpredictable handling at higher speeds. The bushings inside the trucks are key; their firmness, or durometer, determines how much force is needed to lean into a turn. For freeriding, you generally want a setup that offers a predictable, centered feel, allowing you to lean hard into a slide and then smoothly recenter. Always check the condition of your trucks and hardware before you ride.
Choosing wheels for freeride slides
Wheel selection is critical for controlling your slides. The wheel’s durometer, or hardness, affects how easily it breaks traction and slides. Softer wheels generally grip more, while harder wheels slide more predictably, which is why they are common in freeride. The shape of the wheel lip also matters; a sharper lip can grip more aggressively, while a more rounded lip allows the wheel to release into a slide more smoothly. Smaller diameter wheels keep the board lower and can feel more stable during slides. Your goal is a wheel that gives you a consistent, controllable breakaway feel when you initiate a slide.
Frequently Asked Questions
What is the difference between freeride and downhill longboarding?
Freeride focuses on controlled descents using slides and technical maneuvers for style and speed control. Downhill racing is purely about maximum speed and efficient lines. You can explore the difference between freeride and downhill longboards for a deeper comparison.
How long should my freeride longboard be?
For a beginner, aim for a board between 38 and 42 inches. This range offers a stable platform for learning. Our guide to choosing a longboard breaks down length by rider height and style.
Can I learn to slide without slide gloves?
No. For any hands-down slide like a Coleman, gloves are essential. For initial stand-up speed checks, you can practice without them, but gloves are recommended for all slide practice to protect you during falls.
How do I stop speed wobbles?
Speed wobbles come from a combination of speed, uneven weight distribution, and truck instability. Keep your weight forward over your front truck, bend your knees, and ensure your rear truck isn’t drastically looser than your front. If wobbles start, carve gently to shed speed, don’t stiffen up.
Before You Go
Patience, not your board or gloves, is the single biggest factor in learning to freeride. The progression from pushing to linking slides takes months, not days. Your first real slide will likely come after many repetitions, when your body finally understands the weight shift.
Get so comfortable on your board that stepping onto it feels like home. The hills will still be there next week. The longboard stopping skills you build now are what let you walk away from them.
