
How to Stop on a Longboard: Step-by-Step
This post contains affiliate links. As an Amazon Associate, we earn from qualifying purchases.
To stop on a longboard, you control speed without a mechanical brake. The safest method for a beginner is foot braking: keep most of your weight over the front leg, lower the back foot until the sole lightly touches the ground, and increase pressure gradually. Other methods include carving to scrub speed, controlled slides for advanced riders, and low-speed bail-outs. Always practice on flat, traffic-free pavement before riding any hill.
That “no mechanical brake” part is why learning how to stop on a longboard is absolutely essential. Your board won’t do it for you. The difference between a controlled stop and a crash comes down to which technique you use, when you start it, and how much pressure you apply.
What follows is a breakdown of every major stopping method, ordered from safest for day one to advanced skills for downhill. You’ll see where each one works, where it fails, and the specific gear that makes a difference. By the end, you’ll have a practice plan that builds control instead of just hoping you can run it out, a key part of learning how to stop on a longboard.
Key Takeaways
- Foot braking is your first skill. Practice at walking speed on flat ground, keeping your weight forward and increasing sole pressure slowly. Skipping this means you have no reliable stop on a hill.
- Carving alone will not stop you. It only scrubs speed through wide turns. Use it to manage pace on gentle slopes, but pair it with a foot brake for a complete stop.
- Sliding stops you fastest but demands gear. A Coleman slide (hand-down) is the first slide to learn for emergency stops; you must wear slide gloves to protect your palms.
- Running off is a last resort. Motion Boardshop advises only running off your board if your running speed is faster than your skating speed, while a Reddit anecdote suggests running out at speed can be dangerous. Attempting to run out at 15-20 mph can blow out a knee.
- Electric longboards have a hidden trap. A fully charged battery cannot accept regenerative braking energy, making the brakes weak or non-functional on a descent.
Foot Braking: The Beginner’s Foundation
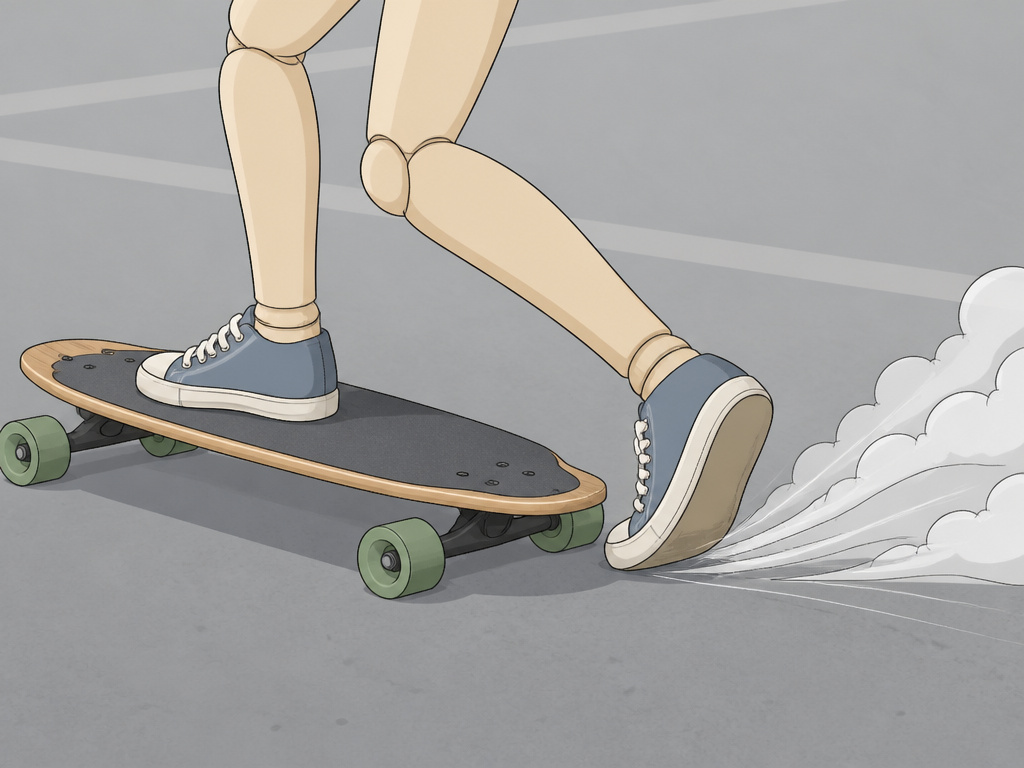
Your initial time on a longboard should be spent here. Foot braking is the core skill every other technique relies on, because it teaches you to balance on one foot while controlling pressure with the other. The motion is simple: shift your weight to your front foot, lower your back foot until the sole skims the pavement, and press down to create friction.
The safest way for a beginner to stop on a longboard is foot braking. Learn it at walking speed on flat, traffic-free pavement before riding hills. Wear a certified helmet and use shoes with flat, grippy soles.
Start on a flat, dry and smooth surface away from cars and pedestrians. Give yourself a gentle push—no need for speed. Lift your back foot and let it brush the ground. The goal isn’t to stop yet; it’s to feel the contact. Once that feels stable, extend the contact time and press a little harder. You’ll hear the sound change from a light skimming to a consistent, gritty drag. That’s the sound of control.
Where this goes sideways: Dragging your toe or the side of your foot. This creates a flat spot on your shoe instantly and can twist your ankle if you catch an edge. Plant your whole foot flat, with your heel and ball of your foot taking equal pressure. A student once asked whether learning to brake on a steep hill would teach him faster. I tried it myself years ago and nearly lost control at the bottom. I recommend learning to stop on flat ground well before any slope.
Canvas sneakers can be shredded quickly. A dedicated skate shoe with a cup sole or a reinforced rubber patch will last longer. Some riders use a Roger Bros Brake Sole, a replaceable rubber pad that straps onto your shoe. It’s a straightforward solution if you’re commuting daily and don’t want to buy new shoes every month.
| Foot Braking Step | Key Action | Common Mistake & Consequence |
|---|---|---|
| 1. Stance Setup | Shift 90% of weight to front foot. | Leaning back. The board shoots forward, you fall backward. |
| 2. Foot Lowering | Lower back foot flat, heel-to-toe. | Dropping only the toe. Ankle twist, uneven wear on shoe. |
| 3. Pressure Application | Increase sole pressure gradually. | Stomping down. The foot catches, throws you forward. |
| 4. Recovery | Lift foot smoothly, return to riding stance. | Jerking foot up. Loss of balance, wobble. |
Carving to Scrub Speed
Carving is what you do when you need to lose a little speed, not all of it. By making wide, continuous turns across the pavement, you convert forward momentum into lateral movement. It’s the most basic speed-management tool, and it feels intuitive because it’s just turning.
But here’s the limit: carving will not fully stop you. On a gentle slope, linking deep carves can bring you to a near-halt, but you’ll still need a foot brake for the final stop. Think of it as your first layer of control. If you’re coming down a mild hill and feel your pace picking up, start carving immediately. Don’t wait until you’re going too fast to turn comfortably.
The technique is in your shoulders and knees. Look where you want to go, lead with your shoulders, and drive your knees into the turn. The tighter and more aggressively you carve, the more speed you scrub. On a longboard with soft, grippy wheels, you’ll feel the board hold the turn. On harder, slide-oriented wheels, the board might feel looser.
Combine it. The real-world application is sequencing: carve to bring your speed down to a manageable level, then deploy your foot brake to finish the stop. This is how experienced riders manage long descents without sliding. They’re never at the mercy of the hill; they’re always controlling the pace with turns, reserving the foot brake for intersections or obstacles.
Sliding: The Advanced Stop
When you need to stop quickly, a controlled slide is the answer. It rotates the board sideways so the wheels lose traction and scrub speed through friction. It can bring you to a stop quicker than a bike. It’s also the technique that separates casual cruisers from downhill and freeride riders.
There are two main slides beginners should know: the Coleman slide (hand-down) and the stand-up slide. The Coleman is safer to learn first because your hand is on the ground for stability.
When performing a slide brake, wear corresponding gloves. A Coleman slide requires you to reach down and place a puck-protected palm on the pavement. Without gloves, you’ll lose skin in one attempt.
The motion starts from a low crouch. As you initiate a heelside turn, reach down with your front hand and place your puck on the ground. Kick your back foot out while keeping your weight over the board. The board will rotate sideways. The noise is unmistakable—a loud, sustained screech as the wheels slide. To end the slide, recenter your weight and let the wheels grip again. It takes dozens of attempts to feel comfortable. Start on a slight incline with plenty of runoff space.
For a detailed look at this essential freeride skill, our guide on how to Coleman slide on a longboard breaks down the weight distribution and kick-out timing.
Gear matters critically for sliding:
- Gloves: Slide gloves with removable pucks are mandatory.
- Wheels: Harder wheels slide more predictably than soft cruising wheels.
- Surface: Practice on clean, dry asphalt. Gravel, sand, or wet pavement can cause sudden grip and high-side falls.
| Slide Type | Best For | Risk If Skipped |
|---|---|---|
| Coleman Slide | Emergency stops, beginners learning to slide. | Hand-down without gloves → severe palm road rash. |
| Stand-Up Slide | Speed checks, stylish freeriding. | Board grips unexpectedly → thrown off balance. |
Bailing Out: The Last Resort
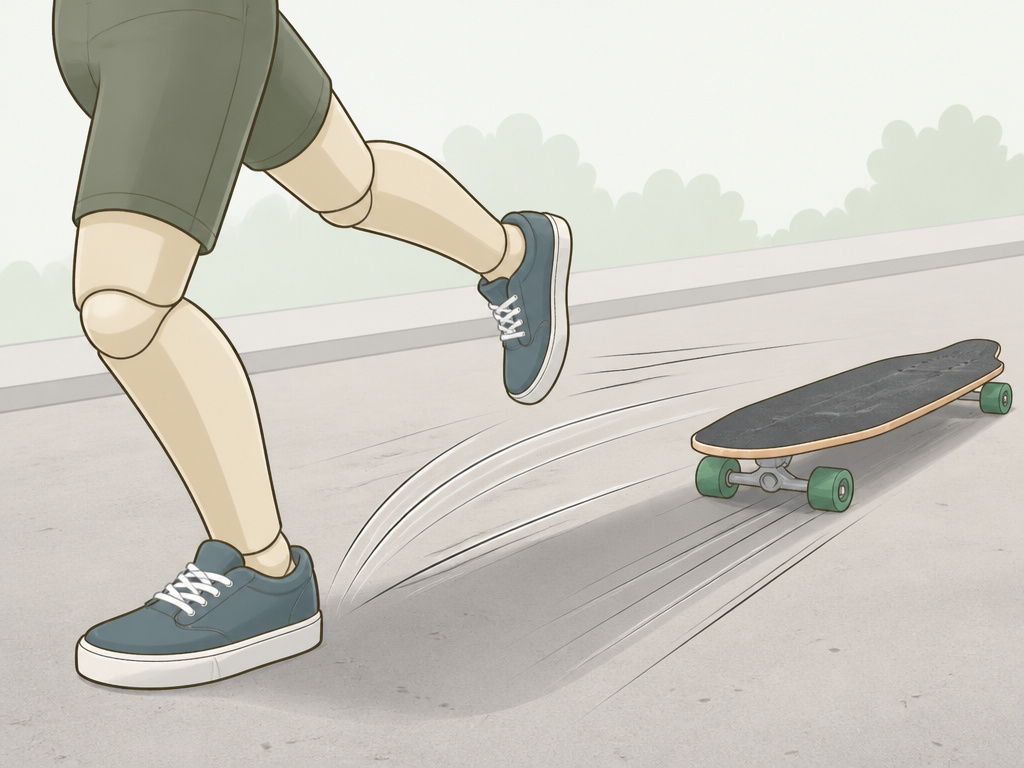
Sometimes, stopping isn’t an option—avoiding is. If a car pulls out or you hit an unexpected patch of gravel, you may need to leave the board. There’s a right way and a very wrong way to do this.
Only run off your board if your running speed is faster than how fast you’re skating. That means at jogging pace or below. If you’re going faster, the physics work against you. Your feet will try to match the board’s speed, often resulting in a stutter-step and a violent fall. A friend tried to run it out at an estimated 15-20 mph when a car blocked the road. He got two steps in before his knee gave out, resulting in a severe injury.
The safer low-speed bail involves stepping off with your front foot and letting the board roll away from you. Keep moving in the direction of travel. If you’re going too fast to run, your better options are to carve hard toward an open space, aim for grass, or perform a controlled fall. Tuck your chin, roll onto your shoulder and back, and try to distribute the impact. It sounds dramatic, but road rash heals faster than ligament damage.
This is where protective gear pays for itself. Wrist guards, knee pads, and a helmet turn a potential hospital visit into a bruised ego and some scuffed plastic.
The Electric Longboard Difference
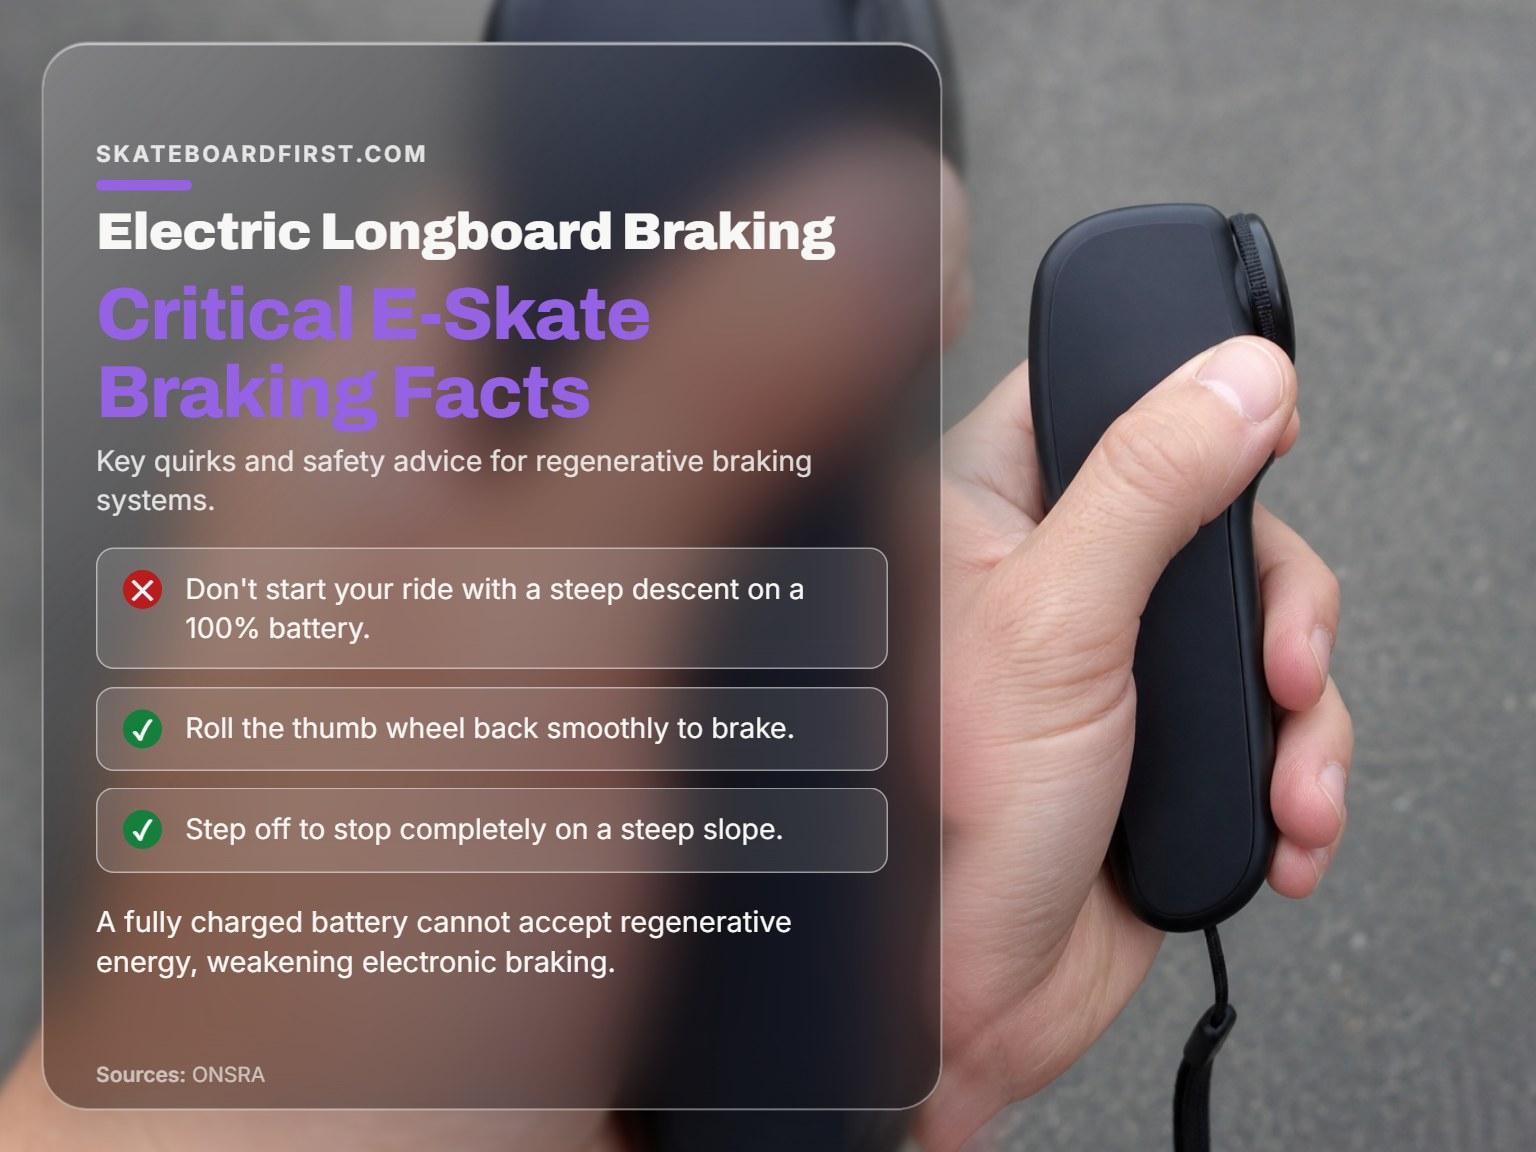
Stopping an electric longboard adds a layer of complexity because your primary brake is electronic, controlled by a thumb wheel on the remote. The principle is regenerative braking: the motor acts as a generator, converting your kinetic energy back into electricity to recharge the battery slightly. This feels like engine braking in a car.
On a steep slope the board can keep rolling slowly even at full brake. Step off to come to a complete stop. Braking force reaches the road through your drivetrain and tires. A loose belt or a slippery surface limits how hard you can brake.
You must roll the thumb wheel back smoothly. A sudden full-brake input at speed is the classic way to get thrown forward. Practice on flat ground: accelerate to a jogging pace, then gently roll back to a stop. Get used to the deceleration curve.
The Full-Battery Trap: This is the critical quirk every e-skate rider must know. A fully charged battery cannot accept regenerative energy. If you start a ride at the top of a hill with a 100% battery, your electronic braking will be weak or non-functional on the descent. The solution is simple: ride on flat ground or uphill first to use a bit of charge, or stop charging slightly before full. Manufacturers like ONSRA state this applies to every board that brakes regeneratively.
The drivetrain also affects braking feel. Belt drives, common on many boards, brake well when the belts are tensioned correctly. According to the ONSRA maintenance guide, if the belt slips when you brake fully, it’s too loose. If it’s too tight, it wears faster, the motor runs hotter, and range drops. Upgrade kits using wider belts can address slip. Gear drives, like on some high-end models, offer a more direct, slip-free braking feel.
For those interested in the engineering behind safe electric skateboard systems, the University of Illinois design document outlines the failure modes and safety principles for these electronically controlled vehicles.
Building Your Stopping Practice Plan
Knowing techniques is one thing. Drilling them into muscle memory is another. This isn’t about a single afternoon session; it’s about incremental, safe progress.
- Week 1: Flat Ground Fundamentals. Find a smooth, empty parking lot. Practice foot braking from a walking push until you can stop reliably on command. Do not move to a hill yet.
- Week 2: Gentle Slope Management. Find a very mild incline. Practice using carving to control your speed down it, then add a foot brake to stop at the bottom. Your goal is to never feel “out of control.”
- Week 3: Introduction to Slides. On a slight hill, with full slide gloves and knee pads, practice the Coleman slide motion at a crawl. Focus on the hand placement and kick-out, not the stop. Our tutorial on how to slide on a longboard covers the foundational body positions.
- Week 4+: Combine techniques. On a moderate hill, carve to set up speed, foot brake to adjust, and practice a low-speed shutdown slide. Always scout your path first for traffic, gravel, and runoff space.
This progression mirrors the foundational skills laid out in our beginner’s guide to building confidence on a board.
Common mistake: Rushing to hills before mastering flat-ground stops. The resulting loss of control is how most serious beginner injuries happen.
If you ride an electric board, dedicate your first few sessions to braking drills on flat ground. Find the board’s stopping distance from various speeds. Test the brake on a safe, gentle decline with a partially charged battery. This knowledge is as important as knowing how to accelerate.
Pros and Cons of Different Braking Methods

Foot braking is the safest beginner method and builds essential one-foot balance, but it wears down the sole of one shoe significantly. Carving or using an air brake by standing upright with your arms out will not bring you to a full stop (Motion Boardshop); my-longboard.com notes the wind brake is only effective at higher speeds (over 50 km/h). Sliding can stop you very quickly, but requires specific gloves and is an advanced skill. Running off your board is only advised if your running speed exceeds your skating speed, as attempting to run it out at speed can lead to injury. For electric boards, regenerative braking can be weak on a full battery, and smooth, early inputs are key to avoid being thrown forward.
Frequently Asked Questions
How are you supposed to stop on a longboard?
You stop by controlling speed through friction, as there is no mechanical brake. The primary method is foot braking: dragging the sole of your shoe on the ground. For slower speed reduction, you carve. For quick stops, advanced riders use controlled slides. In low-speed emergencies, you can step or run off the board.
What is the easiest way for a beginner to stop?
Foot braking is the easiest and safest first method. Start at walking speed on a flat, smooth surface. Keep your weight on your front foot, lower your back foot flat onto the pavement, and gently increase pressure until you stop. Practice this hundreds of times before attempting any hill.
Can carving stop a longboard completely?
No. Carving alone will not fully stop you. It is a speed-management technique that scrubs off momentum by turning the board back and forth across the hill. To come to a complete stop after carving, you must use another method, almost always a foot brake.
How do you stop on an electric longboard?
You stop using the regenerative brake controlled by a thumb wheel on the remote. Roll the wheel back smoothly to decelerate. Be aware of the “full-battery trap”: if your battery is at 100%, regenerative braking may be weak or non-functional on a downhill. Always practice braking distances and have a backup plan (carving, foot braking, safe bail-out).
Is it safe to jump off a longboard to stop?
It is only safe at very low speeds—slower than a jog. If your board speed exceeds your running speed, attempting to run it out often leads to falls and injuries like knee damage or broken wrists. At higher speeds, a controlled slide or aiming for a soft surface (like grass) is a safer bail-out option.
Before You Go
The one rule that reframes all others: never go faster than you could stop without your planned method. If your foot brake fails, your slide doesn’t initiate, or your electric remote disconnects, you need a backup you’ve already practiced. That backup is often a combination of carving for control and knowing how to fall safely.
Your first month should be boring. Walk, push, foot brake, repeat. The curb that feels like an obstacle today will feel like a finish line tomorrow when you stop exactly in front of it, every time. Start with that flat parking lot session. The hills will still be there next week.
