
How to Ollie While Moving: Step-by-Step
This post contains affiliate links. As an Amazon Associate, we earn from qualifying purchases.
To ollie while moving, you must commit to jumping with the board as it rolls. The mechanics are the same as a stationary ollie, pop, slide, level, but your jump needs to be forward, not just up, and your weight must stay centered over the bolts. Start by practicing hippie jumps and tiny “baby pops” at a snail’s pace to build the muscle memory and confidence to land back on the moving board.
That forward jump is the whole game. When you’re still, you jump straight up. When you’re rolling, jumping straight up means your body stays put while the board rolls out from under you. This is why learning how to ollie while moving is essential. You land where the board was, not where it is.
What follows is a breakdown of that forward commitment, the footwork that makes it work, and the exact drills, hippie jumps, tail taps, object progression, that build a reliable rolling ollie from the ground up when learning how to ollie while moving. By the end, you’ll have a practice plan that moves at your pace.
Key Takeaways
- Never learn tricks stationary. You skate while moving, so practice while moving, even at the slowest snail’s pace, from day one.
- Master hippie jumps first. This drill teaches you to jump and land centered on a rolling board, which is 90% of the battle for a moving ollie.
- Start with “baby pops.” Don’t go for height; just get the back wheels to lift an inch while rolling and land balanced. Small wins build the nerve for bigger pops.
- Jump in the direction you’re moving. Your body must travel forward with the board, not straight up. Crossing your arms during the crouch can help keep your shoulders straight.
- Use a stick or crack as a target. Having a small, non-threatening object to ollie over gives your brain a clear goal and dramatically improves commitment.
The Rolling Commitment Test
If you can ollie stationary but bail every time you roll, the problem isn’t your technique. It’s in your head. You’re putting a foot down because you don’t trust that you’ll land on the board. This is a commitment issue, and it’s the most common wall beginners hit.
The part nobody mentions: The fear isn’t of falling. It’s of the board shooting out from under you when you pop. A hippie jump proves the board won’t do that if your weight is centered.
The fix isn’t to “try harder.” It’s to prove to yourself, through a simple drill, that you can do it. Get rolling at a comfortable, slow speed. Now, jump straight up and land back on the board, keeping your feet over the bolts. That’s a hippie jump. Don’t pop the tail; just jump. If the board shoots out behind you, your weight was too far back. If it rolls away in front, you were leaning forward. Do this until you can land cleanly five times in a row. This single exercise builds the core confidence for every trick you’ll ever learn while moving.
Why Stationary Practice Fails You
There’s a real debate here. Some guides insist you learn the ollie motion stationary first. The Reddit community for new skaters is almost unanimous against it. The reasoning is practical: you never skate while standing still, so a stationary ollie uses different muscles and balance points. Learning it stationary means you’ll spend weeks “relearning” the trick as soon as you start rolling.
| Stationary Ollie | Rolling Ollie | The Problem |
|---|---|---|
| Jump is purely vertical | Jump must be forward with momentum | Stationary practice trains the wrong muscle memory |
| Balance is static | Balance is dynamic, adjusting to roll | The stable platform of a still board is a false teacher |
| Focus is 100% on foot motion | Focus splits between footwork and commitment | It builds technical skill without the required courage |
The stronger stance, and the one I’ve come around to, is to never learn them stationary when figuring out how to ollie while moving. The benefit is almost zero because the feeling is completely different. You’re better off spending that time on the hippie jumps and slow rolls described in the next section. If you’ve already learned it stationary, don’t panic. You have the footwork. Now you just need to add the forward jump and rewire your balance.
Pre-Ollie Drills: Hippie Jumps and Tail Taps
Before you even think about sliding your front foot, master these two foundational moves. They isolate the scary parts of a moving ollie.
Hippie Jumps
This is your commitment trainer. The goal is to jump and land without the board moving out from under you.
- Roll at a slow, walking pace.
- Bend your knees and jump straight up, bringing your knees toward your chest.
- Land softly with your feet over the front and rear truck bolts.
- Consequence if skipped: You may struggle to trust the board enough to commit your full weight during an ollie, and the board might feel like it’s going to escape.
Rolling Tail Taps
This drill gets you used to the pop motion while moving, without the pressure of a full ollie.
- Again, start rolling slowly.
- Swiftly tap your tail down against the ground with your back foot, then immediately return your foot to the bolts.
- Don’t try to jump or get air; just feel the tail make contact as you roll.
- Consequence if skipped: The timing of the “pop” while in motion may feel foreign and rushed.
Do these drills until they feel boring. That boredom is confidence.
The Footwork: Pop, Slide, Land
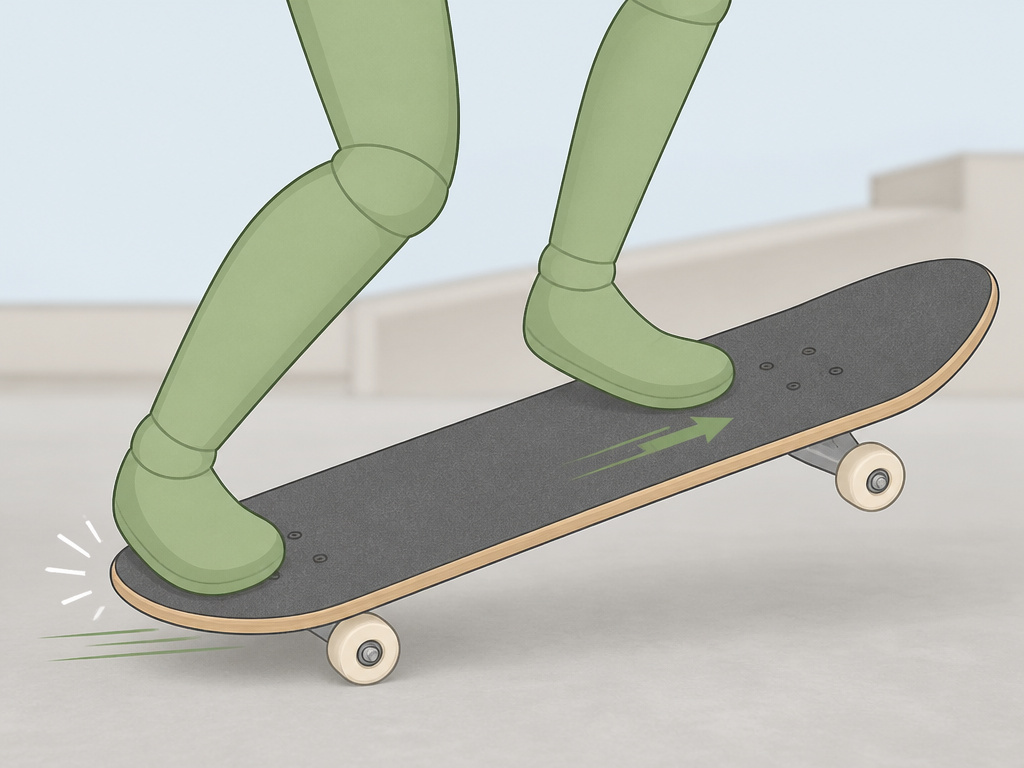
Now for the ollie itself. The sequence is identical to a stationary ollie, but your mental focus shifts.
1. The Crouch and Set-Up
Roll at your slowest possible speed, a true snail’s pace. As you crouch, try crossing your arms in front of you. This physical trick keeps your shoulders squared with the board, preventing your upper body from twisting and throwing off your balance.
2. The Pop and Jump
This is where stationary practice lies to you. You don’t just pop straight down. You jump forward, in the direction you’re moving, the instant your back foot snaps the tail. A small tweak that helps: think about pulling the board backwards slightly with your back foot as you pop. This gets the tail to dig into your rising front foot, making the board level out easier. It’s a subtle drag, not a yank.
3. The Slide and Level
Your front foot slides up and forward toward the nose, just like before. Don’t try to kick it out violently. For your first rolling ollies, just aim to slide your foot to the front bolts. This gives you enough control to level the board and keep it under you. The full nose-slap can come later.
4. The Landing
Your eyes should be looking at the horizon or your landing spot, not at your feet. Aim to put your back foot directly onto the back bolts as you come down. A stiff, straight-legged landing will bounce you off. Bend your knees to absorb the impact, and keep rolling.
I spent a week with my front foot too far forward when I started. The board would pop but never level out. Moving it back to the middle of the bolts was the fix. Foot placement matters more than how hard you stomp.
Building Height and Clearing Objects
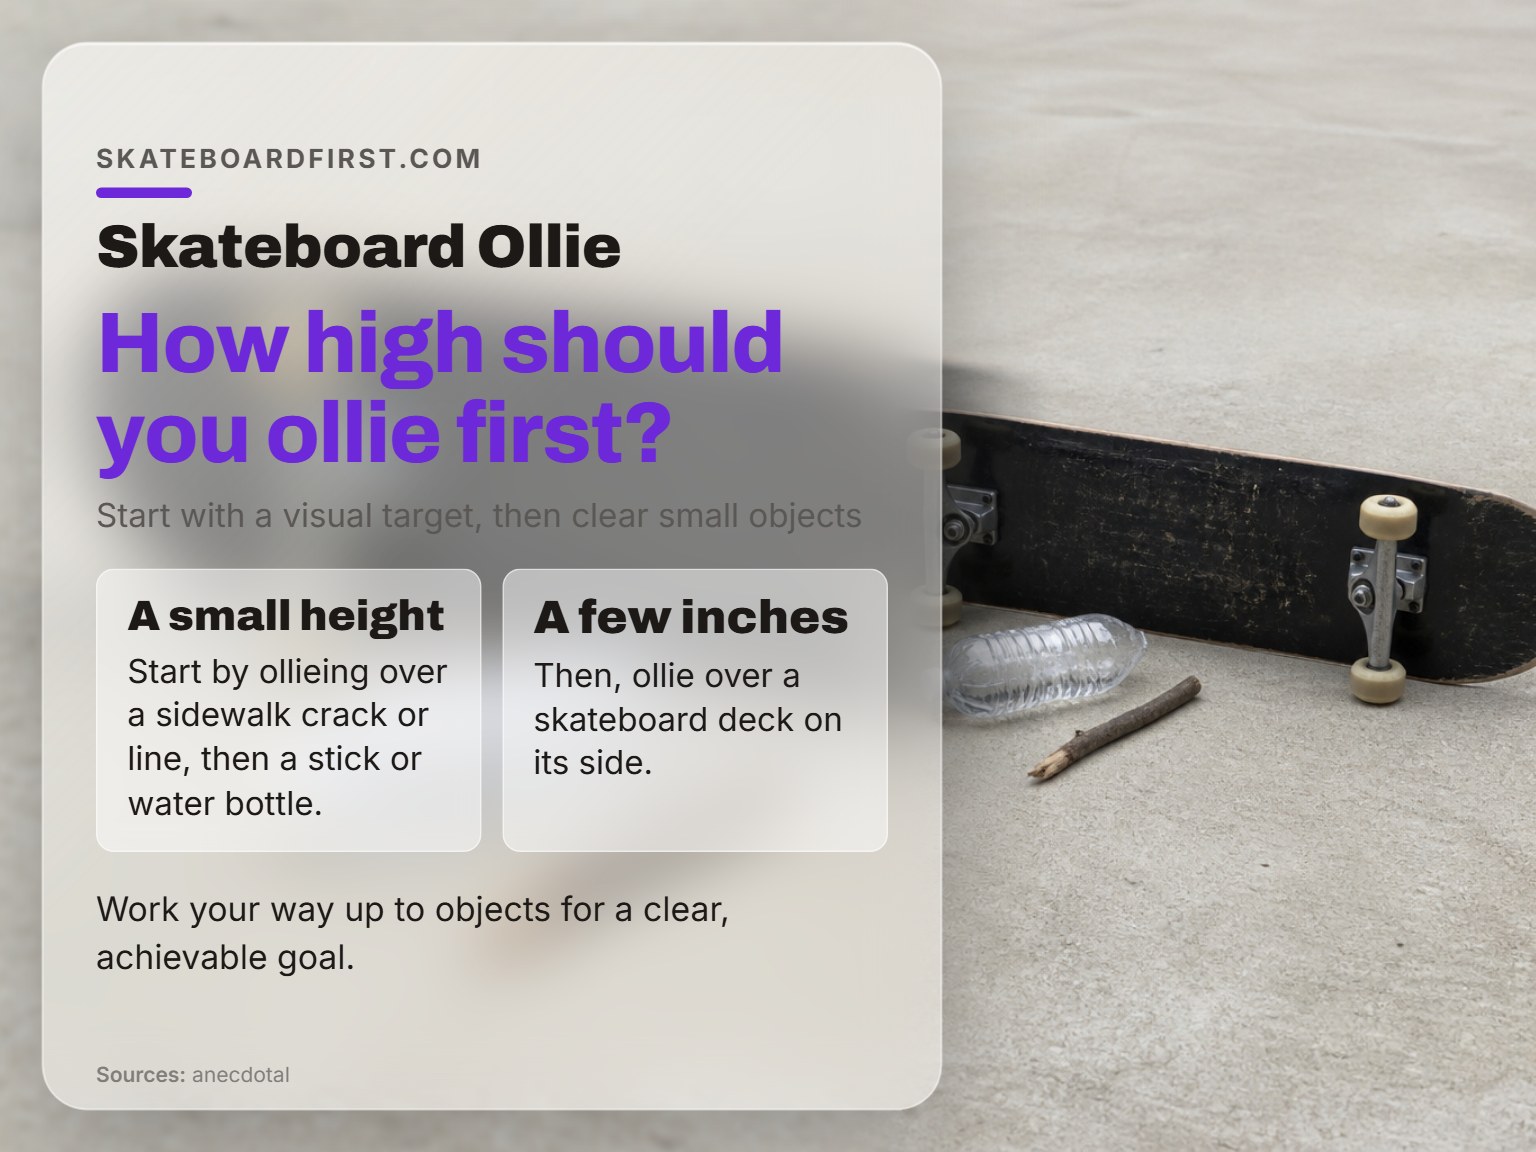
Once you can reliably get a few inches of air while rolling and land with control, it’s time to give your brain a real target. Ollieing over nothing is abstract. Ollieing over a specific thing gives your commitment a purpose.
Start with a painted line on the pavement or a sidewalk crack. The goal isn’t height, it’s to clear it cleanly. Next, use a stick or a plastic water bottle on its side. Finally, move to a skateboard deck lying on its side. This graduated progression works because each object is slightly more intimidating than the last, but you’ve already built the skill to clear the previous one.
| Object | Height/Width | Goal |
|---|---|---|
| Sidewalk crack | 0 inches (visual target) | Practice the timing of your pop to “clear” a line. |
| A stick or water bottle | A small height | Build confidence clearing a real, but forgiving, object. |
| Skateboard deck (on side) | A few inches | Simulate ollieing over a curb or other common obstacle. |
The moment you ollie over that deck, the mental block is gone. You’ve proven you can do it.
Common Problems and How to Fix Them
The board shoots out in front.
You’re leaning too far forward, likely because you’re scared of falling backward. Your weight needs to be centered over the board, not on your toes. Practice more hippie jumps to find the balanced sweet spot.
The board rockets behind me.
Your weight is too far back on your heels, usually from hanging your back foot off the tail too much during the pop. Focus on keeping your back foot more on the ball of your foot, centered on the tail.
I can pop but the board doesn’t level.
You’re likely not sliding your front foot. The pop gets the back up; the front foot slide brings the nose forward and levels the board out. Isolate that sliding motion while holding onto a fence or railing, then try it rolling slowly.
I land with one foot on, one foot off.
This is pure commitment. You’re bailing mid-air because you don’t believe you’ll land it. Go back to hippie jumps. Then, try “baby pops” where you only try to get the back wheels an inch off the ground. The height doesn’t matter; landing with both feet on does.
Frequently Asked Questions
Should I learn to ollie stationary first?
Sources disagree on this: some skaters advise learning stationary first to get the footwork, while others on Reddit strongly advise never learning them stationary because the feeling is completely different. Learning stationary builds a technique that doesn’t translate to rolling, forcing you to relearn the trick later. It’s more efficient to start rolling at the slowest possible speed from the beginning.
How fast should I be going when I start?
As slow as possible. Give yourself one gentle push so the board is barely moving, then attempt the ollie. The goal is to eliminate speed as a variable so you can focus on the motion and commitment. You can gradually add speed as you get comfortable.
Why do I keep turning in the air?
Your shoulders are rotating. When you crouch, your arms are likely swinging out to the sides or one shoulder is dropping. Try crossing your arms in front of your chest during the set-up, this locks your shoulders in a straight line parallel to the board.
How long will it take to learn a moving ollie?
There’s no set timeline, but if you practice these drills consistently, you could see a breakthrough in a few sessions. The key is consistent, focused practice on the pre-ollie drills (hippie jumps, tail taps) before chasing height. Rushing the process often leads to frustration.
What’s the next trick after a rolling ollie?
fakie ollie is a fantastic next step. It uses the same basic motion but while rolling backward, which further cements your board control. After that, learning to ollie over obstacles is the natural application of your new skill.
Before You Go
One rule most guides skip: if you haven’t landed a rolling ollie after several sessions of trying the full trick, stop. Go back and spend a whole session only doing hippie jumps and rolling tail taps. The breakthrough almost always happens when you stop trying to ollie and just work on jumping on and popping the board while it moves. Everything above assumes you’re comfortable on your board, if you’re not, all the footwork advice in the world won’t help. So be honest with yourself. Can you ride, turn, and stop without thinking? If not, that’s your real first step. The ollie can wait.
