
How to Practice Skateboarding Alone: Step-by-Step
This post contains affiliate links. As an Amazon Associate, we earn from qualifying purchases.
To practice skateboarding alone, you need a safe, flat spot, a pre-ride gear check, and a clear, structured plan for each session. Focus on mastering one fundamental skill at a time, like pushing, turning, or stopping, and use a phone to film yourself for review. According to the American Academy of Pediatrics, one-third of skateboarding injuries happen in the first week, so a deliberate, patient approach is your best defense.
You can absolutely learn by yourself. The key is turning a wide-open parking lot or quiet sidewalk into your personal training ground. Solo practice removes the pressure of an audience and allows you to move at your own pace, so many skaters prefer it.
What follows is a system. This guide explains the essential safety steps, a simple four-part practice plan for skating alone, and how to use video to spot mistakes you can’t feel. You’ll also get drills for when you’re stuck at home and a clear ladder to climb from your first push to your first real trick.
Key Takeaways
- A significant portion of skateboarding injuries happen in the first week, per the AAP, so a structured, fundamentals-first solo plan is your best injury prevention.
- Never skate alone without a phone and tell someone where you are; the CPSC explicitly advises against riding solo for emergency reasons.
- Film every session with your phone propped against a backpack; quarter-speed playback reveals flaws like shoulder rotation you never feel in the moment.
- Your initial practice should build comfort, not tricks; master pushing, turning, and stopping on a smooth, flat surface before attempting an ollie.
- A short, focused drill session beats long periods of aimless rolling; use the four-part blueprint: warm-up, skill drill, creative play, cool-down.
The Non-Negotiables: Gear, Location, and Mindset
Before you even step on the board, three things have to be locked in. Get these wrong, and your solo practice becomes a hazard.
First, the gear. This isn’t a debate. The CDC states you need a helmet, knee and elbow pads, and wrist guards. Both the CDC and CPSC emphasize wrist guards; the CPSC notes they are especially important. Your helmet must fit snugly with the chin strap fastened and should meet a recognized standard like the Snell B-95, which the CDC notes is best for skateboarding. Non-slippery shoes are also a must for control.
Before you start: A loose helmet can come off on impact, and skating in low-light conditions drastically increases your risk of a collision. The CPSC warns against riding at dusk, dawn, or in the dark.
Second, the location. The CDC is clear: beginners need a smooth, flat surface. An empty school parking lot on a weekend, a tennis court (check local rules), or a dead-end street with fresh pavement are all ideal. The goal is to eliminate cracks, pebbles, and slopes that can catch a wheel and throw you before you’re ready to fall. Inspect your terrain for holes, bumps, rocks, and debris every time.
Third, the solo mindset. The CPSC advises never riding alone, while the CDC’s guidance implies solo practice can be acceptable in safe environments like skate parks. If you are practicing solo, you must mitigate this risk. Always tell someone your location and when you expect to be back. Have your phone on you and charged. This isn’t about fear; it’s about respecting the very real statistics that government agencies track.
The 4-Step Solo Session Blueprint
A productive solo session has a rhythm. Wandering around pushing for an hour might feel like practice, but it won’t build skills efficiently. This blueprint turns 30-45 minutes into measurable progress.
1. The 5-Minute Warm-Up (On the Board)
Don’t just stretch and go. Start on your board. Practice stationary balance: stand on the board with your feet over the trucks and rock side-to-side, getting a feel for the truck tightness. Then, do slow, deliberate pushes in a straight line for a few minutes. The goal is to wake up your balance and connect with your board, not to get anywhere fast.
2. The 15-Minute Focus Drill
Pick one fundamental skill. Just one. For your first ten sessions, that list is: pushing, foot braking (stopping), kick-turning, and riding switch (your non-dominant stance). Spend the entire block on it. If it’s foot braking, ride, drag your back foot lightly, ride, repeat. The repetition builds muscle memory without the distraction of trying to “land something cool.”
3. The 10-Minute Creative Play
This is where you apply the drill. If you worked on kick-turns, now set up two water bottles and practice weaving between them. If you worked on pushing, see how few pushes you can use to cross the parking lot. This bridges drill work to real riding and keeps the session fun.
4. The 5-Minute Cool-Down and Review
Film your last few attempts during the creative play. As you pack up, watch the clips. Look for one thing: is your back foot where it should be? Are your shoulders square? This immediate feedback loop is how you practice effectively and correct mistakes before they become habits. Then, do a quick board check, tighten any loose truck nuts, spin the wheels to feel for grit.
How to Fall Safely (and Why It’s the First Skill)
You will fall. The goal is to turn a scary, unpredictable crash into a controlled, rolling bail that you walk away from. The American Academy of Pediatrics points out that beginners may find it helpful to take a class to learn the basics, including how to fall properly. Since you’re alone, you have to teach yourself.
The mechanics are simple but counterintuitive. When you feel the board go, don’t stick your arms out straight to catch yourself. That’s a guaranteed wrist injury. Instead, try to tuck and roll, distributing the impact across your padded shoulder and back. Practice this on grass first. Step off your board at a standstill and deliberately drop into a roll.
Where this goes sideways: Catching yourself with a straight arm. The force travels up to your shoulder, and you can sprain your wrist or dislocate your shoulder in a second. Wrist guards help, but the technique is what prevents the big injuries.
Ankle sprains are another common injury, according to HealthyChildren.org. They often happen when you come down awkwardly from a trick or step off a curb wrong. The fix is building strength and practicing precise foot placement during your drills. If your ankle feels weak, call it a day, pushing through a minor twist can lead to a major sprain that sidelines you for weeks.
Using Video as Your Solo Coach
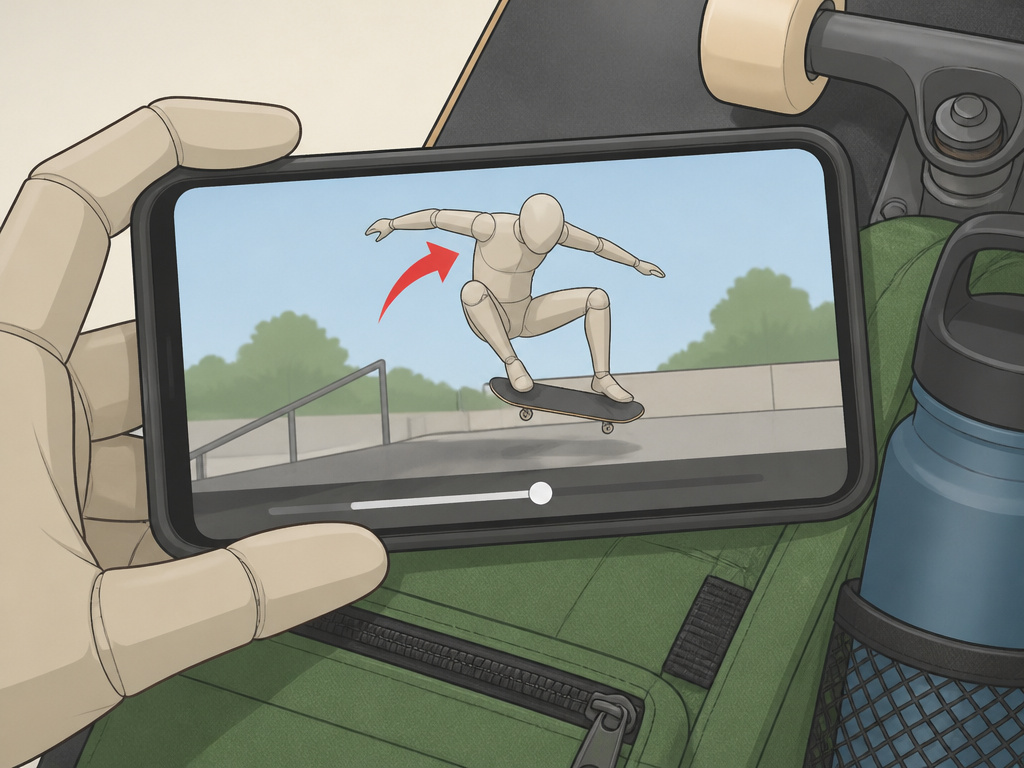
This is the single most powerful tool for solo progression. Your perception of what you’re doing and what you’re actually doing are often completely different.
I film almost every solo session. I prop my phone against my backpack or a water bottle. Later, I watch the clips in slow motion. One time, I was stuck on my ollie for weeks. Watching a clip slowed to quarter speed, I saw my back shoulder opening up early, pulling my hips and board away from under me. I never felt that rotation. I only saw the board shooting out. Without the video, I’d still be guessing.
How to analyze your footage:
- Film a clear angle. Side-on is best for stance and pop.
- Slow it down. Use your phone’s built-in editor.
- Look for one flaw at a time. Don’t try to fix your foot position, shoulder twist, and knee bend all at once. Pick the biggest deviation.
- Correlate it with feeling. The next time you try the trick, focus on the specific correction (e.g., “keep back shoulder closed”).
This process of reviewing footage turns you from a frustrated skater into your own technical analyst. It’s how you track your progress objectively, moving from “I think I’m getting better” to “My back foot is now 2 inches higher than it was last week.”
Drills for When You’re Stuck at Home or in Limited Space
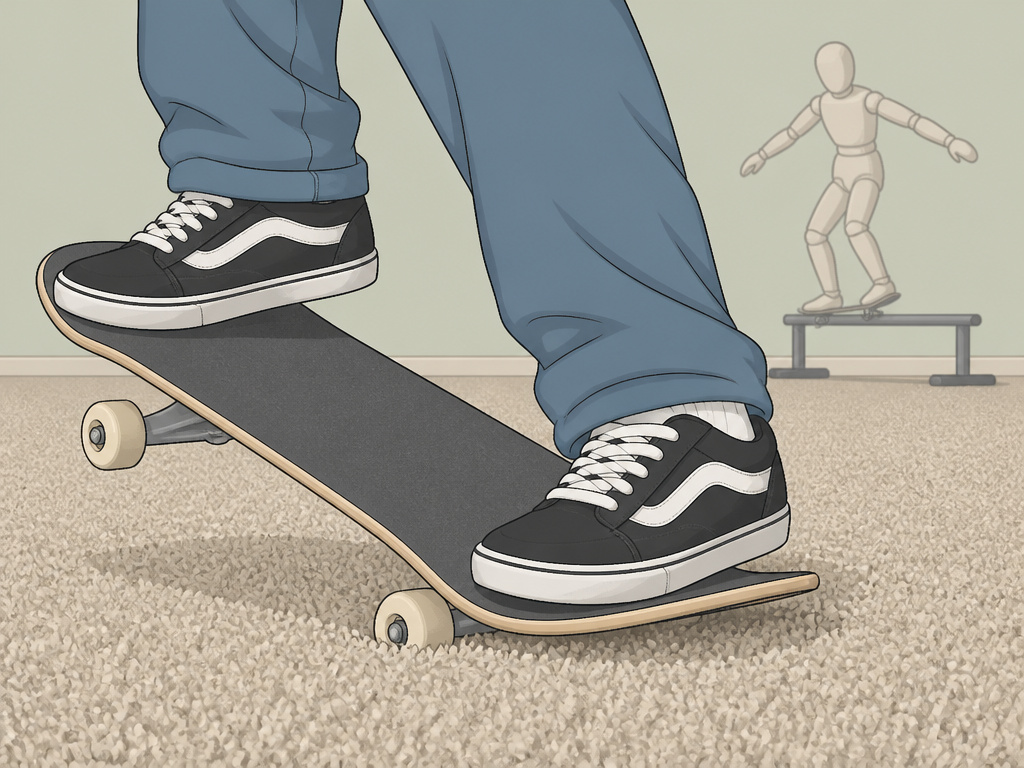
Weather, time, or space can keep you off the pavement. You don’t have to lose a day. These indoor drills maintain and even build skills.
Carpet Boarding: On a carpet or rug, practice your ollie motion. The carpet grips the wheels, letting you focus on the pop, slide, and level-out without the board rolling away. You’ll hear the tail slap the carpet, that’s the sound of a good, solid pop.
Balance Board or Manual Trainers: A balance board is incredible for building core strength and truck-control feel. You can also practice manuals (riding on two wheels) by balancing on the tail of your board on a soft surface. Hold onto a counter or wall for support at first.
Mental Rehearsal: This is underrated. Sit and visualize a trick perfectly from start to finish. Imagine the sound of the tail hitting, the grip tape under your sliding foot, the board leveling in the air. Mental rehearsal is a technique used by athletes to reinforce skills. It keeps your practice routine alive even when you can’t skate.
| Drill | Skill Targeted | Best For |
|---|---|---|
| Carpet Ollies | Pop, foot slide | Building muscle memory for the ollie motion |
| Stationary Manuals | Balance, weight distribution | Finding the board’s sweet spot |
| Tick-Tock Turns (board pivots) | Quick foot adjustments, agility | Tight-space board control |
| Mental Visualization | Focus, sequence memory | Off-day skill reinforcement |
Building a Progression Ladder: From Push to Pop
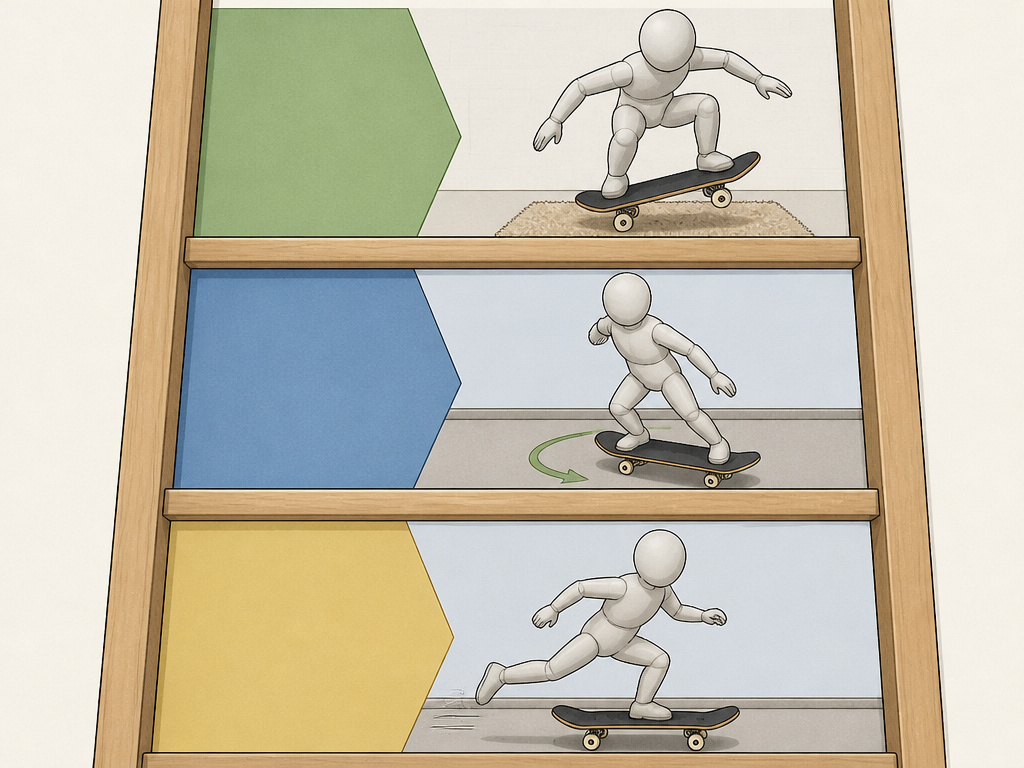
Solo practice without a plan for how to practice skateboarding alone leads to plateaus. This ladder gives you a clear next step every time you master a rung. It follows the CDC’s step-by-step guidance for developing skills: start with pushing and gliding, then learn to turn and stop.
Rung 1: Foundation
- Goal: Comfortable riding in a straight line and stopping.
- Drills: Pushing for distance, foot braking to a complete stop, riding over small cracks.
- Done when: You can look ahead while riding, not down at your feet.
Rung 2: Control
- Goal: Command over your direction and speed.
- Drills: Kick-turns (both ways), carving wide circles, riding down gentle slopes and controlling speed with foot braking.
- Done when: You can navigate around a series of cones or bottles without stopping.
Rung 3: First Trick Prep
- Goal: Set up for your first ollie.
- Drills: Stationary ollies on carpet, hippie jumps (jumping straight up and landing back on the board while rolling), rolling over a painted line or stick.
- Done when: Your stationary ollie motion is consistent, and you’re comfortable jumping on the board.
This ladder is how you teach yourself in a logical, safe order. Skipping from Rung 1 directly to trying an ollie is why so many people get frustrated and quit. The foundational skills of balance and control are what make tricks possible.
Navigating the Mental Game and Staying Motivated
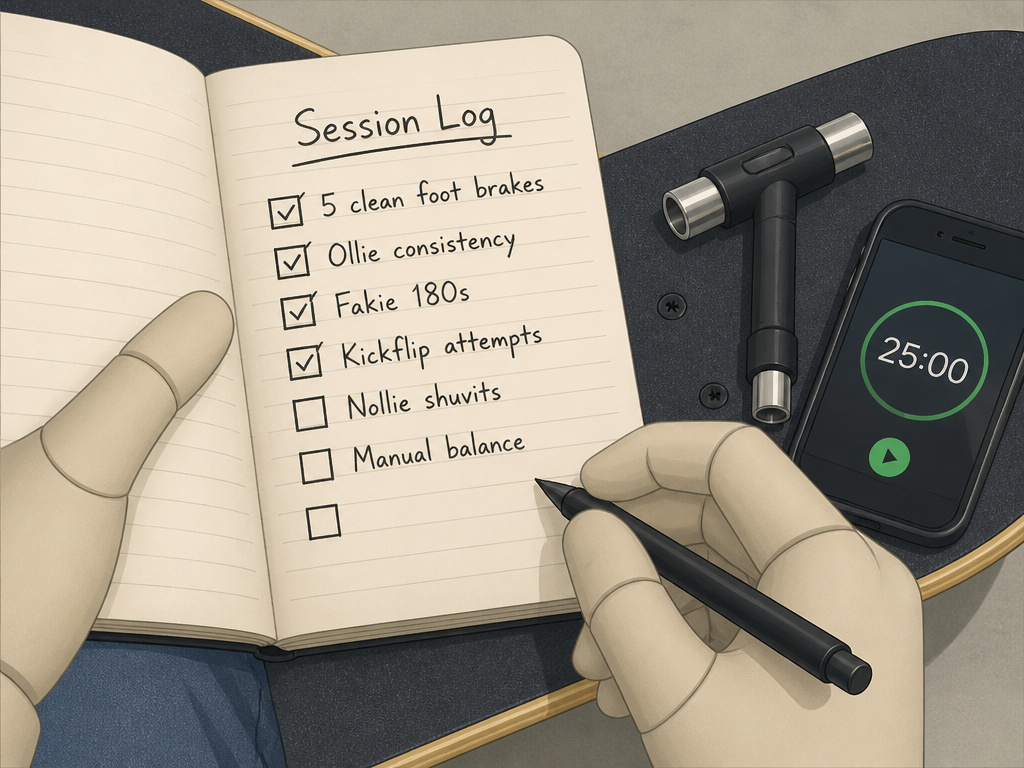
Skating alone can feel lonely. You see edits of friends hyping each other up, and your session is just you and the sound of your wheels. Many skaters find themselves practicing alone but acknowledge the draw of skating with others.
Your motivation has to come from within. Set specific, session-level goals. “Today I will land five clean foot brakes in a row.” That’s a win you can control. Use apps or a simple notebook to log tricks landed and measure consistency. Seeing a list of checked-off skills is powerful.
The part nobody mentions: The loneliness can actually boost focus. With no one watching, you’re free to try the same weird, awkward move 50 times without feeling self-conscious. That’s where breakthroughs happen.
If the isolation gets to you, use your session to plan a session for a future skatepark visit. Work on the basics you’ll need there, like consistent pushing and stopping, so you feel more confident when you do go to meet others. Remember, many skaters at parks started alone too.
Frequently Asked Questions
Can I learn skateboarding by myself?
Yes, absolutely. Many skaters are largely self-taught. The key is using structured practice, video review, and authoritative safety resources like the CDC skateboarding activity guide and CPSC skateboarding safety fact sheet to guide your progression safely.
Where is the best place to practice skateboarding alone?
Look for a smooth, flat surface, like an empty parking lot or quiet sidewalk, with no traffic or pedestrians. Empty school parking lots (on weekends), finished tennis or basketball courts (if allowed), and smooth sidewalks in quiet neighborhoods are ideal. Always inspect the surface for debris.
Is it safe to practice skateboarding alone?
It carries additional risk, which is why the CPSC advises against it. If you choose to practice solo, you must mitigate that risk: always tell someone your location, carry a charged phone, wear all protective gear, and stick to known, safe environments. Never skate alone in remote areas.
How do I stay motivated when skating alone?
Set micro-goals for each session and track them. Film your progress, watching yourself improve is a huge motivator. Also, remember that solo skating builds intense focus and self-reliance, which are huge assets once you do skate with others.
How long should a solo practice session be?
Focused, structured session is far more valuable than long periods of aimless rolling. Use a timer for each segment of the 4-Step Blueprint to maintain intensity and avoid burnout.
Before You Go
The most important rule for solo skating is one the government agencies don’t print: be honest with your own limits. If you’re tired, frustrated, or your ankles are talking to you, pack it in. A fresh start tomorrow beats a forced session that ends in a fall today.
Your next session should start with a board check, tighten those trucks, spin those wheels. Then, pick just one skill from the progression ladder. Film three attempts. That’s it. Small, consistent steps taken alone add up to a competence that is entirely your own. Now go find a smooth patch of ground and put one foot on the board.
