
How to Bail on a Skateboard: Step-by-Step
This post contains affiliate links. As an Amazon Associate, we earn from qualifying purchases.
Bailing on a skateboard means intentionally dismounting to avoid a worse fall. The five core techniques are the run-out (step-off), the forward roll/shoulder slide, the backward fall/butt slide, the board-kick, and the tuck-and-roll for high speed. Master these on soft ground first, your reaction needs to be automatic before you need it at the skatepark.
That gap between a controlled bail and a chaotic slam is where most wrist and collarbone injuries happen. Learning how to bail on a skateboard is a key part of building the muscle memory you need, as you can’t think your way through it in half a second. You need muscle memory built on a forgiving surface.
What follows: the step-by-step breakdown of each bail, the common mistakes that break bones, what to do when your electric board fails, and the drills that make these moves instinctive.
Key Takeaways
- Practice bailing on grass or mats before you need it on concrete, the soft landing builds the right reflexes without the pain.
- Never catch yourself with straight arms, that’s how wrists snap. Roll, slide, or distribute the impact across your side.
- Learn to kick the board away during grinds and slides to avoid landing on it and turning a simple bail into a high-ankle sprain.
- If you ride electric boards like Evolve, know that power can cut out at any time due to low battery, your bail plan must include a foot-brake run-out.
- Wrist guards are essential for beginners. The CPSC calls them “especially important” because they prevent the most common skateboarding fracture.
The Mindset Shift: Bailing Is a Skill You Practice
You don’t practice falling. You practice the controlled dismount that replaces the fall.
I had a student who was terrified of trying anything new. They’d freeze up at the thought of a kickturn. We spent two sessions just on grass, practicing how to step off, roll out, and release the board. After that, the fear was gone. Not reduced, gone. Learning to bail properly allowed them to progress because it removed the consequence of failure. That’s the whole point.
Common mistake: Stiffening your arms and reaching out to catch the ground. Your wrists and collarbone take the full force of the fall, and the injury happens in the first tenth of a second. Roll through the impact instead.
Why Grass and Mats Are Your First Skatepark
The surface teaches your body. Concrete punishes every error, which just makes you flinch harder next time. Grass or gym mats give you the feedback without the hospital trip.
Find a flat patch of lawn. Wear your full gear, helmet, knee pads, elbow pads, and especially wrist guards. You’re going to intentionally bail, slowly at first, then with more commitment. The goal isn’t to fall hard. It’s to learn the shape of each bail technique so well that your body chooses it under pressure.
The Run-Out Bail (Step-Off)
This is your first and most useful tool. It’s for low-speed wobbles, aborted pushes, or when you just lose your balance.
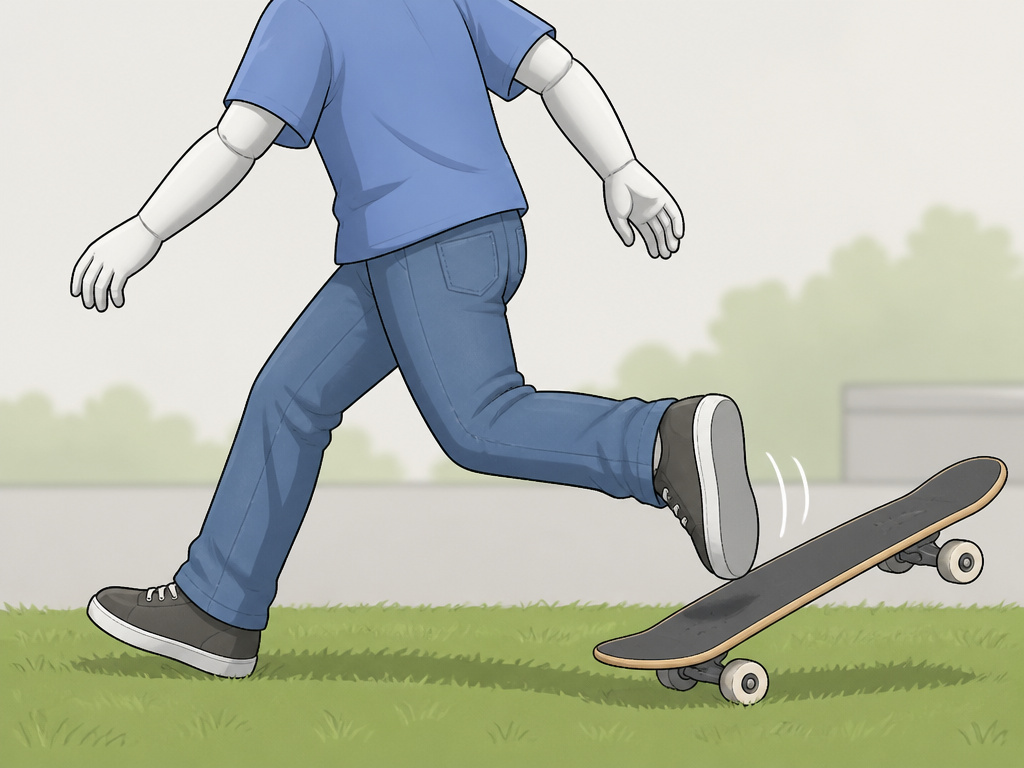
How it works: As soon as you feel the board going, step off with your front foot like you’re taking a big stride. Let the board roll out behind you. Your back foot follows into a run. You’re not jumping; you’re transferring your weight from the board to your feet in a smooth, running motion.
Where it fails: If you try to step off while the board is still under power, especially on an electric skateboard. The board might shoot forward, leaving you in a split. The key is to kill the power or brake first if you can.
The Electric Skateboard Caveat
The manuals aren’t subtle. The Evolve GT manual states your board can lose brakes and power during your ride at any time due to low battery. That means your planned run-out bail might need to happen with no motor braking to help you slow down first.
For Onewheel riders, the warning is even more severe. The U.S. Consumer Product Safety Commission (CPSC) urges consumers to immediately stop using all Onewheel models due to multiple reported deaths and injuries from ejection hazards, while the manufacturer, Future Motion, states the boards are safe with proper riding principles. This is a documented, serious disagreement between a federal safety agency and a manufacturer. If you choose to ride one, your bail practice must account for sudden motor cut-off at any speed.
The Forward Roll and Shoulder Slide
For forward momentum you can’t run out of, like coming off a ramp or losing it mid-olive, you need to redirect that energy into a roll.
The sequence: As you pitch forward, tuck your chin to your chest. Lead with your shoulder, not your face or hands. Let your body roll diagonally across your back, from shoulder to opposite hip. Slap the ground with your open hand as you roll to dissipate energy. Come up onto your feet if you can.
The CPSC fact sheet notes that you can lose control at any speed. This roll is your best defense against that sudden, high-side ejection.
Practice progression: Start on your knees on a mattress or thick mat. Practice falling forward and rolling over your shoulder. Then try it from a crouch on grass. Finally, try it from a slow roll on your skateboard on grass. The slap is crucial, it spreads the impact across your arm and keeps your wrist from buckling.
The Backward Fall and Butt Slide
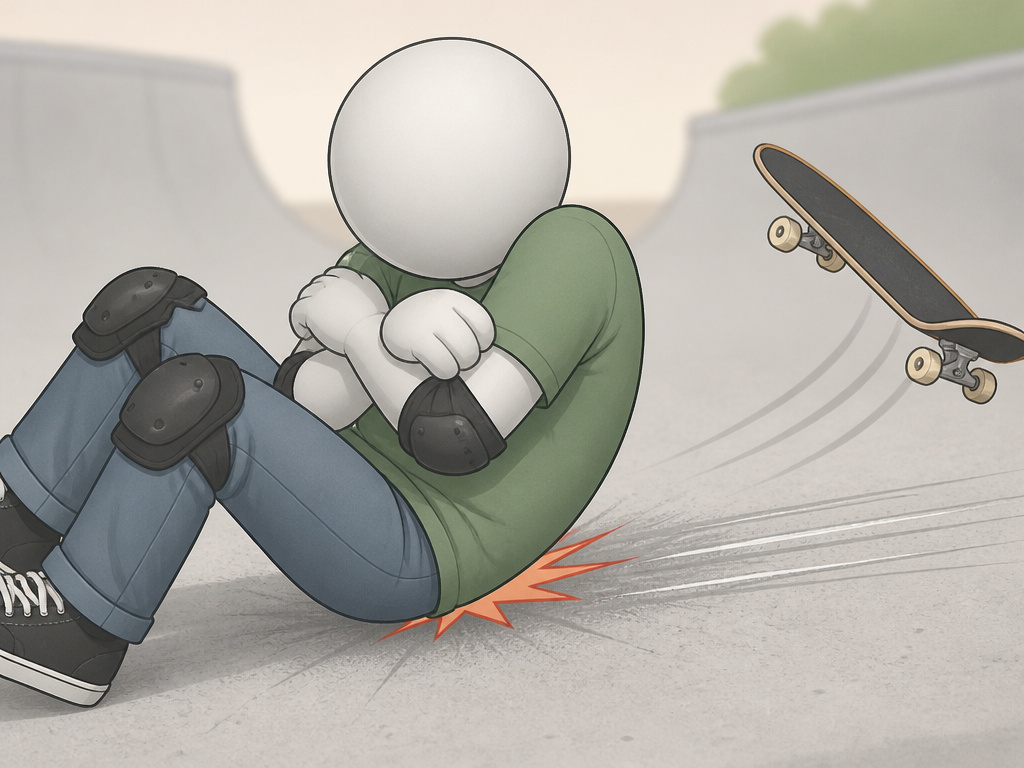
When your feet slip out from under you on a wet patch or a failed boardslide, you’re going backwards. The instinct is to throw your hands back. That’s a one-way ticket to a broken tailbone or wrist.
The correction: As you feel yourself going, tuck your chin (again) and round your back. Aim to land on your buttocks and the meaty part of your back, not your spine. Let your momentum slide you out along the ground. Keep your hands in front of you or crossed over your chest. If you’re wearing slide shorts or durable pants, this slide can burn through the fabric but save your skin.
This technique is key for overcoming the fear of falling on transition. Knowing you can slide out safely makes committing to that first drop-in much less terrifying.
The Board-Kick Bail for Grinds and Slides
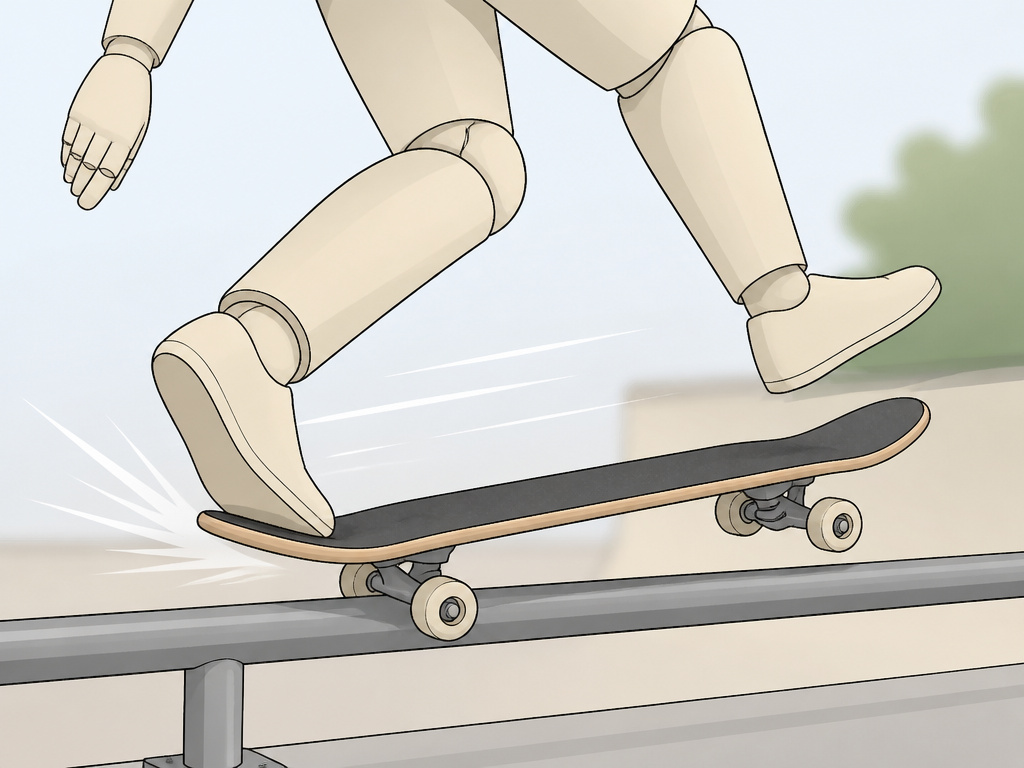
This is a specific move for when you’re locked into a trick that’s going wrong. On a boardslide or 50-50 grind, you don’t want to fall with the board trapped under you.
The move: The moment you know you’re not making it, use your back foot to kick the board backwards, away from your body. Your front foot steps off forward. You separate yourself from the board, so you land on the ground and the board lands elsewhere. It takes practice to do this without looking down, which is why you rehearse it stationary first.
Reddit threads are full of new skaters asking how to manage the board during a bail, which is essentially a question of how to bail on a skateboard correctly. The answer is this kick. It feels violent at first, but it prevents the board from becoming a projectile that hits you or someone else.
The High-Speed Tuck and Roll (For “Speed Wobble”)
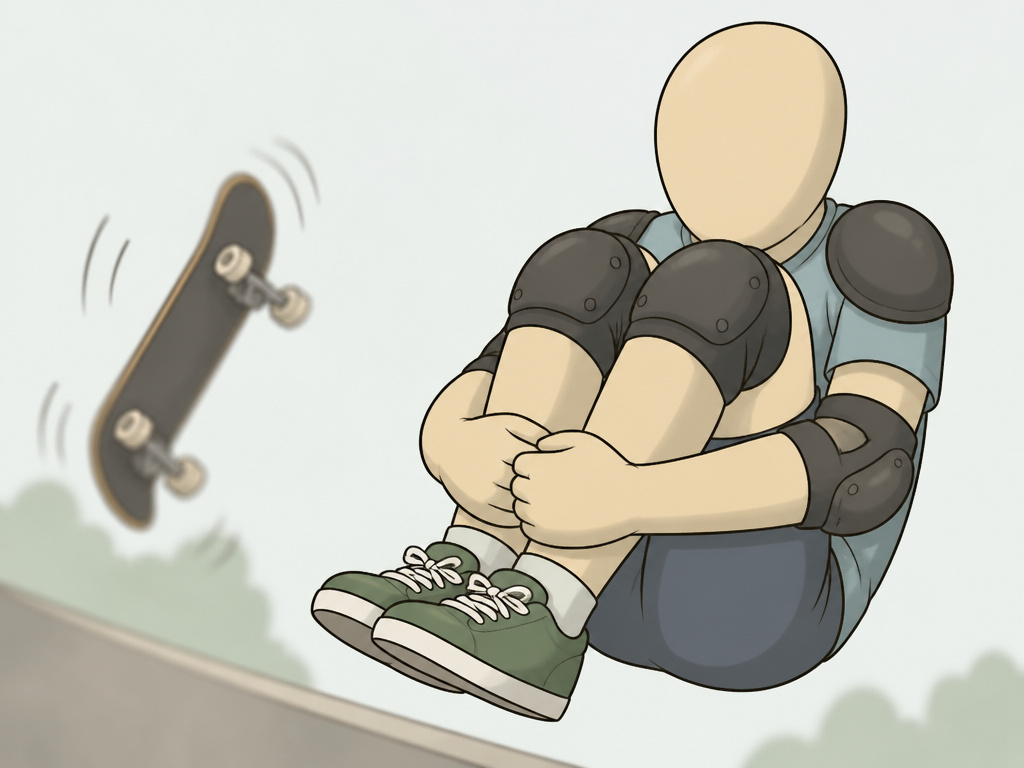
Speed wobble is a specific, terrifying failure mode. The CPSC defines it as when a skateboard begins to shimmy from side to side unexpectedly. They warn it can lead to a violent ejection within seconds.
When wobble starts, you often can’t step off safely. Your best bet is to crouch low on the board to lower your center of gravity and ride it out. If you’re coming off, you need to convert that forward speed into a roll.
The tuck: As you leave the board, bring your knees to your chest and tuck your limbs in. Try to land on the soft muscle of your shoulder and back, not your arms or head. Roll like a log along the direction of travel, not sideways. This is a last-resort move, and it’s why wearing a full set of pads is absolutely necessary for downhill or high-speed riding.
| Bail Technique | Best For | Critical Error to Avoid |
|---|---|---|
| Run-Out (Step-Off) | Low-speed balance loss, electric board power failure | Stepping off before braking, causing a split |
| Forward Roll / Shoulder Slide | Forward momentum from ramps or pitched falls | Leading with your head or sticking straight arms out |
| Backward Fall / Butt Slide | Slipping out backwards on wet ground or failed slides | Throwing hands back to catch your full weight |
| Board-Kick | Grinds, slides, and any trick where the board is trapped | Hesitating and falling on top of the board |
| High-Speed Tuck & Roll | Speed wobble ejections and unavoidable high-speed falls | Staying stiff and sliding on bare skin |
What to Do With Your Hands and Head (The Injury Avoidance Checklist)
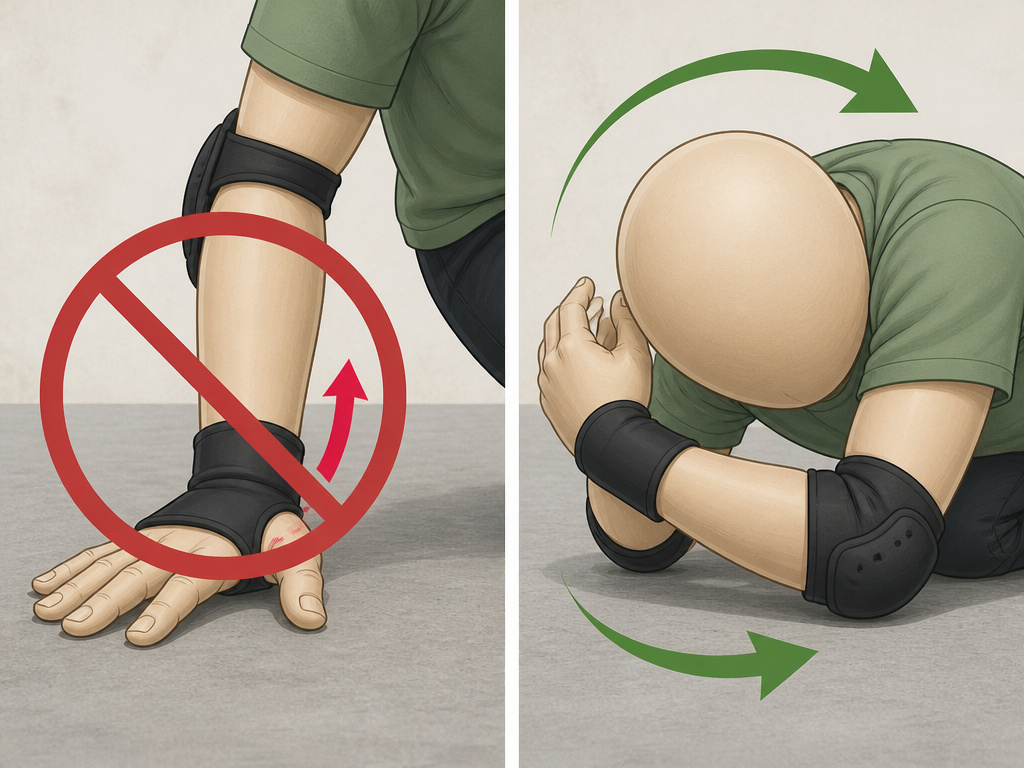
Your body’s default settings are wrong for skating. You have to reprogram them.
- Hands: Never reach out to catch yourself. If your hands must touch ground, do it with an open-palm slap as part of a rolling motion. Wrist guards make this safer, which is why the CPSC highlights them as especially important.
- Head: Your chin goes to your chest, always. A helmet is essential, but it’s not a magic shell. The CPSC states wearing a helmet can mean the difference between life and death, but only if it’s on correctly, snug, level, and designed for skateboarding.
- Eyes: Look where you’re rolling, not at the ground rushing up. Your head follows your gaze.
- Breath: Exhale as you impact. Holding your breath tenses your muscles and makes injuries worse.
How to Practice: The Drills No One Does
Knowing the techniques is one thing. Making them instinct is another. Here’s a drill routine you can do off the skateboard.
- The Roll Drill: On soft ground, from a standing position, drop into a forward roll over your shoulder. Do five on each side.
- The Slap Drill: From your knees, fall forward and practice slapping the ground with both hands as you roll. Focus on the sound of the slap, it should be simultaneous, not a staggered crunch.
- The Step-Off Drill: Push your board slowly on grass, then practice stepping off into a run. Do it ten times, switching your front foot.
- The Board Separation Drill: With your board stationary, practice the kick-back motion with your back foot while stepping forward with your front foot. Do it until you don’t have to look down.
Building this muscle memory through dedicated practice of how to bail on a skateboard is the single best way to build confidence on your board. Fear often comes from the unknown consequence of falling. Remove the unknown.
After the Bail: Recovery and When to Call It
You hit the ground. Now what?
- Don’t pop up immediately. Lie still for a moment and take inventory. Wiggle your fingers and toes. Any sharp pain? Any numbness?
- Roll to your side and get up slowly. Use your hands and knees if you need to.
- Assess the damage. Scrapes and bruises are standard. Throbbing, swelling, or an inability to put weight on a limb is not.
- Know when to stop. The CPSC advises to never ride alone for this reason. If you hit your head hard (even with a helmet), feel dizzy, or have persistent pain, your session is over. Call for help.
Pushing through a real injury doesn’t make you tough. It makes you someone who can’t skate for six weeks. Commit to tricks another day. Live to skate another session.
How to bail on stairs, rails, and in transition
When things go wrong on an obstacle, your goal is to get your body away from the board and the hazard. On stairs, focus on pushing the board out in front of you and aiming your run-out along the line of the stairs, not sideways off them. For rails, you often need to abandon the board completely; try to jump clear and land on your feet, ready to roll. In a transition, like a ramp or bowl, use the curved wall to your advantage. If you lose control, aim to slide down the transition on your pads or roll out along the curve, which is less abrupt than hitting flat ground. Always wear your protective gear, especially a helmet and wrist guards, as these scenarios amplify the risk.
Frequently Asked Questions
What’s the difference between bailing and slamming?
Bailing is intentional. You see the trick failing and you choose a safe exit. Slamming is uncontrolled, you’re along for the ride and you hit the ground with no technique. Bailing minimizes damage; slamming maximizes it.
Should I try to save my board when I bail?
No. Your board is replaceable. Your wrists, teeth, and collarbone are not. The board-kick technique exists to get the board away from you. Saving it is how you land on it awkwardly.
How do I bail on a ramp or mini ramp?
The principles are the same, but the geometry changes. On a ramp, you’re often falling back into the transition. Focus on the butt slide, keeping your hands in front, and sliding down the slope on your pads. We have a dedicated guide on how to fall on a mini ramp that breaks down the angles.
I wear full pads. Do I still need to learn these techniques?
Absolutely. Pads protect you from abrasion and blunt impact, but they don’t prevent joint injuries from bad landings. A knee pad won’t stop your knee from twisting if you land on it sideways. Technique prevents the twist; the pad prevents the scrape.
How do I get over the fear of bailing?
You practice the bail on a safe surface until it’s boring. Then you practice committing to skateboard tricks at a speed where you know you can bail safely. Start small, stay consistent. Your confidence comes from proven competence, not blind courage.
Before You Go
One rule most guides skip: if you haven’t practiced a bail on grass in the last month, you’re not ready to rely on it in a panic. Your body forgets. Schedule ten minutes this week on a soft surface, not to skate, just to fall.
Go push down the block once today. But know your exit before you go.
