
How to Install Skateboard Hardware: Step-by-Step
This post contains affiliate links. As an Amazon Associate, we earn from qualifying purchases.
Installing skateboard hardware requires matching three things: the right bolt length for your setup, the correct tool for your bolt head, and a tight, even crank that stops just before the nylon lock bites. Skate Labs states that 7/8 inch hardware fits most setups without risers, but adding pads or a thicker deck means you need longer bolts.
That 7/8 inch spec is the measurement Skate Labs gives for a setup without risers. Get the length wrong and the board feels off, the trucks can loosen mid-session, or the bolt ends poke into your grip tape. This guide walks through the tools, the steps, and the small mistakes that turn a ten-minute job into a frustrating hour, including a clear explanation of how to install skateboard hardware.
What follows: the four essential tools, the exact step-by-step mounting process, how to diagnose if your hardware is the wrong size, and the one pre-ride check that catches loose bolts before they become a problem.
Key Takeaways
- Use 7/8 inch hardware for a standard deck without riser pads, this is the Skate Labs spec for most setups.
- A skate tool is the best choice, but a Phillips screwdriver or 6mm Allen key with a 10mm wrench works if you don’t have one.
- Tighten bolts in a cross pattern just until the nylon lock on the nut engages; over-tightening strips the threads or cracks the deck.
- Always poke holes in the grip tape before inserting bolts to prevent tearing and ensure a clean, flush mount.
- Check bolt tightness before every session, a quick shake and twist of each bolt takes a minute and prevents dangerous loosening.
The 4 Tools That Replace a $200 Service Visit
You don’t need a mechanic’s toolbox. You need the right tool for the specific fastener on your board. Using the wrong driver is the fastest way to strip a bolt head, and a stripped bolt turns a simple upgrade into a repair nightmare.
The Skatedeluxe assembly guide spells out your options. For the bolts of the assembly kit, you can use a Phillips screwdriver or a 6mm Allen key, depending on the bolt head type, paired with a 10mm wrench for the nut. A 13mm and a 14mm wrench will fit the nuts of the trucks and the kingpin. But their strongest recommendation is simpler: The easiest and best way to assemble your skateboard is with a skate tool.
A skate tool combines the ¼” drive sockets for axle and kingpin nuts (usually 13mm and 14mm) with a reversible screwdriver for Phillips and Allen heads, plus a built-in reamer for cleaning grip-tape holes. It’s the one tool that does everything the job asks for.
I learned this the hard way trying to use a cheap multi-bit screwdriver on some Allen head bolts. The bit wasn’t a perfect fit and started to cam out on the third bolt, rounding the socket just enough that I couldn’t get a solid grip. I had to cut the bolt off. Now I won’t touch hardware without my skate tool, it’s cheap insurance against a stripped head.
Here’s what you actually need on the table:
| Tool | Use | What Happens If You Skip It |
|---|---|---|
| Skate Tool | Tightens all nuts, drives Phillips/Allen bolts, reams holes. | You’ll need three separate tools (wrench, driver, reamer) and risk slipping. |
| Phillips Screwdriver | Turns Phillips-head bolts. | Using an Allen key on a Phillips head strips the cross pattern instantly. |
| 6mm Allen Key | Turns Allen-head bolts. | A Phillips driver will slip and ruin the hexagonal socket. |
| 10mm Wrench | Holds the nut stationary while you tighten the bolt from above. | The nut spins with the bolt, you can’t tighten it, and you gall the threads. |
If you’re choosing between Allen head hardware and Phillips, the decision is about stripping resistance, not looks. Allen heads have more contact area in the socket, so they withstand more torque before deforming. Phillips heads are more common on budget completes, but they cam out under pressure as a safety feature, which also means they strip easier if you’re not perfectly aligned.
Step-by-Step: Mounting the Trucks
Grab your deck, trucks, hardware, and tool. Clear a table with good light, the Skate Labs guide insists on this, noting that rushing is how people cut themselves. Lay everything out so you can see all eight bolts and nuts. Missing one piece here means taking everything apart later.
Step 1: Poke the Holes.
Don’t force the bolt through the grip tape. Use the tip of a screwdriver, the skate tool’s reamer, or even a nail to gently puncture the grip tape at each of the eight mounting holes. Push through until you feel the hole in the deck wood. This creates a clean path for the bolt. Forcing it tears the grip and leaves a frayed edge that catches your shoe.
Step 2: Insert the Bolts.
Place the deck grip-side down. Drop a bolt into each of the eight holes. They should sit flush against the deck. If a bolt sticks up, the grip tape hole is too small, ream it a bit more.
Step 3: Add Risers (If Using).
Slide your riser pads onto the bolts, aligning them with the truck mounting holes. If you’re not using risers, go straight to placing the truck.
Step 4: Seat the Truck.
Turn the deck over so it’s grip-side up. Position the truck baseplate over the four bolts, ensuring the kingpin faces the center of the deck (inward). The bolts should protrude through the baseplate holes.
Step 5: Thread the Nuts.
Flip the deck over again, grip-side down. Start each nut by hand, turning them clockwise until they finger-tighten. Don’t use the tool yet.
Step 6: Tighten in a Cross Pattern.
This is where most people crank down on one nut and call it done. Don’t. Like lug nuts on a car tire, you need even pressure. Follow a star pattern: tighten one nut a half-turn, then move to the nut diagonally opposite, then the next, and so on. Use your skate tool or the 10mm wrench on the nut and the screwdriver/Allen key on the bolt head. Tighten until you feel the nylon insert inside the nut start to resist, that’s the lock engaging. Stop there. Over-tightening compresses the deck laminate and can crack it over time.
Step 7: Final Check.
Give the truck a firm shake. It shouldn’t move. If it does, go around the cross pattern again with a quarter-turn on each nut. You now have one truck mounted. Repeat the entire process for the second truck.
The 7/8 Inch Rule (and When to Break It)
Skate Labs states plainly that 7/8 inch hardware fits most setups without risers. That’s your baseline. If you’re building a standard street deck with no riser pad, grab a pack of 7/8″ bolts. But “most” isn’t “all.” Your hardware length is a stack-up calculation: deck thickness + riser pad thickness + truck baseplate thickness.
A bolt that’s too short won’t engage enough threads in the nut, and the truck will feel loose no matter how hard you tighten it. A bolt that’s too long leaves exposed threads that can grind down or, worse, poke up through the grip tape and into your shoe. The fix is knowing how to measure.
- No Riser: 7/8″ is almost always correct.
- If 1″ bolts are insufficient, purchase longer bolts with a 10-32 thread size. 3.
The Si Boards manual gives us a real-world example of when the standard doesn’t apply. For installing their accessory rails, they note: If the 1” bolts are insufficient, purchase longer bolts with a 10-32 thread size. That’s two specific data points: a known length (1″) and a specific thread (10-32). If your hardware pack doesn’t list the thread, check the specifications; the Si Boards manual references bolts with a 10-32 thread size.
Where this goes sideways: Guessing bolt length by eyeballing. A bolt that’s just a quarter-inch too short won’t secure the truck properly, and the board will develop a dangerous wobble within a few hard landings.
If you’re unsure, our skateboard hardware size guide has a full table. But the rule is simple: the bolt should thread through the truck baseplate and deck, with the end protruding just enough for the nut to fully seat and the nylon lock to engage. If you run out of thread before the nut is tight, you need a longer bolt.
Common Mistakes That Strip Bolts and Crack Decks
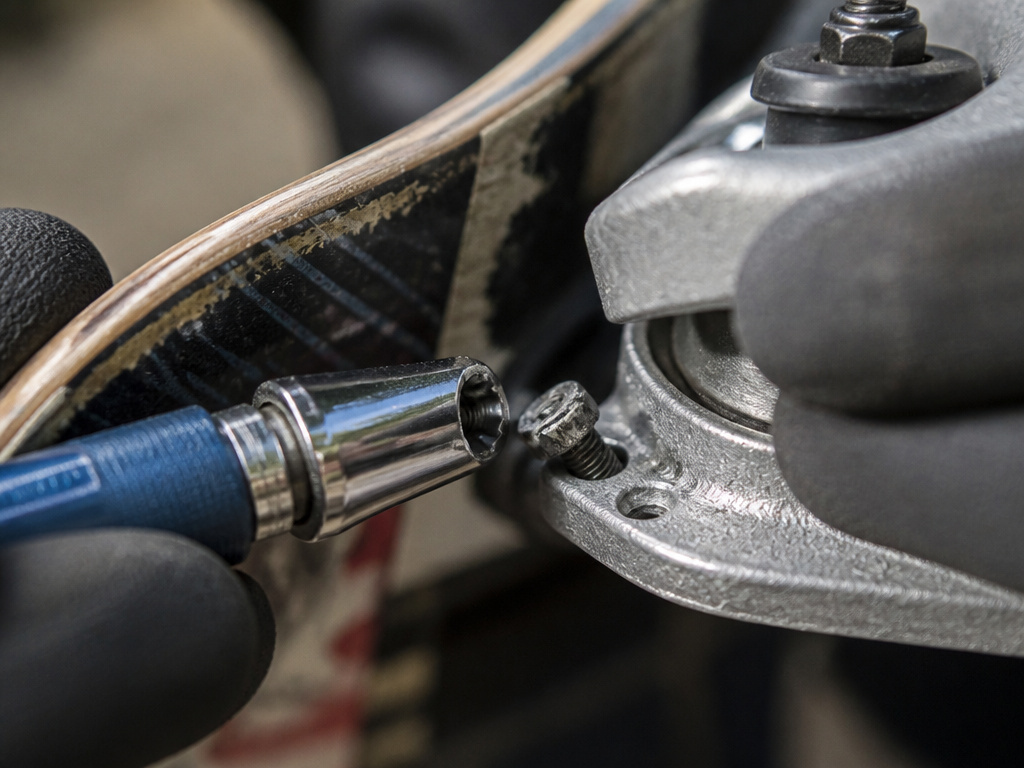
You’ve got the tools and the steps. Now for the part most guides skip: what not to do. These are the mistakes that ruin hardware, damage decks, and send you to the guide to removing stripped bolts.
Cross-Threading the Nut. This is the big one. You must start every nut by hand. If it doesn’t spin on smoothly, back it off and try again. Forcing it with a tool cuts new threads into the nylon insert, ruining the lock and guaranteeing a loose truck. The sound is a gritty crunch. If you hear it, stop.
Over-Tightening. More torque leads to a cracked deck or stripped threads. The Skate Labs safety warning for the kingpin is direct: Never loosen the kingpin nut so far that it barely hangs on. Keep the nut fully threaded onto the kingpin. The same logic applies to your truck bolts. Tighten until resistance increases, then stop. The nylon lock does the rest.
Mixing Up Your Tools. Using a Phillips head on an Allen bolt (or vice-versa) seems like it might work for a turn or two. It won’t. The tool will slip, rounding the edges of the socket or stripping the cross. Always match the driver to the bolt head. If you’re buying new hardware, consider the Allen head for its durability.
Skipping the Pre-Ride Shake Test. I skipped my pre-session hardware check one day because I was in a rush. A truck bolt had loosened, and the board felt strange within minutes. I got lucky and caught it before I fell, but I haven’t skipped the check since. Before you ride, grab each truck and give it a firm shake. Any movement means a loose bolt. A quick twist with your skate tool fixes it in seconds.
Allen vs. Phillips: The Stripping Point
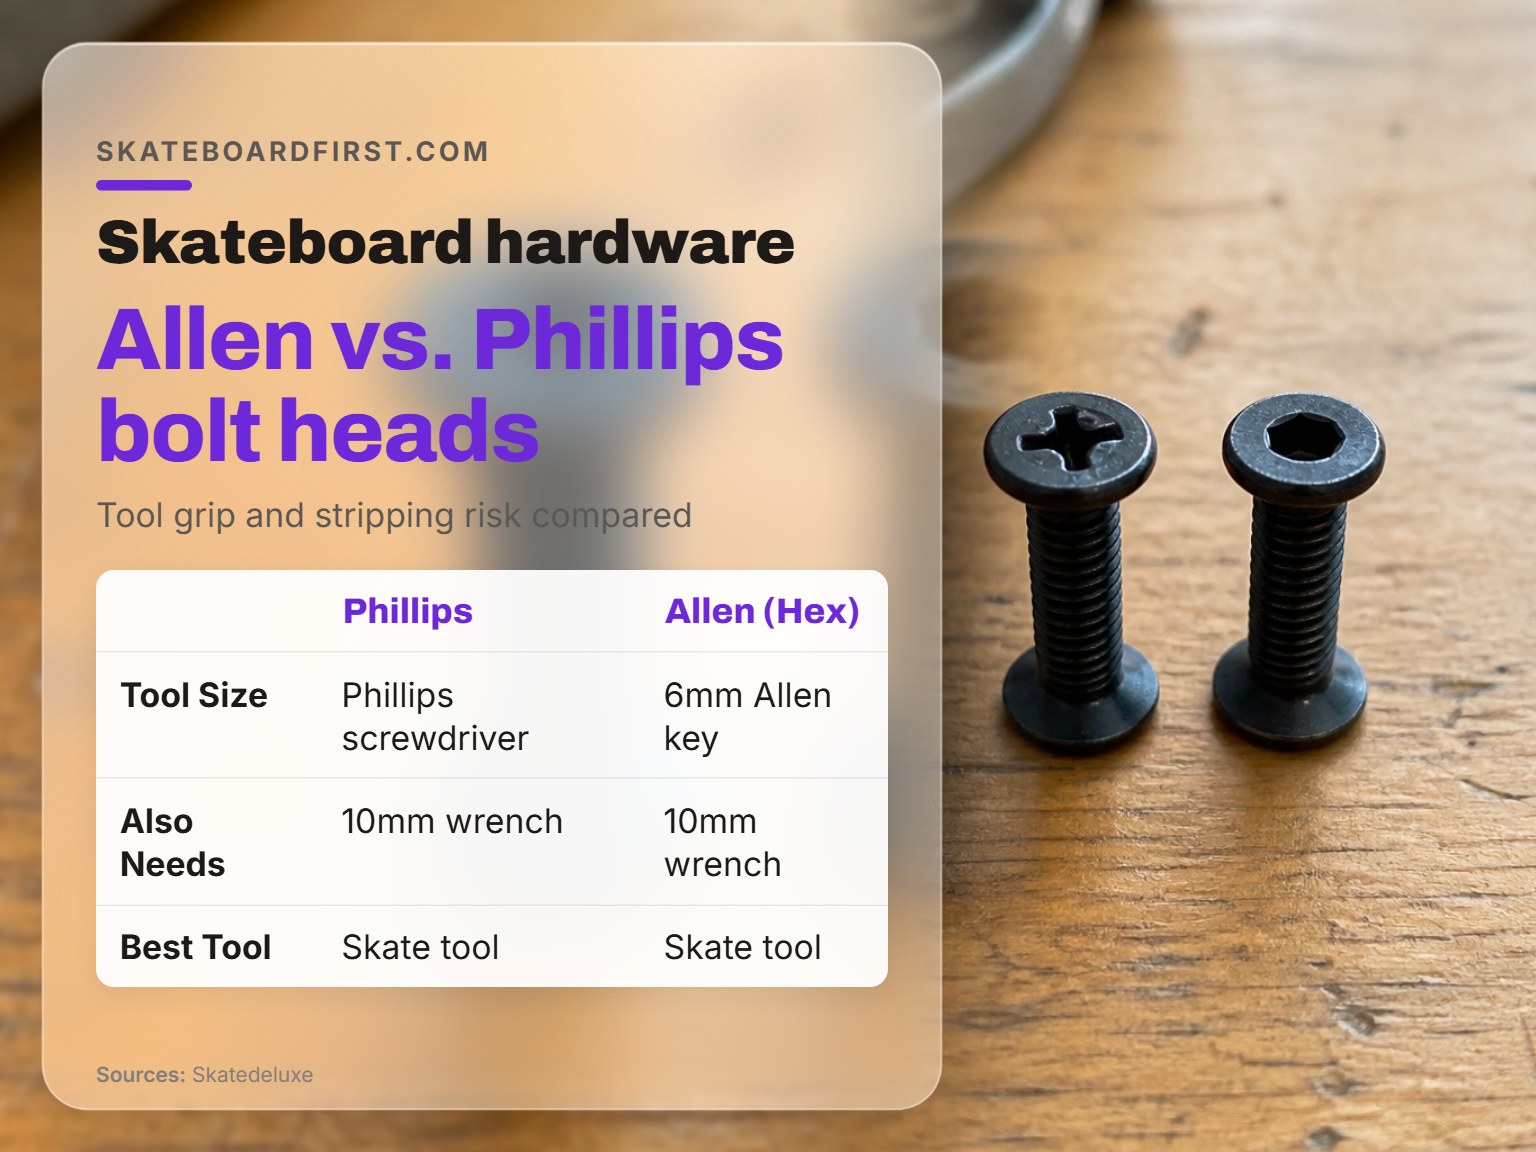
This choice matters more than color or brand. Your bolt head type decides how many times you can safely tighten and loosen your trucks before the head gives out.
| Bolt Head | Best For | Major Risk |
|---|---|---|
| Phillips | Budget completes, widespread availability. | The driver cams out under high torque, stripping the cross. |
| Allen (Hex) | Aftermarket hardware, precision setups. | Requires a perfectly sized key; a worn key can round the socket. |
Phillips heads are designed to cam out, that is, the driver slips out of the cross when a certain torque is reached. This prevents over-tightening but also means if you’re not perfectly straight, you’ll strip the head much easier. Allen heads have a six-sided socket that grips the tool on the flats, distributing force more evenly. They can handle more torque, but a worn or incorrect Allen key will round the corners.
For a beginner who isn’t constantly tweaking their setup, Phillips is fine, especially when you compare a how to install skateboard hardware tutorial for each type. For anyone who likes to experiment with truck tightness or swap parts, Allen is the better investment. It’s the difference between a bolt you remove ten times and one you remove fifty times. When you’re installing trucks, the extra few dollars for Allen head hardware pays off in longevity.
How to Know If Your Hardware is Wrong
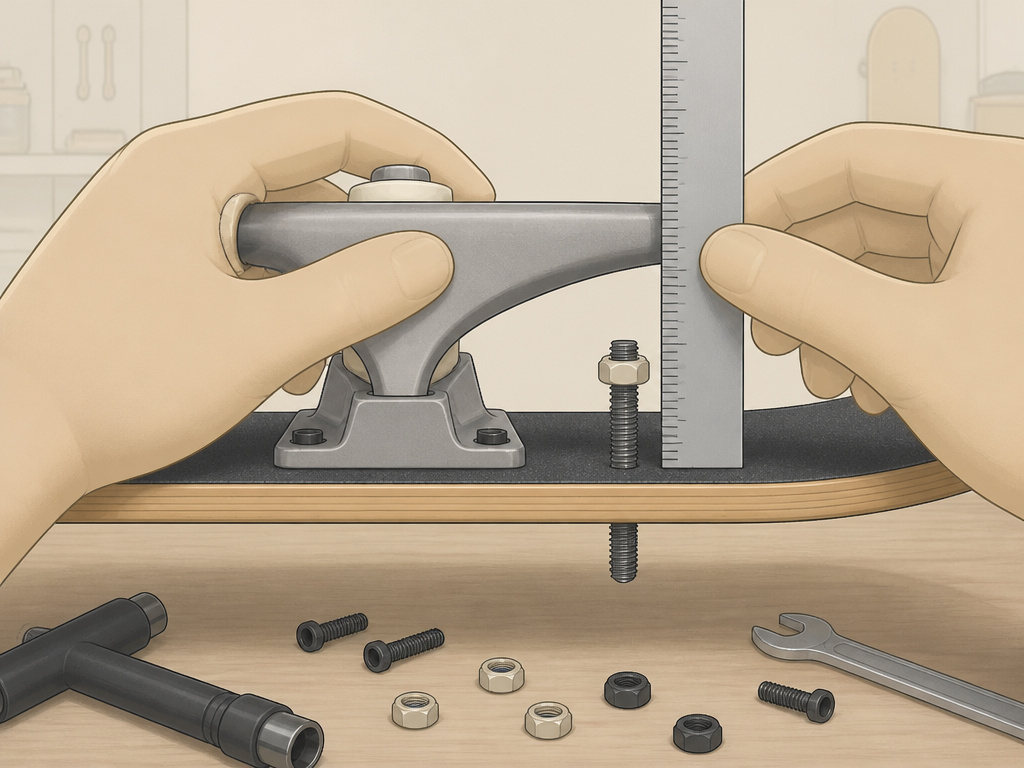
Sometimes you follow all the steps and the board still feels off, even after a standard how to install skateboard hardware process. The problem might be the hardware itself. Here are the symptoms and the fixes.
Symptom: The nut spins but won’t tighten.
Cause: The bolt is too short. It’s not threading deep enough into the nylon lock.
Fix: You need longer bolts. Measure your stack (deck + riser) and buy hardware that’s at least 1/4″ longer than that measurement.
Symptom: The bolt end protrudes through the grip tape.
Cause: The bolt is too long for a setup without risers.
Fix: You need shorter bolts. Swap to a 7/8″ set. You can also add a thin riser pad to take up the extra length, but that changes your ride height.
Symptom: One truck feels looser than the other, even when tightened equally.
Cause: Possibly a worn or crushed bushing on the loose truck, but also check the hardware length is consistent. A shorter bolt on one side can’t generate the same clamping force.
Fix: Compare bolt lengths. Replace any that are shorter than the others. If the bolts match, the bushings might be shot.
Symptom: A persistent squeak or creak when turning.
Cause: This is often a dry pivot cup, but it can also be metal-on-metal contact if a bolt is slightly too long and is touching the hanger.
Fix: Check that all bolts are fully seated in the baseplate and aren’t contacting the truck hanger. A dab of wax in the pivot cup usually solves the noise.
Common mistake: Overtightening to solve a loose truck caused by short bolts. You’ll only strip the nut or crack the deck. The solution is always the correct bolt size, not more force.
Frequently Asked Questions
What skateboard hardware do I need?
You need eight bolts and eight matching locking nuts. The standard size is 7/8 inch in length with a 10-32 thread. Bolt heads are either Phillips or Allen (hex). A skate tool is the recommended tool for installation.
How tight should skateboard hardware be?
Tighten the nut until you feel the nylon locking insert inside start to grip the bolt threads. This is just beyond finger-tight. Do not crank down with full force. Over-tightening can strip threads, crack the deck, or compress the bushings. The lock nut’s job is to prevent loosening, not sheer torque.
Can I reuse old skateboard hardware?
You can, but inspect it first. Check for stripped bolt heads, worn threads, or any corrosion. Nylon locking nuts lose their effectiveness after being removed and re-tightened several times. If in doubt, replace it. Hardware is inexpensive and is the critical link holding your trucks on.
Why are my new trucks not lining up with the holes?
This usually means you have the wrong truck size for your deck width. Trucks should be roughly the same width as your deck. If they are the correct size, ensure you haven’t accidentally swapped the front and rear trucks (they are identical on most modern boards). Also, double-check that you’re aligning the baseplate holes with the bolts, not the hanger.
What do I do if I stripped a bolt head?
First, stop trying to turn it with the same tool, you’ll make it worse. If possible, use a slightly larger Allen key or a Torx bit that you can hammer gently into the stripped socket for grip. Specialized extractor kits are available. For a severe case, you may need to cut the bolt off with a Dremel. We have a full guide on how to remove stripped skateboard bolts.
The Bottom Line
Installing hardware is a fundamental skill, not a one-time task. You’ll do it every time you get a new deck, change trucks, or add risers. Get the length right first, 7/8 inch for no riser is the rule. Match your tool to your bolt head, and tighten just until the lock nut resists. The single best habit you can build is the pre-ride hardware tightness check. A loose bolt feels like a vague wobble; a missing bolt feels like a crash.
One last thing from the Si Boards manual that applies to every build: Use safety equipment and supervise children. You’re working with tools and small parts. Take your time. A board put together carefully rides predictably. That predictable performance is how you learn everything else.
