
How to Fix a Rocket Kickflip: The 3-Step Fix
This post contains affiliate links. As an Amazon Associate, we earn from qualifying purchases.
To fix a rocket kickflip, you need to level the board by pushing your front foot forward through the nose, not just flicking it off the side. The fix comes down to three coordinated changes: moving your front foot closer to the front bolts, delaying your flick until after the pop, and consciously leaning your shoulders forward as you jump.
That forward push is what turns a vertical, rocket-style flip into a level, catchable one. Most skaters feel the board shooting out in front of them when they try to kick harder, which is a sign they’re grabbing the nose in the wrong spot. The real problem isn’t power; it’s geometry, which is the core of how to fix a rocket kickflip.
What follows: a breakdown of why kickflips rocket, a three-step fix you can drill in your next session, and how to tell if your board setup is making the problem worse.
Key Takeaways
- Move your front foot closer to the bolts to flick through the nose and level the board.
- Delay your flick until your back foot has finished the pop; treating it as an ollie first stops the rocket motion.
- If your board flies away when you kick, lean your shoulders forward as you jump to keep the board under you.
- A wider deck and properly broken-in trucks provide the stability needed to commit to the forward flick.
- Pop shuvits are an underrated training tool for learning board control before tackling kickflips.
What a Rocket Kickflip Actually Is (And Why It Happens)
A rocket kickflip isn’t just a bad kickflip. It’s a specific mechanical failure where the board flips vertically, like a rocket taking off, instead of staying level under your feet. The nose points at the sky, the tail drops, and you land on the tail or miss the board entirely. It feels awful.
The physics are simple: your front foot is flicking down and off the side of the board, not forward and through the nose, which is the core of how to fix a rocket kickflip. A kickflip uses that same forward push, but adds a flick off the corner of the nose to initiate the spin. If you skip the forward push and just flick sideways, you’re only spinning the board, not leveling it. The board has no reason to stay flat.
I learned this the hard way. My first hundred kickflip attempts were all rockets. I’d flick my foot out, watch the board spin vertically, and land with my front foot on the ground and my back foot on the tail. I thought I needed to kick harder. I was wrong, which is a common misunderstanding in how to fix a rocket kickflip. Harder flicks just made the board fly farther away. The fix wasn’t more force; it was better aim.
A rocket kickflip happens when the flick is purely rotational, not leveling. The front foot must push the nose forward to bring the tail up, mimicking the leveling action of an ollie.
The 3-Step Fix for Rocket Kickflips
You can’t fix a rocket kickflip by focusing on the flick alone. You have to adjust your setup, your sequence, and your body as one system. These three changes work together.
1. Reposition Your Front Foot
Your front foot placement decides everything. If it’s too far back toward the middle of the board, you’ll flick off the concave, not the nose. That side-flick is what causes the rocket.
Move your front foot so the ball of your foot is just behind the front bolts, about an inch back. Your toes should be hanging over the edge, but the main part of your foot is centered. This position allows you to slide your foot up to the nose and flick off the corner. It feels weird at first, like you’re too far forward to pop. That’s the point. You’re forcing your foot to travel forward to flick, which is the leveling motion you need.
What happens if you skip this: Your foot flicks off the sidewall of the deck. The board spins but doesn’t level, and you get a rocket every time.
2. Ollie First, Flick Second
This is the mental shift that changes the trick. A kickflip is an ollie with a flick at the end. Most people try to pop and flick simultaneously, which rushes the front foot and kills the leveling.
Practice this stationary. Pop an ollie, and at the very peak of the ollie, when the board is level, kick your front foot out and down at a 45-degree angle off the nose. Don’t even try to land it. Just feel the two separate actions: pop, then flick. That delay gives your back foot time to lift the tail, which is what allows the front foot to push the nose forward. When you start rolling, count “one” for the pop, then flick on “two.”
Where this goes sideways: Flicking before the tail leaves the ground. The board never gets a chance to level, and you’ll land on the tail every single time.
3. Lean Forward, Not Back
When you see the board start to rocket, your instinct is to lean back to get away from it. That makes it worse. Leaning back pulls your front foot away from the nose, so you flick down instead of forward. It also keeps your weight over the tail, which pins it down.
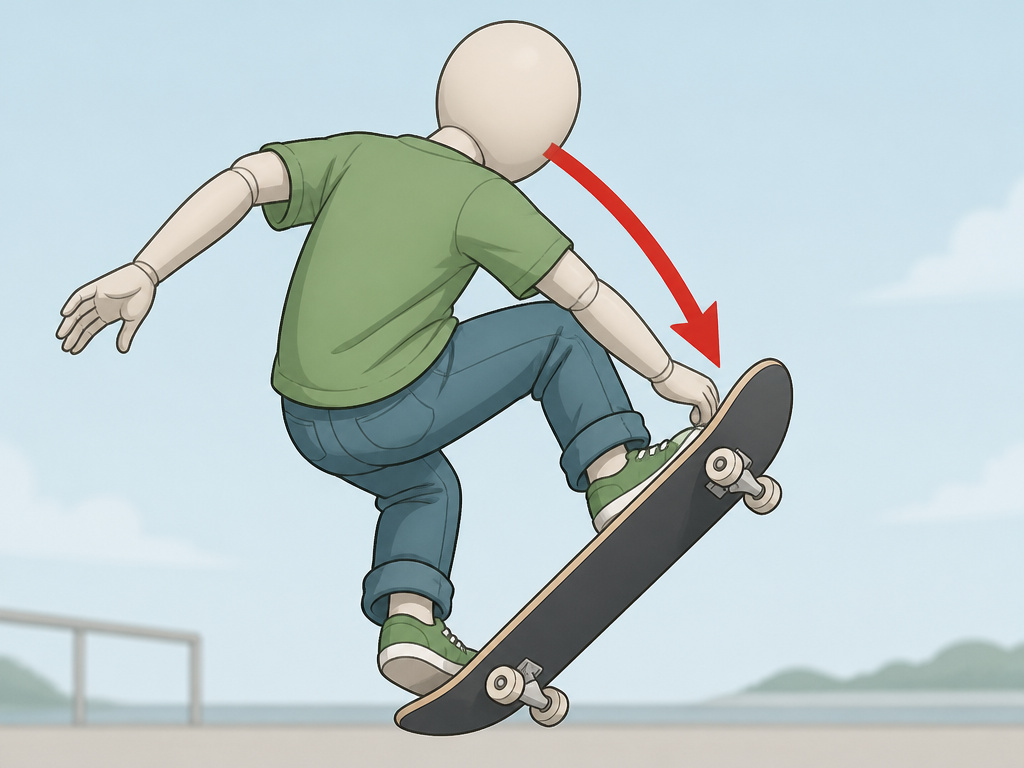
As you pop, consciously shift your shoulders forward, toward the nose of the board. Your head should be over the front trucks when you’re in the air. This does two things: it keeps your front foot in contact with the nose longer for a better flick, and it encourages your body to follow the board if it does travel forward slightly. You’ll feel like you’re jumping forward, which is correct.
| Symptom | Likely Cause | Immediate Fix |
|---|---|---|
| Board flips vertically (rockets) | Front foot flicking off the side, not through the nose | Move front foot closer to bolts; focus on pushing forward |
| Board flies forward away from you | Flick is too far forward on the nose; shoulders are leaning back | Lean shoulders forward as you jump; adjust flick to be more off the corner |
| Board doesn’t flip, just rockets up | Flicking too early, before the pop is complete | Delay the flick; practice “pop, then flick” separately |
| You land on the tail only | No forward leveling motion; all energy is downward | Drill ollies with emphasis on sliding front foot to level the board |
How Your Setup Affects Your Kickflip
Your skateboard isn’t a neutral tool. A deck that’s too narrow or trucks that are too tight can make a rocket kickflip more likely by reducing your margin for error.
Deck Width: A wider deck (8.0″ or more) gives you a bigger platform to aim your flick. On a narrow 7.5″ deck, your foot can easily slip off the side before it reaches the nose, causing that side-flick. For most beginners, an 8.0″ deck is the sweet spot for stability and control. It’s not about looking pro; it’s about having room to learn.
Truck Tightness: Overly tight trucks restrict the board’s ability to tilt, which can make the pop feel dead and force you to flick harder to get the flip. Harder flicks often lead to rockets. Start with your trucks loose enough that you can easily turn. That liveliness translates into a more responsive pop, which means you can use a lighter, more controlled flick.
Grip Tape: Worn-out or cheap grip tape can sabotage your foot’s grip during the slide. If your foot slips instead of sliding, you lose control of the leveling motion. A fresh sheet of coarse grip tape gives you the friction you need to push the nose forward reliably. Don’t let your grip get polished smooth.
Drills to Train the Leveling Motion
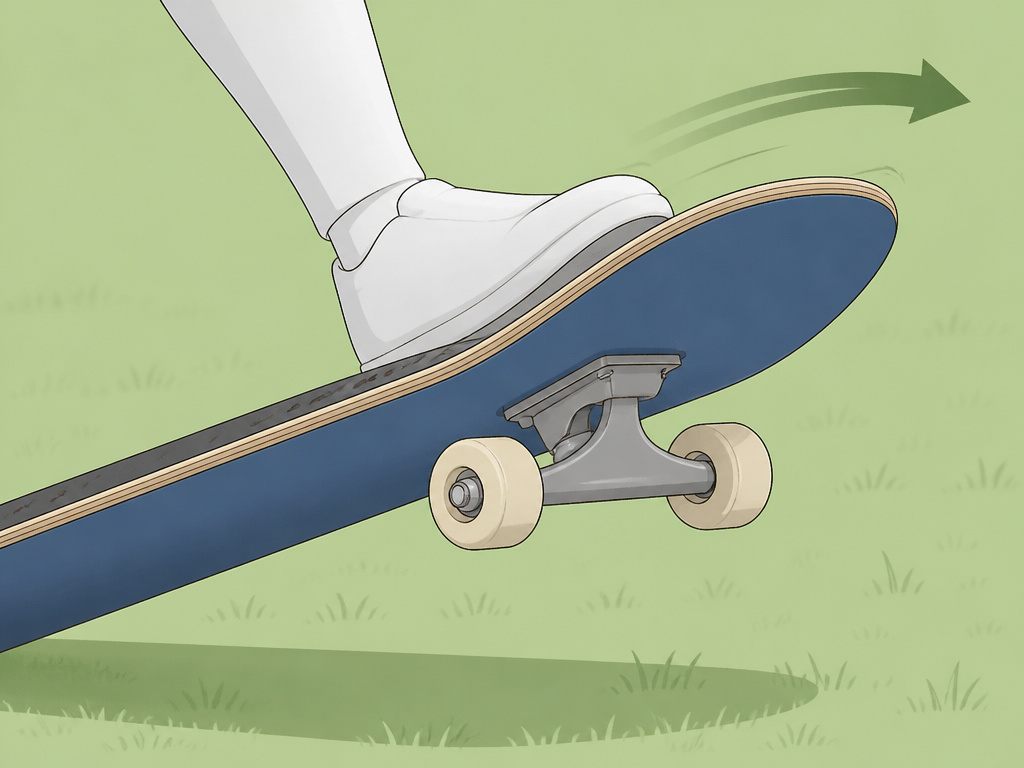
Thinking about foot placement and timing is one thing. Training your muscles to do it automatically is another. These two drills isolate the leveling motion without the pressure of landing a full kickflip.
Ollie-to-Flick Drill: Find a patch of grass or use a carpet. Do an ollie, and as the board levels out, practice flicking your front foot off the nose without worrying about landing. Focus on the sensation of your foot sliding up the grip tape and pushing forward through the nose. Do this 20 times. The goal is to make the forward push feel natural.
Carpet Kickflips: On a soft surface where the board won’t roll away, practice the full kickflip motion. The board won’t pop high, so you’re forced to focus on the leveling action of your front foot. This is where you can experiment with foot placement and flick timing without the fear of the board shooting out. Many skaters find their rocket problem disappears on carpet first, because the instability is removed.
Why this works: These drills remove the consequence of failure. You can focus purely on the mechanics of the front foot. Once the forward push feels ingrained, take it back to concrete.
Common Mistakes That Keep You Rocketing
You can make all the right adjustments and still get a rocket kickflip if you’re tripped up by one of these hidden mistakes.
Looking Down at Your Feet: When you look down at your front foot, your whole upper body leans back, shifting your weight over your tail. Keep your eyes fixed on the horizon or a spot in front of you. Your body will follow your gaze.
Popping with Your Ankle, Not Your Calf: A weak pop forces you to flick harder to get the board around. A strong pop from snapping your calf muscle upward gives the board plenty of height, so you can use a gentle, controlled flick. Practice popping high ollies before adding the flick back in.
Not Committing with the Back Foot: Your back foot has one job: catch the board after it flips. If you’re scared, you’ll pull that foot away, leaving the board to rocket unchecked. Practice commitment by doing half-flips where you focus on stomping the board with your back foot, even if it doesn’t flip all the way.
The part nobody mentions: A rocket kickflip often starts with a fear of landing. You subconsciously make the trick harder to land so you have an excuse for bailing. Commit to landing, even if the board is crooked.
Frequently Asked Questions
Why does my kickflip rocket when I try to kick harder?
Kicking harder usually means you’re flicking farther out to the side, not forward through the nose. More force amplifies the existing mistake. The solution is to kick smoother and more forward, not harder. Focus on guiding your foot off the corner of the nose.
Should I move my front foot closer to the bolts?
Yes. For most skaters fixing a rocket, moving the front foot so the ball is about an inch behind the front bolts is the single most effective change. It shortens the distance to the nose, making the forward flick more natural and less of a sideways kick.
How long does it take to fix a rocket kickflip?
With focused drilling on the three adjustments, foot placement, delayed flick, and forward lean, most skaters see improvement within a few sessions. It takes consistent practice to fully replace the old muscle memory. The key is to stop practicing bad, rocket kickflips. If you feel yourself rocketing, stop and go back to the drills.
Can my board setup cause rocket kickflips?
It can make the problem more likely. A deck that’s too narrow for your stance, overly tight trucks that deaden the pop, or slick grip tape can all contribute. If you’re struggling, check your skateboard pop and consider a slightly wider deck or looser trucks.
Is a rocket kickflip ever useful?
No. It’s an incomplete trick. Some advanced skaters will do a high, slightly angled flip for style, but it’s still level and controllable. A true rocket kickflip is unstable and impossible to land cleanly. Focus on leveling it out first; style comes later.
The Bottom Line
Fix your rocket kickflip by treating it as an ollie that you flick at the end. Move your front foot up, delay the kick, and lean your shoulders forward. Stop trying to muscle the board around with a sideways flick.
If you’ve been stuck on this for weeks, put kickflips aside for your next session. Go practice pop shuvits and high ollies. The board control you gain will make the kickflip feel easier when you come back to it. And when you do, film yourself. Sometimes seeing the rocket is the quickest way to analyze footage and feel the correction.
One rule most guides skip: if you can’t ollie over a two-inch obstacle with the board staying level under your feet, you’re not ready for kickflips. Go master that first. Everything above assumes you have a solid ollie, without it, you’re building on shaky ground.
