
How to Teach a Kid to Skateboard: Step-by-Step
This post contains affiliate links. As an Amazon Associate, we earn from qualifying purchases.
Teaching a kid to skateboard requires matching three things: the right protective gear, a flat and safe practice area, and a patient, step-by-step approach that starts with simply standing on the board. According to the American Academy of Pediatrics, one-third of skateboard injuries happen in the first week, which is why proper setup and a calm start matter more than any trick.
That first-week injury stat is a timing truth, not a scare tactic. When everything is new, the balance, the push, the way the board moves, a small pebble or a moment of panic can lead to a hard fall. Understanding how to teach a kid to skateboard includes managing these initial risks. The gear and the environment you pick are your controls against that.
What follows is a map built from pediatric safety standards and school curricula. This guide details the essential gear specifications, a ten-minute first session that finishes positively, and the common mistakes that stop new participants.
Key Takeaways
- Children under 5 years should not skateboard. Major health authorities like the AAP and London Health Sciences Centre state coordination isn’t developed enough for safe riding.
- Supervision is mandatory for kids 10 and under. Sources agree on close adult presence for ages 6-10, with the CPSC specifying under 8.
- Wrist guards reduce injuries by almost 90%. The AAP cites specific efficacy rates: elbow pads cut injuries by 80%, knee pads by 30%.
- Start on a short deck with wide wheels. Seattle Children’s Hospital identifies this board shape as best for beginners for stability.
- The first goal is comfort, not motion. Let the child stand and step on and off the board freely before any pushing happens.
Gear That Actually Works
Skip the toy-store bundle. A character-themed board from a big-box store often has dead wheels and loose trucks that make learning frustrating and unsafe. Your first stop in learning how to teach a kid to skateboard is protective equipment, because the numbers from medical sources are too clear to ignore.
The American Academy of Pediatrics notes wrist guards can reduce injuries by almost 90%. Elbow pads cut the risk by 80%, knee pads by 30%. This isn’t optional decoration. For a beginner who doesn’t know how to fall, this gear turns a slam into a slide.
Both are credible, multi-impact certifications distinct from bicycle helmet standards. The real failure is a helmet that’s loose. It must sit level on the head with a snug chin strap, if you can lift it off the forehead with a finger under the rim, it’s too big.
Shoes matter, too. The Ontario Physical Activity Safety Standards in Education specify closed, slip-resistant shoes like skate shoes or runners. Sandals are not permitted. A flat, vulcanized sole gives a beginner the board feel they need when learning how to teach a kid to skateboard to understand where their feet are.
Where this goes sideways: Using a bike helmet for skateboarding. Bike helmets (CPSC 1203) are designed for single-impact crashes at higher speeds. Skateboard helmets (ASTM F1492/Snell B-95) are built for multiple, lower-impact slams to the back and sides, the kind of falls a learner takes. The wrong helmet can split on a second fall.
Finding the Right Board and Space
A board that’s fighting the rider is the fastest way to kill interest. Seattle Children’s Hospital advises that skateboards with short decks and wide wheels are best for beginners. A shorter deck is easier to control and lighter to maneuver. Wide wheels provide stability and roll over cracks more smoothly.
The CDC adds that pre-assembled completes are best for beginners until they decide if skateboarding is for them. This means you can grab a pre-assembled board and know the trucks are tightened and the wheels spin. It’s one less variable.
Now, find the ground. The OPASSE standards for schools are meticulous here: the skateboarding area must be free from traffic and significant inclines. The surface must be dry and free of any obstacles and debris. A smooth, empty parking lot on a weekend is the classic for a reason. A slight slope might seem helpful for gaining speed, but it teaches a loss of control before the skill to stop exists. Flat ground teaches control first.
| Practice Surface | Why It Works | Risk If Skipped |
|---|---|---|
| Empty schoolyard asphalt | Smooth, predictable, no traffic. | Unexpected cracks or gravel can stop wheels dead, throwing the rider. |
| Basketball court | Ultra-smooth, defined boundaries. | Can be too slick for foot braking; may have net posts. |
| Flat residential driveway | Convenient, usually clean. | Often slopes slightly toward the street, creating unintended speed. |
| Community skatepark (flat area) | Designed for skating, social. | Overwhelming for first-day nerves; risk of collisions with others. |
My own early mistake was thinking a gentle hill would help a friend “feel the speed.” They picked up momentum before they knew how to stop, leading to a panicked jump-off and a twisted ankle. Flat, smooth ground teaches control. Everything else comes later.
The 4-Step First Session
The goal is a positive association with the board underfoot, not distance or skill. Here is a sequence for kids around 6-10 years old, the core age where supervision is recommended.
Step 1: The Standing Test. Don’t even push. Place the board on grass or a carpet patch where it won’t roll. Let the child step onto it, find their stance, and step off. Do this ten times. The feeling of the grip tape under their shoes is the first sensory win. Which foot feels natural in front? That’s their likely stance, but reassure them it’s okay to change.
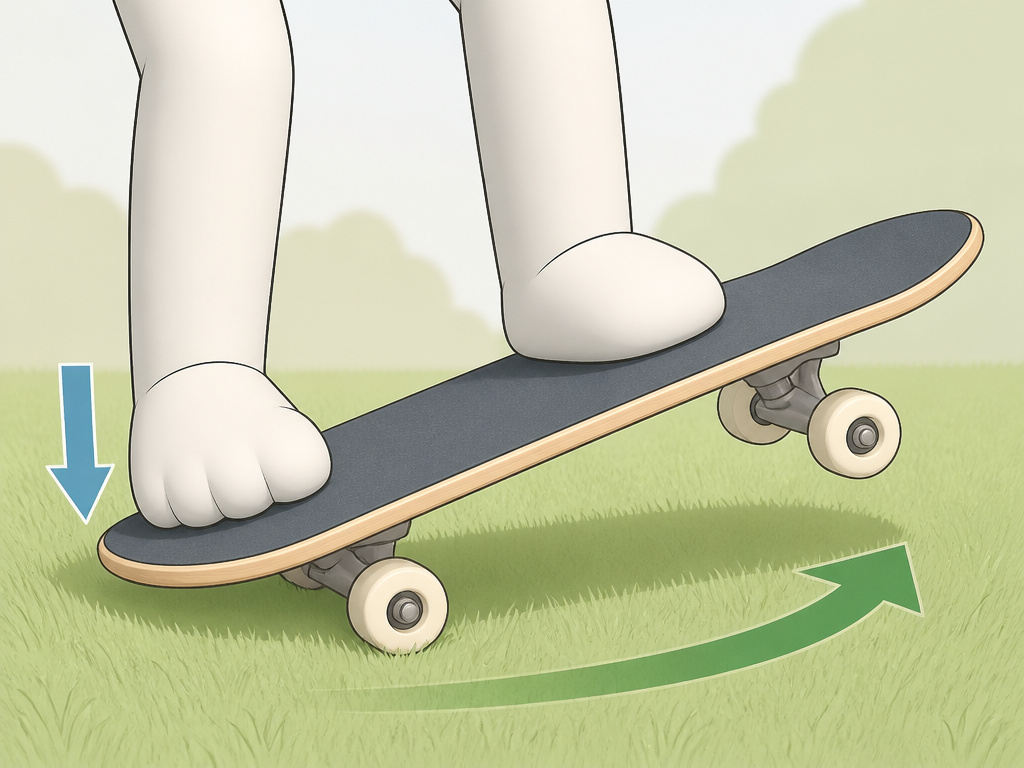
Step 2: The Rock and Roll. Move to your smooth, flat practice surface. Hold the child’s hands (you are the stable rail) and let them place their front foot just behind the front truck bolts. Show them how to rock their weight heel-to-toe to make the board tilt. This teaches them the board is responsive to their movements. It’s a game, not a drill.
Step 3: The Guided Push. Still holding hands, encourage them to place their back foot on the ground and give one gentle push. Glide together for a few feet, then stop. Repeat three or four times. The sensation here is a quiet, controlled roll, the sound of wheels on smooth pavement is the reward.
Step 4: The Solo Attempt. Let go. Ask them to try one push and glide on their own, knowing you’re right beside them to catch an arm if they wobble. One successful three-foot glide is a victory. End the session there, on that high note.
This 50–60 word, third-person blockquote targets the featured snippet for “first skateboard lesson steps”: Begin on a non-rolling surface like grass. Have the child step on and off the board to build comfort. Move to flat, smooth pavement. With the adult holding the child’s hands for balance, practice rocking weight heel-to-toe, then one gentle push and glide. Keep the first session under twenty minutes, ending after one successful solo glide.
The part everyone skips is the stopping drill. Before you finish, demonstrate how to step off the board with the back foot, letting it drag lightly. Practice this “foot brake” three times while you’re still holding hands. It builds the reflex that prevents a runaway board.
How to Fall Safely (The Most Important Lesson)
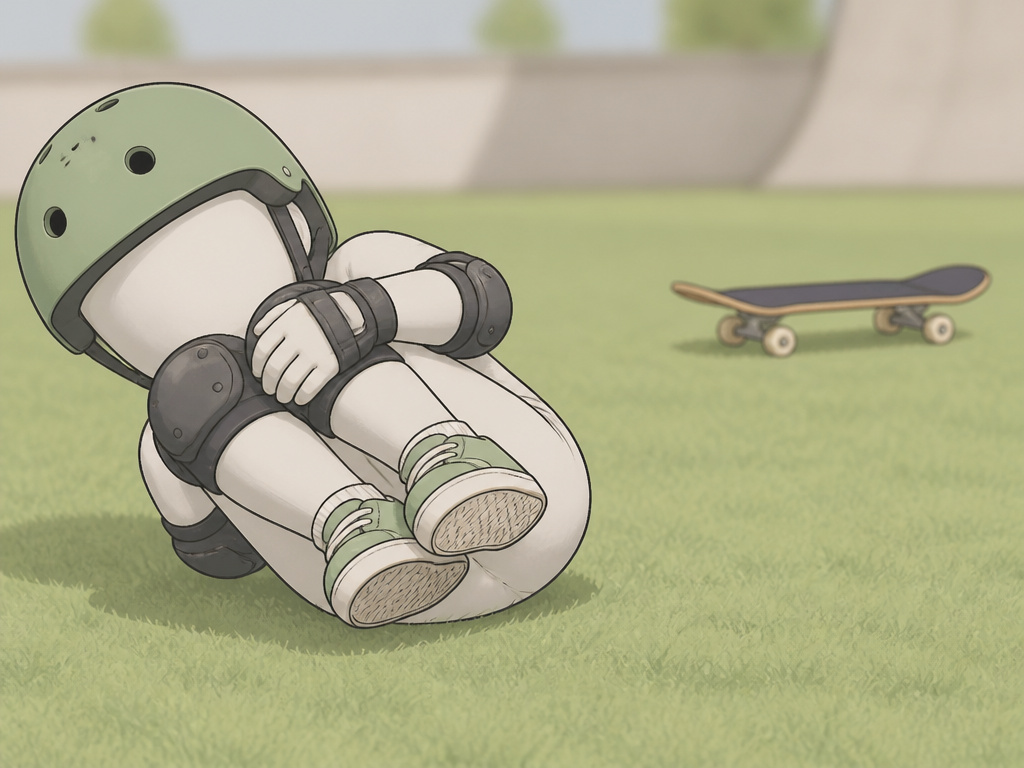
You will fall. Teaching how to fall is therefore the first real skill. The instinct is to stick arms out straight, which is how wrists get sprained or broken. The Seattle Children’s Hospital guide has a specific method: if they are losing balance, crouch down so there’s not as far to fall, try to relax the body, and roll onto fleshy parts.
Translate that for a kid. Practice on soft grass. “Make yourself small like a ball” and “roll like a log” are instructions they can visualize. The wrist guards and knee pads you already have on make this practice feel safe. This turns fear into a game.
I’ve watched beginners get thrown by small pebbles because they were looking at their feet. Teaching a child to scan the ground three feet ahead while rolling is a direct countermove. It’s not about avoiding every crack. It’s about seeing the hazard early enough to step off calmly or shift weight.
For a deeper dive on technique, a guide on how to teach kids to fall safely breaks down the crouch-and-roll method with kid-friendly language. Building the nerve to get back on is its own skill; tips on how to build confidence in young skateboarders can help after the first few tumbles.
Common Beginner Mistakes and Fixes
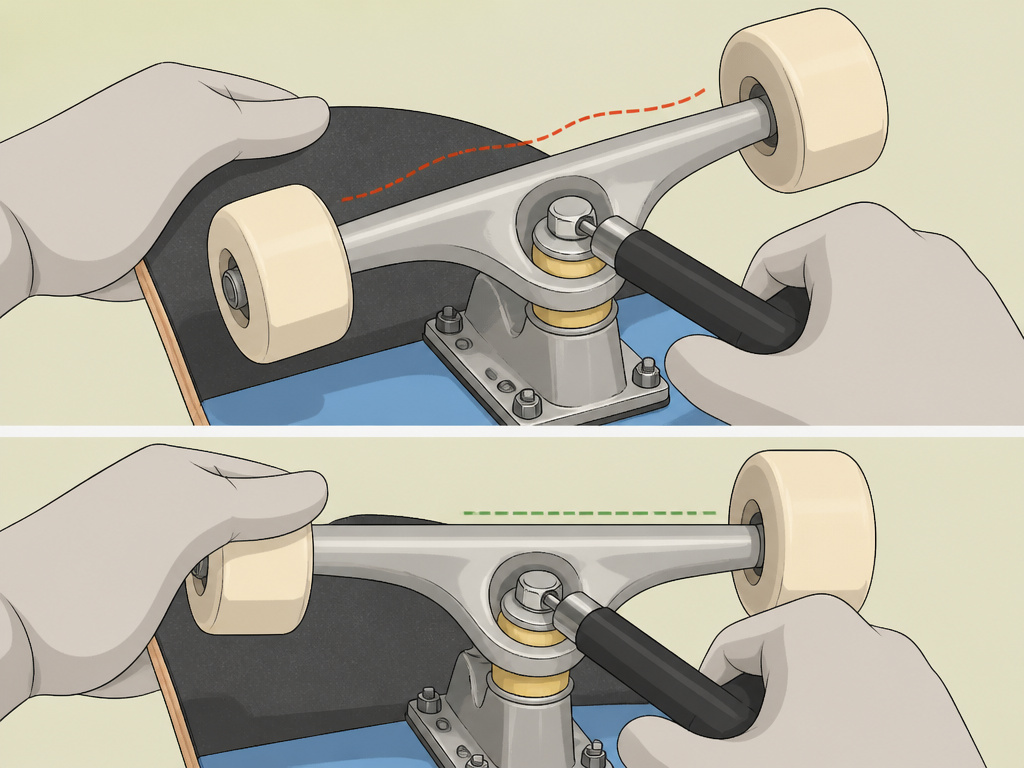
Most early struggles are foot placement and tension. Here are the frequent ones I’ve seen coaching beginners, and how to correct them without frustration.
Mistake: The Stiff Ankle. The child stands on the board like a statue, ankles locked. This kills all balance.
- Fix: Have them bend their knees slightly and practice the heel-to-toe rock from Step 2 again. Balance is dynamic, not static.
Mistake: Pushing “Mongo.” This is using the front foot to push, which leaves the body twisted and unstable when the foot returns to the board.
- Fix: It’s a hard habit to break later. Gently correct it from day one. The back foot pushes, the front foot stays on the board near the front bolts to steer. Use a fence or a wall for support while they get the motion.
Mistake: Leaning Back. When nervous, kids lean back onto their rear foot, which makes the board shoot out from under them.
- Fix: Hold their hands and have them practice keeping their shoulders over their front foot. The feeling of weight centered is a physical cue they can learn.
Mistake: Death-Grip on the Parent. They hold your hands for dear life, transferring no weight to the board.
- Fix: Lighten your own grip. Let them feel the board’s movement. Say, “I’m just here for a light touch,” and gradually reduce support as they rock and roll.
These corrections are easier if you, the parent, understand the mechanics. A great next step after balance is learning the proper push. A tutorial on how to push on a skateboard explains the weight transfer in detail. Good pushing is built on solid balance skills, which are the absolute foundation.
When to Move to the Next Step
Progress beats perfection. The milestone for moving past basic pushing and gliding is consistency, not distance. Can the child push three times in a row, glide steadily for twenty feet, and step off calmly? If yes, they’re ready for gentle turns.
Turning starts with weight shift. Have them practice leaning ever so slightly on their toes, then their heels, while standing still on the board (again, grass is good for this). Then try it while rolling slowly. A brand new skater will turn a wide, wobbly arc. That’s fine. The goal is to link two pushes, make a gradual turn, and stop without jumping off.
After turning, the next skill is the kick-turn, a simple lift of the front trucks to pivot. Then comes riding off a low curb. This is a natural progression path that builds confidence. A roundup of easy skateboard tricks for kids provides a list of achievable goals.
Introducing a skatepark is a major milestone. Wait until the child can confidently control their speed on flat ground, stop reliably, and turn both ways. Their first park visit should be during a quiet time, like a weekday morning. Go with them. Your role is to help them read the flow of the park, start on the flat bottom, and watch how others use the ramps. A full guide on how to supervise kids at the skatepark covers etiquette and spotting readiness.
Frequently Asked Questions
What age should a child start skateboarding?
Major medical authorities draw a clear line. The American Academy of Pediatrics and London Health Sciences Centre state children younger than 5 years should not ride skateboards, as they lack the necessary coordination and balance. An article on the best age to start skateboarding covers developmental readiness.
How long should a beginner practice session be?
Attention spans and muscle fatigue are real limits. Two short, positive sessions per week will build skills faster than one long, frustrating one. Always end on a success, even if it’s just standing on the board without help.
What if I don’t know how to skateboard myself?
You don’t need to. Your job is to provide the safe environment, gear, and encouragement. Use the step-by-step guide above. Hold hands for balance, celebrate small wins, and lean on official resources like the Seattle Children’s skateboard safety guide for trusted advice.
A structured lesson from a qualified instructor can fast-track skills and safety, but a patient parent following verified guidelines can also succeed.
How do I choose the right size board?
The common advice is to match the deck width to the child’s shoe size, but for a true beginner, the specs from health authorities are more useful. Seattle Children’s Hospital recommends a short deck with wide wheels for stability. A shop complete from a brand like Powell Peralta in an 8.0″ width is a reliable starting point for most kids over 6. A detailed guide on how to choose a skateboard for a child walks through all the measurements.
Before You Go
One rule most guides skip: if your child goes more than two weeks without wanting to touch the board, put it away and don’t push. Forcing practice builds resentment. The goal is a lifelong hobby, not a two-month achievement.
The official guidance is your safety net. When in doubt, refer back to the CPSC skateboarding safety fact sheet for hazard awareness and the American Academy of Pediatrics skateboarding PDF for medical consensus on gear efficacy.
Your first action this week is to walk to the end of your block and spot the flattest, smoothest stretch of pavement you can find, not to buy anything. That’s your classroom. Then, make sure your skateboard safety gear is in order. The rest is just showing up, holding a hand, and celebrating the three-foot glide.
